popwindow 经常使用的一个底部弹框
简单的几行代码实现
public class InflateActivity extends AppCompatActivity {private PopupWindow popupWindow;@Overrideprotected void onCreate(@Nullable Bundle savedInstanceState) {super.onCreate(savedInstanceState);setContentView(R.layout.inflate_activity_layout);findViewById(R.id.txt).setOnClickListener(new View.OnClickListener() {@Overridepublic void onClick(View v) {//引入弹框布局View view = getLayoutInflater().inflate(R.layout.bottom__pop_item, null);popupWindow = new PopupWindow(view, FrameLayout.LayoutParams.MATCH_PARENT, FrameLayout.LayoutParams.WRAP_CONTENT, true);//把布局放到popwindow里面popupWindow.setContentView(view);//把popwindow 放到父布局的底部View rootview = LayoutInflater.from(InflateActivity.this).inflate(R.layout.inflate_activity_layout, null);popupWindow.showAtLocation(rootview, Gravity.BOTTOM, 0, 0);}});}
}
inflate_activity_layout 布局代码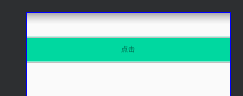
<?xml version="1.0" encoding="utf-8"?>
<LinearLayout xmlns:android="http://schemas.android.com/apk/res/android"android:id="@+id/cons"android:layout_width="match_parent"android:orientation="vertical"android:layout_height="match_parent"><TextViewandroid:id="@+id/txt"android:layout_width="match_parent"android:layout_height="50dp"android:gravity="center"android:text="点击"android:layout_marginTop="50dp"android:background="#00d8a0"/>
</LinearLayout>
bottom__pop_item 布局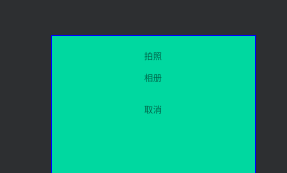
<?xml version="1.0" encoding="utf-8"?>
<android.support.constraint.ConstraintLayout xmlns:android="http://schemas.android.com/apk/res/android"android:layout_width="match_parent"android:layout_height="match_parent"android:background="#00d8a0"xmlns:app="http://schemas.android.com/apk/res-auto"><TextViewandroid:id="@+id/photo"android:layout_width="match_parent"android:layout_height="wrap_content"app:layout_constraintLeft_toLeftOf="parent"app:layout_constraintRight_toRightOf="parent"app:layout_constraintTop_toTopOf="parent"android:gravity="center"android:padding="10dp"android:text="拍照"android:textSize="18dp"android:layout_marginTop="20dp"/><TextViewandroid:id="@+id/camera"android:layout_width="match_parent"android:layout_height="wrap_content"app:layout_constraintLeft_toLeftOf="parent"app:layout_constraintRight_toRightOf="parent"app:layout_constraintTop_toBottomOf="@+id/photo"android:gravity="center"android:padding="10dp"android:text="相册"android:textSize="18dp"/><TextViewandroid:id="@+id/cancel"android:layout_width="match_parent"android:layout_height="wrap_content"app:layout_constraintLeft_toLeftOf="parent"app:layout_constraintRight_toRightOf="parent"app:layout_constraintTop_toBottomOf="@+id/camera"android:gravity="center"android:padding="10dp"android:text="取消"android:textSize="18dp"android:layout_marginTop="20dp"/></android.support.constraint.ConstraintLayout>
以上就完成了一个简单的popwindow 的功能
下面新增一些功能
1 给Popwindow 添加点击事件
//引入弹框布局View view = getLayoutInflater().inflate(R.layout.bottom__pop_item, null);popupWindow = new PopupWindow(view, FrameLayout.LayoutParams.MATCH_PARENT, FrameLayout.LayoutParams.WRAP_CONTENT, true);//把布局放到popwindow里面popupWindow.setContentView(view);//把popwindow 放到父布局的底部View rootview = LayoutInflater.from(InflateActivity.this).inflate(R.layout.inflate_activity_layout, null);popupWindow.showAtLocation(rootview, Gravity.BOTTOM, 0, 0);TextView photo = view.findViewById(R.id.photo);photo.setOnClickListener(new View.OnClickListener() {@Overridepublic void onClick(View v) {Toast.makeText(InflateActivity.this, "点击了", Toast.LENGTH_SHORT).show();}});2 怎样关闭PopWindow
使用 popupWindow.dismiss(); 方法
3 PopWindow 点击弹框外弹框消失的监听事件
popupWindow.setOnDismissListener(new PopupWindow.OnDismissListener() {@Overridepublic void onDismiss() {}});4 给popwindow 弹框之外的区域添加灰色的背景
这个就正整个窗口的颜色调整,所以还需要在调集弹框消失的时候把颜色的值设置回来
WindowManager.LayoutParams lp = getWindow().getAttributes();lp.alpha = 0.6f;getWindow().setAttributes(lp);popupWindow.setBackgroundDrawable(new ColorDrawable(Color.TRANSPARENT));整体如下
//引入弹框布局View view = getLayoutInflater().inflate(R.layout.bottom__pop_item, null);popupWindow = new PopupWindow(view, FrameLayout.LayoutParams.MATCH_PARENT, FrameLayout.LayoutParams.WRAP_CONTENT, true);//把布局放到popwindow里面popupWindow.setContentView(view);WindowManager.LayoutParams lp = getWindow().getAttributes();lp.alpha = 0.6f;getWindow().setAttributes(lp);popupWindow.setBackgroundDrawable(new ColorDrawable(Color.TRANSPARENT));popupWindow.setOnDismissListener(new PopupWindow.OnDismissListener() {@Overridepublic void onDismiss() {WindowManager.LayoutParams lp = getWindow().getAttributes();lp.alpha = 1f;getWindow().setAttributes(lp);}});5 popwindow 设置点击弹框之外的区域不消失
popupWindow.setFocusable(false);
popupWindow.setOutsideTouchable(false);
popupWindow.setTouchable(true);
刚开始的时候以为setOutsideTouchable 设置一下就可以了,但是最后发现如果单独设置setOutsideTouchable是无效的
如果设置setFocusable和setOutsideTouchable 发现把所有的都禁止了,弹框都不能点击了
所以上面的三个属性都要设置
6 popwindow 设置动画
使用setAnimationStyle
代码设置
popupWindow.setAnimationStyle(R.style.popupAnimation);style 里面的代码
<style name="popupAnimation" parent="android:Animation"><item name="android:windowEnterAnimation">@anim/push_bottom_in</item><item name="android:windowExitAnimation">@anim/push_bottom_out</item></style>anim 里面的代码
in
<?xml version="1.0" encoding="utf-8"?>
<translate xmlns:android="http://schemas.android.com/apk/res/android"android:duration="300"android:fromYDelta="100%"android:interpolator="@android:anim/linear_interpolator"android:toYDelta="0" />
out
<?xml version="1.0" encoding="utf-8"?>
<translate xmlns:android="http://schemas.android.com/apk/res/android"android:duration="500"android:fromYDelta="0"android:interpolator="@android:anim/decelerate_interpolator"android:toYDelta="150%" />
动他的动画这里就不写了,就是基本的动画写法。。。
7 popwindow 设置弹框的位置
popwindow 弹框的位置一般有相对于父布局的弹框比如底部弹框,中间弹框 等,这些使用的是showAtLocation
还有就是相对于某个控件的弹框这个弹框使用的是showAsDropDown
假如写一个中间的弹框
//设置弹框的位置在中间
popupWindow.showAtLocation(rootview, Gravity.CENTER, 0, 0);
全部代码
//引入弹框布局View view = getLayoutInflater().inflate(R.layout.bottom__pop_item, null);popupWindow = new PopupWindow(view, FrameLayout.LayoutParams.MATCH_PARENT, FrameLayout.LayoutParams.WRAP_CONTENT, true);//把布局放到popwindow里面popupWindow.setContentView(view);//设置弹框设置灰色背景WindowManager.LayoutParams lp = getWindow().getAttributes();lp.alpha = 0.6f;getWindow().setAttributes(lp);popupWindow.setBackgroundDrawable(new ColorDrawable(Color.TRANSPARENT));popupWindow.setAnimationStyle(R.style.popupAnimation);View rootview = LayoutInflater.from(InflateActivity.this).inflate(R.layout.inflate_activity_layout, null);//设置弹框的位置在中间popupWindow.showAtLocation(rootview, Gravity.CENTER, 0, 0);这个动画可以写一个淡入淡出的效果
现在要相对于某一个控件的弹框使用showAsDropDown
一个常用的相对位置弹框
下面看下代码
public class InflateActivity extends AppCompatActivity {private PopupWindow popupWindow;private TextView textView;@Overrideprotected void onCreate(@Nullable Bundle savedInstanceState) {super.onCreate(savedInstanceState);setContentView(R.layout.inflate_activity_layout);textView = findViewById(R.id.txt);findViewById(R.id.txt).setOnClickListener(new View.OnClickListener() {@Overridepublic void onClick(View v) {//引入弹框布局View view = getLayoutInflater().inflate(R.layout.bottom__pop_item, null);popupWindow = new PopupWindow(view, FrameLayout.LayoutParams.MATCH_PARENT, FrameLayout.LayoutParams.WRAP_CONTENT, true);//把布局放到popwindow里面popupWindow.setContentView(view);popupWindow.showAsDropDown(textView);
//               TextView photo = view.findViewById(R.id.photo);photo.setOnClickListener(new View.OnClickListener() {@Overridepublic void onClick(View v) {popupWindow.dismiss();Toast.makeText(InflateActivity.this, "点击了", Toast.LENGTH_SHORT).show();}});}});}
}
很简单把, 如果发现位置不符合自己的项目的ui可以使用xy 坐标调试
使用popwindow 注意事项
使用的时候记得添加一个背景图片,由于版本问题有时候弹框可能透明