文章目录
- 1 和Docker相关的概念
- 1.1 虚拟机和容器
- 1.2 容器、镜像和Docker
- 1.3 Docker和k8s
- 2 Docker的安装
- 2.1 在ubuntu中安装
- 2.2 在Win10中安装
- 2.3 Hello world
- 3 Docker镜像的使用
- 3.1 列出本地所有镜像
- 3.2 从镜像库中查找镜像
- 3.3 下载新的镜像
- 4 Docker容器的使用
- 4.1 启动容器
- 4.2 将宿主机的文件挂载到容器
- 4.3 容器的端口映射
- 4.4 容器管理
- 5 自制Docker镜像
- 5.1 自制显示文本文件内容镜像
- 5.2 自制web服务器镜像
- 5.3 自制apscheduler服务镜像
- 6 多阶段构建压缩镜像体积
- 7 导入镜像到生产环境
1 和Docker相关的概念
想要真正理解Docker,就不得不从虚拟化技术的发展历程说起。普遍认为虚拟化技术经历了物理机时代、虚拟机时代,目前已经进入到了容器化时代。可以说,Docker是虚拟化技术不断发展的必然结果。

那么,什么是容器呢?容器和虚拟机有什么不同?Docker和容器又是什么关系呢?搞明白这几个问题,Docker的概念就清晰了。
1.1 虚拟机和容器
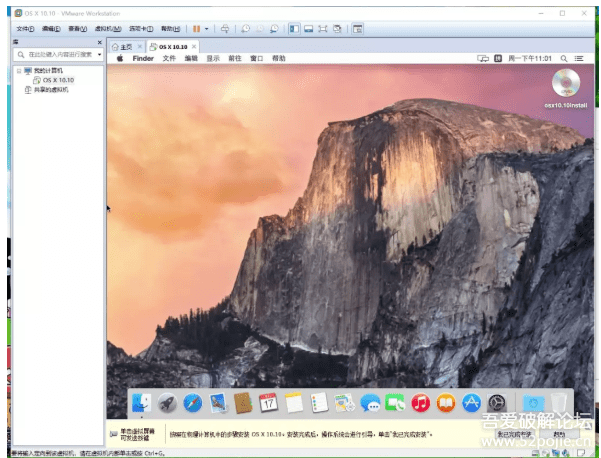
借助于VMWare等软件,可以在一台计算机上创建多个虚拟机,每个虚拟机都拥有独立的操作系统,可以各自独立的运行程序。这种分身术虽然隔离度高(操作系统级),使用方便(类似物理机),但占用存储资源多(GB级)、启动速度慢(分钟级)的缺点也是显而易见的。
相较于虚拟机,容器(Container)是一种轻量型的虚拟化技术,它虚拟的是最简运行环境(类似于沙盒)而非操作系统,启动速度快(秒级)、占用存储资源少(KB级或MB级),容器间隔离度为进程级。在一台计算机上可以运行上千个容器,这是容器技术对虚拟机的碾压式优势。
1.2 容器、镜像和Docker
Docker是一个开源的应用容器引擎,可以创建容器以及基于容器运行的程序。Docker可以让开发者打包他们的应用和依赖包到一个轻量级、可移植的容器中,然后发布到任何流行的Linux机器上,也可以实现虚拟化。
听起来很简单,但是在Docker和容器之间,还隐藏着一个镜像的概念,令初学者颇感困惑。本质上,Docker镜像是一个特殊的文件系统,它提供容器运行时所需的程序、库、资源、配置等文件。Docker镜像类似于一个py文件,它需要Docker的运行时(类似于Python解释器)运行。镜像被运行时,即创建了一个镜像的实例,一个实例就是一个容器。
1.3 Docker和k8s
作为容器引擎,Docker为容器化的应用程序提供了开放的标准,使得开发者可以用管理应用程序的方式来管理基础架构,实现快速交付、测试和部署代码。随着容器的大量使用,又产生了如何协调、调度和管理容器的问题,Docker的容器编排应运而生。
k8s是Google开源的一个容器编排引擎,它支持自动化部署、大规模可伸缩、应用容器化管理,是一个开源的,用于管理云平台中多个主机上的容器化的应用,k8s的目标是让部署容器化的应用简单并且高效,k8s提供了应用部署、规划、更新、维护的一种机制。
Docker和k8sr都是以containerd(容器化标准)作为运行时,因此使用Docker创建的镜像完全可以在k8s中无障碍的使用。
2 Docker的安装
2.1 在ubuntu中安装
在linux系统中安装Docker非常简单,官方为我们提供了一键安装脚本。这个方法也适用于Debian或CentOS等发行版。
curl -sSL https://get.daocloud.io/docker | sh
安装过程如果出现超时,不要灰心,多试几次,总会成功的。安装完成后,Docker只能被root用户使用,可以使用下面的命令取消权限限制:
sudo gpasswd -a <你的用户名> docker
然后,重启docker服务:
sudo service docker restart
最后,关闭当前的命令行,重新打开新的命令行就可以了。
顺便提一下,如果在CentOS下安装,可能会出现一堆类似于下面的错误:
问题 1: problem with installed package podman-2.0.5-5.module_el8.3.0+512+b3b58dca.x86_64- package podman-2.0.5-5.module_el8.3.0+512+b3b58dca.x86_64 requires runc >= 1.0.0-57, but none of the providers can be installed- package podman-3.0.1-6.module_el8.4.0+781+acf4c33b.x86_64 requires runc >= 1.0.0-57, but none of the providers can be installed- package podman-3.0.1-7.module_el8.4.0+830+8027e1c4.x86_64 requires runc >= 1.0.0-57, but none of the providers can be installed- package containerd.io-1.4.6-3.1.el8.x86_64 conflicts with runc provided by runc-1.0.0-68.rc92.module_el8.3.0+475+c50ce30b.x86_64- package containerd.io-1.4.6-3.1.el8.x86_64 obsoletes runc provided by runc-1.0.0-68.rc92.module_el8.3.0+475+c50ce30b.x86_64- package containerd.io-1.4.6-3.1.el8.x86_64 conflicts with runc provided by runc-1.0.0-70.rc92.module_el8.4.0+673+eabfc99d.x86_64- package containerd.io-1.4.6-3.1.el8.x86_64 obsoletes runc provided by runc-1.0.0-70.rc92.module_el8.4.0+673+eabfc99d.x86_64- package containerd.io-1.4.6-3.1.el8.x86_64 conflicts with runc provided by runc-1.0.0-73.rc93.module_el8.4.0+830+8027e1c4.x86_64- package containerd.io-1.4.6-3.1.el8.x86_64 obsoletes runc provided by runc-1.0.0-73.rc93.module_el8.4.0+830+8027e1c4.x86_64- cannot install the best candidate for the job- package runc-1.0.0-64.rc10.module_el8.4.0+522+66908d0c.x86_64 is filtered out by modular filtering- package runc-1.0.0-65.rc10.module_el8.4.0+819+4afbd1d6.x86_64 is filtered out by modular filtering- package runc-1.0.0-70.rc92.module_el8.4.0+786+4668b267.x86_64 is filtered out by modular filtering- package runc-1.0.0-71.rc92.module_el8.4.0+833+9763146c.x86_64 is filtered out by modular filtering问题 2: package podman-3.0.1-6.module_el8.4.0+781+acf4c33b.x86_64 requires runc >= 1.0.0-57, but none of the providers can be installed- package containerd.io-1.4.3-3.1.el8.x86_64 conflicts with runc provided by runc-1.0.0-70.rc92.module_el8.4.0+673+eabfc99d.x86_64- package containerd.io-1.4.3-3.1.el8.x86_64 obsoletes runc provided by runc-1.0.0-70.rc92.module_el8.4.0+673+eabfc99d.x86_64- package containerd.io-1.4.3-3.1.el8.x86_64 conflicts with runc provided by runc-1.0.0-73.rc93.module_el8.4.0+830+8027e1c4.x86_64- package containerd.io-1.4.3-3.1.el8.x86_64 obsoletes runc provided by runc-1.0.0-73.rc93.module_el8.4.0+830+8027e1c4.x86_64- package docker-ce-3:20.10.7-3.el8.x86_64 requires containerd.io >= 1.4.1, but none of the providers can be installed- package containerd.io-1.4.3-3.2.el8.x86_64 conflicts with runc provided by runc-1.0.0-70.rc92.module_el8.4.0+673+eabfc99d.x86_64- package containerd.io-1.4.3-3.2.el8.x86_64 obsoletes runc provided by runc-1.0.0-70.rc92.module_el8.4.0+673+eabfc99d.x86_64- package containerd.io-1.4.3-3.2.el8.x86_64 conflicts with runc provided by runc-1.0.0-73.rc93.module_el8.4.0+830+8027e1c4.x86_64- package containerd.io-1.4.3-3.2.el8.x86_64 obsoletes runc provided by runc-1.0.0-73.rc93.module_el8.4.0+830+8027e1c4.x86_64- package podman-catatonit-3.0.1-6.module_el8.4.0+781+acf4c33b.x86_64 requires podman = 3.0.1-6.module_el8.4.0+781+acf4c33b, but none of the providers can be installed- problem with installed package podman-catatonit-2.0.5-5.module_el8.3.0+512+b3b58dca.x86_64- package podman-catatonit-3.0.1-7.module_el8.4.0+830+8027e1c4.x86_64 requires podman = 3.0.1-7.module_el8.4.0+830+8027e1c4, but none of the providers can be installed- package podman-3.0.1-7.module_el8.4.0+830+8027e1c4.x86_64 requires runc >= 1.0.0-57, but none of the providers can be installed- package containerd.io-1.4.3-3.1.el8.x86_64 conflicts with runc provided by runc-1.0.0-68.rc92.module_el8.3.0+475+c50ce30b.x86_64- package containerd.io-1.4.3-3.1.el8.x86_64 obsoletes runc provided by runc-1.0.0-68.rc92.module_el8.3.0+475+c50ce30b.x86_64- package containerd.io-1.4.3-3.2.el8.x86_64 conflicts with runc provided by runc-1.0.0-68.rc92.module_el8.3.0+475+c50ce30b.x86_64- package containerd.io-1.4.3-3.2.el8.x86_64 obsoletes runc provided by runc-1.0.0-68.rc92.module_el8.3.0+475+c50ce30b.x86_64- package containerd.io-1.4.4-3.1.el8.x86_64 conflicts with runc provided by runc-1.0.0-68.rc92.module_el8.3.0+475+c50ce30b.x86_64- package containerd.io-1.4.4-3.1.el8.x86_64 obsoletes runc provided by runc-1.0.0-68.rc92.module_el8.3.0+475+c50ce30b.x86_64- package containerd.io-1.4.6-3.1.el8.x86_64 conflicts with runc provided by runc-1.0.0-68.rc92.module_el8.3.0+475+c50ce30b.x86_64- package containerd.io-1.4.6-3.1.el8.x86_64 obsoletes runc provided by runc-1.0.0-68.rc92.module_el8.3.0+475+c50ce30b.x86_64- cannot install the best candidate for the job- package runc-1.0.0-64.rc10.module_el8.4.0+522+66908d0c.x86_64 is filtered out by modular filtering- package runc-1.0.0-65.rc10.module_el8.4.0+819+4afbd1d6.x86_64 is filtered out by modular filtering- package runc-1.0.0-70.rc92.module_el8.4.0+786+4668b267.x86_64 is filtered out by modular filtering- package runc-1.0.0-71.rc92.module_el8.4.0+833+9763146c.x86_64 is filtered out by modular filtering- package containerd.io-1.4.4-3.1.el8.x86_64 conflicts with runc provided by runc-1.0.0-70.rc92.module_el8.4.0+673+eabfc99d.x86_64- package containerd.io-1.4.4-3.1.el8.x86_64 obsoletes runc provided by runc-1.0.0-70.rc92.module_el8.4.0+673+eabfc99d.x86_64- package containerd.io-1.4.4-3.1.el8.x86_64 conflicts with runc provided by runc-1.0.0-73.rc93.module_el8.4.0+830+8027e1c4.x86_64- package containerd.io-1.4.4-3.1.el8.x86_64 obsoletes runc provided by runc-1.0.0-73.rc93.module_el8.4.0+830+8027e1c4.x86_64- package containerd.io-1.4.6-3.1.el8.x86_64 conflicts with runc provided by runc-1.0.0-70.rc92.module_el8.4.0+673+eabfc99d.x86_64- package containerd.io-1.4.6-3.1.el8.x86_64 obsoletes runc provided by runc-1.0.0-70.rc92.module_el8.4.0+673+eabfc99d.x86_64- package containerd.io-1.4.6-3.1.el8.x86_64 conflicts with runc provided by runc-1.0.0-73.rc93.module_el8.4.0+830+8027e1c4.x86_64- package containerd.io-1.4.6-3.1.el8.x86_64 obsoletes runc provided by runc-1.0.0-73.rc93.module_el8.4.0+830+8027e1c4.x86_64- package podman-catatonit-2.0.5-5.module_el8.3.0+512+b3b58dca.x86_64 requires podman = 2.0.5-5.module_el8.3.0+512+b3b58dca, but none of the providers can be installed- package podman-2.0.5-5.module_el8.3.0+512+b3b58dca.x86_64 requires runc >= 1.0.0-57, but none of the providers can be installed
这是由于docker和Podman冲突造成的,需要先卸载Podman:
yum erase podman buildah
2.2 在Win10中安装
Docker的运行,依赖linux的环境,官方提供了Docker Desktop for Windows,但是它需要安装Hyper-V,Hyper-V是微软开发的虚拟机,类似于 VMWare 或 VirtualBox,仅适用于 Windows 10。这个虚拟机一旦启用,QEMU、VirtualBox 或 VMWare Workstation 15 及以下版本将无法使用!如果你必须在电脑上使用其他虚拟机(例如开发 Android 应用必须使用的模拟器),请不要使用 Hyper-V!
我的电脑是win10家庭版,不能直接安装hyper-v,需要将下面的命令保存到cmd文件中:
pushd "%~dp0"dir /b %SystemRoot%\servicing\Packages\*Hyper-V*.mum >hyper-v.txtfor /f %%i in ('findstr /i . hyper-v.txt 2^>nul') do dism /online /norestart /add-package:"%SystemRoot%\servicing\Packages\%%i"del hyper-v.txtDism /online /enable-feature /featurename:Microsoft-Hyper-V-All /LimitAccess /ALL
然后在cmd文件上点击右键,选择使用管理员运行。执行完毕后会重启,在重启的过程中进行安装。
2.3 Hello world
docker服务启动的情况下,运行下面的命令:
docker run ubuntu:20.04 /bin/echo "Hello world"
此命令的含义是:
- docker run:运行docker镜像命令
- ubuntu:20.04:镜像名称为ubuntu版本号为20.04
- /bin/echo “Hello world”:运行参数,此镜像的参数含义为运行镜像的echo命令显示hello world
第一次运行时,因为本地没有ubuntu:20.04镜像,docker会自动从镜像服务器下载。下载过程可能需要多试几次,只要成功一次,以后执行就不再需要下载了。
docker官方还提供了一个hello-world镜像,可以直接运行:
docker run hello-world
此命令省略了镜像版本和运行参数,docker使用latest作为版本,即最新版本。
从hello world的例子中,也可以体验到,docker实例的运行是非常快的。
3 Docker镜像的使用
docker官方的镜像库比较慢,在进行镜像操作之前,需要将镜像源设置为国内的站点。
新建文件/etc/docker/daemon.json,输入如下内容:
{"registry-mirrors" : ["https://registry.docker-cn.com","https://docker.mirrors.ustc.edu.cn","http://hub-mirror.c.163.com","https://cr.console.aliyun.com/"]
}
然后重启docker的服务:
systemctl restart docker
3.1 列出本地所有镜像
执行命令docker images可以查看
$ docker images
REPOSITORY          TAG                 IMAGE ID            CREATED             SIZE
ubuntu              20.04               f643c72bc252        5 weeks ago         72.9MB
hello-world         latest              bf756fb1ae65        12 months ago       13.3kB
当前我本地只有刚才安装的两个镜像。
3.2 从镜像库中查找镜像
执行命令docker search 镜像名称可以从docker镜像库中查找镜像。
$ docker search python
NAME                             DESCRIPTION                                     STARS              OFFICIAL          AUTOMATED
python                           Python is an interpreted, interactive, objec…   5757                [OK]
django                           Django is a free web application framework, …   1039                [OK]
pypy                             PyPy is a fast, compliant alternative implem…   260                 [OK]
joyzoursky/python-chromedriver   Python with Chromedriver, for running automa…   57                                      [OK]
nikolaik/python-nodejs           Python with Node.js                             57                                      [OK]
arm32v7/python                   Python is an interpreted, interactive, objec…   53
circleci/python                  Python is an interpreted, interactive, objec…   42
centos/python-35-centos7         Platform for building and running Python 3.5…   38
centos/python-36-centos7         Platform for building and running Python 3.6…   30
hylang                           Hy is a Lisp dialect that translates express…   29                  [OK]
arm64v8/python                   Python is an interpreted, interactive, objec…   24
revolutionsystems/python         Optimized Python Images                         18
centos/python-27-centos7         Platform for building and running Python 2.7…   17
bitnami/python                   Bitnami Python Docker Image                     10                                      [OK]
publicisworldwide/python-conda   Basic Python environments with Conda.           6                                       [OK]
d3fk/python_in_bottle            Simple python:alpine completed by Bottle+Req…   5                                       [OK]
dockershelf/python               Repository for docker images of Python. Test…   5                                       [OK]
clearlinux/python                Python programming interpreted language with…   4
i386/python                      Python is an interpreted, interactive, objec…   3
ppc64le/python                   Python is an interpreted, interactive, objec…   2
centos/python-34-centos7         Platform for building and running Python 3.4…   2
amd64/python                     Python is an interpreted, interactive, objec…   1
ccitest/python                   CircleCI test images for Python                 0                                       [OK]
s390x/python                     Python is an interpreted, interactive, objec…   0
saagie/python                    Repo for python jobs                            0
最好选择官方(OFFICIAL)的镜像,这样的镜像最稳定一些。
3.3 下载新的镜像
执行命令docker pull 镜像名称:版本号即可下载新的镜像。
$ docker pull python:3.8
3.8: Pulling from library/python
6c33745f49b4: Pull complete
ef072fc32a84: Pull complete
c0afb8e68e0b: Pull complete
d599c07d28e6: Pull complete
f2ecc74db11a: Pull complete
26856d31ce86: Pull complete
2cd68d824f12: Pull complete
7ea1535f18c3: Pull complete
2bef93d9a76e: Pull complete
Digest: sha256:9079aa8582543494225d2b3a28fce526d9a6b06eb06ce2bac3eeee592fcfc49e
Status: Downloaded newer image for python:3.8
docker.io/library/python:3.8
镜像下载后,就可以使用镜像来创建容器了。
4 Docker容器的使用
4.1 启动容器
执行命令docker run即可启动容器,也就是创建某个镜像的实例。docker run命令非常复杂,可以先执行一个docker run --help来查看帮助:
$ docker run --helpUsage: docker run [OPTIONS] IMAGE [COMMAND] [ARG...]Run a command in a new containerOptions:--add-host list Add a custom host-to-IP mapping (host:ip)-a, --attach list Attach to STDIN, STDOUT or STDERR--blkio-weight uint16 Block IO (relative weight), between 10 and 1000, or 0 to disable (default 0)--blkio-weight-device list Block IO weight (relative device weight) (default [])--cap-add list Add Linux capabilities--cap-drop list Drop Linux capabilities--cgroup-parent string Optional parent cgroup for the container--cidfile string Write the container ID to the file--cpu-period int Limit CPU CFS (Completely Fair Scheduler) period--cpu-quota int Limit CPU CFS (Completely Fair Scheduler) quota--cpu-rt-period int Limit CPU real-time period in microseconds--cpu-rt-runtime int Limit CPU real-time runtime in microseconds-c, --cpu-shares int CPU shares (relative weight)--cpus decimal Number of CPUs--cpuset-cpus string CPUs in which to allow execution (0-3, 0,1)--cpuset-mems string MEMs in which to allow execution (0-3, 0,1)-d, --detach Run container in background and print container ID--detach-keys string Override the key sequence for detaching a container--device list Add a host device to the container--device-cgroup-rule list Add a rule to the cgroup allowed devices list--device-read-bps list Limit read rate (bytes per second) from a device (default [])--device-read-iops list Limit read rate (IO per second) from a device (default [])--device-write-bps list Limit write rate (bytes per second) to a device (default [])--device-write-iops list Limit write rate (IO per second) to a device (default [])--disable-content-trust Skip image verification (default true)--dns list Set custom DNS servers--dns-option list Set DNS options--dns-search list Set custom DNS search domains--domainname string Container NIS domain name--entrypoint string Overwrite the default ENTRYPOINT of the image-e, --env list Set environment variables--env-file list Read in a file of environment variables--expose list Expose a port or a range of ports--gpus gpu-request GPU devices to add to the container ('all' to pass all GPUs)--group-add list Add additional groups to join--health-cmd string Command to run to check health--health-interval duration Time between running the check (ms|s|m|h) (default 0s)--health-retries int Consecutive failures needed to report unhealthy--health-start-period duration Start period for the container to initialize before starting health-retries countdown (ms|s|m|h) (default 0s)--health-timeout duration Maximum time to allow one check to run (ms|s|m|h) (default 0s)--help Print usage-h, --hostname string Container host name--init Run an init inside the container that forwards signals and reaps processes-i, --interactive Keep STDIN open even if not attached--ip string IPv4 address (e.g., 172.30.100.104)--ip6 string IPv6 address (e.g., 2001:db8::33)--ipc string IPC mode to use--isolation string Container isolation technology--kernel-memory bytes Kernel memory limit-l, --label list Set meta data on a container--label-file list Read in a line delimited file of labels--link list Add link to another container--link-local-ip list Container IPv4/IPv6 link-local addresses--log-driver string Logging driver for the container--log-opt list Log driver options--mac-address string Container MAC address (e.g., 92:d0:c6:0a:29:33)-m, --memory bytes Memory limit--memory-reservation bytes Memory soft limit--memory-swap bytes Swap limit equal to memory plus swap: '-1' to enable unlimited swap--memory-swappiness int Tune container memory swappiness (0 to 100) (default -1)--mount mount Attach a filesystem mount to the container--name string Assign a name to the container--network network Connect a container to a network--network-alias list Add network-scoped alias for the container--no-healthcheck Disable any container-specified HEALTHCHECK--oom-kill-disable Disable OOM Killer--oom-score-adj int Tune host's OOM preferences (-1000 to 1000)--pid string PID namespace to use--pids-limit int Tune container pids limit (set -1 for unlimited)--platform string Set platform if server is multi-platform capable--privileged Give extended privileges to this container-p, --publish list Publish a container's port(s) to the host-P, --publish-all Publish all exposed ports to random ports--read-only Mount the container's root filesystem as read only--restart string Restart policy to apply when a container exits (default "no")--rm Automatically remove the container when it exits--runtime string Runtime to use for this container--security-opt list Security Options--shm-size bytes Size of /dev/shm--sig-proxy Proxy received signals to the process (default true)--stop-signal string Signal to stop a container (default "SIGTERM")--stop-timeout int Timeout (in seconds) to stop a container--storage-opt list Storage driver options for the container--sysctl map Sysctl options (default map[])--tmpfs list Mount a tmpfs directory-t, --tty Allocate a pseudo-TTY--ulimit ulimit Ulimit options (default [])-u, --user string Username or UID (format: <name|uid>[:<group|gid>])--userns string User namespace to use--uts string UTS namespace to use-v, --volume list Bind mount a volume--volume-driver string Optional volume driver for the container--volumes-from list Mount volumes from the specified container(s)-w, --workdir string Working directory inside the container
比如我们要执行python的shell,需要添加-it参数,即:docker run -it python:3.8
$ docker run -it python:3.8
Python 3.8.7 (default, Dec 22 2020, 18:46:25)
[GCC 8.3.0] on linux
Type "help", "copyright", "credits" or "license" for more information.
>>>
4.2 将宿主机的文件挂载到容器
docker容器与宿主机是隔离的,要想让容器内的程序能访问宿主机上的文件,需要通过-v参数将宿主机的文件挂载到容器中。
比如我们在宿主机上有一个hello.py,可以打印hello,想要在python容器中执行,就需要进行挂载。-v后还需要接两个参数,分别是宿主机的目录和容器内的目录,两者使用:分隔,路径必须都是绝对路径。
我的hello.py保存在主目录的/docker_test目录中,将这个目录挂载到容器的/docker_test目录,然后在容器内执行python /docker_test/hello.py:
$ docker run -v ~/docker_test:/docker_test python:3.8 python /docker_test/hello.py
hello
4.3 容器的端口映射
我们修改一下hello.py,创建一个socket服务端,并监听5000端口,当有客户端连接时,打印客户端的地址,先客户端发送hello,然后关闭连接:
import socketip_port = ('127.0.0.1', 5000)sk = socket.socket()
sk.bind(ip_port)
sk.listen(5)while True:print('server waiting...')conn,addr = sk.accept()print(addr)conn.sendall(b'hello\n')conn.close()
在容器内执行:
docker run -v ~/docker_test:/docker_test python:3.8 python /docker_test/hello.py
接下来,尝试用telnet命令连接,结果却是失败的。原因是,127.0.0.1是宿主机的ip地址,5000是容器的端口,这与我们的习惯稍微有些不同。事实上,docker的容器是非常轻量的,它并没有自己的网络,要想访问容器的端口,需要进行端口映射,将容器的某端口映射到宿主机的端口,客户端连接时,只要与宿主机的端口进行连接就可以了。
需要注意的是,上面的代码创建的服务器,无论如何也不可能被客户端连接,因为代码中绑定了127.0.0.1的ip,在容器中运行时,需要绑定所有ip,即0.0.0.0。
import socketip_port = ('0.0.0.0', 5000)sk = socket.socket()
sk.bind(ip_port)
sk.listen(5)while True:print('server waiting...')conn,addr = sk.accept()print(addr)conn.sendall(b'hello\n')conn.close()
然后,再使用-p参数,-p还需要三个参数,即宿主机的ip地址、宿主机的端口、容器的端口,三者之间使用:分隔。一般的,可以将宿主机的ip地址省略,只写宿主机的端口:容器的端口即可。
docker run -v ~/docker_test:/docker_test -it -p 5001:5000 python:3.8 python /docker_test/hello.py
这样,就将容器的5000端口映射到了宿主机的5001端口,使用:
telnet 127.0.0.1 5001
即可与容器中的服务器进行连接。
4.4 容器管理
上面的服务运行之后,可以使用docker ps命令,查看运行中的容器:
$ docker ps
CONTAINER ID     IMAGE           COMMAND                  CREATED           STATUS         PORTS                    NAMES
ec4c86b8a163     python:3.8      "python /docker_test…"   5 seconds ago     Up 4 seconds   0.0.0.0:5000->5000/tcp   eager_wilson
显示的内容有下面几列:
- CONTAINER ID:容器ID
- IMAGE:镜像名称和版本
- COMMAND:执行的命令
- CREATED:容器创建时间
- STATUS:容器的状态
- PORTS:端口映射
- NAMES:容器名
要想结束容器,可以使用docker kill 容器ID命令。
5 自制Docker镜像
一般而言,当我们的程序开发完成后,会连同程序文件与运行环境一起制作成一个新的镜像。
要制作镜像,需要编写Dockerfile。DockeFile由多个命令组成,常用的命令有:
- FROM:基于某个镜像来制作新的镜像。格式为:FROM 镜像名称:镜像版本。
- COPY:从宿主机复制文件,支持
?、*等通配符。格式为:COPY 源文件路径 目标文件路径。 - ADD:从宿主机添加文件,格式与COPY相同,区别在于当文件为压缩文件时,会解压缩到目标路径。
- RUN:在创建新镜像的过程中执行的shell命令。格式为:RUN shell命令行。注意,此shell命令将在容器内执行。
- CMD:在容器实例中运行的命令,格式与RUN相同。注意,如果在docker run时指定了命令,将不会执行CMD的内容。
- ENTRYPOINT:在容器实例中运行的命令,格式与CMD相同。注意,如果在docker run时指定了命令,该命令会以命令行参数的形式传递到ENTRYPOINT中。
- ENV:在容器中创建环境变量,格式为:ENV 变量名 值
注意,Docker镜像中有一个层的概念,每执行一个RUN命令,就会创建一个层,层过多会导致镜像文件体积增大。尽量在RUN命令中使用&&连接多条shell命令,减少RUN命令的个数,可以有效减小镜像文件的体积。
5.1 自制显示文本文件内容镜像
编写cat.py,接收一个文件名,由python读取文件并显示文件的内容:
import os
import sysinput = sys.argv[1]with open(input, "r") as fp:print(fp.read())
这个例子比较简单,缩写Dockerfile如下:
FROM python:3.8
WORKDIR /files
COPY cat.py /cat.py
ENTRYPOINT ["python", "/cat.py"]
这个Dockerfile的含义是:
- 以python:3.8为基础镜像
- 容器启动命令的工作目录为/files,在运行镜像时,需要我们把宿主机的某目录挂载到容器的/files目录
- 复制cat.py到容器的根目录下
- 启动时运行python /cat.py命令
需要说明的是,ENTRYPOINT有两种写法:
ENTRYPOINT python /cat.py
ENTRYPOINT ["python", "/cat.py"]
这里采用第二种写法,是因为我们要在外部给容器传递参数。执行命令编译Docker镜像:
docker build -t cat:1.0 .
这个命令中,-t的含义是目标,即生成的镜像名为hello,版本号为1.0,别忘了最后那个.,这叫到上下文路径,是指 docker 在构建镜像,有时候想要使用到本机的文件(比如复制),docker build 命令得知这个路径后,会将路径下的所有内容打包。
这样,我们的第一个镜像就制作完成了,使用下面的命令执行它:
docker run -it -v ~/docker_test/cat/files:/files cat:1.0 test.txt
即可看到~/docker_test/cat/files/test.txt的内容。
5.2 自制web服务器镜像
我们使用tornado开发一个网站,而python的官方镜像是没有tornado库的,这就需要在制作镜像时进行安装。
测试的ws.py如下:
import tornado.httpserver
import tornado.ioloop
import tornado.options
import tornado.webfrom tornado.options import define, options
define("port", default=8000, help="run on the given port", type=int)class IndexHandler(tornado.web.RequestHandler):def get(self):self.write("Hello world")if __name__ == "__main__":tornado.options.parse_command_line()app = tornado.web.Application(handlers=[(r"/", IndexHandler)])http_server = tornado.httpserver.HTTPServer(app)http_server.listen(options.port)tornado.ioloop.IOLoop.instance().start()
编写Dockerfile文件如下:
FROM python:3.8
WORKDIR /ws
COPY ws.py /ws/ws.py
RUN pip install tornado
CMD python hello.py
在此我们验证一下CMD与ENTRYPOINT的区别。在Dockerfile所在有目录下执行如下命令:
docker build -t ws:1.0 .
执行完成后,再使用docker images使用就可以看到生成的镜像了,然后使用下面的命令运行:
docker run -it -p 8000:8000 ws:1.0
在浏览器中输入宿主机的ip和8000端口,就可以看到页面了。
在这个例子中,我使用的运行命令是CMD,如果在docker run中指定的其他的命令,此命令就不会被执行,如:
$ docker run -it -p 8000:8000 ws:1.0 python
Python 3.8.7 (default, Dec 22 2020, 18:46:25)
[GCC 8.3.0] on linux
Type "help", "copyright", "credits" or "license" for more information.
>>>
此时,容器中被执行的是python命令,而不是我们的服务。在更多情况下,我们希望在docker run命令中为我们的服务传参,而不是覆盖执行命令,那么,我们应该使用ENTRYPOINT而不是CMD:
FROM python:3.8
WORKDIR /ws
COPY ws.py /ws/ws.py
RUN pip install tornado
ENTRYPOINT python ws.py
上面这种写法,是不支持传递参数的,ENTRYPOINT和CMD还支持另一种写法:
FROM python:3.8
WORKDIR /ws
COPY ws.py /ws/ws.py
RUN pip install tornado
ENTRYPOINT ["python", "ws.py"]
使用这种写法,docker run命令中的参数才可以传递给hello.py:
docker run -it -p 8000:9000 ws:1.0 --port=9000
这个命令中,--port=9000被作为参数传递到hello.py中,因此容器内的端口就成了9000。
在生产环境中运行时,不会使用-it选项,而是使用-d选项,让容器在后台运行:
$ docker run -d -p 8000:9000 ws:1.0 --port=9000
4a2df9b252e2aff6a8853b3a8bf46c0577545764831bb7557b836ddcd85cba70
$ docker ps
CONTAINER ID   IMAGE        COMMAND                  CREATED           STATUS            PORTS                    NAMES
4a2df9b252e2   hello:1.0    "python ws.py --p…"   9 seconds ago     Up 8 seconds      0.0.0.0:8000->9000/tcp   elegant_sammet
这种方式下,即使当前的控制台被关闭,该容器也不会停止。
5.3 自制apscheduler服务镜像
接下来,制作一个使用apscheduler编写的服务镜像,代码如下:
import sys
import shutil
from apscheduler.schedulers.blocking import BlockingScheduler
from apscheduler.triggers.cron import CronTriggerdef scan_files():shutil.copytree(sys[1], sys[2])scheduler = BlockingScheduler()
scheduler.add_job(scan_files,trigger=CronTrigger(minute="*"),misfire_grace_time=30
)
Dockerfile也是信手拈来:
FROM python:3.8
WORKDIR /
COPY sch.py /sch.py
RUN pip install apscheduler
ENTRYPOINT ["python", "sch.py"]
生成镜像:
docker build -t sch:1.0 .
应该可以运行了,文件复制需要两个目录,在运行时,可以使用两次-v来挂载不同的目录:
docker run -d -v ~/docker_test/sch/src:/src -v ~/docker_test/sch/dest:/dest sch:1.0 /src /dest
6 多阶段构建压缩镜像体积
前面用到的官方python镜像大小足足882MB,在这个基础上,再安装用到的第三方库,添加项目需要的图片等资源,大小很容易就超过1个G,这么大的镜像,网络传给客户非常的不方便,因此,减小镜像的体积是非常必要的工作。
docker hub上有个一python:3.8-alpine镜像,大小只有44.5MB。之所以小,是因为alpine是一个采用了busybox架构的操作系统,一般用于嵌入式应用。我尝试使用这个镜像,发现安装一般的库还好,但如果想安装numpy等就会困难重重,甚至网上都找不到解决方案。
还是很回到基本的路线上来,主流的操作系统镜像,ubuntu的大小为72.9MB,centos的大小为209MB——这也算是我更喜欢使用ubuntu的一个重要原因吧!使用ubuntu作为基础镜像,安装python后的大小为139MB,再安装pip后的大小一下子上升到了407MB,要是再安装点其他东西,很容易就赶上或超过python官方镜像的大小了。
看来,寻常路线是很难压缩镜像文件体积了。幸好,还有一条曲线救国的路可走,这就是多阶段构建法。
多阶段构建的思想其实很简单,先构建一个大而全的镜像,然后只把镜像中有用的部分拿出来,放在一个新的镜像里。在我们的场景下,pip只在构建镜像的过程中需要,而对运行我们的程序却一点用处也没有。我们只需要安装pip,再用pip安装第三方库,然后将第三方库从这个镜像中复制到一个只有python,没有pip的镜像中,这样,pip占用的268MB空间就可以被节省出来了。
-
在ubuntu镜像的基础上安装python:
FROM ubuntu
RUN apt update \&& apt install python3
然后运行:
docker build -t python:3.8-ubuntu .这样,就生成了python:3.8-ubuntu镜像。
-
在python:3.8-ubuntu的基础上安装pip:
FROM python:3.8-ubuntu
RUN apt install python3
然后运行:
docker build -t python:3.8-ubuntu-pip .这样,就生成了python:3.8-ubuntu-pip镜像。
-
多阶段构建目标镜像:
FROM python:3.8-ubuntu-pip
RUN pip3 install -i https://pypi.tuna.tsinghua.edu.cn/simple numpy
FROM python:3.8-ubuntu
COPY --from=0 /usr/local/lib/python3.8/dist-packages/ /usr/local/lib/python3.8/dist-packages/
这个dockerfile需要解释一下了,因为它有两个FROM命令。
第一个是以python:3.8-ubuntu-pip镜像为基础,安装numpy,当然,在实际应用中,把所有用到的第三方库出写在这里。
第二个FROM是以FROM python:3.8-ubuntu镜像为基础,将第三方库统统复制过来,COPY命令后的–from=0的意思是从第0阶段进行复制。实际应用中再从上下文中复制程序代码,添加需要的ENTRYPOINT等。
最后,再运行:
docker build -t project:1.0 .这然,用于我们项目的镜像就做好了。比使用官方python镜像构建的版本,小了大约750MB。
7 导入镜像到生产环境
到此,我们的镜像已经制作好了,可是,镜像文件在哪,如何在生产环境下运行呢?
刚才使用docker images命令时,已经看到了生成的镜像:
$ docker images
REPOSITORY          TAG                 IMAGE ID            CREATED             SIZE
hello               1.0                 01fe19111dc7        59 minutes ago      893MB
python              3.8                 f5041c8ae6b1        13 days ago         884MB
ubuntu              20.04               f643c72bc252        5 weeks ago         72.9MB
hello-world         latest              bf756fb1ae65        12 months ago       13.3kB
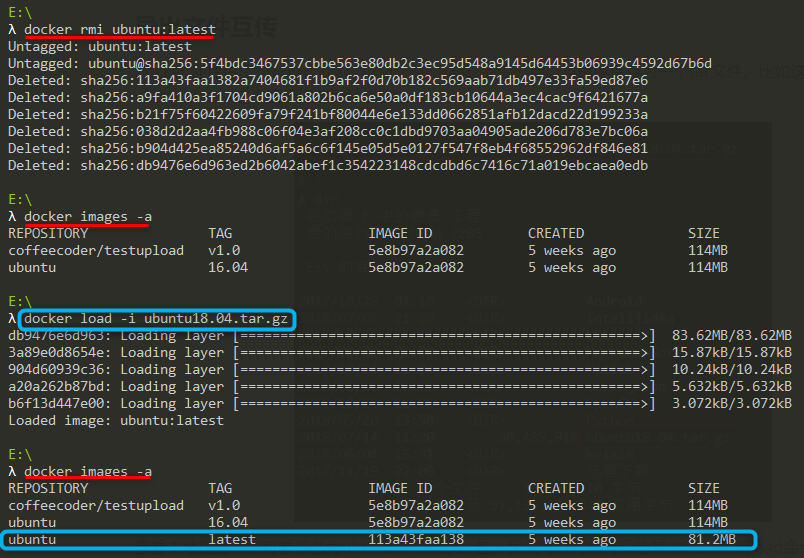
我们可以使用docker save命令将镜像保存到指定的文件中,保存的文件是一个.tar格式的压缩文件:
docker save -o hello.tar hello:1.0
将hello.tar复制到生产环境的机器上,然后执行导入命令:
docker load -i hello.tar
就可以使用了。

