博主之前已经为大家讲了Element入门教程,如果还有什么疑问的话可以查看博主置顶的文章。相信大家对Element 框架已经有了一个基本的了解,这次为大家讲一下如何调用接口。
以我自己为例子,我想要调用我接口里的图片,并让他在浏览器里显示出来。
-
打开自己的element-starter文件夹,在src目录下新建一个Login文件夹,在里面新建一个Index.vue文件。
代码如下:
<template><div id='app'><div v-for="item in listone" :key="item.id"><img :src="item.imgurl" class="img"> </div></div>
</template>
<script>
export default {data(){return {listone:[],listtwo:[]}},created(){this.GetListImg();},methods:{GetListImg(){var that = this;that.$axios({method:"get",url:"/api/index/data"}).then (response => {// console.log(response.data )that.listone = response.data.data.listone;that.listtwo = response.data.data.listtwo;//输出接口数据console.log(that.listone);})}}}
</script>
<style>.img {width:50%;height:50%;float:left;}</style>
注意:'imgurl’为我自己写的接口一个图片地址,‘listone’、'listtwo’为我自己写的的接口请里的图片。
- 修改一下main.js文件
代码如下:
import Vue from 'vue'
import ElementUI from 'element-ui'
import 'element-ui/lib/theme-chalk/index.css'
import App from './App.vue'
import vueRouter from 'vue-router'
import routes from './router/routes.js'
import axios from 'axios'
//修改vue的原始属性
Vue.prototype.$axios = axios
定义路由组件
Vue.use(vueRouter)
const router = new vueRouter({routes,mode:'history'
})Vue.use(ElementUI)
定义路由
new Vue({router,el: '#app',render: h => h(App)})- src目录下新建一个router文件夹,在里面新建一个routes.js文件。
代码如下:
//导入你建的Login
import Login from"../views/Login/Index.vue"
//路由配置
let routes = [{path:'/login',component:Login,name:"登录页",hidden:true}]
export default routes;- 最后修改一下webpack.config.js文件
devServer: {host: '127.0.0.1',port: 8010,proxy: {'/api/': {target: 'http://www. 省略.com:8090/'changeOrigin: true,pathRewrite: {'^/api': ''}}},
target:‘http://’ 为你们自己写的接口地址
-
运行
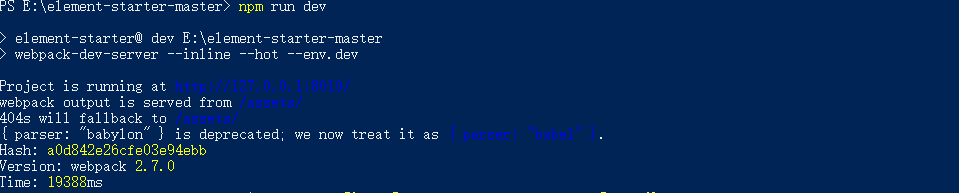
-
浏览器输入http://127.0.0.1:8010/login

注意:这是我写的接口运行结果


![[SpringBoot系列]项目测试](https://img-blog.csdnimg.cn/cf9864ce05654078bd3961c98e1d283f.png)