JavaScript之Js运动
在我们进行web开发的过程中,为了与用户进行更加友好、有趣的交互,拥有一套完美的运动框架就能轻松解决。
这次就给大家带来Javascript学习中Js运动的编写和注意事项。实现运动的思想很简单,首先对这个元素获取定位,然后通过改变该元素的left值和top值或者透明度,通过定时器就可以实现元素的运动效果。
Js运动代码编写的过程,基本步骤如下:
1、关闭上一次定时器。
因为重复点击多次开始运动,就相当于重复启动了多次定时器,这样造成的麻烦就是点击多次运动会加速。如果我们确保同一时间只启动一个定时器,在每次启动定时器之前先将上一次定时器关闭,就可以有效的解决上述问题。
关闭定时器:clearInterval(timer);
2、运动和停止分开。
到达目的值后,点击按钮,还会往前运动,这时我们就需要用if-else语句将运动和停止分开。
var timer = setInterval(function(){if(oDiv.offsetLeft >= 500){clearInterval(timer);   //停止运动}else{oDiv.style.left = oDiv.offsetLeft + speed + "px"; //运动}
},30);
3、分析元素怎么动
接下来我们将从匀速运动、淡入淡出、缓冲运动、多物体运动这些案例逐一展开分享。
一、匀速运动:速度不会改变。
分析: 1.实现匀速运动效果,我们先设置元素样式,然后通过document.getElementById(id)获取到对应的id节点元素。
2.关闭上一次定时器
3.定义speed速度(可以随意定义运动的速度值)
4.设置运动和停止分开
【注】接下来的案例分析与之类似,在代码块中详细注释。
<!DOCTYPE html>
<html lang="en"><head><meta charset="UTF-8"><meta name="viewport" content="width=device-width, initial-scale=1.0"><title>Document</title><style>//css样式设置*{margin: 0px; padding: 0px;}#div1{width: 100px; height: 100px; background-color: red; position: absolute; left: 0px; top: 200px;}</style><script>window.onload = function (){var oBtn = document.getElementById("btn1");//获取btn1元素节点var oDiv = document.getElementById("div1");//获取div1元素节点oBtn.onclick = function(){clearInterval(timer);//关闭上一次定时器var speed = 8;//设置速度为8var timer = setInterval(function(){//记录定时器返回值,设置定时器,30ms运动一下if(oDiv.offsetLeft >= 500){clearInterval(timer);//如果运动到目的值,关闭定时器}else{oDiv.style.left = oDiv.offsetLeft + speed + "px";//运动方式}},30);}}</script></head><body><button id = 'btn1'>开始运动</button><div id = 'div1'></div></body>
</html>
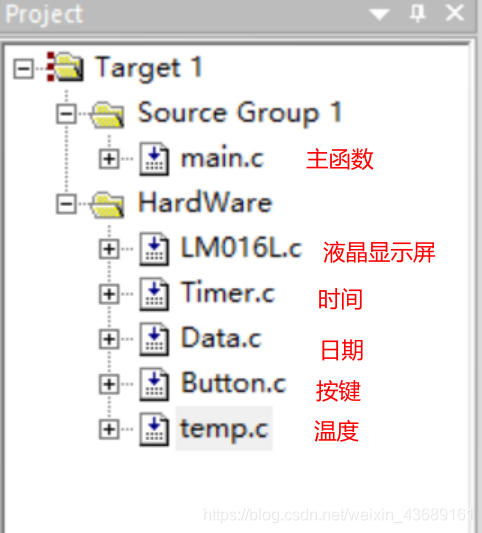
来看一下匀速运动的效果图:
二、分享到菜单案例
封装了starMove和startMove2函数
<!DOCTYPE html>
<html lang="en"><head><meta charset="UTF-8"><meta name="viewport" content="width=device-width, initial-scale=1.0"><title>Document</title><style>#menu{width: 100px; height: 200px; background-color: gray; position: absolute; top: 300px; left: -100px;}#menu span{width: 20px; height: 60px; line-height: 20px; background-color: yellow; position: absolute; left: 100px; top: 70px;}</style><script>window.onload = function(){var oMenu = document.getElementById("menu");//鼠标移入,调用startMove函数oMenu.onmouseover = function(){startMove();}//鼠标移出,调用startMove2函数oMenu.onmouseout = function(){startMove2();}}var timer = null; //记录定时器返回值function startMove(){var oMenu = document.getElementById("menu");var speed = 5;//1、每次启动定时器,将上一次定时器关闭clearInterval(timer);//关闭定时器timer = setInterval(function(){//2、运动和停止分开,目的值是左侧边框位置0pxif(oMenu.offsetLeft == 0){clearInterval(timer);}else{oMenu.style.left = oMenu.offsetLeft + speed + 'px';//运动}}, 30);} function startMove2(){var oMenu = document.getElementById("menu");var speed = -5;//1、每次启动定时器,将上一次定时器关闭clearInterval(timer);timer = setInterval(function(){//2、运动和停止分开,目的值是左侧边框位置-100pxif(oMenu.offsetLeft == -100){clearInterval(timer);//关闭定时器}else{oMenu.style.left = oMenu.offsetLeft + speed + 'px';//运动}}, 30);}</script></head><body><div id = 'menu'><span>分享到</span></div></body>
</html>
上面的代码未免显得啰嗦笨拙,我们可以将它改动一下,把speed和iTarget的值作为形参传递到函数中,这样只封装成一个startMove函数就可以实现。
window.onload = function(){var oMenu = document.getElementById("menu");oMenu.onmousemove = function(){starMove(3,0);//speed为3,目标值为0px};oMenu.onmouseout = function(){starMove(-3,-100);//speed为-3,目标值为-100px}// 记录定时器返回值var timer = null;function starMove(speed, iTarget){// 获取menu的idvar oMenu = document.getElementById("menu");// 关闭定时器clearInterval(timer);// 运动和停止timer = setInterval(function(){if(oMenu.offsetLeft == iTarget){clearInterval(timer);}else{oMenu.style.left = oMenu.offsetLeft + speed + "px";}},3);}}
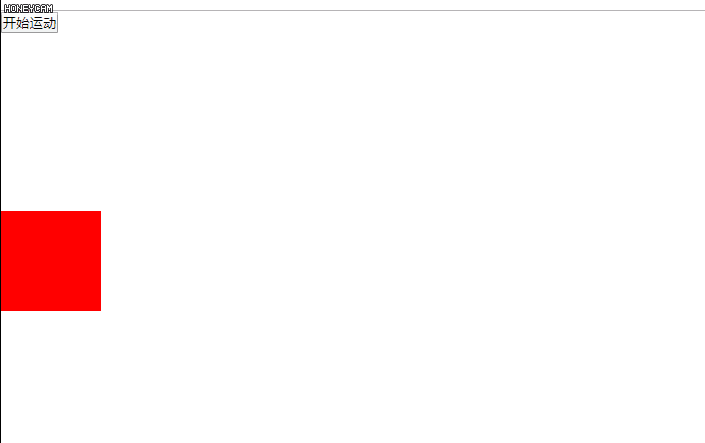
来看一下分享到菜单的效果图:
三、淡入淡出效果
通过改变透明度的值来实现元素的淡入淡出效果。
<!DOCTYPE html>
<html lang="en"><head><meta charset="UTF-8"><meta name="viewport" content="width=device-width, initial-scale=1.0"><title>Document</title><style>#img1{opacity: 0.3; filter: alpha(opacity=30);}body{background-color: black;}</style><script>window.onload = function(){var oImg = document.getElementById("img1");//鼠标移入,透明度为1oImg.onmouseover = function(){startMove(100);}//鼠标移出,透明度为0.3oImg.onmouseout = function(){startMove(30);}}//计算透明度的时候,如果遇到浏览器不兼容的问题,可以通过设置中间变量alpha完成计算var alpha = 30;//设置中间变量var timer = null;//function startMove(iTarget){var oImg = document.getElementById("img1");var speed = 2;//1、判断速度的正负if(alpha < iTarget){speed = Math.abs(speed);//如果当前值小于目标值,速度取正}else{speed = -Math.abs(speed);//如果当前值大于目标值,速度取负,停止运动}//2、每次启动定时器之前,现将上一次定时器关闭掉clearInterval(timer);timer = setInterval(function(){//3、运动和停止要分开if(alpha == iTarget){clearInterval(timer);}else{alpha += speed;//设置透明度oImg.style.opacity = alpha / 100;oImg.style.filter = `alpha(opacity=${alpha})`;// alert(`alpha(opacity=${alpha})`)}}, 30);           }</script></head><body><img id = 'img1' src="timg.jpeg" alt=""></body>
</html>
来看一下淡入淡出的效果图:

四、缓冲运动
匀速运动的动画效果就像一个钢铁直男,直来直去。为了给动画效果做的更加流畅、舒适,我们现在来了解一下缓冲运动。
什么是缓冲运动?举个栗子,刹车就是缓冲运动!速度与距离成正相关就是缓冲运动,距离越大,速度越大;距离越小,速度越小。在Js中,(距离/速度=8)实现的缓冲效果最好,所以我们可以定义速度:var speed = (iTarget - node.offsetLeft) / 8;
但是要特别注意的是,计算机能够识别的最小像素是1px,小于1px不能识别,同时定义速度的时候必须为整数,要不然可是会出大事情!!所以要在定义速度的时候给它一个判断:speed = speed > 0 ? Math.ceil(speed) : Math.floor(speed);即speed>0时,向上取整,否则向下取整。
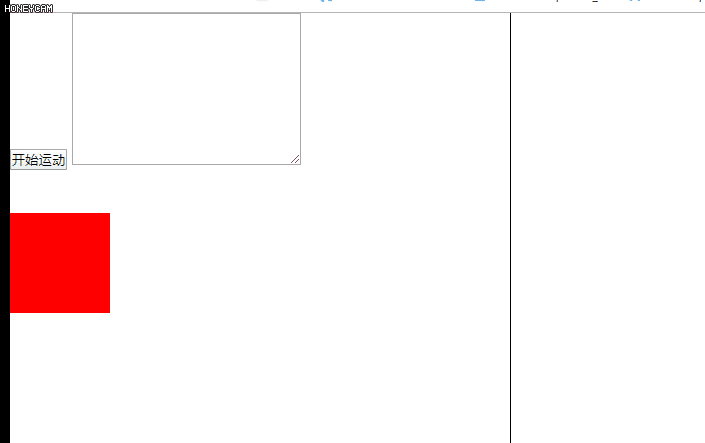
下面来看看代码,详细学习一下缓冲运动。
<!DOCTYPE html>
<html lang="en"><head><meta charset="UTF-8"><meta name="viewport" content="width=device-width, initial-scale=1.0"><title>Document</title><style>*{margin: 0px; padding: 0px;}#div1{width: 100px; height: 100px; background-color: red; position: absolute; left: 0px; top: 200px;}span{width: 1px; height: 500px; background-color: black; position: absolute; left: 500px; top: 0px; display: block;}</style><script>window.onload = function(){var oBtn = document.getElementById("btn1");//点击按钮,调用startMove函数,目标值为500pxoBtn.onclick = function(){startMove(500);}}//定时器var timer = null;//封装startMove函数function startMove(iTarget){var oDiv = document.getElementById("div1");var oTxt = document.getElementById("txt1");//关闭上一次的定时器clearInterval(timer);timer = setInterval(function(){//计算速度var speed = (iTarget - oDiv.offsetLeft) / 8;//如果速度>0,向上取整,否则向下取整。speed = speed > 0 ? Math.ceil(speed) : Math.floor(speed);//运动和停止分开if(oDiv.offsetLeft == iTarget){clearInterval(timer);//到达目的值,关闭定时器}else{oDiv.style.left = oDiv.offsetLeft + speed + 'px';}//用来打印速度和当前值,更好的理解缓冲运动oTxt.value += speed + ", " + oDiv.offsetLeft + "\n";}, 30);}</script></head><body><button id = 'btn1'>开始运动</button><div id = 'div1'></div><span></span><textarea name="" id="txt1" cols="30" rows="10"></textarea></body>
</html>
缓冲运动效果图如下:
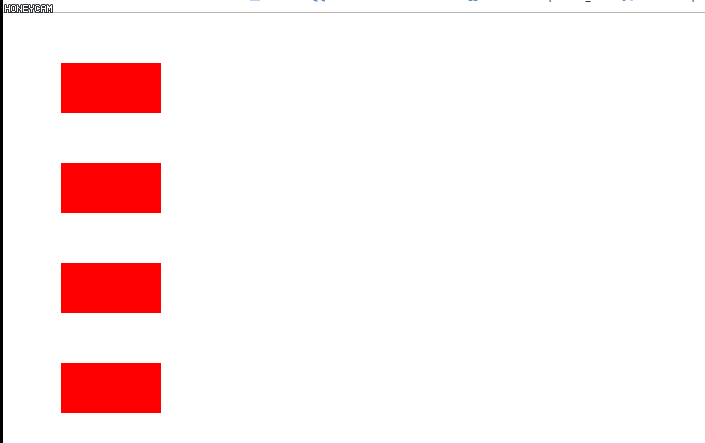
五、多物体运动
多个元素一起运动会出现一个问题,就是上个元素运动未结束再去执行下一个运动的时候,上个元素会被干扰,暂停运动。这时就要让每一个元素拥有自己独享的定时器:node.index = i; node.timer = 定时器;
<!DOCTYPE html>
<html lang="en"><head><meta charset="UTF-8"><meta name="viewport" content="width=device-width, initial-scale=1.0"><title>Document</title><style>div{width: 100px; height: 50px; background-color: red; margin: 50px;}</style><script>window.onload = function(){var aDivs = document.getElementsByTagName("div");for(var i = 0; i < aDivs.length; i++){aDivs[i].onmouseover = function(){//100 => 300startMove(this, 300);}aDivs[i].onmouseout = function(){//300 => 100startMove(this, 100);}}}/*让每一个运动的物体,都拥有一个自己独享的定时器。node.index = i;node.timer = 定时器*/function startMove(node, iTarget){clearInterval(node.timer);node.timer = setInterval(function(){//计算速度var speed = (iTarget - node.offsetWidth) / 8;speed = speed > 0 ? Math.ceil(speed) : Math.floor(speed);if(node.offsetWidth == iTarget){clearInterval(node.timer);}else{node.style.width = node.offsetWidth + speed + 'px';}}, 30);}</script></head><body><div></div><div></div><div></div><div></div></body>
</html>
多物体运行图
以上是Js运动的基本动画效果。相信大家看完这篇文章对Js运动有了一定的了解。下一篇将继续为大家深入Js运动,实现多物体多样式案例效果,并且为大家封装一个完美运动函数。
文章为学习阶段一个总结,有错误之处希望大家指正!
坚强阳光努力的人运气都不会太差!