https://testng.org/doc/documentation-main.html
TestNG概述
TestNG is a testing framework inspired from JUnit and NUnit but introducing some new functionalities that make it more powerful and easier to use, such as:
Annotations.
- Run your tests in arbitrarily big thread pools with various policies available (all methods in their own thread, one thread per test class, etc…)
- Test that your code is multithread safe.
- Flexible test configuration.
- Support for data-driven testing (with @DataProvider).
- Support for ** parameters **.
- Powerful execution model (
no more TestSuite). - Supported by a variety of tools and plug-ins (Eclipse, IDEA, Maven, etc…).
- Embeds BeanShell for further flexibility.
- Default JDK functions for runtime and logging (no dependencies).
- Dependent methods for application server testing.
TestNG is designed to cover all categories of tests: unit, functional, end-to-end, integration, etc…
单元测试,功能测试,端到端测试,集成测试…
SampleTest
package example1;import org.testng.annotations.*;public class SimpleTest {@BeforeClasspublic void setUp() {// code that will be invoked when this test is instantiated}@Test(groups = { "fast" })public void aFastTest() {System.out.println("Fast test");}@Test(groups = { "slow" })public void aSlowTest() {System.out.println("Slow test");}}-
setUp()会在所有test method方法前执行,且执行一次。 -
如果只执行 group
fast,aFastTest()会被执行,但是aSlowTest()会被跳过.
1 - Introduction
编写一个测试通常需要3个步骤:
- 在业务代码中 插入
TestNG annotations - 在
testng.xml文件或build.xml(ant)文件中添加关于你的测试的信息(例如,类名,你希望运行的组,等等)。 - 运行TestNG
本文档涉及的概念如下:
- suite: 套件。一个套件由一个XML文件表示。它由
<suit>标记,它可以包含一个或多个测试; - test:测试。它由
<test>标记,可以包含一个或多个TestNG类。 - TestNG类是至少包含一个TestNG注释的Java类。它由
<class>标记,可以包含一个或多个测试方法。 - 测试方法是源代码中带有
@Test注释的Java方法。
TestNG测试可以通过@BeforeXXX和@AfterXXX注释配置,这些注释允许在某个点之前和之后执行一些Java逻辑。
2 - Annotations
@Before* & @After*
- @BeforeSuite: 该注解方法会在
before all tests in this suite have run.仅执行一次 - ****@BeforeTest: ** 该注解方法会在
before any test method belonging to the classes inside the <test> tag is run. - **@BeforeGroups: 该注解方法会在
before the first test method that belongs to any of these groups is invoked - **@BeforeClass: ** 该注解方法会在
before the first test method in the current class is invoked. - ****@BeforeMethod: ** 该注解方法会在 每一个Test方法前执行
@After*不再赘述。环绕注解:
before1 -> before2 -> xx -> after2 -> after1
当将上面的注释放在TestNG类的父类中时,也会被继承。
TestNG保证“@Before”方法按照继承顺序执行(首先是最高的父类,然后沿着继承链向下),而“@After”方法按照相反的顺序执行(沿着继承链向上)。
@DataProvider
将方法标记为为测试方法提供数据。带有该注释的方法必须返回一个Object[][] ,其中每个Object[][] 都可以被分配测试方法的参数列表。@Test方法通过dataProvider属性指定所需的提供数据的方法。
@Factory
将方法标记为工厂,该工厂返回的对象将被TestNG用作Test类。该方法必须返回Object[]。
@Listeners
在测试类上定义侦听器。
@Parameters
描述如何将参数传递给@Test方法。
@Test
将类或方法标记为测试的一部分。
3 - testng.xml
你可以用几种不同的方式调用TestNG:
- 使用testng.xml文件
- 使用ant
- 从命令行
examples
testng.xml
<!DOCTYPE suite SYSTEM "https://testng.org/testng-1.0.dtd" ><suite name="Suite1" verbose="1" ><test name="Nopackage" ><classes><class name="NoPackageTest" /></classes></test><test name="Regression1"><classes><class name="test.sample.ParameterSample"/><class name="test.sample.ParameterTest"/></classes></test>
</suite>
扫描package
<!DOCTYPE suite SYSTEM "https://testng.org/testng-1.0.dtd" ><suite name="Suite1" verbose="1" ><test name="Regression1"   ><packages><!-- package test.sample 下所有带有@Test的类都会执行。*注意*: 若仅method上带有@Test注解,但是类上没有,则会被跳过。--><package name="test.sample" /></packages></test>
</suite>
included and excluded
<test name="Regression1"><groups><run><!-- groups 支持included and excluded--><exclude name="brokenTests"  /><include name="checkinTests"  /></run></groups><classes><class name="test.IndividualMethodsTest"><methods><!--  支持included and excluded--><include name="testMethod" /></methods></class></classes>
</test>
preserve-order
<!-- 默认情况下: test下的class和method会按照定义顺序执行, 若希望以一种不可预测的顺序执行: 加上 preserve-order=false
-->
<test name="Regression1" preserve-order="false"><classes><class name="test.Test1"><methods><include name="m1" /><include name="m2" /></methods></class><class name="test.Test2" /></classes>
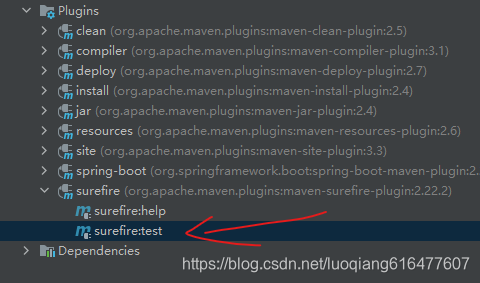
</test>4 - Run TestNG
TestNG 可以以如下几种方式执行
- Command line
- ant
- Eclipse , IntelliJ’s IDEA
下面以Command line为例。
java org.testng.TestNG testng1.xml [testng2.xml testng3.xml ...]
它执行以下参数信息:

例:
java -Dtestng.test.classpath="c:/build;c:/java/classes;" org.testng.TestNG testng.xmljava org.testng.TestNG -groups windows,linux -testclass org.test.MyTest
5 - Test methods, Test classes and Test groups
5.1 Test methods
带@Test注解的方法返回值将会被忽略,除非你在testng.xml中将allow-return-values设置为true:
<suite allow-return-values="true">
or
<test allow-return-values="true">
5.2 Test Groups
可以在<test>或<suite>标签下定义<groups>组。
<suite>标记中指定的组应用于下面的所有<test>标记。
注意,如果您在<suite>中指定组“a”,在<test>中指定组“b”,那么**“a”和“b”都将被包含**。
example1
例如,有至少两类测试是很常见的
Check-in tests。在提交新代码之前,应该运行这些测试。他们通常应该是快速的,只是确保没有基本的功能被破坏。Functional tests。这些测试应该覆盖软件的所有功能,并且至少每天运行一次,尽管理想情况下您希望连续运行它们。
JAVA代码
public class Test1 {@Test(groups = { "functest", "checkintest" })public void testMethod1() {}@Test(groups = {"functest", "checkintest"} )public void testMethod2() {}@Test(groups = { "functest" })public void testMethod3() {}
}
testng.xml
<test name="Test1"><groups><run><include name="functest"/></run></groups><classes><class name="example1.Test1"/></classes>
</test>
仅 testMethod1() , testMethod2()被执行。
example2
java代码
@Test
public class Test1 {@Test(groups = { "windows.checkintest" })public void testWindowsOnly() {}@Test(groups = {"linux.checkintest"} )public void testLinuxOnly() {}@Test(groups = { "windows.functest" )public void testWindowsToo() {}
}
testng.xml
<test name="Test1"><groups><run><include name="windows.*"/></run></groups><classes><class name="example1.Test1"/></classes>
</test>
仅执行windows相关用例。
Method Groups(不建议使用)
<test name="Test1"><classes><class name="example1.Test1"><methods><include name=".*enabledTestMethod.*"/><exclude name=".*brokenTestMethod.*"/></methods></class></classes>
</test>
5.3 Groups of Groups
组还可以包括其他组。这些组被称为“MetaGroups”。
<test name="Regression1"><groups><define name="functest"> <!-- 定义metagroups --><include name="windows"/><include name="linux"/></define><define name="all"><include name="functest"/><include name="checkintest"/> <!-- windows + linux --></define><run><include name="all"/></run></groups><classes><class name="test.sample.Test1"/></classes>
</test>
5.4 - Exclusion groups
java
@Test(groups = {"checkintest", "broken"} )
public void testMethod2() {
}
testng.xml
<test name="Simple example"><groups><run><include name="checkintest"/><exclude name="broken"/></run></groups><classes><class name="example1.Test1"/></classes>
</test>
本例中,不会有测试用例执行。
您还可以使用
@Test和@Before/After注释上可用的“enabled”属性禁用单个测试。
5.5 - Partial groups
类级别定义组,然后在方法级别添加组:
@Test(groups = { "checkin-test" })
public class All {@Test(groups = { "func-test" ) public void method1() { ... } // 属于 func-test + checkin-test组public void method2() { ... } // 仅属于 checkin-test组
}
5.6 - Parameters
有两种方法设置这些参数:使用testng.xml或以编程方式。
parameters from testng.xml
java
@Parameters({ "first-name" })
@Test
public void testSingleString(String firstName) {System.out.println("Invoked testString " + firstName);assert "Cedric".equals(firstName);
}
testng.xml
<suite name="My suite"><parameter name="first-name" value="Cedric"/><test name="Simple example"><-- ... -->
也可以用于@Before/After和@Factory注释:
@Parameters({ "datasource", "jdbcDriver" })
@BeforeMethod
public void beforeTest(String ds, String driver) {m_dataSource = ...;                              // look up the value of datasourcem_jdbcDriver = driver;
}
参数可选
@Parameters("db")
@Test
public void testNonExistentParameter(@Optional("mysql") String db) { ... } //mysql作为默认值,
注意
- XML参数的顺序必须与java代码中顺序一致且个数相同,否则TestNG会报错。
- 在testng.xml中,可以在
<suite>标记下声明它们,也可以在<test>标记下声明它们。如果两个参数具有相同的名称,则<test>中定义的参数具有优先级。
parameters with DataProviders
** 成员方法1 **
//This method will provide data to any test method that declares that its Data Provider
//is named "test1"
@DataProvider(name = "test1")
public Object[][] createData1() {return new Object[][] {{ "Cedric", new Integer(36) },{ "Anne", new Integer(37)},};
}//This test method declares that its data should be supplied by the Data Provider
//named "test1"
@Test(dataProvider = "test1")
public void verifyData1(String n1, Integer n2) {System.out.println(n1 + " " + n2);
}
** static 静态方法**
public class StaticProvider {@DataProvider(name = "create")public static Object[][] createData() {return new Object[][] {new Object[] { new Integer(42) }};}
}public class MyTest {@Test(dataProvider = "create", dataProviderClass = StaticProvider.class)public void test(Integer n) {// ...}
}
多种返回类型: MyCustomData[][] or Iterator
返回类型不仅限于Object,因此也可以使用MyCustomData[][]或Iterator<Supplier>。
@DataProvider(name = "test1")
public Iterator<Object[]> createData() {return new MyIterator(DATA);
}//----------//
@DataProvider(name = "test1")
public MyCustomData[] createData() {return new MyCustomData[]{ new MyCustomData() };
}//----------//
@DataProvider(name = "test1")
public Iterator<MyCustomData> createData() {return Arrays.asList(new MyCustomData()).iterator();
}//----------//
@DataProvider(name = "test1")
public Iterator<Stream> createData() {return Arrays.asList(Stream.of("a", "b", "c")).iterator();
}
** 打印调用DataProvider的方法**
@DataProvider(name = "dp")
public Object[][] createData(Method m) { // 第一个参数为 java.reflect.MethodSystem.out.println(m.getName());  // print test method namereturn new Object[][] { new Object[] { "Cedric" }};
}@Test(dataProvider = "dp")
public void test1(String s) {
}@Test(dataProvider = "dp")
public void test2(String s) {
}
5.7 - Dependencies
有时,您需要以特定的顺序调用测试方法。
Dependencies with annotations
以下是两种依赖关系:
- Hard Dependency。您所依赖的所有方法必须已经运行并成功运行。如果您的依赖项中发生了一个故障,则本次测试将被标记为
SKIP。 - Soft Dependency。当您只想确保您的测试方法以特定的顺序运行,不关注依赖的执行结果。在@Test注释中添加
“alwaysRun=true”来设置。
Hard Dependency Example
@Test
public void serverStartedOk() {}@Test(dependsOnMethods = { "serverStartedOk" })
public void method1() {}
依赖 groups
@Test(groups = { "init" })
public void serverStartedOk() {}@Test(groups = { "init" })
public void initEnvironment() {}@Test(dependsOnGroups = { "init.*" })
public void method1() {}
Dependencies in XML
<test name="My suite"><groups><dependencies><group name="c" depends-on="a  b" /><group name="z" depends-on="c" /></dependencies></groups>
</test>
5.8 - Factories
工厂允许您动态地创建测试.
** 例如**,假设您想要创建一个测试方法,它将用不同的参数多次访问Web站点上的一个页面。
public class TestWebServer {@Test(parameters = { "number-of-times" })public void accessPage(int numberOfTimes) {while (numberOfTimes-- > 0) {// access the web page}}
}
<test name="T1"><parameter name="number-of-times" value="10"/><classes><class name= "TestWebServer" /></classes>
</test><test name="T2"><parameter name="number-of-times" value="20"/><classes><class name= "TestWebServer"/></classes>
</test><test name="T3"><parameter name="number-of-times" value="30"/><classes><class name= "TestWebServer"/></classes>
当后面出现T4,T5.... Tn种测试需求时,整个xml文件将变得异常庞大,且无法管理。
使用factory
- 定义factory
public class WebTestFactory {@Factorypublic Object[] createInstances() {Object[] result = new Object[10]; for (int i = 0; i < 10; i++) {result[i] = new WebTest(i * 10); //生产 WebTest对象}return result;}
}
- 重新定义test
public class WebTest {private int m_numberOfTimes;public WebTest(int numberOfTimes) {m_numberOfTimes = numberOfTimes;}@Testpublic void testServer() {for (int i = 0; i < m_numberOfTimes; i++) {// access the web page}}
}
-
引入factory
<class name="WebTestFactory" />或者
TestNG testNG = new TestNG();
testNG.setTestClasses(WebTestFactory.class);
testNG.run();
Factories + DataProvider
@Factory(dataProvider = "dp") // 引用@DataProvider
public FactoryDataProviderSampleTest(int n) {super(n);
}@DataProvider
static public Object[][] dp() {return new Object[][] {new Object[] { 41 },new Object[] { 42 },};
}
5.9 - Class level annotations
@Test
public class Test1 {public void test1() {}public void test2() {}
}//为test添加属性
@Test
public class Test1 {public void test1() {}@Test(groups = "g1")public void test2() {}
}
5.10 - Ignoring tests
5.10 - Ignoring tests
//ignore class
@Ignore
public class TestcaseSample {@Testpublic void testMethod1() {}@Testpublic void testMethod2() {}
}//ignore package
@Ignore
package com.testng.master;
import org.testng.annotations.Ignore;
5.11 - Parallelism and time-outs
Parallel suites
# 不同的suite在不同的线程中执行 ; 指定的线程池大小为3
java org.testng.TestNG -suitethreadpoolsize 3 testng1.xml testng2.xml testng3.xml
parallel
<!-- parallel值选项为:- methods   所有的测试用例都在独立的线程中执行- tests   <test>标签下的所有用例,在一个线程中执行;  各<test>标签在独立线程执行- classes  class内的method,在同一个线程中执行; 不同的class独立线程执行- instances 同一个java对象实例中的所有方法,在同一个线程执行; 不同实例&相同方法 在独立线程执行。
-->
<suite name="My suite" parallel="methods" thread-count="5">
5.12 - Rerunning failed tests
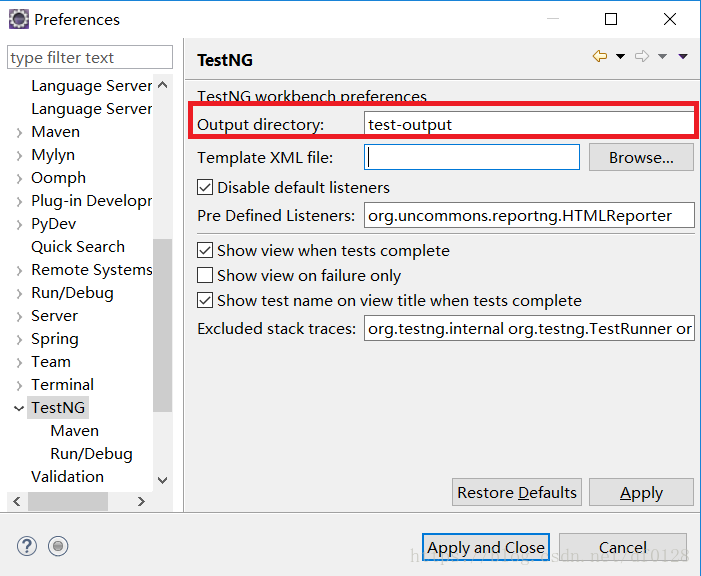
result
每次suite中的测试失败时,TestNG都会在输出目录中创建一个名为TestNG -failed.xml的文件。
这个XML文件包含只重新运行这些失败的方法所需的信息,允许您快速地重现失败,而不必运行整个测试。
java -classpath testng.jar;%CLASSPATH% org.testng.TestNG -d test-outputs testng.xml
java -classpath testng.jar;%CLASSPATH% org.testng.TestNG -d test-outputs test-outputs\testng-failed.xml
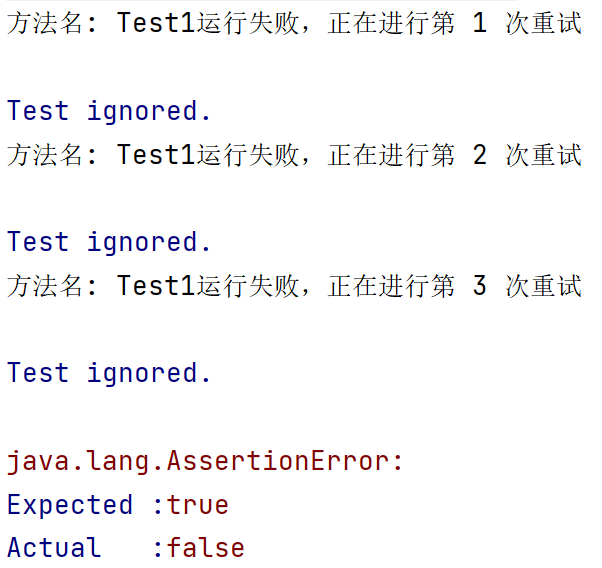
retry
//1. 定义 IRetryAnalyzer  实现类
import org.testng.IRetryAnalyzer;
import org.testng.ITestResult;public class MyRetry implements IRetryAnalyzer {private int retryCount = 0;private static final int maxRetryCount = 3;@Overridepublic boolean retry(ITestResult result) {if (retryCount < maxRetryCount) {retryCount++;return true;}return false;}
}//2. 引入retry@Test(retryAnalyzer = MyRetry.class)public void test2() {Assert.fail();}
5.13 - JUnit tests(略)
5.14 - Running TestNG programmatically
编程方式
TestListenerAdapter tla = new TestListenerAdapter();
TestNG testng = new TestNG();
testng.setTestClasses(new Class[] { Run2.class });
testng.addListener(tla); // 或者 实现ITestListener
testng.run();
virtual testng.xml
//1. 构建 XmlSuite
XmlSuite suite = new XmlSuite();
suite.setName("TmpSuite");XmlTest test = new XmlTest(suite);
test.setName("TmpTest");
List<XmlClass> classes = new ArrayList<XmlClass>();
classes.add(new XmlClass("test.failures.Child"));
test.setXmlClasses(classes) ;//2. 执行
List<XmlSuite> suites = new ArrayList<XmlSuite>();
suites.add(suite);
TestNG tng = new TestNG();
tng.setXmlSuites(suites);
tng.run();
执行效果同
<suite name="TmpSuite" ><test name="TmpTest" ><classes><class name="test.failures.Child"  /><classes></test>
</suite>
5.15 - BeanShell and advanced group selection(略)
例:若 include和exclude无法满足需求
<test name="BeanShell test"><method-selectors><method-selector><script language="beanshell"><![CDATA[groups.containsKey("test1")]]></script></method-selector></method-selectors><!-- ... -->5.16 - Annotation Transformers
TestNG允许您在运行时修改所有注释的内容。
IAnnotationTransformer接口
public interface IAnnotationTransformer {public void transform(ITest annotation, Class testClass,Constructor testConstructor, Method testMethod);
}
自定义MyTransformer
public class MyTransformer implements IAnnotationTransformer {public void transform(ITest annotation, Class testClass,Constructor testConstructor, Method testMethod){if ("invoke".equals(testMethod.getName())) {annotation.setInvocationCount(5);}}
}
执行命令
java org.testng.TestNG -listener MyTransformer testng.xml
或者
TestNG tng = new TestNG();
tng.setAnnotationTransformer(new MyTransformer());
// ...
5.17 - Method Interceptors
可以通过Interceptors来个性化指定各个method的执行顺序。
public List<IMethodInstance> intercept(List<IMethodInstance> methods, ITestContext context) {List<IMethodInstance> result = new ArrayList<IMethodInstance>();for (IMethodInstance m : methods) {Test test = m.getMethod().getConstructorOrMethod().getAnnotation(Test.class);Set<String> groups = new HashSet<String>();for (String group : test.groups()) {groups.add(group);}if (groups.contains("fast")) {result.add(0, m); // fast group优先执行}else {result.add(m);}}return result;
}
执行命令:
java -classpath "testng-jdk15.jar:test/build" org.testng.TestNG -listener test.methodinterceptors.NullMethodInterceptor-testclass test.methodinterceptors.FooTest
5.18 - TestNG Listeners
- IAnnotationTransformer
- IAnnotationTransformer2
- IHookable
- IInvokedMethodListener
- IMethodInterceptor
- IReporter
- ISuiteListener
- ITestListener
Specifying listeners with testng.xml or in Java
<suite><listeners><listener class-name="com.example.MyListener" /><listener class-name="com.example.MyMethodInterceptor" /></listeners>
或者
@Listeners({ com.example.MyListener.class, com.example.MyMethodInterceptor.class })
public class MyTest {
}
使用SPI方式注入
# META-INF/services/org.testng.ITestNGListener
test.tmp.TmpSuiteListener
5.19 - Dependency injection(略)
TestNG支持两种不同类型的依赖项注入:本地(由TestNG本身执行)和外部(由Guice等依赖项注入框架执行)。
5.20 - Listening to method invocations
IInvokedMethodListener
public interface IInvokedMethodListener extends ITestNGListener {void beforeInvocation(IInvokedMethod method, ITestResult testResult);void afterInvocation(IInvokedMethod method, ITestResult testResult);
}
5.21 - Overriding test methods
TestNG允许覆盖甚至可能跳过测试方法的调用。
如果您需要使用特定的安全管理器来测试方法。你可以通过提供一个实现IHookable监听器来实现这一点。
public class MyHook implements IHookable {public void run(final IHookCallBack icb, ITestResult testResult) {// Preferably initialized in a @Configuration methodmySubject = authenticateWithJAAs(); //模拟登录Subject.doAs(mySubject, new PrivilegedExceptionAction() {public Object run() {icb.callback(testResult);}};}
}
5.22 - Altering suites (or) tests
有时您可能只需要在运行时更改套件xml中的测试标记,而不需要更改套件文件的内容。
public class AlterSuiteNameListener implements IAlterSuiteListener {@Overridepublic void alter(List<XmlSuite> suites) {XmlSuite suite = suites.get(0);suite.setName(getClass().getSimpleName());}
}
6 - Test results
6.1 - Success, failure and assert
如果测试完成时没有抛出任何异常,或者抛出了预期的异常,则认为测试成功。
import static org.testng.AssertJUnit.*;
//...
@Test
public void verify() {assertEquals("Beust", m_lastName);
}
6.2 - Logging and results
使用带有Listeners和Reporters的TestNG可以很容易地生成自己的报表:
LoggingListener
public class DotTestListener extends TestListenerAdapter {private int m_count = 0;@Overridepublic void onTestFailure(ITestResult tr) {log("F");}@Overridepublic void onTestSkipped(ITestResult tr) {log("S");}@Overridepublic void onTestSuccess(ITestResult tr) {log(".");}private void log(String string) {System.out.print(string);if (++m_count % 40 == 0) {System.out.println("");}}
}
执行命令:java -classpath testng.jar;%CLASSPATH% org.testng.TestNG -listener org.testng.reporters.DotTestListener test\testng.xml
IReporter
public interface IReporter {public void generateReport(List<ISuite> suites, String outputDirectory)
}
6.2.3 - JUnitReports(略)
6.2.4 - Reporter API(略)
6.2.5 - XML Reports(略)
7 - YAML
XML
<suite name="SingleSuite" verbose="2" thread-count="4"><parameter name="n" value="42" /><test name="Regression2"><groups><run><exclude name="broken" /></run></groups><classes><class name="test.listeners.ResultEndMillisTest" /></classes></test>
</suite>
YAML
name: SingleSuite
threadCount: 4
parameters: { n: 42 }tests:- name: Regression2parameters: { count: 10 }excludedGroups: [ broken ]classes:- test.listeners.ResultEndMillisTest
默认情况下,TestNG不会将与YAML相关的库引入到类路径中。因此,你需要在你的构建文件中添加一个对YAML库的显式引用。
<dependency><groupid>org.yaml</groupid><artifactid>snakeyaml</artifactid><version>1.23</version>
</dependency>