最近磕磕绊绊的去尝试用open cascade建立自己需要的工程文件,终于成功了,一直从网上获取方法,今天自己写一点心得,分享给大家。
一、准备:
1、安装 open cascade , 我安装后目录是: C:\OpenCASCADE7.1.0-vc10-64\opencascade-7.1.0 (注意这个是64bit的库),如果是其它目录,请在后续操作,做出对应调整。后面会用到的是lib、inc、src, 安装方法很简单,下载官网的安装包,直接安装就好,安装好后目录内容如下:

2、IDE使用的是:VS2010
二、建立MFC工程
建立工程可以参考这个网友的方法和流程:
http://www.zyh1690.org/used-in-the-mfc-opencascade-example/
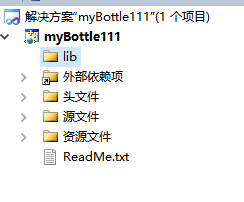
2.1 点击VS的 文件 - 新建 - 项目, 输入工程名字“myBottle111”, 如下图

2.2 点确定后, 在弹出的界面, 点下一步, 选择单文档, 选择MFC标准, 然后点完成即可

2.3 设置工程为x64, 因为使用的lib和dll都是64位的, 点击VS的 项目 - 属性, 在弹出界面的右上角点击 “配置管理器”, 在弹出的界面,按照下图,点击“新建”

2.4 在弹出界面, 点击 确定

设置成功后,变成下图界面

2.5配置包含路径, 点击VS的项目 - 属性, 点右边的 配置属性 下一级的 “VC++目录”, 分别编辑 “包含目录”、“库目录”、“源目录”
依次各增加一个路径
“C:\OpenCASCADE7.1.0-vc10-64\opencascade-7.1.0\inc”
“C:\OpenCASCADE7.1.0-vc10-64\opencascade-7.1.0\win64\vc10\lib”
“C:\OpenCASCADE7.1.0-vc10-64\opencascade-7.1.0\src”

三、编辑工程
3.1 在工程,解决方案视图,找到“stdafx.h” , 打开后, 添加以下头文件
#pragma warning( disable : 4244 ) // Issue warning 4244
#include "Standard_ShortReal.hxx"
#pragma warning( default : 4244 ) // Issue warning 4244
#include <Standard.hxx>
#include <AIS_InteractiveContext.hxx>
#include <AIS_Shape.hxx>
#include <AIS_Point.hxx>
#include <AIS_TextLabel.hxx>
#include <Aspect_Grid.hxx>
#include <Aspect_Window.hxx>
#include <Aspect_Background.hxx>
#include <BRepMesh_IncrementalMesh.hxx>
#include <BRepAlgo.hxx>
#include <BRep_Builder.hxx>
#include <BRepBuilderAPI_MakeVertex.hxx>
#include <BRepBuilderAPI_MakeFace.hxx>
#include <BRepBuilderAPI_MakeEdge.hxx>
#include <BRepBuilderAPI_MakeWire.hxx>
#include <BRepPrimAPI_MakePrism.hxx>
#include <BRepBuilderAPI_Transform.hxx>
#include <BRepLib.hxx>
#include <BRepFilletAPI_MakeFillet.hxx>
#include <BRepPrimAPI_MakeCylinder.hxx>
#include <BRepOffsetAPI_ThruSections.hxx>
#include <BRepTools.hxx>
#include <Bnd_Box2d.hxx>
#include <BndLib.hxx>
#include <BndLib_Add2dCurve.hxx>
#include <BndLib_Add3dCurve.hxx>
#include <BndLib_AddSurface.hxx>
#include <BRep_Tool.hxx>
#include <BRepAlgoAPI_Fuse.hxx>
#include <BRepOffsetAPI_MakeThickSolid.hxx>
#include <BRepAlgoAPI_BuilderAlgo.hxx>
#include <Standard_NotImplemented.hxx>
#include <DsgPrs_LengthPresentation.hxx>
#include <FairCurve_Batten.hxx>
#include <FairCurve_MinimalVariation.hxx>
#include <GC_MakeCircle.hxx>
#include <GC_MakeArcOfCircle.hxx>
#include <GC_MakeTranslation.hxx>
#include <GC_MakeSegment.hxx>
#include <GC_MakeConicalSurface.hxx>
#include <Geom_ConicalSurface.hxx>
#include <GC_MakePlane.hxx>
#include <GC_MakeEllipse.hxx>
#include <Geom_Ellipse.hxx>
#include <Geom_CylindricalSurface.hxx>
#include <GccAna_Circ2d2TanRad.hxx>
#include <GccAna_Lin2d2Tan.hxx>
#include <GccAna_Pnt2dBisec.hxx>
#include <GccEnt.hxx>
#include <GccEnt_QualifiedCirc.hxx>
#include <GccEnt_QualifiedLin.hxx>
#include <gce_MakeCirc2d.hxx>
#include <gce_MakeLin2d.hxx>
#include <GCE2d_MakeSegment.hxx>
#include <GCE2d_MakeParabola.hxx>
#include <GCE2d_MakeEllipse.hxx>
#include <GCE2d_MakeArcOfCircle.hxx>
#include <GCE2d_MakeArcOfEllipse.hxx>
#include <GCPnts_AbscissaPoint.hxx>
#include <GCPnts_QuasiUniformDeflection.hxx>
#include <GCPnts_TangentialDeflection.hxx>
#include <GCPnts_UniformAbscissa.hxx>
#include <Geom_BezierSurface.hxx>
#include <Geom_BSplineSurface.hxx>
#include <Geom_CartesianPoint.hxx>
#include <Geom_Circle.hxx>
#include <Geom_Curve.hxx>
#include <Geom_Line.hxx>
#include <Geom_Plane.hxx>
#include <Geom_RectangularTrimmedSurface.hxx>
#include <Geom_Surface.hxx>
#include <Geom_SphericalSurface.hxx>
#include <Geom_Transformation.hxx>
#include <Geom_TrimmedCurve.hxx>
#include <Geom_OffsetSurface.hxx>
#include <Geom_SurfaceOfLinearExtrusion.hxx>
#include <Geom_SurfaceOfRevolution.hxx>
#include <Geom2dAPI_ExtremaCurveCurve.hxx>
#include <Geom2dAPI_InterCurveCurve.hxx>
#include <Geom2dAPI_Interpolate.hxx>
#include <Geom2dAPI_PointsToBSpline.hxx>
#include <Geom2d_OffsetCurve.hxx>
#include <Geom2d_Circle.hxx>
#include <Geom2d_Curve.hxx>
#include <Geom2d_Ellipse.hxx>
#include <Geom2d_Line.hxx>
#include <Geom2d_TrimmedCurve.hxx>
#include <Geom2d_BezierCurve.hxx>
#include <Geom2d_BSplineCurve.hxx>
#include <Geom2d_Parabola.hxx>
#include <Geom2dAdaptor_Curve.hxx>
#include <Geom2dConvert.hxx>
#include <Geom2dLProp_Curve2dTool.hxx>
#include <Geom2dLProp_CLProps2d.hxx>
#include <GeomAbs_CurveType.hxx>
#include <GeomAdaptor_Curve.hxx>
#include <GeomAdaptor_HCurve.hxx>
#include <GeomAdaptor_Surface.hxx>
#include <GeomAdaptor_HSurface.hxx>
#include <GeomAPI.hxx>
#include <GeomAPI_ExtremaSurfaceSurface.hxx>
#include <GeomAPI_IntCS.hxx>
#include <GeomAPI_PointsToBSplineSurface.hxx>
#include <GeomAPI_PointsToBSpline.hxx>
#include <Geom_BSplineCurve.hxx>
#include <GeomAPI_ProjectPointOnSurf.hxx>
#include <GeomAPI_ProjectPointOnCurve.hxx>
#include <GeomAPI_Interpolate.hxx>
#include <GeomConvert.hxx>
#include <GeomConvert_CompBezierSurfacesToBSplineSurface.hxx>
#include <GeomFill_ConstrainedFilling.hxx>
#include <GeomFill_SimpleBound.hxx>
#include <GeomFill_FillingStyle.hxx>
#include <GeomFill_BSplineCurves.hxx>
#include <GeomFill_Pipe.hxx>
#include <GeomLib.hxx>
#include <GeomPlate_BuildPlateSurface.hxx>
#include <GeomPlate_PointConstraint.hxx>
#include <GeomPlate_MakeApprox.hxx>
#include <GeomTools.hxx>
#include <GeomTools_Curve2dSet.hxx>
#include <Graphic3d_Group.hxx>
#include <Graphic3d_ArrayOfPolylines.hxx>
#include <Graphic3d_ArrayOfSegments.hxx>
#include <GProp_PEquation.hxx>
#include <gp.hxx>
#include <gp_Ax2d.hxx>
#include <gp_Circ2d.hxx>
#include <gp_Dir2d.hxx>
#include <gp_Dir.hxx>
#include <gp_Elips.hxx>
#include <gp_Lin.hxx>
#include <gp_Lin2d.hxx>
#include <gp_Mat.hxx>
#include <gp_Parab2d.hxx>
#include <gp_Pln.hxx>
#include <gp_Pnt2d.hxx>
#include <gp_Trsf.hxx>
#include <gp_Vec2d.hxx>
#include <IntAna_IntConicQuad.hxx>
#include <OSD_Environment.hxx>
#include <OpenGl_GraphicDriver.hxx>
#include <Poly_Triangulation.hxx>
#include <Precision.hxx>
#include <Prs3d_Arrow.hxx>
#include <Prs3d_Drawer.hxx>
#include <Prs3d_Root.hxx>
#include <Prs3d_Text.hxx>
#include <Prs3d_ArrowAspect.hxx>
#include <Prs3d_IsoAspect.hxx>
#include <PrsMgr_PresentationManager3d.hxx>
#include <Prs3d_IsoAspect.hxx>
#include <Prs3d_TextAspect.hxx>
#include <Prs3d_PointAspect.hxx>
#include <SelectMgr_EntityOwner.hxx>
#include <SelectMgr_SelectableObject.hxx>
#include <SelectMgr_Selection.hxx>
#include <SelectMgr_SelectionManager.hxx>
#include <ShapeAnalysis_FreeBounds.hxx>
#include <ShapeFix_Shape.hxx>
#include <StdSelect_ViewerSelector3d.hxx>
#include <StdPrs_ShadedSurface.hxx>
#include <StdPrs_Point.hxx>
#include <StdPrs_WFSurface.hxx>
#include <StdPrs_WFPoleSurface.hxx>
#include <StdPrs_Curve.hxx>
#include <StdPrs_PoleCurve.hxx>
#include <Standard_ErrorHandler.hxx>
#include <TColStd_MapIteratorOfMapOfTransient.hxx>
#include <TColgp_Array1OfPnt.hxx>
#include <TColgp_Array2OfPnt.hxx>
#include <TColgp_Array1OfPnt2d.hxx>
#include <TColgp_Array2OfPnt2d.hxx>
#include <TColgp_HArray1OfPnt.hxx>
#include <TColgp_HArray1OfPnt2d.hxx>
#include <TColgp_SequenceOfPnt.hxx>
#include <TColgp_SequenceOfPnt2d.hxx>
#include <TColGeom_Array2OfBezierSurface.hxx>
#include <TColStd_HArray1OfInteger.hxx>
#include <TopoDS_Shape.hxx>
#include <TopoDS_Solid.hxx>
#include <TopoDS.hxx>
#include <TopoDS_ListIteratorOfListOfShape.hxx>
#include <TopExp.hxx>
#include <TopExp_Explorer.hxx>
#include <TopoDS_Compound.hxx>
#include <TopoDS_Wire.hxx>
#include <TopoDS_Builder.hxx>
#include <TopoDS_Vertex.hxx>
#include <TopoDS_Shape.hxx>
#include <TopoDS_Face.hxx>
#include <TopTools_IndexedMapOfShape.hxx>
#include <V3d_Viewer.hxx>
#include <V3d_View.hxx>
#include <WNT_Window.hxx>
3.2 在解决方案视图, 给解决方案新建一个文件夹, 右键“myBottle111”, 文件夹命名为“lib”

3.3 添加cascade库文件,右键“lib”文件夹 —— 添加 —— 现有项

在弹出界面中, 定位到“C:\OpenCASCADE7.1.0-vc10-64\opencascade-7.1.0\win64\vc10\lib”目录, 然后选中全部的lib,点击添加。 这里不知道后续会用到哪些lib, 所以讲全部的lib都添加进工程。

3.4 接下来, 点击VS的 调试 - 启动调试, 则会弹出确实dll文件,这是第三方库的依赖, 需要将这些dll文件拷贝到工程输出的文件, 本次使用的是debug文件夹, 所以要拷贝到debug文件夹目录下。 四个dll文件可在这个链接下载
https://download.csdn.net/download/zxc2008/11195744
本教程的目录是“..\myBottle111\x64\Debug”


拷贝过去后就能成功了

以上就已经完成了对open cascade环境的搭建支持。
后续操作就跟网友的完全一致了,http://www.zyh1690.org/used-in-the-mfc-opencascade-example/
四、画一个瓶子
4.1 在APP类 头文件中添加 标准宏定义 和 图形设备 头文件
#include <Standard_Macro.hxx>
#include <Graphic3d_GraphicDriver.hxx>

4.2 在APP类添加以下成员变量和方法(不理解的,需要重新学习C++知识,ps:我就是这么过来的):
//头文件 注意,别把下面这几行代码放在DECLARE_MESSAGE_MAP()后面了!
Handle_Graphic3d_GraphicDriver myGraphicDriver;
Handle_Graphic3d_GraphicDriver GetGraphicDriver()const {return myGraphicDriver;} ;

4.3 在APP类的构造函数中完成对设备环境生成和初始化:
try
{
Handle(Aspect_DisplayConnection) aDisplayConnection;
myGraphicDriver = new OpenGl_GraphicDriver (aDisplayConnection);
}
catch(Standard_Failure)
{
// AfxMessageBox ("Fatal error during graphic initialization", MB_ICONSTOP);
ExitProcess (1);
}

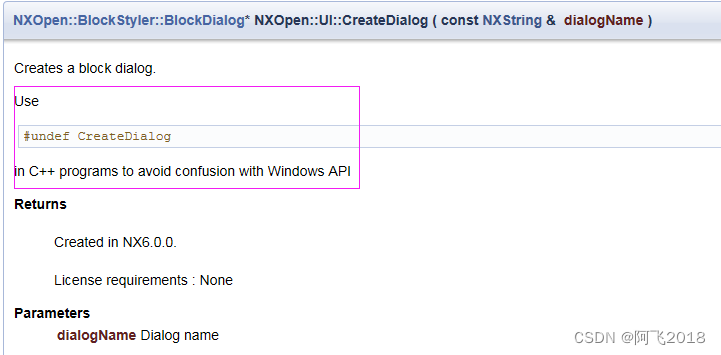
此时编译会提示如下错误:
![]()
原因是因为OpenCascade对new操作符进行了重载,与VS中的定义存在冲突,屏蔽CPP文件前面的以下代码就可以解决了。
| 1 2 3 | #ifdef _DEBUG /*#define new DEBUG_NEW*/ #endif |
后面OpenCascade使用new操作符的地方,都需同样的方法解决。更多请阅读:
五、 接下来:在Document类中添加OpenCasCade间接设备环境和图形接口
5.1在Doc类的头文件中添加OpenCasCade成员变量和方法:
//几个方法的声明和定义分开写,在调用时会有LNK2019错误,原因不明(我才特么没有写错字母),知道的亲还请留言告知,(∩_∩)
public:
Handle(V3d_Viewer) myViewer;
Handle(AIS_InteractiveContext) myAISContext;
Handle(AIS_InteractiveContext)& GetAISContext(){ return myAISContext;}
Handle(V3d_Viewer) GetViewer(){ return myViewer;}
Handle(AIS_InteractiveContext)& GetInteractiveContext(){ return myAISContext;}

5.2 接着在Doc类的构造函数中完成对OpenCasCade变量初始化设置:
// TODO: 在此添加一次性构造代码
Handle(Graphic3d_GraphicDriver) aGraphicDriver = ((CmyBottle111App*)AfxGetApp())->GetGraphicDriver();
TCollection_ExtendedString a3DName("Visu3D");
myViewer = new V3d_Viewer(aGraphicDriver,a3DName.ToExtString());
myViewer->SetDefaultLights();
myViewer->SetLightOn();
//myViewer->SetDefaultBackgroundColor(Quantity_NOC_BLUE1);//改变背景颜色
myAISContext =new AIS_InteractiveContext(myViewer); //创建一个交互文档
myAISContext->DefaultDrawer()->UIsoAspect()->SetNumber(11);
myAISContext->DefaultDrawer()->VIsoAspect()->SetNumber(11);
//这里设置实体的显示模式
myAISContext->SetDisplayMode(AIS_Shaded,Standard_False);

六、View类中的OpenCasCade变量设置以及图形显示设置
6.1 添加变量:
private:
Handle_V3d_View myView;
Standard_Boolean myHlrModeIsOn;

6.2 添加OnInitialUpdate() , 在类视图中, 右键 CView, 选择类向导, 在点弹框的“虚函数”, 选中OnInitialUpdate() 后,双击,然后点弹框的应用 ——确定。


6.3 重写 OnInitialUpdate() 函数,添加如下代码:
CView::OnInitialUpdate();
// TODO: 在此添加专用代码和/或调用基类
myView =((CmyBottle111Doc*)GetDocument())->GetViewer()->CreateView();
myHlrModeIsOn = Standard_False;
myView -> SetComputedMode(myHlrModeIsOn);
Handle(Graphic3d_GraphicDriver) aGraphicDriver = ((CmyBottle111App*)AfxGetApp())->GetGraphicDriver();
Handle(WNT_Window) aWNTWindow = new WNT_Window(GetSafeHwnd());
myView->SetWindow(aWNTWindow);
if (!aWNTWindow->IsMapped()) aWNTWindow->Map();
aWNTWindow->SetBackground(Quantity_NOC_SLATEBLUE2);

6.4 在OnDraw函数中添加OpenCasCade的重绘代码:
void CneedAVView::OnDraw(CDC* /*pDC*/)
{
CneedAVDoc* pDoc = GetDocument();
ASSERT_VALID(pDoc);
if (!pDoc)
return;
myView->Redraw();
// TODO: 在此处为本机数据添加绘制代码
}

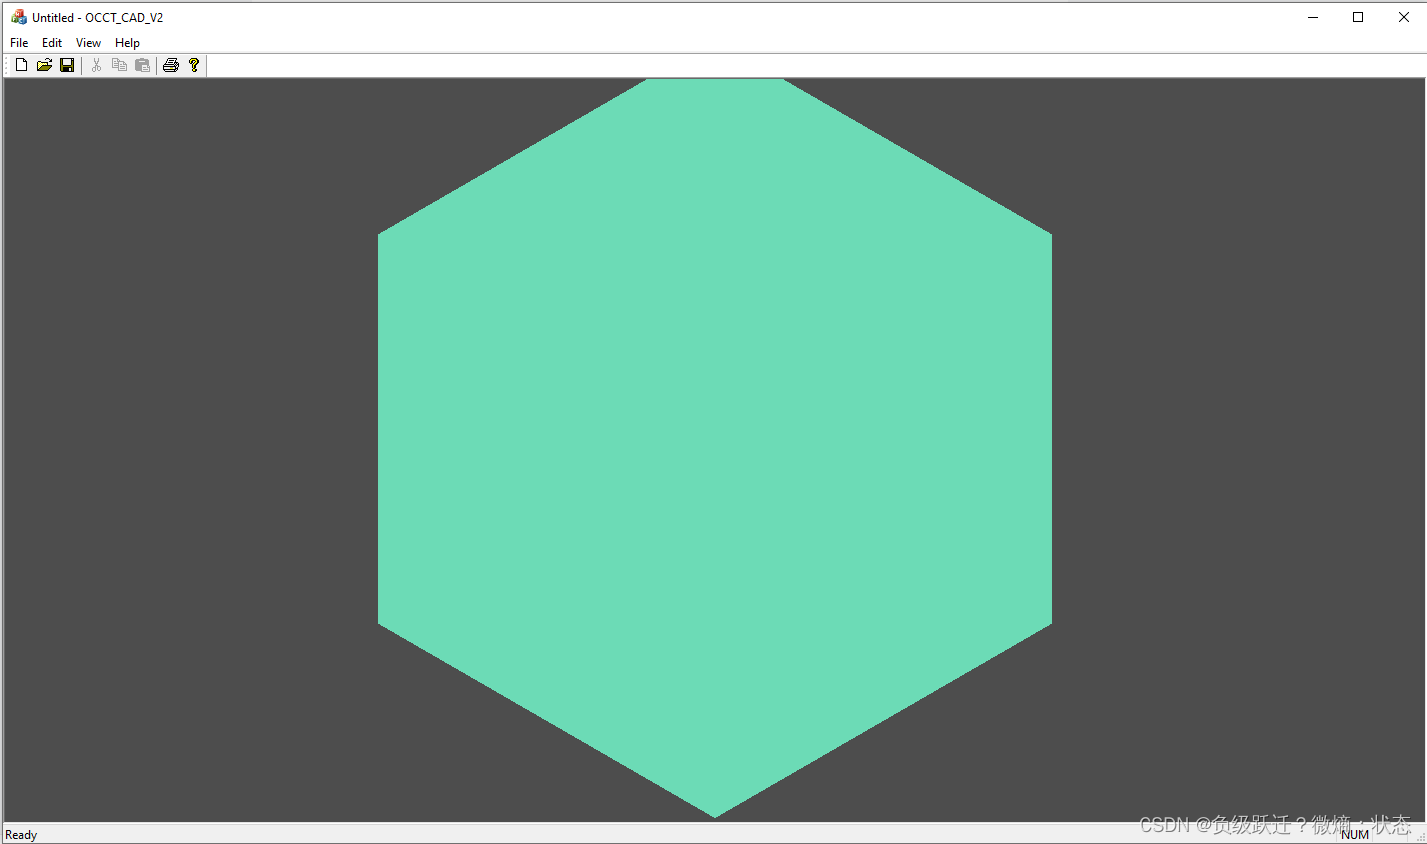
至此,运行程序,你便可以看到 OpenCasCade 灰灰的窗口了
七、开始画瓶子
后面可以使用OpenCasCade工作。直接用官方给的画瓶子的函数代码即可(给View类添加MakeBottle方法,很多人因为这个出错,请大家仔细看教程),MakeBottle函数代码如下(所需的头文件,已全部在stdafx.h, 类方法的构造都在lib文件中)
TopoDS_Shape CmyBottle111View::MakeBottle(const Standard_Real myWidth, const Standard_Real myHeight,const Standard_Real myThickness)
{
// Profile : Define Support Points
gp_Pnt aPnt1(-myWidth / 2., 0, 0);
gp_Pnt aPnt2(-myWidth / 2., -myThickness / 4., 0);
gp_Pnt aPnt3(0, -myThickness / 2., 0);
gp_Pnt aPnt4(myWidth / 2., -myThickness / 4., 0);
gp_Pnt aPnt5(myWidth / 2., 0, 0);
// Profile : Define the Geometry
Handle(Geom_TrimmedCurve) anArcOfCircle = GC_MakeArcOfCircle(aPnt2,aPnt3,aPnt4);
Handle(Geom_TrimmedCurve) aSegment1 = GC_MakeSegment(aPnt1, aPnt2);
Handle(Geom_TrimmedCurve) aSegment2 = GC_MakeSegment(aPnt4, aPnt5);
// Profile : Define the Topology
TopoDS_Edge anEdge1 = BRepBuilderAPI_MakeEdge(aSegment1);
TopoDS_Edge anEdge2 = BRepBuilderAPI_MakeEdge(anArcOfCircle);
TopoDS_Edge anEdge3 = BRepBuilderAPI_MakeEdge(aSegment2);
TopoDS_Wire aWire = BRepBuilderAPI_MakeWire(anEdge1, anEdge2, anEdge3);
// Complete Profile
gp_Ax1 xAxis = gp::OX();
gp_Trsf aTrsf;
aTrsf.SetMirror(xAxis);
BRepBuilderAPI_Transform aBRepTrsf(aWire, aTrsf);
TopoDS_Shape aMirroredShape = aBRepTrsf.Shape();
TopoDS_Wire aMirroredWire = TopoDS::Wire(aMirroredShape);
BRepBuilderAPI_MakeWire mkWire;
mkWire.Add(aWire);
mkWire.Add(aMirroredWire);
TopoDS_Wire myWireProfile = mkWire.Wire();
// Body : Prism the Profile
TopoDS_Face myFaceProfile = BRepBuilderAPI_MakeFace(myWireProfile);
gp_Vec aPrismVec(0, 0, myHeight);
TopoDS_Shape myBody = BRepPrimAPI_MakePrism(myFaceProfile, aPrismVec);
// Body : Apply Fillets
BRepFilletAPI_MakeFillet mkFillet(myBody);
TopExp_Explorer anEdgeExplorer(myBody, TopAbs_EDGE);
while(anEdgeExplorer.More()){
TopoDS_Edge anEdge = TopoDS::Edge(anEdgeExplorer.Current());
//Add edge to fillet algorithm
mkFillet.Add(myThickness / 12., anEdge);
anEdgeExplorer.Next();
}
myBody = mkFillet.Shape();
// Body : Add the Neck
gp_Pnt neckLocation(0, 0, myHeight);
gp_Dir neckAxis = gp::DZ();
gp_Ax2 neckAx2(neckLocation, neckAxis);
Standard_Real myNeckRadius = myThickness / 4.;
Standard_Real myNeckHeight = myHeight / 10.;
BRepPrimAPI_MakeCylinder MKCylinder(neckAx2, myNeckRadius, myNeckHeight);
TopoDS_Shape myNeck = MKCylinder.Shape();
myBody = BRepAlgoAPI_Fuse(myBody, myNeck);
// Body : Create a Hollowed Solid
TopoDS_Face faceToRemove;
Standard_Real zMax = -1;
for(TopExp_Explorer aFaceExplorer(myBody, TopAbs_FACE); aFaceExplorer.More(); aFaceExplorer.Next()){
TopoDS_Face aFace = TopoDS::Face(aFaceExplorer.Current());
// Check if <aFace> is the top face of the bottle抯 neck
Handle(Geom_Surface) aSurface = BRep_Tool::Surface(aFace);
if(aSurface->DynamicType() == STANDARD_TYPE(Geom_Plane)){
Handle(Geom_Plane) aPlane = Handle(Geom_Plane)::DownCast(aSurface);
gp_Pnt aPnt = aPlane->Location();
Standard_Real aZ = aPnt.Z();
if(aZ > zMax){
zMax = aZ;
faceToRemove = aFace;
}
}
}
TopTools_ListOfShape facesToRemove;
facesToRemove.Append(faceToRemove);
myBody = BRepOffsetAPI_MakeThickSolid(myBody, facesToRemove, -myThickness / 50, 1.e-3);
// Threading : Create Surfaces
Handle(Geom_CylindricalSurface) aCyl1 = new Geom_CylindricalSurface(neckAx2, myNeckRadius * 0.99);
Handle(Geom_CylindricalSurface) aCyl2 = new Geom_CylindricalSurface(neckAx2, myNeckRadius * 1.05);
// Threading : Define 2D Curves
gp_Pnt2d aPnt(2. * M_PI, myNeckHeight / 2.);
gp_Dir2d aDir(2. * M_PI, myNeckHeight / 4.);
gp_Ax2d anAx2d(aPnt, aDir);
Standard_Real aMajor = 2. * M_PI;
Standard_Real aMinor = myNeckHeight / 10;
Handle(Geom2d_Ellipse) anEllipse1 = new Geom2d_Ellipse(anAx2d, aMajor, aMinor);
Handle(Geom2d_Ellipse) anEllipse2 = new Geom2d_Ellipse(anAx2d, aMajor, aMinor / 4);
Handle(Geom2d_TrimmedCurve) anArc1 = new Geom2d_TrimmedCurve(anEllipse1, 0, M_PI);
Handle(Geom2d_TrimmedCurve) anArc2 = new Geom2d_TrimmedCurve(anEllipse2, 0, M_PI);
gp_Pnt2d anEllipsePnt1 = anEllipse1->Value(0);
gp_Pnt2d anEllipsePnt2 = anEllipse1->Value(M_PI);
Handle(Geom2d_TrimmedCurve) aSegment = GCE2d_MakeSegment(anEllipsePnt1, anEllipsePnt2);
// Threading : Build Edges and Wires
TopoDS_Edge anEdge1OnSurf1 = BRepBuilderAPI_MakeEdge(anArc1, aCyl1);
TopoDS_Edge anEdge2OnSurf1 = BRepBuilderAPI_MakeEdge(aSegment, aCyl1);
TopoDS_Edge anEdge1OnSurf2 = BRepBuilderAPI_MakeEdge(anArc2, aCyl2);
TopoDS_Edge anEdge2OnSurf2 = BRepBuilderAPI_MakeEdge(aSegment, aCyl2);
TopoDS_Wire threadingWire1 = BRepBuilderAPI_MakeWire(anEdge1OnSurf1, anEdge2OnSurf1);
TopoDS_Wire threadingWire2 = BRepBuilderAPI_MakeWire(anEdge1OnSurf2, anEdge2OnSurf2);
BRepLib::BuildCurves3d(threadingWire1);
BRepLib::BuildCurves3d(threadingWire2);
// Create Threading
BRepOffsetAPI_ThruSections aTool(Standard_True);
aTool.AddWire(threadingWire1);
aTool.AddWire(threadingWire2);
aTool.CheckCompatibility(Standard_False);
TopoDS_Shape myThreading = aTool.Shape();
// Building the Resulting Compound
TopoDS_Compound aRes;
BRep_Builder aBuilder;
aBuilder.MakeCompound (aRes);
aBuilder.Add (aRes, myBody);
aBuilder.Add (aRes, myThreading);
Handle(AIS_Shape) ais2 = new AIS_Shape(aRes);
GetDocument()->GetAISContext()->SetColor(ais2,Quantity_NOC_BROWN,Standard_False);
GetDocument()->GetAISContext()->SetMaterial(ais2,Graphic3d_NOM_GOLD,Standard_False);
GetDocument()->GetAISContext()->Display(ais2,Standard_True);
return aRes;
}


添加事件响应函数,如图:

void CmyBottle111View::OnLButtonDown(UINT nFlags, CPoint point)
{
// TODO: 在此添加消息处理程序代码和/或调用默认值
MakeBottle(400,240,160);
CView::OnLButtonDown(nFlags, point);
}

然后就大功告成了

![[C++] OpenCasCade空间几何库的模型展现](https://img-blog.csdnimg.cn/20190104124903515.png?x-oss-process=image/watermark,type_ZmFuZ3poZW5naGVpdGk,shadow_10,text_aHR0cHM6Ly9ibG9nLmNzZG4ubmV0L20wXzM4MTI1Mjc4,size_16,color_FFFFFF,t_70)


![基于 Octotree 的[码云]文件树插件](https://img-blog.csdnimg.cn/20191025113723820.png?x-oss-process=image/watermark,type_ZmFuZ3poZW5naGVpdGk,shadow_10,text_aHR0cHM6Ly9ibG9nLmNzZG4ubmV0L2dhbnF1YW56aG9uZw==,size_16,color_FFFFFF,t_70)


