蓝牙自动配对,即搜索到其它蓝牙设备之后直接进行配对,不需要弹出配对确认框或者密钥输入框。
本文章用来连接蓝牙设备ai-thinker,如果你要连接其他蓝牙设备,注意修改相关名字以及修改设备初试pin值。
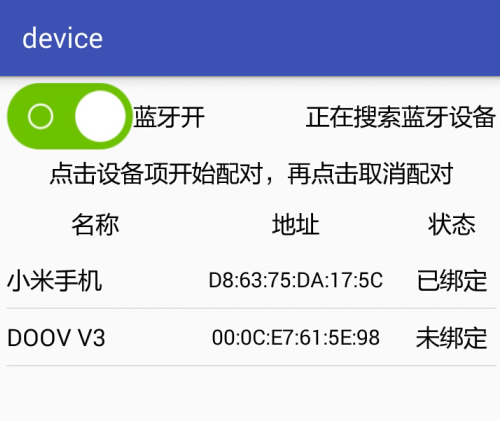
将Demo安装在Android手机上,点击按钮,可以实现与目标蓝牙设备的自动配对。
以下是涉及的代码,两个类一个activity:

实现是activity_main:
<?xml version="1.0" encoding="utf-8"?>
<androidx.constraintlayout.widget.ConstraintLayout xmlns:android="http://schemas.android.com/apk/res/android"xmlns:app="http://schemas.android.com/apk/res-auto"xmlns:tools="http://schemas.android.com/tools"android:layout_width="match_parent"android:layout_height="match_parent"tools:context=".MainActivity"><Buttonandroid:id="@+id/btn_autopair"android:layout_width="wrap_content"android:layout_height="wrap_content"android:text="Hello World!"app:layout_constraintStart_toStartOf="parent"app:layout_constraintTop_toTopOf="parent" /></androidx.constraintlayout.widget.ConstraintLayout>
ClsUtils:
package com.example.myapplication;
import java.lang.reflect.Field;
import java.lang.reflect.Method;import android.bluetooth.BluetoothDevice;
import android.util.Log;
public class ClsUtils{/*** 与设备配对 参考源码:platform/packages/apps/Settings.git* /Settings/src/com/android/settings/bluetooth/CachedBluetoothDevice.java*/static public boolean createBond(Class btClass, BluetoothDevice btDevice)throws Exception{Method createBondMethod = btClass.getMethod("createBond");Boolean returnValue = (Boolean) createBondMethod.invoke(btDevice);return returnValue.booleanValue();}/*** 与设备解除配对 参考源码:platform/packages/apps/Settings.git* /Settings/src/com/android/settings/bluetooth/CachedBluetoothDevice.java*/static public boolean removeBond(Class btClass, BluetoothDevice btDevice)throws Exception{Method removeBondMethod = btClass.getMethod("removeBond");Boolean returnValue = (Boolean) removeBondMethod.invoke(btDevice);return returnValue.booleanValue();}static public boolean setPin(Class btClass, BluetoothDevice btDevice,String str) throws Exception{try{Method removeBondMethod = btClass.getDeclaredMethod("setPin",new Class[]{byte[].class});Boolean returnValue = (Boolean) removeBondMethod.invoke(btDevice,new Object[]{str.getBytes()});Log.e("returnValue", "" + returnValue);}catch (SecurityException e){// throw new RuntimeException(e.getMessage());e.printStackTrace();}catch (IllegalArgumentException e){// throw new RuntimeException(e.getMessage());e.printStackTrace();}catch (Exception e){// TODO Auto-generated catch blocke.printStackTrace();}return true;}// 取消用户输入static public boolean cancelPairingUserInput(Class btClass,BluetoothDevice device)throws Exception{Method createBondMethod = btClass.getMethod("cancelPairingUserInput");// cancelBondProcess()Boolean returnValue = (Boolean) createBondMethod.invoke(device);return returnValue.booleanValue();}// 取消配对static public boolean cancelBondProcess(Class btClass,BluetoothDevice device)throws Exception{Method createBondMethod = btClass.getMethod("cancelBondProcess");Boolean returnValue = (Boolean) createBondMethod.invoke(device);return returnValue.booleanValue();}/**** @param clsShow*/static public void printAllInform(Class clsShow){try{// 取得所有方法Method[] hideMethod = clsShow.getMethods();int i = 0;for (; i < hideMethod.length; i++){Log.e("method name", hideMethod[i].getName() + ";and the i is:"+ i);}// 取得所有常量Field[] allFields = clsShow.getFields();for (i = 0; i < allFields.length; i++){Log.e("Field name", allFields[i].getName());}}catch (SecurityException e){// throw new RuntimeException(e.getMessage());e.printStackTrace();}catch (IllegalArgumentException e){// throw new RuntimeException(e.getMessage());e.printStackTrace();}catch (Exception e){// TODO Auto-generated catch blocke.printStackTrace();}}//确认配对static public void setPairingConfirmation(Class<?> btClass,BluetoothDevice device,boolean isConfirm)throws Exception{Method setPairingConfirmation = btClass.getDeclaredMethod("setPairingConfirmation",boolean.class);setPairingConfirmation.invoke(device,isConfirm);}
}
MainActivity:
package com.example.myapplication;import android.app.Activity;
import android.bluetooth.BluetoothAdapter;
import android.bluetooth.BluetoothDevice;
import android.os.Bundle;
import android.util.Log;
import android.view.View;
import android.view.View.OnClickListener;
import android.widget.Button;public class MainActivity extends Activity implements OnClickListener{/** Called when the activity is first created. */private static BluetoothDevice remoteDevice=null;private Button btn_autopair=null;final static String ACTION_BLUETOOTHBC="android.bluetooth.device.action.PAIRING_REQUEST";@Overridepublic void onCreate(Bundle savedInstanceState) {super.onCreate(savedInstanceState);setContentView(R.layout.activity_main);btn_autopair=(Button)findViewById(R.id.btn_autopair);btn_autopair.setOnClickListener(this);}public static boolean pair(String strAddr, String strPsw){boolean result = false;//蓝牙设备适配器BluetoothAdapter bluetoothAdapter = BluetoothAdapter.getDefaultAdapter();//取消发现当前设备的过程bluetoothAdapter.cancelDiscovery();if (!bluetoothAdapter.isEnabled()){bluetoothAdapter.enable();}if (!BluetoothAdapter.checkBluetoothAddress(strAddr)){ // 检查蓝牙地址是否有效Log.d("mylog", "devAdd un effient!");}//由蓝牙设备地址获得另一蓝牙设备对象BluetoothDevice device = bluetoothAdapter.getRemoteDevice(strAddr);if (device.getBondState() != BluetoothDevice.BOND_BONDED){try{Log.d("mylog", "NOT BOND_BONDED");ClsUtils.setPin(device.getClass(), device, strPsw); // 手机和蓝牙采集器配对ClsUtils.createBond(device.getClass(), device);//    ClsUtils.cancelPairingUserInput(device.getClass(), device);remoteDevice = device; // 配对完毕就把这个设备对象传给全局的remoteDeviceresult = true;}catch (Exception e){// TODO Auto-generated catch blockLog.d("mylog", "setPiN failed!");e.printStackTrace();} //}else{Log.d("mylog", "HAS BOND_BONDED");try{//ClsUtils这个类的的以下静态方法都是通过反射机制得到需要的方法ClsUtils.createBond(device.getClass(), device);//创建绑定ClsUtils.setPin(device.getClass(), device, strPsw); // 手机和蓝牙采集器配对ClsUtils.createBond(device.getClass(), device);//    ClsUtils.cancelPairingUserInput(device.getClass(), device);remoteDevice = device; // 如果绑定成功,就直接把这个设备对象传给全局的remoteDeviceresult = true;}catch (Exception e){// TODO Auto-generated catch blockLog.d("mylog", "setPiN failed!");e.printStackTrace();}}return result;}@Overridepublic void onClick(View v) {// TODO Auto-generated method stubswitch (v.getId()) {case R.id.btn_autopair:if (pair("94:C9:60:1E:00:04", "123456")) {//pair的第一个参数是要配对的蓝牙地址,第二个参数是配对时预先设置的密钥Log.i("aaron", remoteDevice.getAddress());}break;default:break;}}
}
最后别忘了加上权限哦 AndroidManifest.xml:
(权限太多了 忘记是哪个了。)
<!-- 使用蓝牙的权限 --><uses-permission android:name="android.permission.BLUETOOTH" /> <!-- 扫描蓝牙设备或者操作蓝牙设置 --><uses-permission android:name="android.permission.BLUETOOTH_ADMIN" /> <!-- 模糊定位权限,仅作用于6.0+ --><uses-permission android:name="android.permission.ACCESS_COARSE_LOCATION" /> <!-- 精准定位权限,仅作用于6.0+ --><uses-permission android:name="android.permission.ACCESS_FINE_LOCATION" /><uses-permission android:name="android.permission.BLUETOOTH_CONNECT" /><uses-permission android:name="android.permission.BLUETOOTH_SCAN" /><uses-sdkandroid:minSdkVersion="8"android:targetSdkVersion="21" /><uses-permission android:name="android.permission.BLUETOOTH"/><uses-permission android:name="android.permission.BLUETOOTH_ADMIN"/>最后我发现这样子运行还是有pin码的弹窗 如以下:

这时候就让硬件工程师帮你把pin码给取消掉就好了,取消之后就没有这个对话框了。
不过我发现一个问题,这个代码在小米手机运行没问题。在华为手机上会不稳定,有时候会报错。本文章只是记录学习过程中的一些小问题,如有错误请指正。