下面我来分享两种生成二维码图片的方法。
第一种,填入你扫描二维码要跳转的网址直接生成二维码
第一步:导入相关的包
1 <dependency>
2     <groupId>com.google.zxing</groupId>
3     <artifactId>core</artifactId>
4     <version>3.3.3</version>
5 </dependency>
第二步:配置图像写入器类

 1 package com.easycare.util.twocode;2 3 import java.awt.image.BufferedImage;4 import java.io.File;5 import java.io.IOException;6 7 import javax.imageio.ImageIO;8 9 import com.google.zxing.common.BitMatrix;
10
11 /**
12  * 配置图像写入器
13  *
14  * @author 18316
15  *
16  */
17 public class MatrixToImageWriter {
18     private static final int BLACK = 0xFF000000;
19     private static final int WHITE = 0xFFFFFFFF;
20
21     private MatrixToImageWriter() {
22     }
23
24     public static BufferedImage toBufferedImage(BitMatrix matrix) {
25         int width = matrix.getWidth();
26         int height = matrix.getHeight();
27         BufferedImage image = new BufferedImage(width, height, BufferedImage.TYPE_INT_RGB);
28         for (int x = 0; x < width; x++) {
29             for (int y = 0; y < height; y++) {
30                 image.setRGB(x, y, matrix.get(x, y) ? BLACK : WHITE);
31             }
32         }
33         return image;
34     }
35
36     public static void writeToFile(BitMatrix matrix, String format, File file) throws IOException {
37         BufferedImage image = toBufferedImage(matrix);
38         if (!ImageIO.write(image, format, file)) {
39             throw new IOException("Could not write an image of format " + format + " to " + file);
40         }
41     }
42
43 }
第三步:测试类
package com.easycare.util.twocode;import java.io.File;
import java.io.IOException;
import java.util.HashMap;
import java.util.Map;
import java.util.UUID;import com.google.zxing.BarcodeFormat;
import com.google.zxing.EncodeHintType;
import com.google.zxing.MultiFormatWriter;
import com.google.zxing.WriterException;
import com.google.zxing.common.BitMatrix;public class MyTest {public static void main(String[] args) {System.out.println("开始生成...");code();System.out.println("生成完毕!");}public static void code() {try {String content = "https://www.baidu.com";String path = "G:/测试";// 二维码保存的路径String codeName = UUID.randomUUID().toString();// 二维码的图片名String imageType = "jpg";// 图片类型MultiFormatWriter multiFormatWriter = new MultiFormatWriter();Map<EncodeHintType, String> hints = new HashMap<EncodeHintType, String>();hints.put(EncodeHintType.CHARACTER_SET, "UTF-8");BitMatrix bitMatrix = multiFormatWriter.encode(content, BarcodeFormat.QR_CODE, 400, 400, hints);File file1 = new File(path, codeName + "." + imageType);MatrixToImageWriter.writeToFile(bitMatrix, imageType, file1);} catch (WriterException e) {e.printStackTrace();} catch (IOException e) {e.printStackTrace();}}}
好了第一种二维码生成功能写好了,点击运行测试类,下面给出效果图,因为我的代码写的是二维码保存在G:/测试,所以到G盘中找到图片
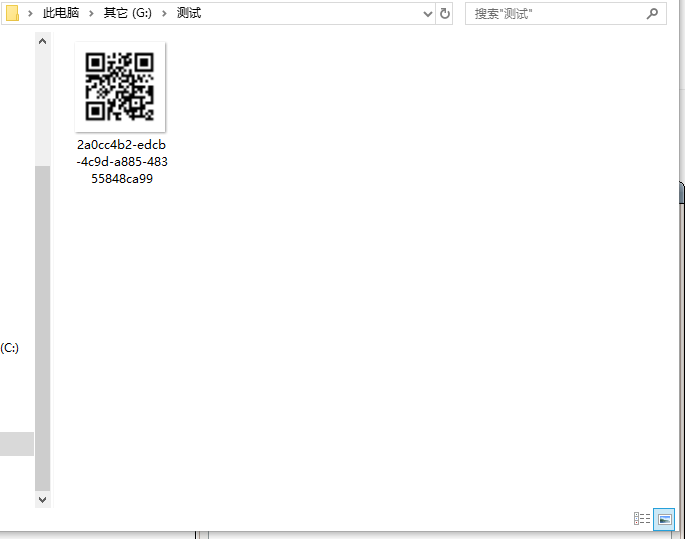
扫描之后就能跳转到我写入的百度地址。
第二种生成二维码的方法,这种相比上一种能在生成的二维码中插入个性logo
第一步:导入相关的包
1 <dependency>
2     <groupId>com.google.zxing</groupId>
3     <artifactId>core</artifactId>
4     <version>3.3.3</version>
5 </dependency>
第二步:继承LuminanceSource类
 1 package com.easycare.util.imagecode;2 3 import java.awt.Graphics2D;4 import java.awt.geom.AffineTransform;5 import java.awt.image.BufferedImage;6 7 import com.google.zxing.LuminanceSource;8 9 public class BufferedImageLuminanceSource extends LuminanceSource {
10     private final BufferedImage image;
11     private final int left;
12     private final int top;
13
14     public BufferedImageLuminanceSource(BufferedImage image) {
15         this(image, 0, 0, image.getWidth(), image.getHeight());
16     }
17
18     public BufferedImageLuminanceSource(BufferedImage image, int left, int top, int width, int height) {
19         super(width, height);
20         int sourceWidth = image.getWidth();
21         int sourceHeight = image.getHeight();
22         if (left + width > sourceWidth || top + height > sourceHeight) {
23             throw new IllegalArgumentException("Crop rectangle does not fit within image data.");
24         }
25         for (int y = top; y < top + height; y++) {
26             for (int x = left; x < left + width; x++) {
27                 if ((image.getRGB(x, y) & 0xFF000000) == 0) {
28                     image.setRGB(x, y, 0xFFFFFFFF); // = white
29                 }
30             }
31         }
32         this.image = new BufferedImage(sourceWidth, sourceHeight, BufferedImage.TYPE_BYTE_GRAY);
33         this.image.getGraphics().drawImage(image, 0, 0, null);
34         this.left = left;
35         this.top = top;
36     }
37
38     @Override
39     public byte[] getRow(int y, byte[] row) {
40         if (y < 0 || y >= getHeight()) {
41             throw new IllegalArgumentException("Requested row is outside the image: " + y);
42         }
43         int width = getWidth();
44         if (row == null || row.length < width) {
45             row = new byte[width];
46         }
47         image.getRaster().getDataElements(left, top + y, width, 1, row);
48         return row;
49     }
50
51     @Override
52     public byte[] getMatrix() {
53         int width = getWidth();
54         int height = getHeight();
55         int area = width * height;
56         byte[] matrix = new byte[area];
57         image.getRaster().getDataElements(left, top, width, height, matrix);
58         return matrix;
59     }
60
61     @Override
62     public boolean isCropSupported() {
63         return true;
64     }
65
66     @Override
67     public LuminanceSource crop(int left, int top, int width, int height) {
68         return new BufferedImageLuminanceSource(image, this.left + left, this.top + top, width, height);
69     }
70
71     @Override
72     public boolean isRotateSupported() {
73         return true;
74     }
75
76     @Override
77     public LuminanceSource rotateCounterClockwise() {
78         int sourceWidth = image.getWidth();
79         int sourceHeight = image.getHeight();
80         AffineTransform transform = new AffineTransform(0.0, -1.0, 1.0, 0.0, 0.0, sourceWidth);
81         BufferedImage rotatedImage = new BufferedImage(sourceHeight, sourceWidth, BufferedImage.TYPE_BYTE_GRAY);
82         Graphics2D g = rotatedImage.createGraphics();
83         g.drawImage(image, transform, null);
84         g.dispose();
85         int width = getWidth();
86         return new BufferedImageLuminanceSource(rotatedImage, top, sourceWidth - (left + width), getHeight(), width);
87     }
88 }
第三步:配置图像写入器类
package com.easycare.util.imagecode;import java.awt.BasicStroke;
import java.awt.Graphics;
import java.awt.Graphics2D;
import java.awt.Image;
import java.awt.Shape;
import java.awt.geom.RoundRectangle2D;
import java.awt.image.BufferedImage;
import java.io.File;
import java.util.Hashtable;
import java.util.UUID;import javax.imageio.ImageIO;import com.google.zxing.BarcodeFormat;
import com.google.zxing.EncodeHintType;
import com.google.zxing.MultiFormatWriter;
import com.google.zxing.common.BitMatrix;
import com.google.zxing.qrcode.decoder.ErrorCorrectionLevel;/*** 二维码生成类* * @author 18316**/
public class QRCodeUtil {private static final String CHARSET = "utf-8";private static final String FORMAT_NAME = "jpg";// 二维码尺寸private static final int QRCODE_SIZE = 300;// LOGO宽度private static final int WIDTH = 100;// LOGO高度private static final int HEIGHT = 100;private static BufferedImage createImage(String content, String imgPath, boolean needCompress) throws Exception {Hashtable<EncodeHintType, Object> hints = new Hashtable<EncodeHintType, Object>();hints.put(EncodeHintType.ERROR_CORRECTION, ErrorCorrectionLevel.H);hints.put(EncodeHintType.CHARACTER_SET, CHARSET);hints.put(EncodeHintType.MARGIN, 1);BitMatrix bitMatrix = new MultiFormatWriter().encode(content, BarcodeFormat.QR_CODE, QRCODE_SIZE, QRCODE_SIZE,hints);int width = bitMatrix.getWidth();int height = bitMatrix.getHeight();BufferedImage image = new BufferedImage(width, height, BufferedImage.TYPE_INT_RGB);for (int x = 0; x < width; x++) {for (int y = 0; y < height; y++) {image.setRGB(x, y, bitMatrix.get(x, y) ? 0xFF000000 : 0xFFFFFFFF);}}if (imgPath == null || "".equals(imgPath)) {return image;}// 插入图片QRCodeUtil.insertImage(image, imgPath, needCompress);return image;}/*** 插入LOGO* * @param source       二维码图片* @param imgPath      LOGO图片地址* @param needCompress 是否压缩* @throws Exception*/private static void insertImage(BufferedImage source, String imgPath, boolean needCompress) throws Exception {File file = new File(imgPath);if (!file.exists()) {System.err.println("" + imgPath + "   该文件不存在!");return;}Image src = ImageIO.read(new File(imgPath));int width = src.getWidth(null);int height = src.getHeight(null);if (needCompress) { // 压缩LOGOif (width > WIDTH) {width = WIDTH;}if (height > HEIGHT) {height = HEIGHT;}Image image = src.getScaledInstance(width, height, Image.SCALE_SMOOTH);BufferedImage tag = new BufferedImage(width, height, BufferedImage.TYPE_INT_RGB);Graphics g = tag.getGraphics();g.drawImage(image, 0, 0, null); // 绘制缩小后的图g.dispose();src = image;}// 插入LOGOGraphics2D graph = source.createGraphics();int x = (QRCODE_SIZE - width) / 2;int y = (QRCODE_SIZE - height) / 2;graph.drawImage(src, x, y, width, height, null);Shape shape = new RoundRectangle2D.Float(x, y, width, width, 6, 6);graph.setStroke(new BasicStroke(3f));graph.draw(shape);graph.dispose();}/*** 生成二维码(内嵌LOGO)* * @param content      内容* @param imgPath      LOGO地址* @param destPath     存放目录* @param needCompress 是否压缩LOGO* @throws Exception*/public static String encode(String content, String imgPath, String destPath, boolean needCompress)throws Exception {BufferedImage image = QRCodeUtil.createImage(content, imgPath, needCompress);mkdirs(destPath);// 随机生成二维码图片文件名String file = UUID.randomUUID() + ".jpg";ImageIO.write(image, FORMAT_NAME, new File(destPath + "/" + file));return destPath + file;}/*** 当文件夹不存在时,mkdirs会自动创建多层目录,区别于mkdir.(mkdir如果父目录不存在则会抛出异常)* * @author lanyuan Email: mmm333zzz520@163.com* @date 2013-12-11 上午10:16:36* @param destPath 存放目录*/public static void mkdirs(String destPath) {File file = new File(destPath);// 当文件夹不存在时,mkdirs会自动创建多层目录,区别于mkdir.(mkdir如果父目录不存在则会抛出异常)if (!file.exists() && !file.isDirectory()) {file.mkdirs();}}}
运行测试了,效果图
来源:https://www.cnblogs.com/Reborn-yuan/p/10409693.html


![[转]IPython介绍](https://img-blog.csdn.net/20161108200136142)


