Python3 人脸识别
face_recognition 源码
人脸图片进行训练,识别摄像头人脸

-
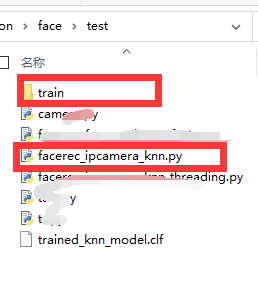
代码和人脸库在同一级
-
训练库中以人名命名文件夹

-
每个人可以多张图片,这里的名字无所谓

1. Ubuntu 20 安装人脸识别库
# 先:
sudo su rootapt-get install -y gitapt-get install -y cmake apt-get install -y python3-pip apt-get install libboost-all-devgit clone https://github.com/davisking/dlib.git
cd dlib
mkdir build
cd build
cmake .. -DDLIB_USE_CUDA=0 -DUSE_AVX_INSTRUCTIONS=1
cmake --build .
cd .. # 可能会报错
# 第一种:
python3 setup.py install --yes USE_AVX_INSTRUCTIONS --no DLIB_USE_CUDA
# 第二种
python3 setup.py install --set USE_AVX_INSTRUCTIONS=1 --set DLIB_USE_CUDA=1# 修改 ~/.pip/pip.conf (没有就创建一个)
[global]
index-url = https://pypi.tuna.tsinghua.edu.cn/simplepip3 install face_recognitionpip install scikit-buildsudo apt-get install build-essential
sudo apt-get install cmake git libgtk2.0-dev pkg-config libavcodec-dev libavformat-dev libswscale-dev
sudo apt-get install python-dev python-numpy libtbb2 libtbb-dev libjpeg-dev libpng-dev libtiff-dev libjasper-dev libdc1394-22-dev# 上面有报错的执行
sudo add-apt-repository "deb http://security.ubuntu.com/ubuntu xenial-security main"
sudo apt update
sudo apt install libjasper1 libjasper-devpython3 -m pip install --upgrade pippip3 install opencv-pythonpip3 install scikit-learn# npm
sudo apt-get install npm
npm config set registry https://registry.npm.taobao.org
2. Windwos 安装face_recognition
参考文章:
- https://blog.csdn.net/weixin_41194171/article/details/108513392
- https://pypi.org/simple/dlib/
- https://www.icode9.com/content-1-1197216.html
人脸识别源码:
import cv2
import math
from sklearn import neighbors
import os
import os.path
import pickle
from numba import cuda
from PIL import Image, ImageDraw
import face_recognition
from face_recognition.face_recognition_cli import image_files_in_folder
import numpy as npALLOWED_EXTENSIONS = {'png', 'jpg', 'jpeg', 'JPG'}# cuda.select_device(1)
# @cuda.jit
# def gpu():
#     pass# 训练(训练的目录, 训练库保存的位置, )
def train(train_dir, model_save_path=None, n_neighbors=None, knn_algo='ball_tree', verbose=False):X = []y = []for class_dir in os.listdir(train_dir):if not os.path.isdir(os.path.join(train_dir, class_dir)):continueprint("开始训练用户:", class_dir, "...", end="")images = []for img_path in image_files_in_folder(os.path.join(train_dir, class_dir)):image = face_recognition.load_image_file(img_path)images.append(image)S = face_recognition.batch_face_locations(images, number_of_times_to_upsample=1, batch_size=len(images))for face_bounding_boxes in S:if len(face_bounding_boxes) != 1:if verbose:print("图片中人脸太多或者不存在人脸,不适合进行训练")else:X.append(face_recognition.face_encodings(image, known_face_locations=face_bounding_boxes)[0])y.append(class_dir)print("训练结束")if n_neighbors is None:n_neighbors = int(round(math.sqrt(len(X))))if verbose:print("Chose n_neighbors automatically:", n_neighbors)knn_clf = neighbors.KNeighborsClassifier(n_neighbors=n_neighbors, algorithm=knn_algo, weights='distance')knn_clf.fit(X, y)if model_save_path is not None:with open(model_save_path, 'wb') as f:pickle.dump(knn_clf, f)return knn_clfdef predict(X_frame, knn_clf=None, model_path=None, distance_threshold=0.5):if knn_clf is None and model_path is None:raise Exception("Must supply knn classifier either thourgh knn_clf or model_path")if knn_clf is None:with open(model_path, 'rb') as f:knn_clf = pickle.load(f)X_face_locations = face_recognition.face_locations(X_frame)if len(X_face_locations) != 1:return []faces_encodings = face_recognition.face_encodings(X_frame, known_face_locations=X_face_locations)closest_distances = knn_clf.kneighbors(faces_encodings, n_neighbors=1)are_matches = [closest_distances[0][i][0] <= distance_threshold for i in range(len(X_face_locations))]return [(pred, loc) if rec else ("", loc) for pred, loc, rec inzip(knn_clf.predict(faces_encodings), X_face_locations, are_matches)]"""X_face_locations = face_recognition.face_locations(X_frame)S = face_recognition.batch_face_locations([X_frame], number_of_times_to_upsample=1, batch_size=128)for face_bounding_boxes in S:print(face_bounding_boxes)if len(face_bounding_boxes) != 1:return []faces_encodings = face_recognition.face_encodings(X_frame, known_face_locations=face_bounding_boxes)# 匹配人脸closest_distances = knn_clf.kneighbors(faces_encodings, n_neighbors=1)are_matches = [closest_distances[0][i][0] <= distance_threshold for i in range(len(X_face_locations))]return [(pred, loc) if rec else ("", loc) for pred, loc, rec inzip(knn_clf.predict(faces_encodings), X_face_locations, are_matches)]return []"""def show_prediction_labels_on_image(frame, predictions):pil_image = Image.fromarray(frame)draw = ImageDraw.Draw(pil_image)for name, (top, right, bottom, left) in predictions:# enlarge the predictions for the full sized image.top *= 2right *= 2bottom *= 2left *= 2# Draw a box around the face using the Pillow moduleif name == "":rgbFace = (0, 0, 255)else:rgbFace = (118, 238, 0)draw.rectangle(((left, top), (right, bottom)), outline=rgbFace)name = name.encode("UTF-8")text_width, text_height = draw.textsize(name)draw.rectangle(((left, bottom - text_height - 10), (right, bottom)), fill=rgbFace, outline=rgbFace)draw.text((left + 6, bottom - text_height - 5), name, fill=(255, 255, 255, 255))del drawopencvimage = np.array(pil_image)return opencvimagedef set_gpus(gpu_index):if type(gpu_index) == list:gpu_index = ','.join(str(_) for _ in gpu_index)if type(gpu_index) == int:gpu_index = str(gpu_index)os.environ["CUDA_DEVICE_ORDER"] = "PCI_BUS_ID"os.environ["CUDA_VISIBLE_DEVICES"] = gpu_indexif __name__ == "__main__":set_gpus(0)train_flag = 1 # 1表示训练、0表示不训练【训练一次之后建议改为0,提高效率,更图片或者添加人脸后需要重新训练】if train_flag:print("Training KNN classifier...")classifier = train("./train", model_save_path="trained_knn_model.clf", n_neighbors=2)print("Training complete!")print('Setting cameras up...')# 摄像头读取:https://blog.csdn.net/qq_44009311/article/details/121799698cap = cv2.VideoCapture(0)while 1 > 0:ret, frame = cap.read()if ret:img = cv2.resize(frame, (0, 0), fx=0.5, fy=0.5)predictions = predict(img, model_path="trained_knn_model.clf")frame = show_prediction_labels_on_image(frame, predictions)cv2.imshow('camera', frame)if ord('q') == cv2.waitKey(10):cap.release()cv2.destroyAllWindows()exit(0)