首先下载Ehcache,我下载的是ehcache-2.5.2,下载后解压文件,目录结构如下:

主要说明下terracotta这个目录,这个是terracotta服务器,里面有个bin目录,包含启动服务器和关闭服务的脚本,以及开发控制台:
start-tc-server.bat 开启服务器
dev-console.bat 开发控制台(可以监控terracotta服务器)
下面开始进入正题(搭建ehcache环境、java环境的省略了,大家自己动动手),主要说明下服务器,为了与正式环境贴近,我在自己电脑上开了个虚拟机,这样就相当于2台电脑了:
A服务器:192.168.1.100
B服务器:192.168.1.131
然后将ehcache分别放到A服务器和B服务器里。服务器搭建好后,开始动手写ehcache测试类,分别建立一个ehcache(放到A服务器中)与ehcache_1(放到B服务器中)的项目(项目代码基本一样,ehcache项目有点区别),下面说明2个项目的ehcache.xml的配置信息:
Ehcache项目中的ehcache.xml的配置信息:
Xml代码 ![]()
![]()

- <span style="font-size: medium;"><?xml version="1.0" encoding="UTF-8"?>
- <ehcache xmlns:xsi="http://www.w3.org/2001/XMLSchema-instance"
- xsi:noNamespaceSchemaLocation="ehcache.xsd"
- updateCheck="true" monitoring="off"
- dynamicConfig="true">
- <cacheManagerEventListenerFactory class="" properties=""/>
- <terracottaConfig url="192.168.1.100:9510,192.168.1.131:9510"/> <!--terracotta服务器配置,默认端口为9510,多个服务器用,分隔 -->
- <defaultCache
- maxEntriesLocalHeap="0"
- eternal="false"
- overflowToDisk="false"
- timeToIdleSeconds="30"
- timeToLiveSeconds="60">
- <terracotta clustered="true" /> <!-- 开启集群 -->
- </defaultCache>
- <cache name="demoCache"
- maxBytesLocalHeap="200M"
- eternal="false"
- overflowToDisk="false"
- timeToIdleSeconds="30"
- timeToLiveSeconds="60"
- memoryStoreEvictionPolicy="LFU"
- maxElementsOnDisk="100000"
- >
- <terracotta clustered="true" />
- </cache>
- </ehcache>
- </span>
<?xml version="1.0" encoding="UTF-8"?><ehcache xmlns:xsi="http://www.w3.org/2001/XMLSchema-instance" xsi:noNamespaceSchemaLocation="ehcache.xsd" updateCheck="true" monitoring="off" dynamicConfig="true"> <cacheManagerEventListenerFactory class="" properties=""/> <terracottaConfig url="192.168.1.100:9510,192.168.1.131:9510"/> <!--terracotta服务器配置,默认端口为9510,多个服务器用,分隔 --> <defaultCache maxEntriesLocalHeap="0" eternal="false" overflowToDisk="false" timeToIdleSeconds="30" timeToLiveSeconds="60"> <terracotta clustered="true" /> <!-- 开启集群 --> </defaultCache> <cache name="demoCache" maxBytesLocalHeap="200M" eternal="false" overflowToDisk="false" timeToIdleSeconds="30" timeToLiveSeconds="60" memoryStoreEvictionPolicy="LFU" maxElementsOnDisk="100000" > <terracotta clustered="true" /> </cache></ehcache>
Ehcache_1项目中的ehcache.xml的配置信息与ehcache项目中的一样。
项目配置好后,准备启动terracotta服务器,启动服务器之前,先写一段terracotta的配置文件,新建一个tc-config.xml的文件,内容如下:
Xml代码 ![]()
![]()
- <span style="font-size: medium;"><?xml version="1.0" encoding="UTF-8" ?>
- <tc:tc-config xmlns:tc="http://www.terracotta.org/config">
- <servers>
- <!-- Sets where the Terracotta server can be found. Replace the value of host with the server's IP address. -->
- <server host="192.168.1.100" name="Server1">
- <data>%(user.home)/terracotta/server-data</data>
- <logs>%(user.home)/terracotta/server-logs</logs>
- </server>
- <!-- If using a standby Terracotta server, also referred to as an ACTIVE-PASSIVE configuration, add the second server here. -->
- <server host="192.168.1.131" name="Server2">
- <data>%(user.home)/terracotta/server-data</data>
- <logs>%(user.home)/terracotta/server-logs</logs>
- </server>
- <!-- If using more than one server, add an <ha>
- section. -->
- <ha>
- <mode>networked-active-passive</mode>
- <networked-active-passive>
- <election-time>5</election-time>
- </networked-active-passive>
- </ha>
- </servers>
- <!-- Sets where the generated client logs are saved on clients. Note that the exact location of Terracotta logs on client machines may vary based on the value of user.home and the local disk layout. -->
- <clients>
- <logs>%(user.home)/terracotta/client-logs</logs>
- </clients>
- </tc:tc-config></span>
<?xml version="1.0" encoding="UTF-8" ?> <tc:tc-config xmlns:tc="http://www.terracotta.org/config"> <servers> <!-- Sets where the Terracotta server can be found. Replace the value of host with the server's IP address. --> <server host="192.168.1.100" name="Server1"> <data>%(user.home)/terracotta/server-data</data> <logs>%(user.home)/terracotta/server-logs</logs> </server> <!-- If using a standby Terracotta server, also referred to as an ACTIVE-PASSIVE configuration, add the second server here. --> <server host="192.168.1.131" name="Server2"> <data>%(user.home)/terracotta/server-data</data> <logs>%(user.home)/terracotta/server-logs</logs> </server> <!-- If using more than one server, add an <ha> section. --> <ha> <mode>networked-active-passive</mode> <networked-active-passive> <election-time>5</election-time> </networked-active-passive> </ha> </servers> <!-- Sets where the generated client logs are saved on clients. Note that the exact location of Terracotta logs on client machines may vary based on the value of user.home and the local disk layout. --> <clients> <logs>%(user.home)/terracotta/client-logs</logs> </clients> </tc:tc-config>
上面的配置信息中配置了2个server,一个是本机的(A服务器),另外一个是B服务器的,如果此处只配置一个服务器,比如本机的服务器,而不将B服务器配置在这里,将无法建立集群。
然后将tc-config.xml分别放到A服务器和B服务器的ehcache\terracotta\bin下,下面开始分别启动A、B服务器的terracotta,在ehcache\terracotta\bin下找到start-tc-server.bat,下面是启动命令:
start-tc-server.bat–f tc-config.xml ---f表示从指定配置文件启动
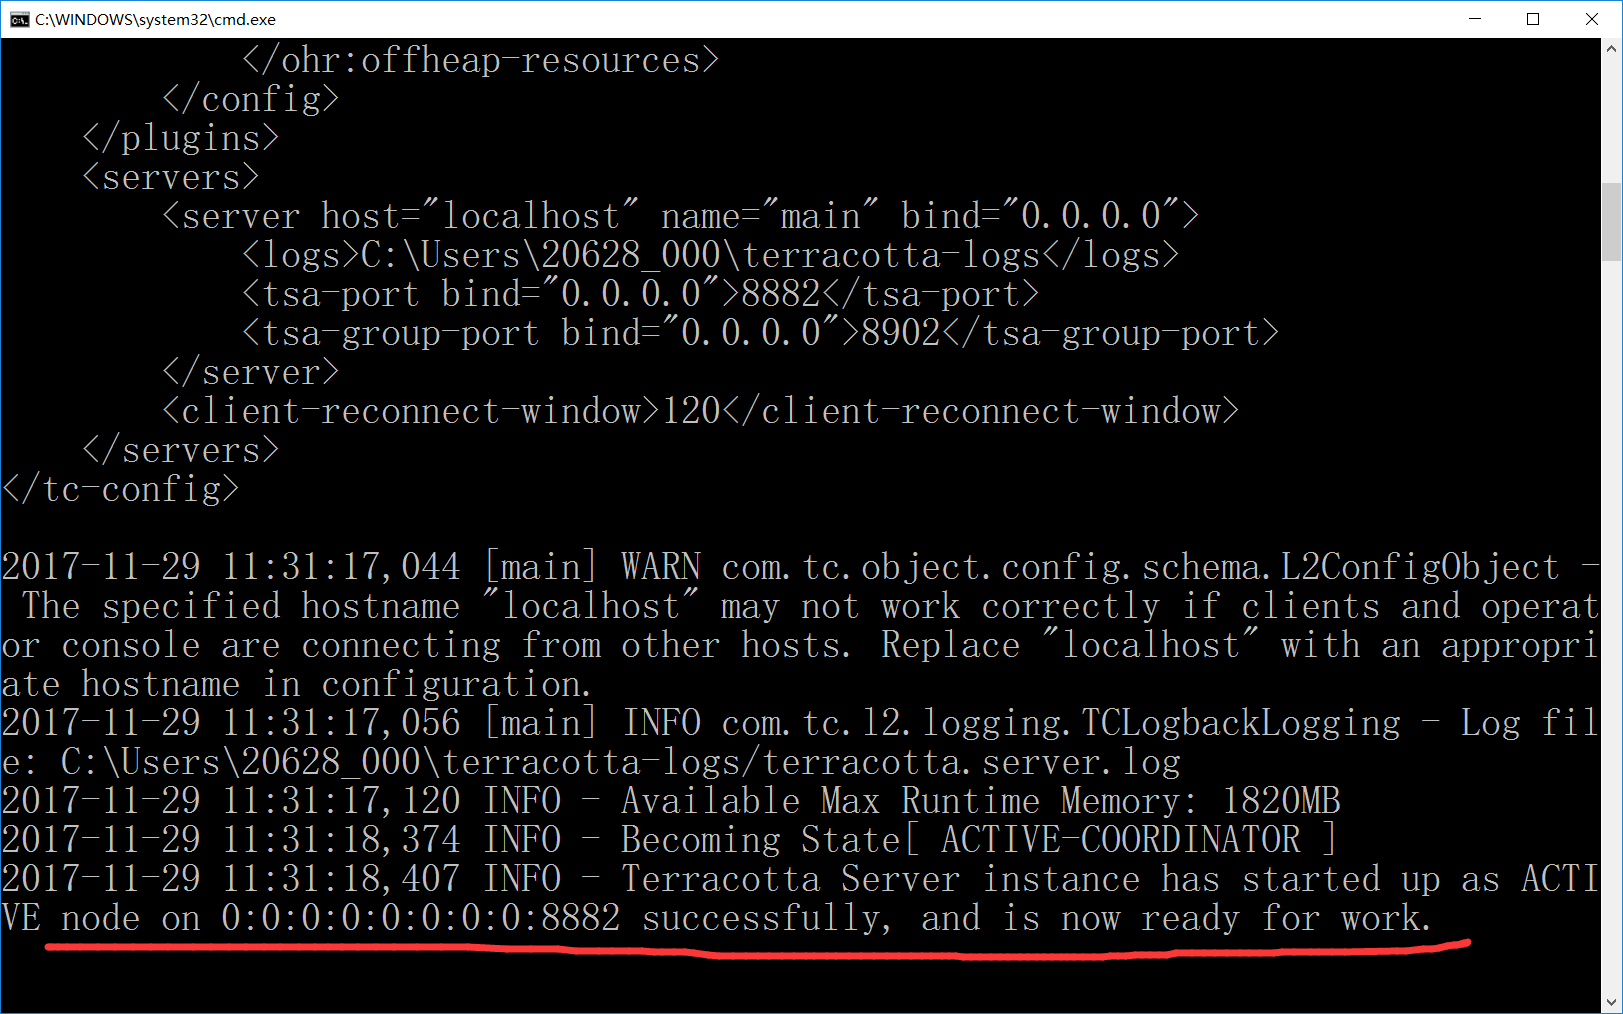
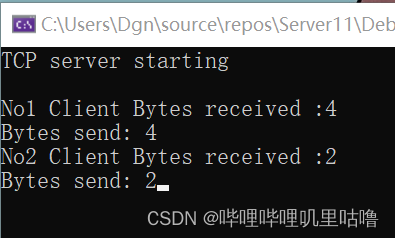
启动结果如下图:
A服务器:

B服务器:

从启动结果中可以看到NodeID[XXXXXX] joined the cluster,节点已加入集群,代表terracotta结群建立成功,下面运行测试代码:
A服务器:
Java代码 ![]()
![]()
- <span style="font-size: medium;">import net.sf.ehcache.Cache;
- import net.sf.ehcache.CacheManager;
- import net.sf.ehcache.Element;
- public class EhcacheDemo {
- private static final CacheManager CACHE_MANAGER = CacheManager.create();
- public static Cache getCache(String cacheName){
- return CACHE_MANAGER.getCache(cacheName);
- }
- public static Object getObjectValue(String key){
- Element e = getCache("demoCache").get(key);
- Object val = null;
- if(e == null){
- System.out.println("缓存中不存在,读取数据");
- /**用于测试集群是否正常工作,当缓存中的数据超时时加入新数据,同时将B服务器中的terracotta服务器关闭,测试B服务器中的程序是否能够获取数据
- *
- * */
- EhcacheDemo.put("name", "11111");
- EhcacheDemo.put("password", "333");
- }else{
- val = e.getObjectValue();
- }
- return val;
- }
- public static void put(String key, Object val){
- Element e = new Element(key, val);
- getCache("demoCache").put(e);
- }
- public static void delete(String key){
- getCache("demoCache").remove(key);
- }
- public void close(){
- CACHE_MANAGER.shutdown();
- }
- /**
- * @param args
- */
- public static void main(String[] args) {
- EhcacheDemo.put("name", "sssssss");
- EhcacheDemo.put("password", "22222");
- Thread t = new Thread(new Runnable() {
- @Override
- public void run() {
- while(true){
- try {
- Thread.currentThread().sleep(10000L);
- } catch (InterruptedException e) {
- e.printStackTrace();
- }
- System.out.println(EhcacheDemo.getObjectValue("name") +" "+ getObjectValue("password"));
- }
- }
- });
- t.start();
- }
- }
- </span>
import net.sf.ehcache.Cache;import net.sf.ehcache.CacheManager;import net.sf.ehcache.Element;public class EhcacheDemo { private static final CacheManager CACHE_MANAGER = CacheManager.create(); public static Cache getCache(String cacheName){ return CACHE_MANAGER.getCache(cacheName); } public static Object getObjectValue(String key){ Element e = getCache("demoCache").get(key); Object val = null; if(e == null){ System.out.println("缓存中不存在,读取数据"); /**用于测试集群是否正常工作,当缓存中的数据超时时加入新数据,同时将B服务器中的terracotta服务器关闭,测试B服务器中的程序是否能够获取数据 * * */ EhcacheDemo.put("name", "11111"); EhcacheDemo.put("password", "333"); }else{ val = e.getObjectValue(); } return val; } public static void put(String key, Object val){ Element e = new Element(key, val); getCache("demoCache").put(e); } public static void delete(String key){ getCache("demoCache").remove(key); } public void close(){ CACHE_MANAGER.shutdown(); } /** * @param args */ public static void main(String[] args) { EhcacheDemo.put("name", "sssssss"); EhcacheDemo.put("password", "22222"); Thread t = new Thread(new Runnable() { @Override public void run() { while(true){ try { Thread.currentThread().sleep(10000L); } catch (InterruptedException e) { e.printStackTrace(); } System.out.println(EhcacheDemo.getObjectValue("name") +" "+ getObjectValue("password")); } } }); t.start(); }}
B服务器:
Java代码 ![]()
![]()
- <span style="font-size: medium;">import net.sf.ehcache.Cache;
- import net.sf.ehcache.CacheManager;
- import net.sf.ehcache.Element;
- public class EhcacheDemo {
- private static final CacheManager CACHE_MANAGER = CacheManager.create();
- public static Cache getCache(String cacheName){
- return CACHE_MANAGER.getCache(cacheName);
- }
- public static Object getObjectValue(String key){
- Element e = getCache("demoCache").get(key);
- Object val = null;
- if(e == null){
- System.out.println("缓存中不存在,读取数据");
- }else{
- val = e.getObjectValue();
- }
- return val;
- }
- public static void put(String key, Object val){
- Element e = new Element(key, val);
- getCache("demoCache").put(e);
- }
- public static void delete(String key){
- getCache("demoCache").remove(key);
- }
- public void close(){
- CACHE_MANAGER.shutdown();
- }
- /**
- * @param args
- */
- public static void main(String[] args) {
- EhcacheDemo.put("name", "sssssss");
- EhcacheDemo.put("password", "22222");
- Thread t = new Thread(new Runnable() {
- @Override
- public void run() {
- while(true){
- try {
- Thread.currentThread().sleep(10000L);
- } catch (InterruptedException e) {
- e.printStackTrace();
- }
- System.out.println(EhcacheDemo.getObjectValue("name") +" "+ getObjectValue("password"));
- }
- }
- });
- t.start();
- }
- }
- </span>
import net.sf.ehcache.Cache;import net.sf.ehcache.CacheManager;import net.sf.ehcache.Element;public class EhcacheDemo { private static final CacheManager CACHE_MANAGER = CacheManager.create(); public static Cache getCache(String cacheName){ return CACHE_MANAGER.getCache(cacheName); } public static Object getObjectValue(String key){ Element e = getCache("demoCache").get(key); Object val = null; if(e == null){ System.out.println("缓存中不存在,读取数据"); }else{ val = e.getObjectValue(); } return val; } public static void put(String key, Object val){ Element e = new Element(key, val); getCache("demoCache").put(e); } public static void delete(String key){ getCache("demoCache").remove(key); } public void close(){ CACHE_MANAGER.shutdown(); } /** * @param args */ public static void main(String[] args) { EhcacheDemo.put("name", "sssssss"); EhcacheDemo.put("password", "22222"); Thread t = new Thread(new Runnable() { @Override public void run() { while(true){ try { Thread.currentThread().sleep(10000L); } catch (InterruptedException e) { e.printStackTrace(); } System.out.println(EhcacheDemo.getObjectValue("name") +" "+ getObjectValue("password")); } } }); t.start(); }}
A与B服务器中的程序有一点区别,详见注释部分,主要为了测试集群是否工作正常,当一个节点挂掉之后,B服务器上的测试程序是否能获取新的缓存数据。
同时运行2个测试程序后,我们可以观察terracotta是否正常工作,运行ehcache\terracotta\bin下的dev-console.bat并连接到2个服务器的terracotta服务器:

从上图中可以看到数据与请求已经同步(connected clients),下面我们再测试将B服务器中的terracotta服务器关闭,然后观察B服务器上的测试数据是否能获取数据:

从上图可以看出,可以获取数据。代表数据获取正常而B服务器中的terracotta服务器已经关闭了(如下图):

至此Ehcache与terracotta的分布式缓存配置就完成了。下面说下配置过程中需要注意的位置,也是本人刚开始搭建的时候遇到的问题,主要是数据与请求不能同步的问题,该问题主要是tc-config.xml没有配置好,刚开始我只配置了一个server,也就是分别只配置了本机的IP,后来查看官方文档后,将A、B服务器的terracotta服务器都加入进去就可以了。