目录
1 Gson解析JSON
1.1 引入依赖
1.2 使用
1.3 安装插件
1.4 Demo
2 下滑刷新,上滑加载新数据
2.1 背景
2.2 引入依赖
2.3 代码实现
3 加载网络图片
3.1 背景
3.2 引入依赖
3.3 代码实现
4 轮播图
4.1 引入依赖
4.2 代码实现
5 网络数据请求 Retrofit
5.1 引入依赖
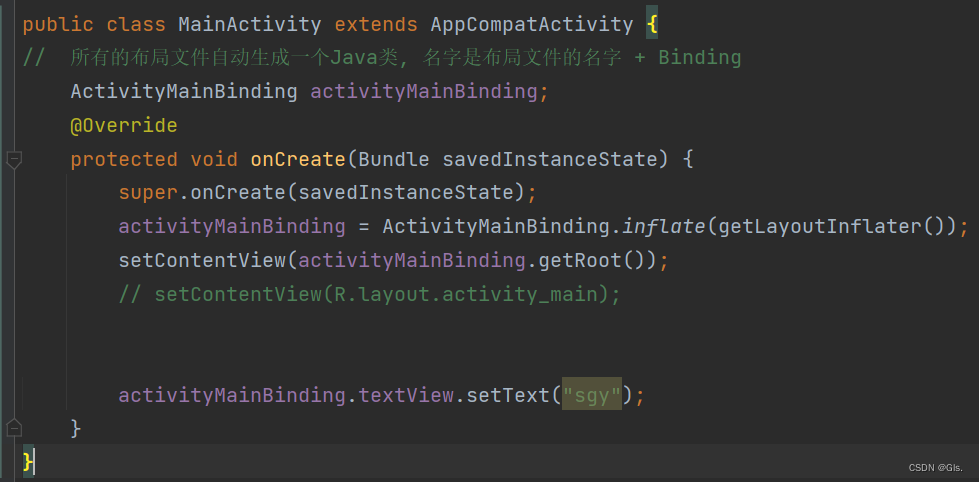
6、viewBinding
1 Gson解析JSON
为什么需要用到Gson?
当我们对JSON进行解析的时候,觉得太繁琐了。
1.1 引入依赖
implementation 'com.google.code.gson:gson:2.9.0'1.2 使用
Gson gson = new Gson();
Class1 class1 = gson.fromJson(finalResult,Class1.class);两行代码就实现了对JSON字符串的解析。注意这里的Class1这个类是要自己写的(表示班级,字段有:年级,学生列表等.),这个类的字段要符合JSON的格式,所以我们还需要自己写一个类,还是比较麻烦的。所以我们下面介绍一款插件来简化开发!
1.3 安装插件
在使用gson对json进行解析
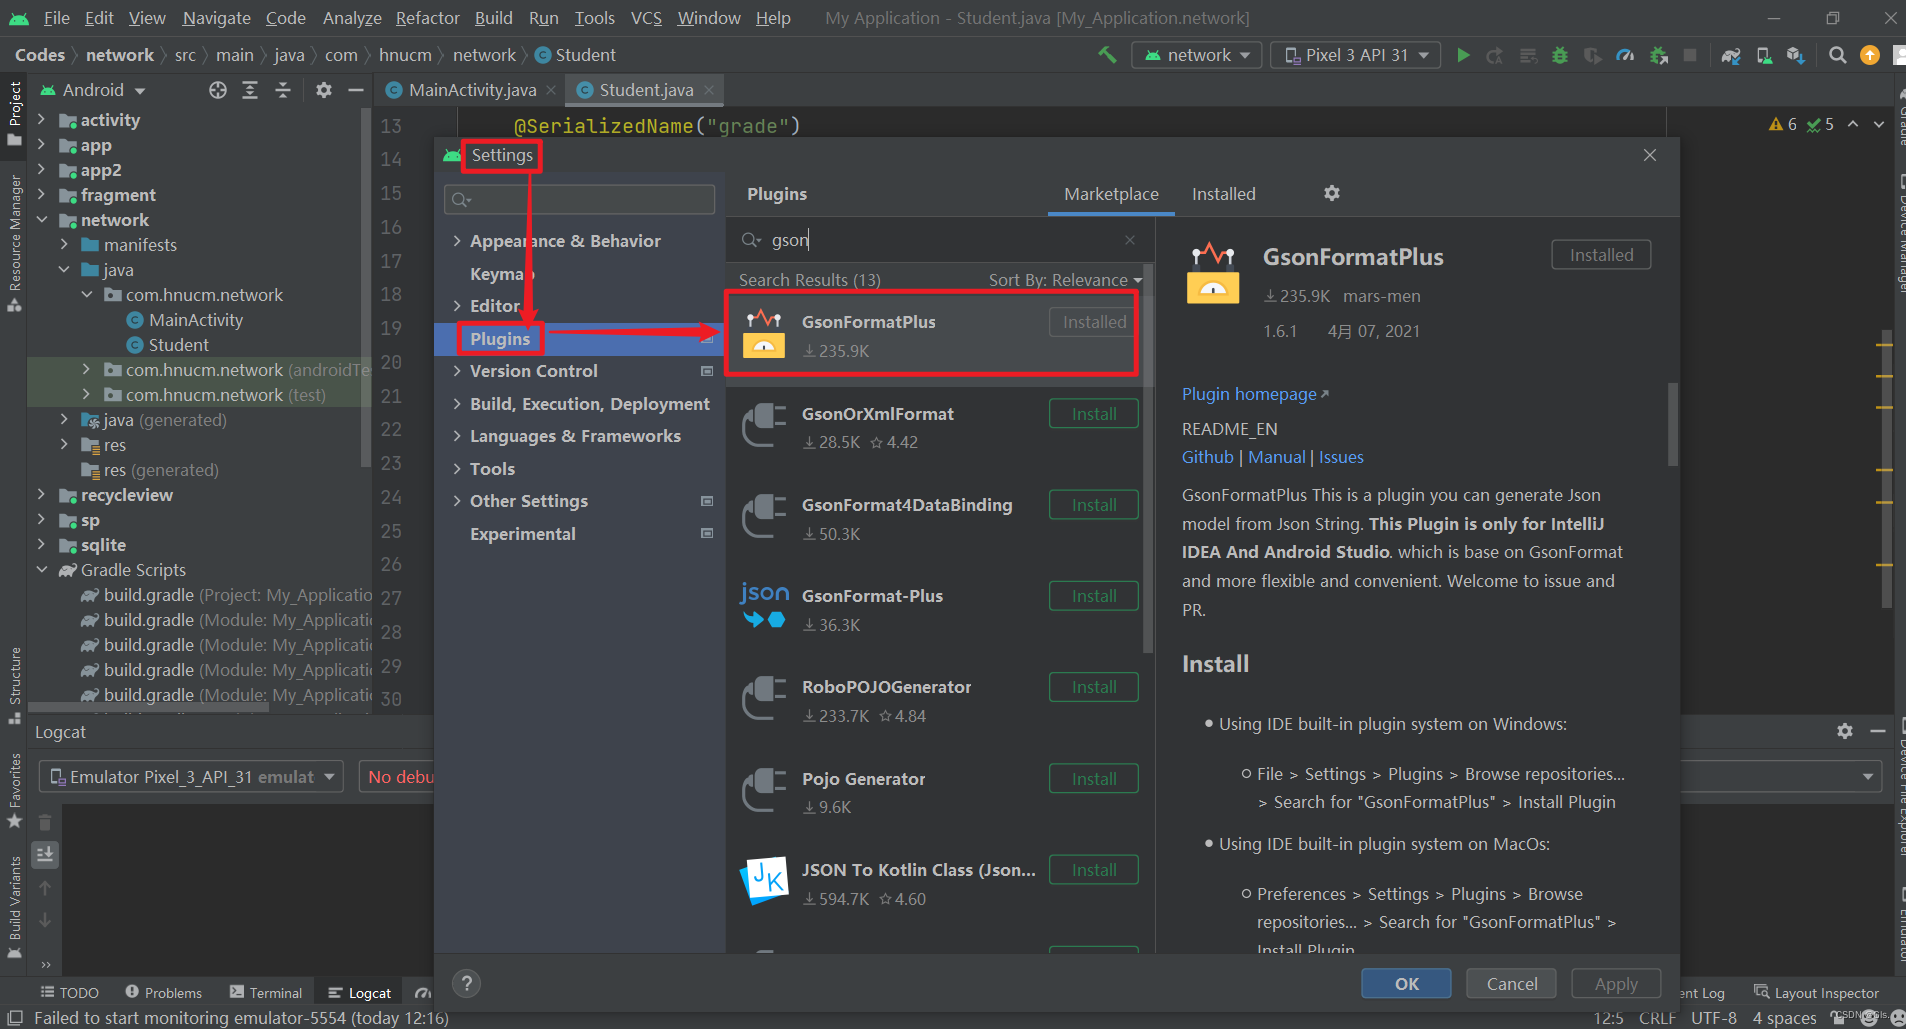
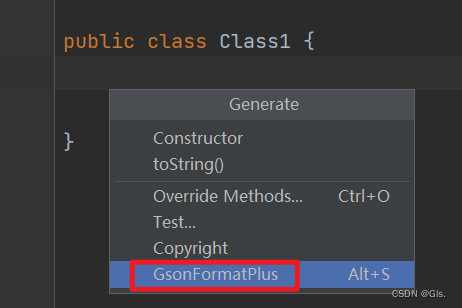
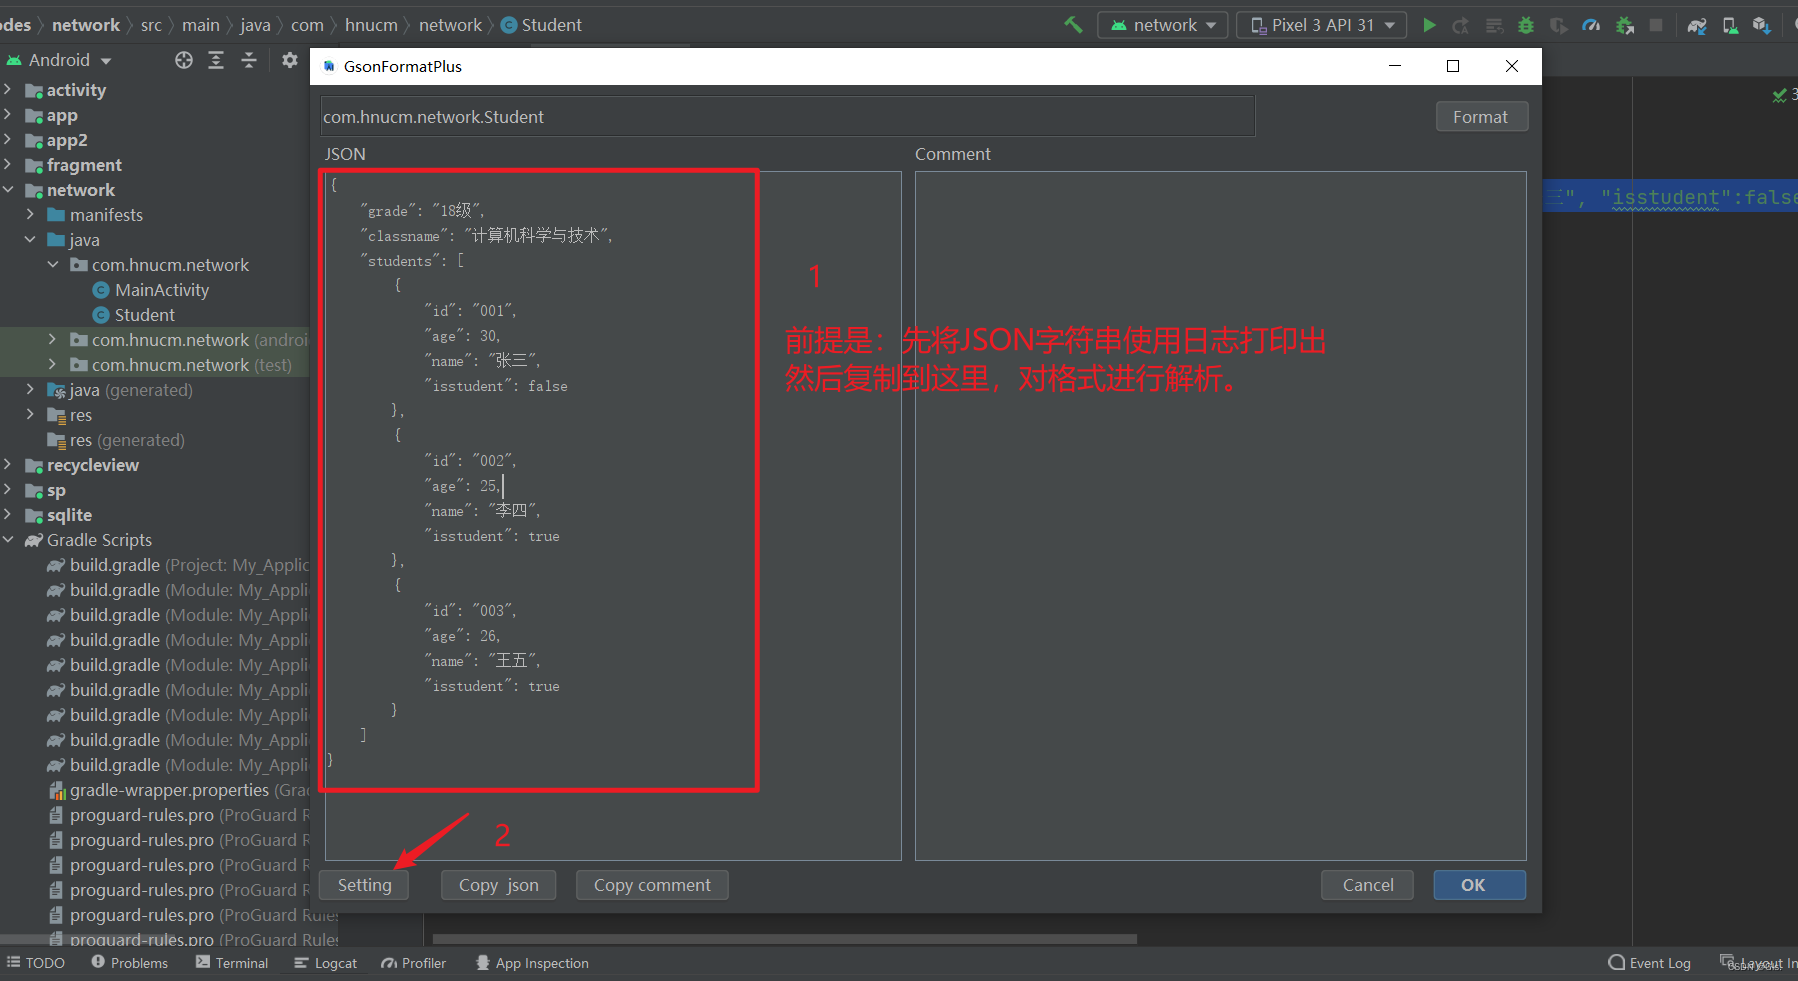
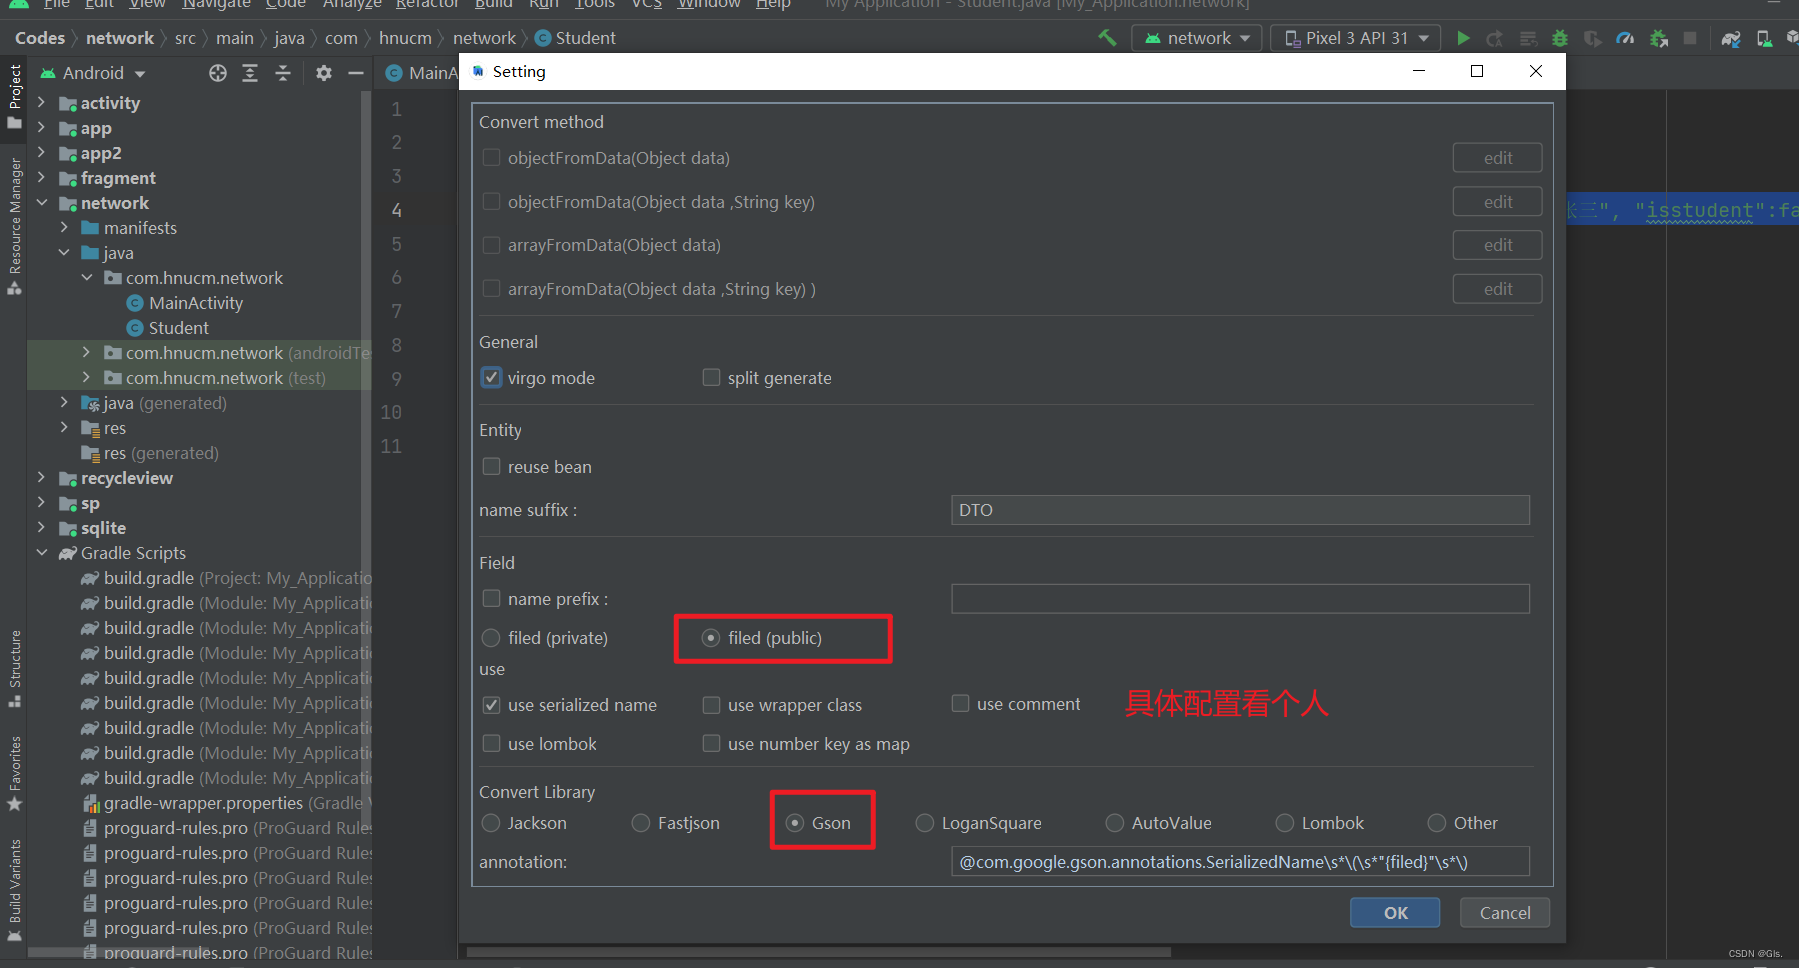
最后,就自动生成这个类的代码了!
package com.hnucm.network;import java.util.List;
// { "grade":"18级","classname":"计算机科学与技术","students":[ { "id":"001","age":30,"name":"张三", "isstudent":false }, { "id":"002","age":25,"name":"李四", "isstudent":true }, { "id":"003","age":26,"name":"王五", "isstudent":true } ]}
public class Class1 {private String grade;private String classname;private List<StudentsDTO> students;public String getGrade() {return grade;}public void setGrade(String grade) {this.grade = grade;}public String getClassname() {return classname;}public void setClassname(String classname) {this.classname = classname;}public List<StudentsDTO> getStudents() {return students;}public void setStudents(List<StudentsDTO> students) {this.students = students;}public static class StudentsDTO {private String id;private int age;private String name;private boolean isstudent;public String getId() {return id;}public void setId(String id) {this.id = id;}public int getAge() {return age;}public void setAge(int age) {this.age = age;}public String getName() {return name;}public void setName(String name) {this.name = name;}public boolean isIsstudent() {return isstudent;}public void setIsstudent(boolean isstudent) {this.isstudent = isstudent;}}
}
1.4 Demo
public class MainActivity extends AppCompatActivity {TextView textView;@Overrideprotected void onCreate(Bundle savedInstanceState) {super.onCreate(savedInstanceState);setContentView(R.layout.activity_main);textView = findViewById(R.id.text1);Thread thread = new Thread(){@Overridepublic void run() {super.run();try {/*//http://121.4.44.56/user//http://121.4.44.56/object1//http://121.4.44.56/object2//http://121.4.44.56/object3*/URL url = new URL("http://121.4.44.56/object3");HttpURLConnection urlConnection = (HttpURLConnection) url.openConnection();urlConnection.setRequestMethod("GET");InputStream inputStream = urlConnection.getInputStream();Reader reader = new InputStreamReader(inputStream);BufferedReader bufferedReader = new BufferedReader(reader);String result = "";String temp;while((temp = bufferedReader.readLine())!=null){result += temp;}Log.i("gls",result);String finalResult = result;// 在UI线程运行
//                    runOnUiThread(new Runnable() {
//                        @Override
//                        public void run() {
//
//
//                        }
//                    });//                  lambda 表达式runOnUiThread(()->{// 利用第三方框架,一次性将JSON解析为对象Gson gson = new Gson();Class1 class1 = gson.fromJson(finalResult,Class1.class);List<Class1.StudentsDTO> students = class1.getStudents();for(Class1.StudentsDTO studentsDTO : students){Log.i("gls",studentsDTO.getName());}});bufferedReader.close();reader.close();inputStream.close();} catch (Exception e) {e.printStackTrace();}}};thread.start();}}
注意:
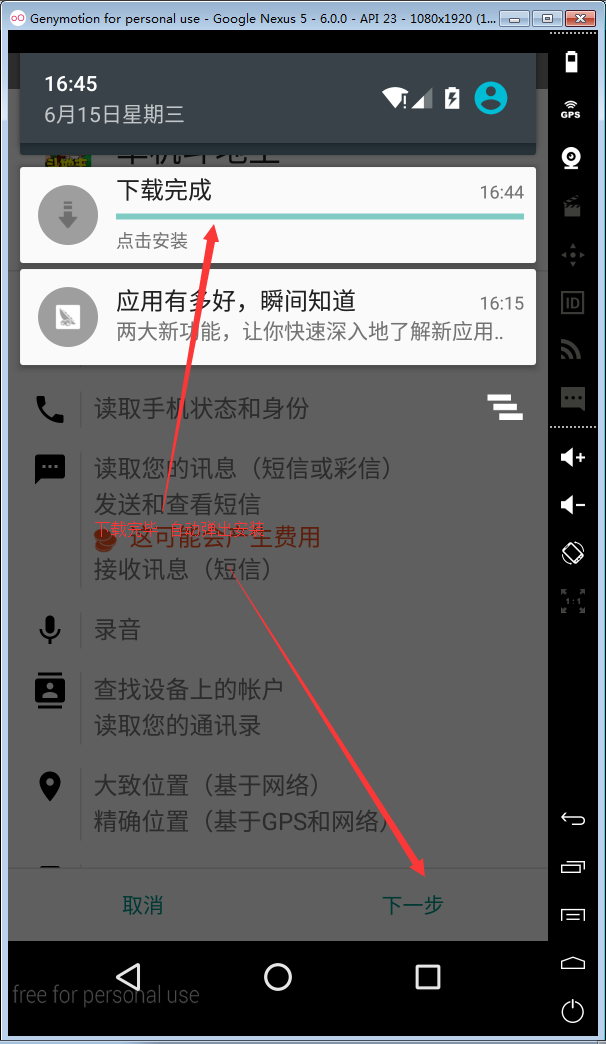
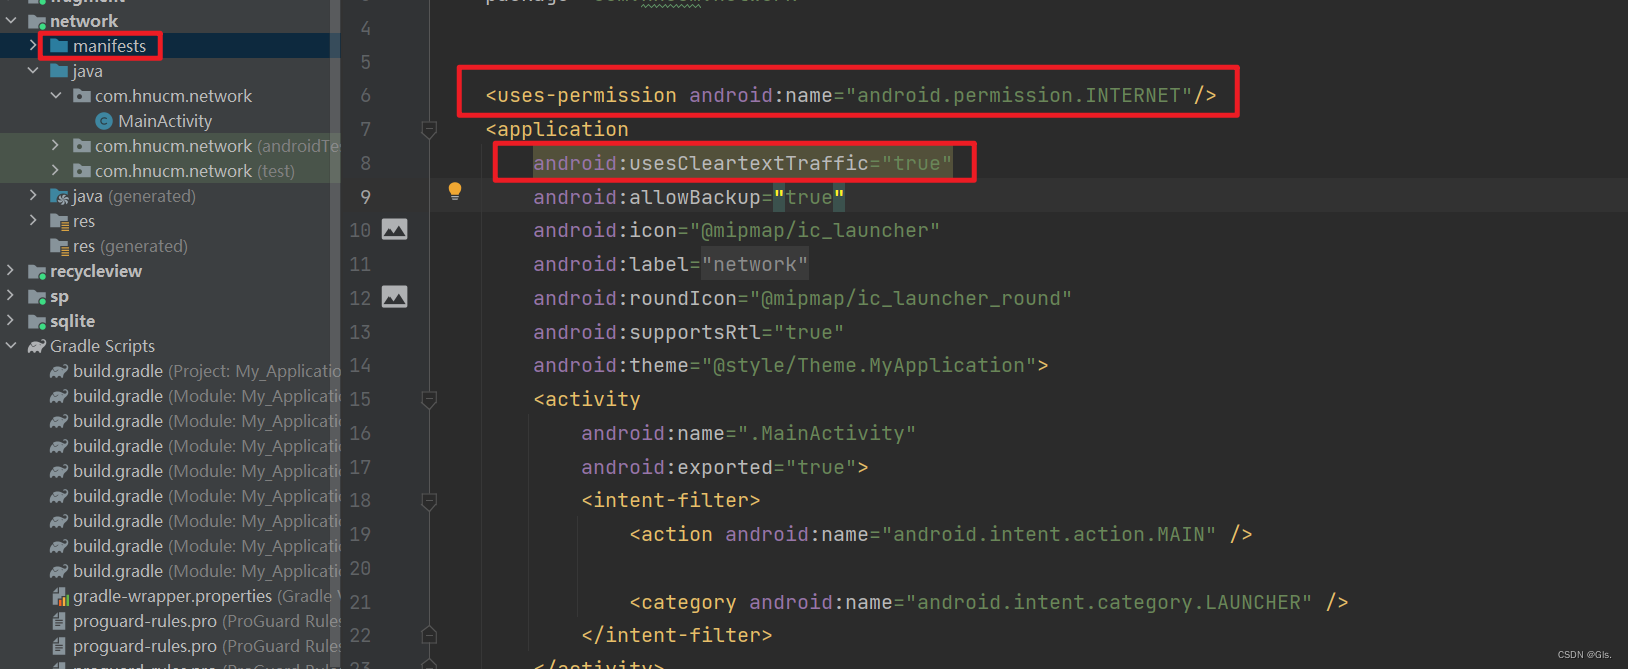
该过程因为有访问服务器,所以有需要使用网络,所以要记得配置联网授权。
2 下滑刷新,上滑加载新数据
2.1 背景
为什么我们要使用?
使用第三方框架,可以使开发更简单,同时样式也更加丰富。
2.2 引入依赖
在build.gradle文件的dependencies节点添加以下依赖:
// 下滑刷新,上滑加载implementation 'io.github.scwang90:refresh-layout-kernel:2.0.5'//核心必须依赖implementation 'io.github.scwang90:refresh-header-classics:2.0.5'//经典刷新头implementation 'io.github.scwang90:refresh-header-radar:2.0.5'//雷达刷新头implementation 'io.github.scwang90:refresh-header-falsify:2.0.5'//虚拟刷新头implementation 'io.github.scwang90:refresh-header-material:2.0.5' //谷歌刷新头implementation 'io.github.scwang90:refresh-header-two-level:2.0.5' //二级刷新头implementation 'io.github.scwang90:refresh-footer-ball:2.0.5' //球脉冲加载implementation 'io.github.scwang90:refresh-footer-classics:2.0.5' //经典加载在gradle.properties中添加
android.useAndroidX=true # 文件中已存在,所以不必添加
# 上拉刷新,下拉加载 还有android.useAndroidX=true
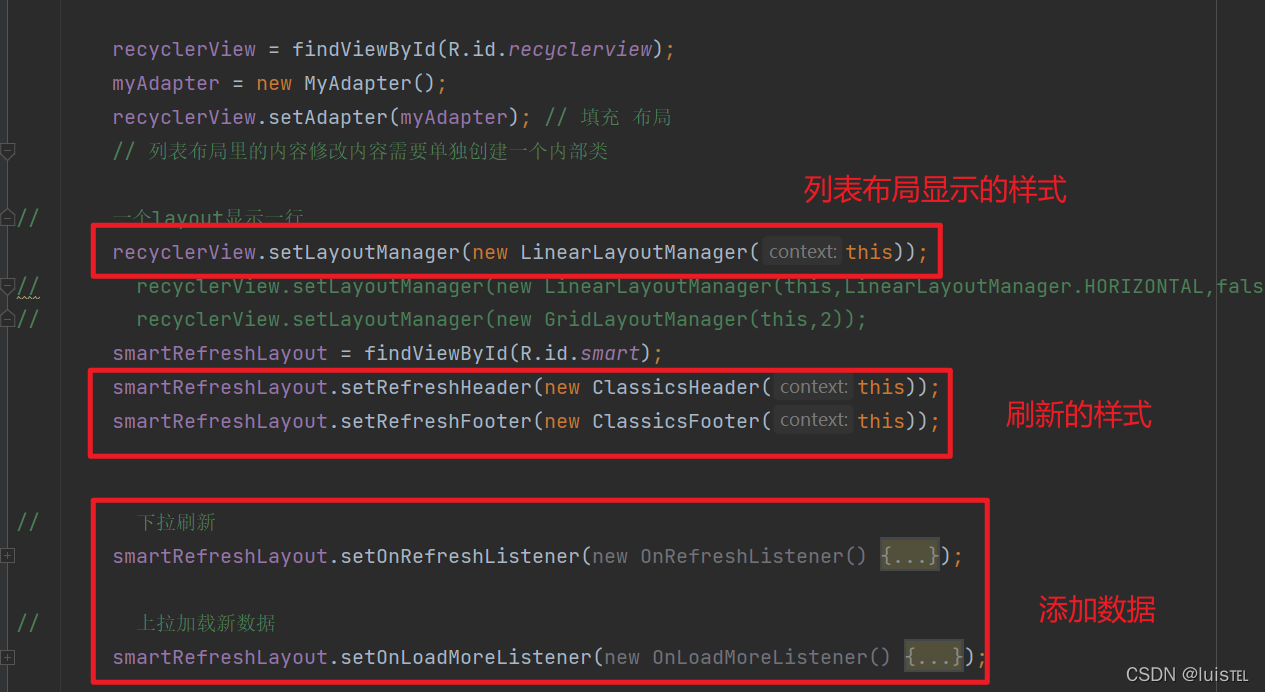
android.enableJetifier=true2.3 代码实现
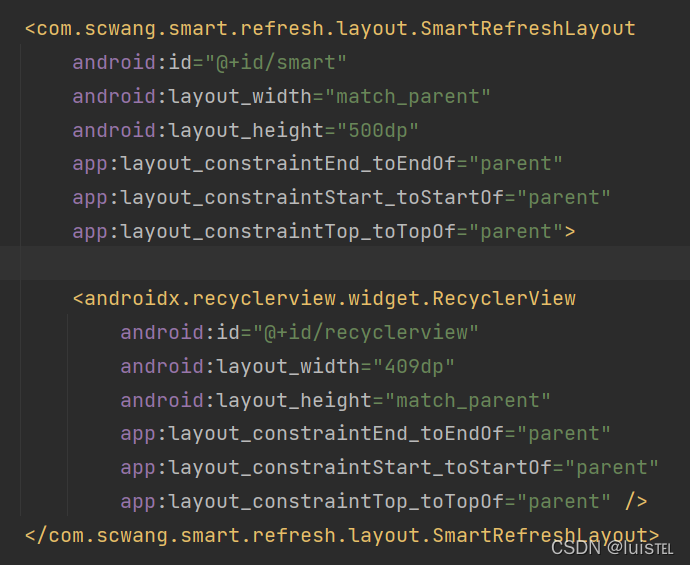
1、在activity_main中将RecylerView嵌入SmartRefreshLayout(智能刷新布局)
2、设置刷新的样式等
3 加载网络图片
3.1 背景
加载的图片,一般是不放在项目中的,而且是网上找资源。可以自己有一台服务器,在服务器上存放使用的图片。
3.2 引入依赖
// 所需依赖implementation 'com.github.bumptech.glide:glide:4.13.0'annotationProcessor 'com.github.bumptech.glide:compiler:4.13.0'注意:
- 需要联网授权
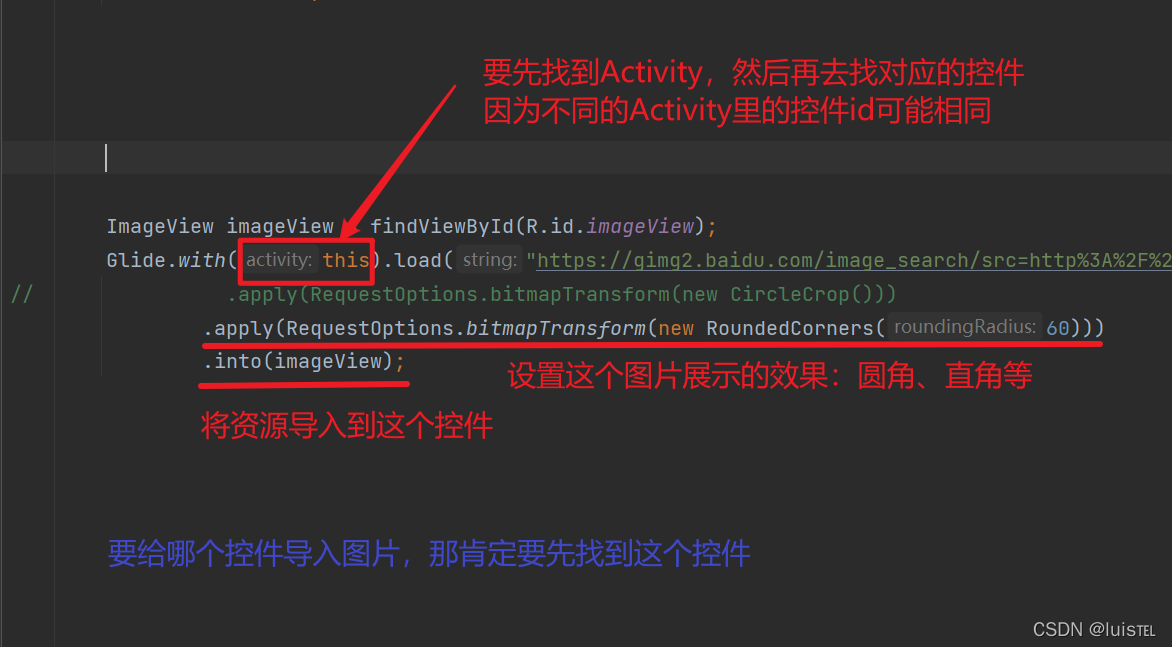
3.3 代码实现
4 轮播图
4.1 引入依赖
implementation 'io.github.youth5201314:banner:2.2.2'
implementation 'com.github.bumptech.glide:glide:4.13.0'
annotationProcessor 'com.github.bumptech.glide:compiler:4.13.0'
4.2 代码实现
定义Banner控件,相当于存放图片的容器。
<com.youth.banner.Bannerandroid:id="@+id/banner"android:layout_width="match_parent"android:layout_height="200dp"app:layout_constraintEnd_toEndOf="parent"app:layout_constraintStart_toStartOf="parent"app:layout_constraintTop_toTopOf="parent"></com.youth.banner.Banner>public class MainActivity extends AppCompatActivity {Banner banner;List<String> bannerList = new ArrayList<>();@Overrideprotected void onCreate(Bundle savedInstanceState) {super.onCreate(savedInstanceState);setContentView(R.layout.activity_main);banner = findViewById(R.id.banner);bannerList.add("https://www.keaidian.com/uploads/allimg/190424/24110307_6.jpg");bannerList.add("https://img.mianfeiwendang.com/pic/65133e4129b6446aa22c9f9f/1-810-jpg_6-1080-0-0-1080.jpg");bannerList.add("https://www.keaidian.com/uploads/allimg/190424/24110307_19.jpg");banner.setAdapter(new BannerImageAdapter<String>(bannerList) {@Overridepublic void onBindView(BannerImageHolder holder, String data, int position, int size) {Glide.with(holder.imageView).load(data).into(holder.imageView);}});banner.setIndicator(new CircleIndicator(this));banner.setIndicatorRadius(200);}
}5 网络数据请求 Retrofit
5.1 引入依赖
//  解析JSON  第三发框架implementation 'com.google.code.gson:gson:2.9.0'
//    OkHttp   简化网络请求 -- 第三方框架implementation("com.squareup.okhttp3:okhttp:4.9.3")//  Retrofit 框架
//    implementation("com.squareup.okhttp3:okhttp:4.9.3")  上面已包含implementation 'com.squareup.retrofit2:retrofit:2.9.0'implementation 'com.squareup.retrofit2:converter-gson:2.9.0'//    日志拦截implementation 'com.squareup.okhttp3:logging-interceptor:4.9.3'
6、viewBinding