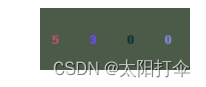
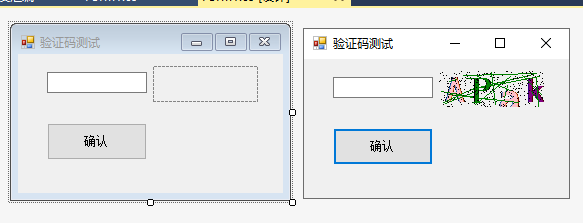
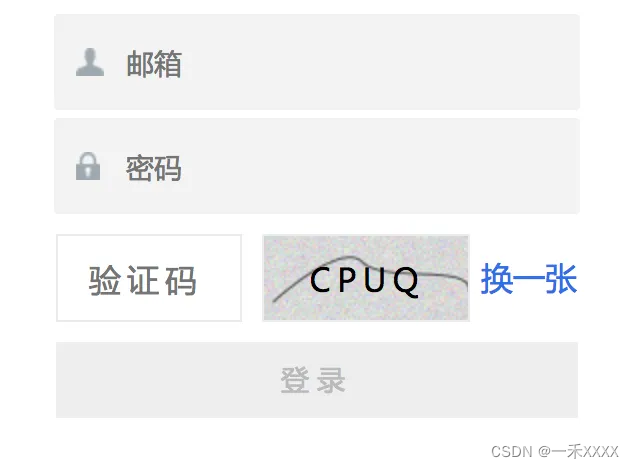
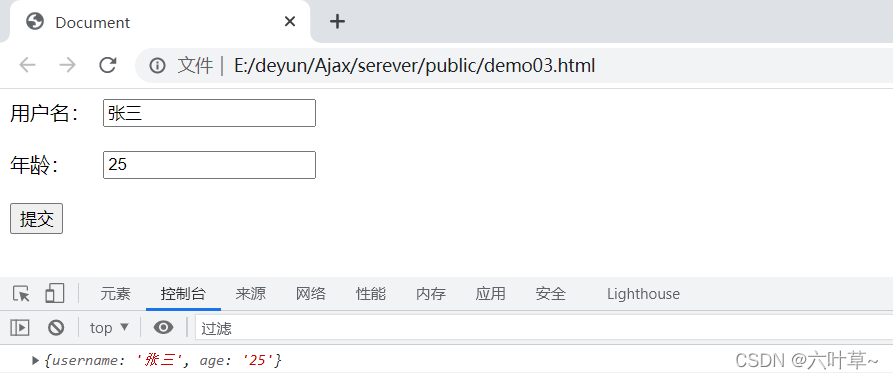
我们在一些网站注册的时候,经常需要填写以上图片的信息。
这种图片验证方式是我们最常见的形式,它可以有效的防范恶意攻击者采用恶意工具,调用“动态验证码短信获取”接口进行动态短信发送, 导致接入用户短信被刷,造成账号余额损失。同时这种动态发送方式会朝许多无关的手机用户,发送很多验证码短信,导致手机用户被骚扰,甚至引起用户投诉。这种恶意攻击究其原因是攻击者可以自动对接口进行大量调用。
如果网站在用户进行“动态验证码短信发送” 操作前,要求用户输入图片验证码,确认用户是真实有效后,服务器端再发送动态短信到用户手机上。这一种流程就可以有效的解决恶意攻击问题。
1、图片生成实体类:
package com.lele.util;import java.awt.Color;
import java.awt.Font;
import java.awt.Graphics2D;
import java.awt.image.BufferedImage;
import java.io.FileOutputStream;
import java.io.IOException;
import java.io.OutputStream;
import java.util.Random;import javax.imageio.ImageIO;public class ImageVerificationCode {private int weight = 100;           //验证码图片的长和宽private int height = 40;private String text;                //用来保存验证码的文本内容private Random r = new Random();    //获取随机数对象//private String[] fontNames = {"宋体", "华文楷体", "黑体", "微软雅黑", "楷体_GB2312"};   //字体数组//字体数组private String[] fontNames = {"Georgia"};//验证码数组private String codes = "23456789abcdefghjkmnopqrstuvwxyzABCDEFGHJKMNPQRSTUVWXYZ";/*** 获取随机的颜色** @return*/private Color randomColor() {int r = this.r.nextInt(225);  //这里为什么是225,因为当r,g,b都为255时,即为白色,为了好辨认,需要颜色深一点。int g = this.r.nextInt(225);int b = this.r.nextInt(225);return new Color(r, g, b);            //返回一个随机颜色}/*** 获取随机字体** @return*/private Font randomFont() {int index = r.nextInt(fontNames.length);  //获取随机的字体String fontName = fontNames[index];int style = r.nextInt(4);         //随机获取字体的样式,0是无样式,1是加粗,2是斜体,3是加粗加斜体int size = r.nextInt(10) + 24;    //随机获取字体的大小return new Font(fontName, style, size);   //返回一个随机的字体}/*** 获取随机字符** @return*/private char randomChar() {int index = r.nextInt(codes.length());return codes.charAt(index);}/*** 画干扰线,验证码干扰线用来防止计算机解析图片** @param image*/private void drawLine(BufferedImage image) {int num = r.nextInt(10); //定义干扰线的数量Graphics2D g = (Graphics2D) image.getGraphics();for (int i = 0; i < num; i++) {int x1 = r.nextInt(weight);int y1 = r.nextInt(height);int x2 = r.nextInt(weight);int y2 = r.nextInt(height);g.setColor(randomColor());g.drawLine(x1, y1, x2, y2);}}/*** 创建图片的方法** @return*/private BufferedImage createImage() {//创建图片缓冲区BufferedImage image = new BufferedImage(weight, height, BufferedImage.TYPE_INT_RGB);//获取画笔Graphics2D g = (Graphics2D) image.getGraphics();//设置背景色随机g.setColor(new Color(255, 255, r.nextInt(245) + 10));g.fillRect(0, 0, weight, height);//返回一个图片return image;}/*** 获取验证码图片的方法** @return*/public BufferedImage getImage() {BufferedImage image = createImage();Graphics2D g = (Graphics2D) image.getGraphics(); //获取画笔StringBuilder sb = new StringBuilder();for (int i = 0; i < 4; i++)             //画四个字符即可{String s = randomChar() + "";      //随机生成字符,因为只有画字符串的方法,没有画字符的方法,所以需要将字符变成字符串再画sb.append(s);                      //添加到StringBuilder里面float x = i * 1.0F * weight / 4;   //定义字符的x坐标g.setFont(randomFont());           //设置字体,随机g.setColor(randomColor());         //设置颜色,随机g.drawString(s, x, height - 5);}this.text = sb.toString();drawLine(image);return image;}/*** 获取验证码文本的方法** @return*/public String getText() {return text;}public static void output(BufferedImage image) throws IOException                  //将验证码图片写出的方法{OutputStream out = new FileOutputStream("E:\\hotelManagementSystem\\wanglele\\src\\assets\\yanzhengma\\a.jpg");  /// 将图片生成到 e盘下面ImageIO.write(image, "jpg", out);}
}
2.控制层的方法
package com.lele.controller;import com.lele.Result.Code;
import com.lele.Result.Result;
import com.lele.util.ImageVerificationCode;
import org.springframework.web.bind.annotation.GetMapping;
import org.springframework.web.bind.annotation.RequestMapping;
import org.springframework.web.bind.annotation.RestController;
import java.awt.image.BufferedImage;
import java.io.IOException;
import java.util.HashMap;
import java.util.Map;@RestController
@RequestMapping("/loginImage")
public class LoginImageController {@GetMapping("/image")public Result getVerifiCode() throws IOException {/*1.生成验证码2.把验证码上的文本存在session中3.把验证码图片发送给客户端*/ImageVerificationCode ivc = new ImageVerificationCode();     //用我们的验证码类,生成验证码类对象
//        System.out.println(ivc);BufferedImage image = ivc.getImage();  //获取验证码
//        System.out.println(image);Map<String, Object> texts = new HashMap<>();texts.put("text", ivc.getText());
//        System.out.println(texts);
//        request.getSession().setAttribute("text", ivc.getText()); //将验证码的文本存在session中ivc.output(image);//将验证码图片响应给客户端 指定地址
//        OutputStream fos = new FileOutputStream("D://a.jpg");
//        System.out.println(fos);Integer code = texts != null ? Code.GET_OK : Code.GET_ERR;String msg = texts != null ? "成功" : "数据查询失败请重试";return new Result(code, texts, msg);}
}
3.前端请求图片
<template><section><!-- 背景颜色 --><div class="color"></div><div class="color"></div><div class="color"></div><div class="box"><!-- 背景圆 --><div class="circle" style="--x:0"></div><div class="circle" style="--x:1"></div><div class="circle" style="--x:2"></div><div class="circle" style="--x:3"></div><div class="circle" style="--x:4"></div><!-- 登录框 --><div class="container"><div class="form"><h2>登录</h2><form><div class="inputBox"><input type="text" v-model="username" placeholder="姓名"></div><div class="inputBox"><input type="password" v-model="password" placeholder="密码"></div><input class="inputBoz" type="text" v-model="key" placeholder="请输入验证码"><a @click="LoginImage()"><img class="yzm_img"style="width: 100px;height: 36px; margin: 20px 0 0 5px;border-radius: 3px;"title="点击刷新验证码" src="../assets/yanzhengma/a.jpg" /></a><div class="inputBox"><input type="submit" @click="login()" value="登录"><!-- <el-button type="success" icon="el-icon-check" circle>管理员</el-button> --></div><p class="forget">忘记密码?<a href="#">点击这里</a></p><p class="forget">没有账户? <router-link :to="{ path: '/register' }">注册</router-link></p><p class="forget">管理员登录 <router-link :to="{ path: '/adminLogin' }">点击这里</router-link></p></form></div></div></div></section>
</template><style scoped>
.inputBoz {margin-top: 15px;width: 130px;padding: 10px 10px;background: rgba(255, 255, 255, 0.2);outline: none;border: none;border-radius: 30px;border: 1px solid rgba(255, 255, 255, 0.5);border-right: 1px solid rgba(255, 255, 255, 0.2);border-bottom: 1px solid rgba(255, 255, 255, 0.2);font-size: 16px;letter-spacing: 1px;color: #fff;box-shadow: 0 5px 15px rgba(0, 0, 0, 0.05);
}/* 清除浏览器默认边距,
使边框和内边距的值包含在元素的width和height内 */* {margin: 0;padding: 0;box-sizing: border-box;
}/* 使用flex布局,让内容垂直和水平居中 */section {/* 相对定位 */position: relative;overflow: hidden;display: flex;justify-content: center;align-items: center;min-height: 100vh;/* linear-gradient() 函数用于创建一个表示两种或多种颜色线性渐变的图片 */background: linear-gradient(to bottom, #f1f4f9, #dff1ff);
}/* 背景颜色 */section .color {/* 绝对定位 */position: absolute;/* 使用filter(滤镜) 属性,给图像设置高斯模糊*/filter: blur(200px);
}/* :nth-child(n) 选择器匹配父元素中的第 n 个子元素 */section .color:nth-child(1) {top: -350px;width: 600px;height: 600px;background: #ff359b;
}section .color:nth-child(2) {bottom: -150px;left: 100px;width: 500px;height: 500px;background: #fffd87;
}section .color:nth-child(3) {bottom: 50px;right: 100px;width: 500px;height: 500px;background: #00d2ff;
}.box {position: relative;
}/* 背景圆样式 */.box .circle {position: absolute;background: rgba(255, 255, 255, 0.1);/* backdrop-filter属性为一个元素后面区域添加模糊效果 */backdrop-filter: blur(5px);box-shadow: 0 25px 45px rgba(0, 0, 0, 0.1);border: 1px solid rgba(255, 255, 255, 0.5);border-right: 1px solid rgba(255, 255, 255, 0.2);border-bottom: 1px solid rgba(255, 255, 255, 0.2);border-radius: 50%;/* 使用filter(滤镜) 属性,改变颜色。hue-rotate(deg)  给图像应用色相旋转 calc() 函数用于动态计算长度值 var() 函数调用自定义的CSS属性值x*/filter: hue-rotate(calc(var(--x) * 70deg));/* 调用动画animate,需要10s完成动画,linear表示动画从头到尾的速度是相同的,infinite指定动画应该循环播放无限次*/animation: animate 10s linear infinite;/* 动态计算动画延迟几秒播放 */animation-delay: calc(var(--x) * -1s);
}/* 背景圆动画 */@keyframes animate {0%,100% {transform: translateY(-50px);}50% {transform: translateY(50px);}
}.box .circle:nth-child(1) {top: -50px;right: -60px;width: 100px;height: 100px;
}.box .circle:nth-child(2) {top: 150px;left: -100px;width: 120px;height: 120px;z-index: 2;
}.box .circle:nth-child(3) {bottom: 50px;right: -60px;width: 80px;height: 80px;z-index: 2;
}.box .circle:nth-child(4) {bottom: -80px;left: 100px;width: 60px;height: 60px;
}.box .circle:nth-child(5) {top: -80px;left: 140px;width: 60px;height: 60px;
}/* 登录框样式 */.container {position: relative;width: 400px;min-height: 400px;background: rgba(255, 255, 255, 0.1);display: flex;justify-content: center;align-items: center;backdrop-filter: blur(5px);box-shadow: 0 25px 45px rgba(0, 0, 0, 0.1);border: 1px solid rgba(255, 255, 255, 0.5);border-right: 1px solid rgba(255, 255, 255, 0.2);border-bottom: 1px solid rgba(255, 255, 255, 0.2);
}.form {position: relative;width: 100%;height: 100%;padding: 50px;
}/* 登录标题样式 */.form h2 {position: relative;color: #fff;font-size: 24px;font-weight: 600;letter-spacing: 5px;margin-bottom: 30px;cursor: pointer;
}/* 登录标题的下划线样式 */.form h2::before {content: "";position: absolute;left: 0;bottom: -10px;width: 0px;height: 3px;background: #fff;transition: 0.5s;
}.form h2:hover:before {width: 53px;
}.form .inputBox {width: 100%;margin-top: 20px;
}/* 输入框样式 */.form .inputBox input {width: 100%;padding: 10px 20px;background: rgba(255, 255, 255, 0.2);outline: none;border: none;border-radius: 30px;border: 1px solid rgba(255, 255, 255, 0.5);border-right: 1px solid rgba(255, 255, 255, 0.2);border-bottom: 1px solid rgba(255, 255, 255, 0.2);font-size: 16px;letter-spacing: 1px;color: #fff;box-shadow: 0 5px 15px rgba(0, 0, 0, 0.05);
}.form .inputBox input::placeholder {color: #fff;
}/* 登录按钮样式 */.form .inputBox input[type="submit"] {background: #fff;color: #666;max-width: 100px;margin-bottom: 20px;font-weight: 600;cursor: pointer;
}.forget {margin-top: 6px;color: #fff;letter-spacing: 1px;
}.forget a {color: #fff;font-weight: 600;text-decoration: none;
}
</style><script>
import jwt_decode from 'jwt-decode';
export default {data() {return {message: "你好Vue.js",username: "admin",password: "1234",key: '',maps: []}},methods: {login() {if (this.maps.text === this.key) {// alert("你好")// http://localhost:3000/client// http://localhost:80/customer/loginfetch('http://localhost:80/customer/login', {method: 'post',headers: {'Content-Type': 'application/json'},body: JSON.stringify({username: this.username,password: this.password})}).then(response => response.json()).then(data => {console.log(data.data)// const jwt_decode = require('jwt-decode');// const decodeToken = jwt_decode(JSON.stringify(data.data));// JSON.parse(data.data)// const s = JSON.stringify(data.data);// console.log(s)// console.log("++++++++++++++++++"+decodeToken)// eyJ0eXAiOiJKV1QiLCJhbGciOiJIUzI1NiJ9// const decodeToken = jwt_decode(data.data);// console.log(decodeToken)// const s = sessionStorage.getItem('token')// console.log(s)// const s = sessionStorage.getItem('token')//     const decodeToken = jwt_decode(s);//     console.log(decodeToken)// if (data.data.username == this.username && data.data.password == this.password) {//     // alert("已经成功了" + this.username);//     this.open2(data.data.username);//     console.log('data>', data.data);//     localStorage.setItem("token", JSON.stringify(data.data))//     this.$store.commit('savePhone', data.data)// }//登录验证失败,显示错误信息,成功将token信息存⼊sessionStorageif (data.code !== 20040) {this.$notify({title: '警告',message: 'data.msg',type: 'warning'});} else {this.open2();// sessionStorage.setItem("token",data);// 存储到绘画存储// sessionStorage.setItem('token', JSON.stringify(data.data))sessionStorage.setItem('token', data.data)const s = sessionStorage.getItem('token')// 用jwt 解密信息const decodeToken = jwt_decode(s);// 存储到本地存储localStorage.setItem("token", JSON.stringify(decodeToken))this.$store.commit('savePhone', decodeToken)// window.sessionStorage.setItem('token', JSON.stringify(data.data))// let content = JSON.parse(sessionStorage.getItem('token').username)// sessionStorage.setItem("token",s);// this.username = content// location.href = "main.html"setTimeout(() => { this.$router.push({ path: '/main' }); }, 2000);  //5秒后将会调用执行remind()函数}// push 实现前进和后退的效果// alert(data.message);// if (data.success) {//     // 要把身份信息存储在本地//     // 本地存储 H5新特性 网页任何地方都可以存储一下//     window.localStorage.setItem("loinkey", JSON.Stringify(data.data));//     window.location.href = "main.html"//     this.$store.commit('savePhone',)// }})} else {this.$message({message: '验证码错误',type: 'error',})}},open2() {this.$message({message: '恭喜,成功登录',type: 'success'});},LoginImage() {fetch('http://localhost:80/loginImage/image', {method: 'get',headers: {'Content-Type': 'application/json',},}).then(response => response.json()).then(data => {console.log(data)if (data.code == 20041) {this.$message({message: '更换成功',type: 'success',})this.maps = data.data} else {this.$message({message: '更换失败',type: 'error'})}console.log(data.data.text)console.log(this.maps.text)}).catch((error) => {console.error('Error:', error);});}}}</script>
ssm方法
1、图片生成实体类:
package com.hexianwei.graphic;import java.awt.Color;
import java.awt.Font;
import java.awt.Graphics2D;
import java.awt.image.BufferedImage;
import java.io.FileNotFoundException;
import java.io.FileOutputStream;
import java.io.IOException;
import java.io.OutputStream;
import java.util.Random;import javax.imageio.ImageIO;public class ImageVerificationCode {private int weight = 100;           //验证码图片的长和宽private int height = 40;private String text;                //用来保存验证码的文本内容private Random r = new Random();    //获取随机数对象//private String[] fontNames = {"宋体", "华文楷体", "黑体", "微软雅黑", "楷体_GB2312"};   //字体数组//字体数组private String[] fontNames = {"Georgia"};//验证码数组private String codes = "23456789abcdefghjkmnopqrstuvwxyzABCDEFGHJKMNPQRSTUVWXYZ";/*** 获取随机的颜色** @return*/private Color randomColor() {int r = this.r.nextInt(225);  //这里为什么是225,因为当r,g,b都为255时,即为白色,为了好辨认,需要颜色深一点。int g = this.r.nextInt(225);int b = this.r.nextInt(225);return new Color(r, g, b);            //返回一个随机颜色}/*** 获取随机字体** @return*/private Font randomFont() {int index = r.nextInt(fontNames.length);  //获取随机的字体String fontName = fontNames[index];int style = r.nextInt(4);         //随机获取字体的样式,0是无样式,1是加粗,2是斜体,3是加粗加斜体int size = r.nextInt(10) + 24;    //随机获取字体的大小return new Font(fontName, style, size);   //返回一个随机的字体}/*** 获取随机字符** @return*/private char randomChar() {int index = r.nextInt(codes.length());return codes.charAt(index);}/*** 画干扰线,验证码干扰线用来防止计算机解析图片** @param image*/private void drawLine(BufferedImage image) {int num = r.nextInt(10); //定义干扰线的数量Graphics2D g = (Graphics2D) image.getGraphics();for (int i = 0; i < num; i++) {int x1 = r.nextInt(weight);int y1 = r.nextInt(height);int x2 = r.nextInt(weight);int y2 = r.nextInt(height);g.setColor(randomColor());g.drawLine(x1, y1, x2, y2);}}/*** 创建图片的方法** @return*/private BufferedImage createImage() {//创建图片缓冲区BufferedImage image = new BufferedImage(weight, height, BufferedImage.TYPE_INT_RGB);//获取画笔Graphics2D g = (Graphics2D) image.getGraphics();//设置背景色随机g.setColor(new Color(255, 255, r.nextInt(245) + 10));g.fillRect(0, 0, weight, height);//返回一个图片return image;}/*** 获取验证码图片的方法** @return*/public BufferedImage getImage() {BufferedImage image = createImage();Graphics2D g = (Graphics2D) image.getGraphics(); //获取画笔StringBuilder sb = new StringBuilder();for (int i = 0; i < 4; i++)             //画四个字符即可{String s = randomChar() + "";      //随机生成字符,因为只有画字符串的方法,没有画字符的方法,所以需要将字符变成字符串再画sb.append(s);                      //添加到StringBuilder里面float x = i * 1.0F * weight / 4;   //定义字符的x坐标g.setFont(randomFont());           //设置字体,随机g.setColor(randomColor());         //设置颜色,随机g.drawString(s, x, height - 5);}this.text = sb.toString();drawLine(image);return image;}/*** 获取验证码文本的方法** @return*/public String getText() {return text;}public static void output(BufferedImage image, OutputStream out) throws IOException                  //将验证码图片写出的方法{ImageIO.write(image, "JPEG", out);}
}
2、在控制器中把图片响应给前端页面(ssm框架)
@RequestMapping("getVerifiCode")@ResponseBodypublic void getVerifiCode(HttpServletRequest request, HttpServletResponse response) throws IOException {/*1.生成验证码2.把验证码上的文本存在session中3.把验证码图片发送给客户端*/ImageVerificationCode ivc = new ImageVerificationCode(); //用我们的验证码类,生成验证码类对象BufferedImage image = ivc.getImage(); //获取验证码request.getSession().setAttribute("text", ivc.getText()); //将验证码的文本存在session中ivc.output(image, response.getOutputStream());//将验证码图片响应给客户端}3、从session获得验证码字符(ssm框架)
@RequestMapping("Login_authentication")@ResponseBodypublic String Login_authentication(HttpServletRequest request,HttpServletResponse response) throws IOException, ServletException {request.setCharacterEncoding("utf-8");String session_vcode=(String) request.getSession().getAttribute("text"); //从session中获取真正的验证码return session_vcode;}4、前端请求图片
<a href="javascript:getVerifiCode()"><img id="yzm_img" style="cursor:pointer;width: 100px;height: 36px;margin: 5px 0 0 5px;border-radius: 3px;" title="点击刷新验证码" src="Mcake/getVerifiCode"/>
</a>
function getVerifiCode() {$("#yzm_img").prop('src','Mcake/getVerifiCode?a='+new Date().getTime());
}