1、Spring AOP简介
1、什么是AOP
1、定义阐述
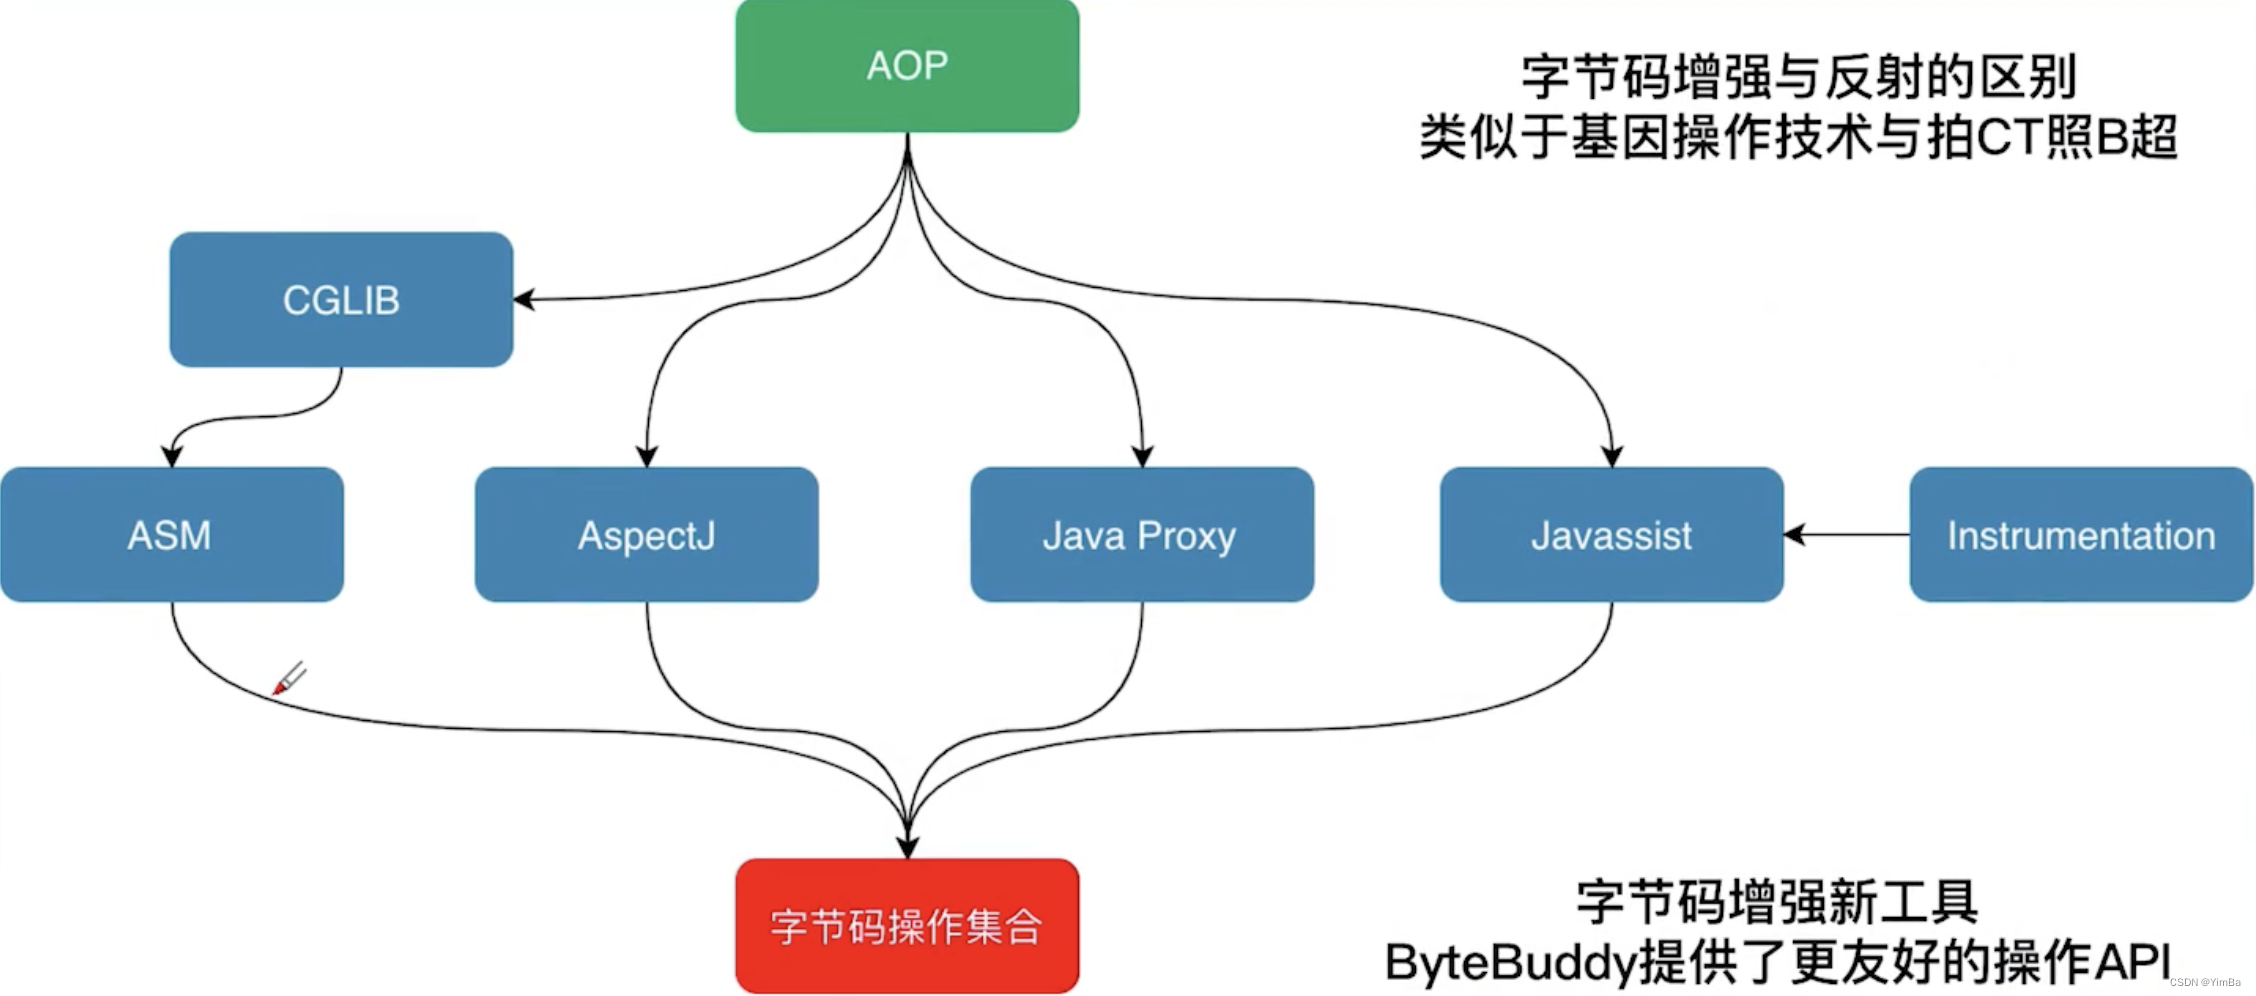
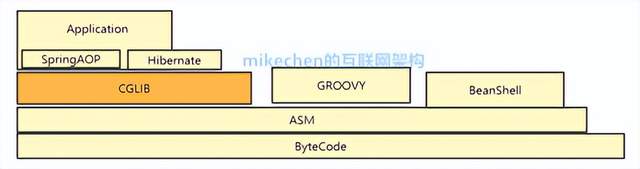
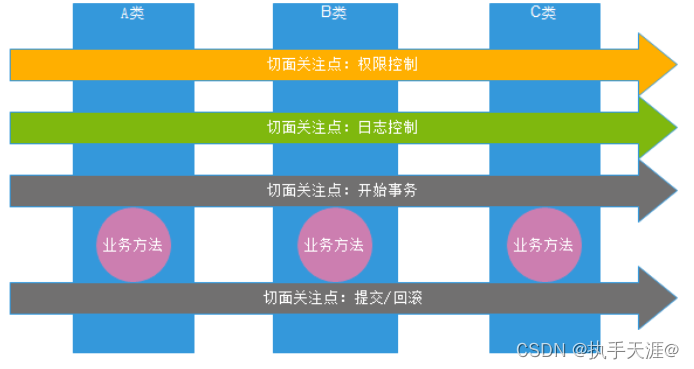
AOP的全称是 Aspect Oriented Programming,是面向切面编程的技术,把一个个的横切关注点放到某个模块中去,称之为切面。那么每一个的切面都能影响业务的某一种功能,切面的目的就是功能增强,如日志切面就是一个横切关注点,应用中许多方法需要做日志记录的只需要插入日志的切面即可。(动态代理就可以实现 AOP),这种面向切面编程的思想就是 AOP 思想了。
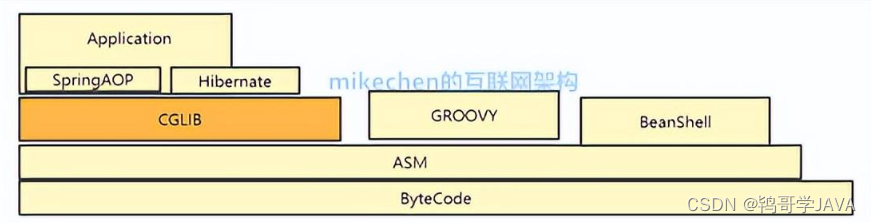
2、图示
3、好处
- AOP 能够将那些与业务无关,却为业务模块所共同调用的逻辑或责任(例如事务处理、日志管理、权限控制等)封装起来。
- 减少代码重复。
- 降低模块之间的耦合度,有利于维护和拓展。
2、AOP术语
- Aspect:切面,在实际应用中,通常指的是封装的用于横向插入系统功能的类。该类要被Spring容器识别为切面,需要在配置文件中进行指定。
- Joinpoint:连接点,一般指的是要被增强的方法。
- Pointcut:切入点,哪些包中的哪些类中的哪些方法想加增强方法。
- Advice:(增强或通知处理):AOP框架在特定的切入点执行的增强处理。也就是在什么时候做什么增强处理。
- Target Object(目标对象):是指所有被通知的对象,也称为被增强的对象,如果使用的动态的AOP实现,该对象是一个代理对象。
- Proxy:代理:将通知应用到目标对象之后,被动创建代理对象。
- Weaving:织入:将切面代码插入到目标对象之上,从而产生代理对象的过程。
3、AspectJ开发
1、什么是AspecJ
AspectJ 是一个面向切面的框架,它扩展了Java 语言(即使用 Java 对 AOP 进行了实现)。
2、AspectJ 切入点语法

3、切入点语法通配符
- *:匹配任何部分,只能表示一个单词。
..: 可用于全限定名中和方法参数中,分别表示子包和 0 到 N 个参数。
4、举例
// 注意第一个星符号后面有空格
execution(* cn.wolfcode.ssm.service.impl.*ServiceImpl.*(..))
4、基于XML配置的声明式AspectJ
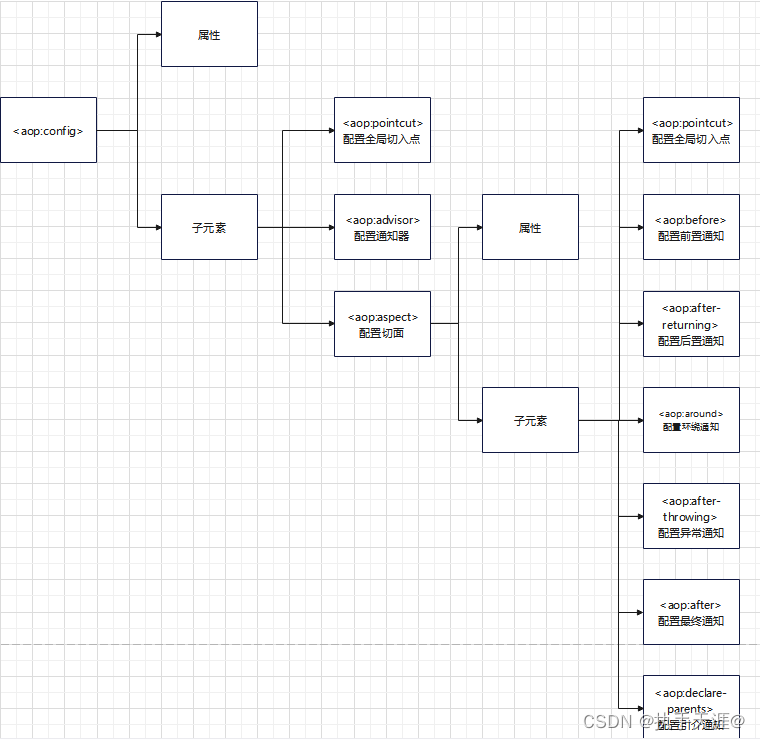
1、<aop:config>元素及其子元素
2、创建一个Maven项目导入如下依赖
<dependencies><dependency><groupId>org.springframework</groupId><artifactId>spring-context</artifactId><version>5.0.8.RELEASE</version></dependency><dependency><groupId>org.springframework</groupId><artifactId>spring-test</artifactId><version>5.0.8.RELEASE</version><scope>test</scope></dependency><dependency><groupId>junit</groupId><artifactId>junit</artifactId><version>4.12</version><scope>test</scope></dependency><dependency><groupId>org.aspectj</groupId><artifactId>aspectjweaver</artifactId><version>1.8.13</version></dependency></dependencies>
4、提供一个service接口
package cn.simplelife.service;/*** @ClassName IEmployeeService* @Description* @Author simplelife* @Date 2022/11/23 10:50* @Version 1.0*/public interface IEmployeeService {void save(String name, String password);
}
5、书写接口实现类
package cn.simplelife.service.impl;import cn.simplelife.service.IEmployeeService;/*** @ClassName IEmployeeServiceImpl* @Description* @Author simplelife* @Date 2022/11/23 10:51* @Version 1.0*/public class IEmployeeServiceImpl implements IEmployeeService {@Overridepublic void save(String name, String password) {System.out.println("保存:" + name + " " + password);}
}
6、书写增强方法
package cn.simplelife.utils;/*** @ClassName MyTransactionManger* @Description* @Author simplelife* @Date 2022/11/23 10:52* @Version 1.0*/public class MyTransactionManger {public void begin() {System.out.println("开启事务");}public void commit() {System.out.println("提交事务");}public void rollback() {System.out.println("回滚事务");}
}
7、书写配置
<?xml version="1.0" encoding="UTF-8"?>
<beans xmlns="http://www.springframework.org/schema/beans"xmlns:xsi="http://www.w3.org/2001/XMLSchema-instance" xmlns:aop="http://www.springframework.org/schema/aop"xsi:schemaLocation="http://www.springframework.org/schema/beans http://www.springframework.org/schema/beans/spring-beans.xsd http://www.springframework.org/schema/aop http://www.springframework.org/schema/aop/spring-aop.xsd"><!--配置事务管理器对象--><bean id="myTransactionManger" class="cn.simplelife.utils.MyTransactionManger"/><!--配置业务对象:此时的对象不再是真实对象,而是springAOP创建的代理对象--><bean id="employeeService" class="cn.simplelife.service.impl.IEmployeeServiceImpl"/><!--AOP配置 WHERE WHEN WHAT proxy-target-class="true" 改用底层使用CJLB动态代理--><aop:config><!--切面配置ref:将事务管理与切面关联--><aop:aspect ref="myTransactionManger"><!--切入点配置--><aop:pointcut id="txPointcut" expression="execution(* cn.simplelife.service.impl.*ServiceImpl.*(..))"/><!-- 关联三者:在业务方法执行之前,在容器中找到myTransactionManger对象,调用其begin方法--><aop:before pointcut-ref="txPointcut" method="begin"/><!-- 关联三者:在业务方法执行正常执行,在容器中找到myTransactionManger对象,调用其commit方法--><aop:after-returning pointcut-ref="txPointcut" method="commit"/><!-- 关联三者:在业务方法抛出异常之后,在容器中找到myTransactionManger对象,调用其rollback方法--><aop:after-throwing pointcut-ref="txPointcut" method="rollback" /></aop:aspect></aop:config>
</beans>
8、编写测试类
package cn.simplelife.service.impl;import cn.simplelife.service.IEmployeeService;
import org.junit.Test;
import org.junit.runner.RunWith;
import org.springframework.beans.factory.annotation.Autowired;
import org.springframework.test.context.ContextConfiguration;
import org.springframework.test.context.junit4.SpringJUnit4ClassRunner;import static org.junit.Assert.*;/*** @ClassName IEmployeeServiceImplTest* @Description* @Author simplelife* @Date 2022/11/23 11:05* @Version 1.0*/@RunWith(SpringJUnit4ClassRunner.class)
@ContextConfiguration("classpath:applicationContext.xml")
public class IEmployeeServiceImplTest {@Autowiredprivate IEmployeeService iEmployeeService;@Testpublic void save() {System.out.println(iEmployeeService.getClass());iEmployeeService.save("张三", "123456");}
}
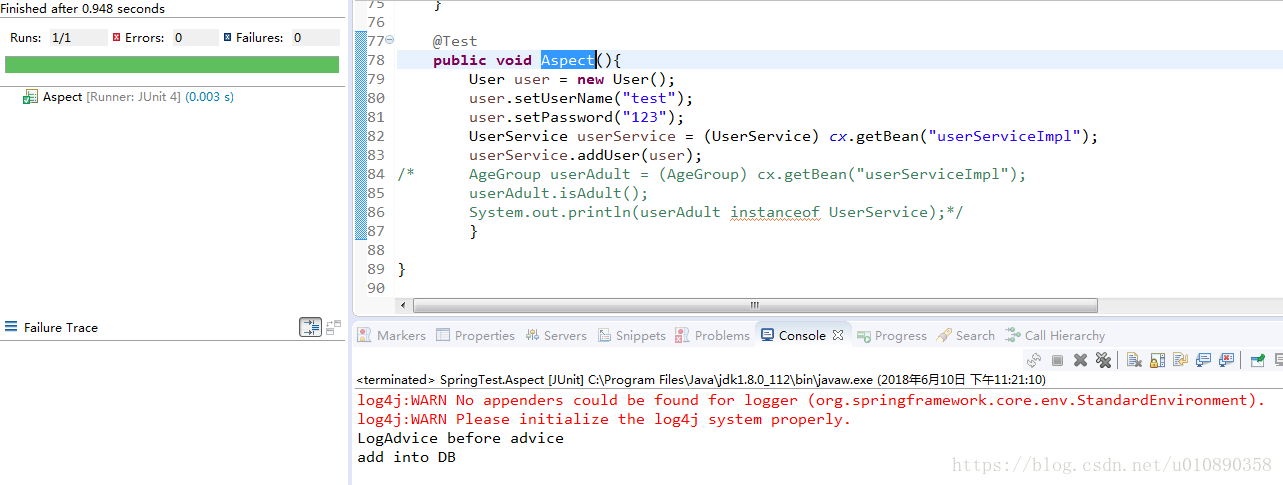
9、测试结果
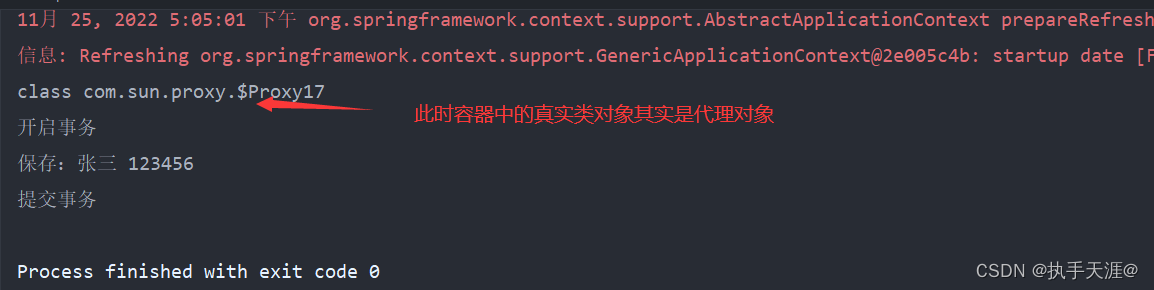
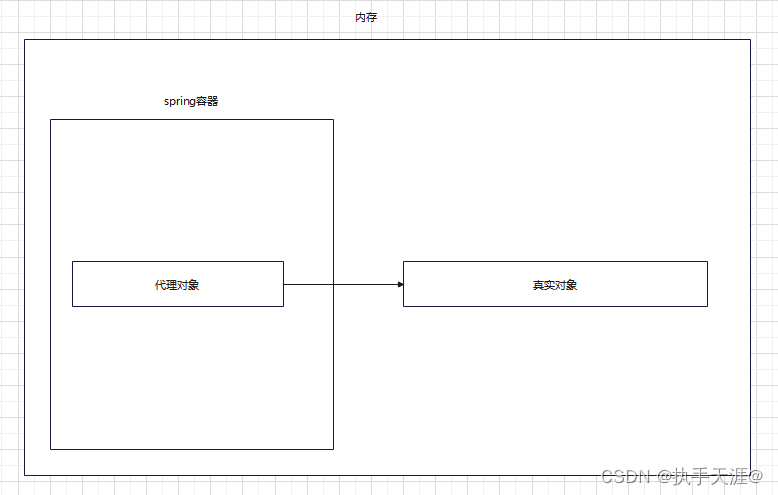
内存解释:
5、基于注解配置AOP
2、创建一个Maven项目导入如下依赖
<dependencies><dependency><groupId>org.springframework</groupId><artifactId>spring-context</artifactId><version>5.0.8.RELEASE</version></dependency><dependency><groupId>org.springframework</groupId><artifactId>spring-test</artifactId><version>5.0.8.RELEASE</version><scope>test</scope></dependency><dependency><groupId>junit</groupId><artifactId>junit</artifactId><version>4.12</version><scope>test</scope></dependency><dependency><groupId>org.aspectj</groupId><artifactId>aspectjweaver</artifactId><version>1.8.13</version></dependency></dependencies>
4、提供一个service接口
package cn.simplelife.service;/*** @ClassName IEmployeeService* @Description* @Author simplelife* @Date 2022/11/23 10:50* @Version 1.0*/public interface IEmployeeService {void save(String name, String password);
}
5、书写接口实现类
package cn.simplelife.service.impl;import cn.simplelife.service.IEmployeeService;/*** @ClassName IEmployeeServiceImpl* @Description* @Author simplelife* @Date 2022/11/23 10:51* @Version 1.0*/
@Service
public class IEmployeeServiceImpl implements IEmployeeService {@Overridepublic void save(String name, String password) {System.out.println("保存:" + name + " " + password);}
}
6、书写增强方法
package cn.simplelife.utils;import org.aspectj.lang.annotation.*;
import org.springframework.stereotype.Component;/*** @ClassName MyTransactionManger* @Description* @Author simplelife* @Date 2022/11/23 10:52* @Version 1.0*/@Component
@Aspect
public class MyTransactionManger {@Pointcut("execution(* cn.simplelife.service.impl.*ServiceImpl.*(..))")public void txPoint() {}@Before("txPoint()")public void begin() {System.out.println("开启事务");}@AfterReturning("txPoint()")public void commit() {System.out.println("提交事务");}@AfterThrowing("txPoint()")public void rollback() {System.out.println("回滚事务");}
}
7、配置文件修改
<?xml version="1.0" encoding="UTF-8"?>
<beans xmlns="http://www.springframework.org/schema/beans"xmlns:xsi="http://www.w3.org/2001/XMLSchema-instance" xmlns:aop="http://www.springframework.org/schema/aop"xmlns:context="http://www.springframework.org/schema/context"xsi:schemaLocation="http://www.springframework.org/schema/beans http://www.springframework.org/schema/beans/spring-beans.xsd http://www.springframework.org/schema/aop http://www.springframework.org/schema/aop/spring-aop.xsd http://www.springframework.org/schema/context http://www.springframework.org/schema/context/spring-context.xsd"><!--配置Ioc di注解解析器--><context:component-scan base-package="cn.simplelife"/><!--配置AOP的注解解析器--><aop:aspectj-autoproxy />
</beans>
8、书写测试类
package cn.simplelife.service.impl;import cn.simplelife.service.IEmployeeService;
import org.junit.Test;
import org.junit.runner.RunWith;
import org.springframework.beans.factory.annotation.Autowired;
import org.springframework.test.context.ContextConfiguration;
import org.springframework.test.context.junit4.SpringJUnit4ClassRunner;import static org.junit.Assert.*;/*** @ClassName IEmployeeServiceImplTest* @Description* @Author simplelife* @Date 2022/11/23 11:05* @Version 1.0*/@RunWith(SpringJUnit4ClassRunner.class)
@ContextConfiguration("classpath:applicationContext.xml")
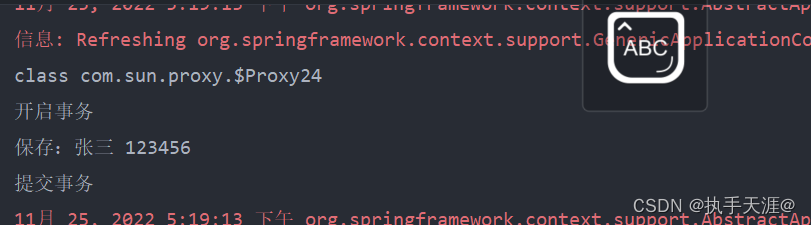
public class IEmployeeServiceImplTest {@Autowiredprivate IEmployeeService iEmployeeService;@Testpublic void save() {System.out.println(iEmployeeService.getClass());iEmployeeService.save("张三", "123456");}
}
9、测试结果
10、相关注解解释
| 注解 | 描述 |
|---|---|
| @Aspect | 用于定义一个切面 |
| @Pointcut | 用于定义切点表达式 |
| @Before | 用于定义前置通知 |
| @AfterReturning | 用于定义后置通知 |
| @AfterThrowing | 用于定义异常时通知 |
| @Around | 用于定义环绕通知 |
| @After | 用于定义最终通知 |