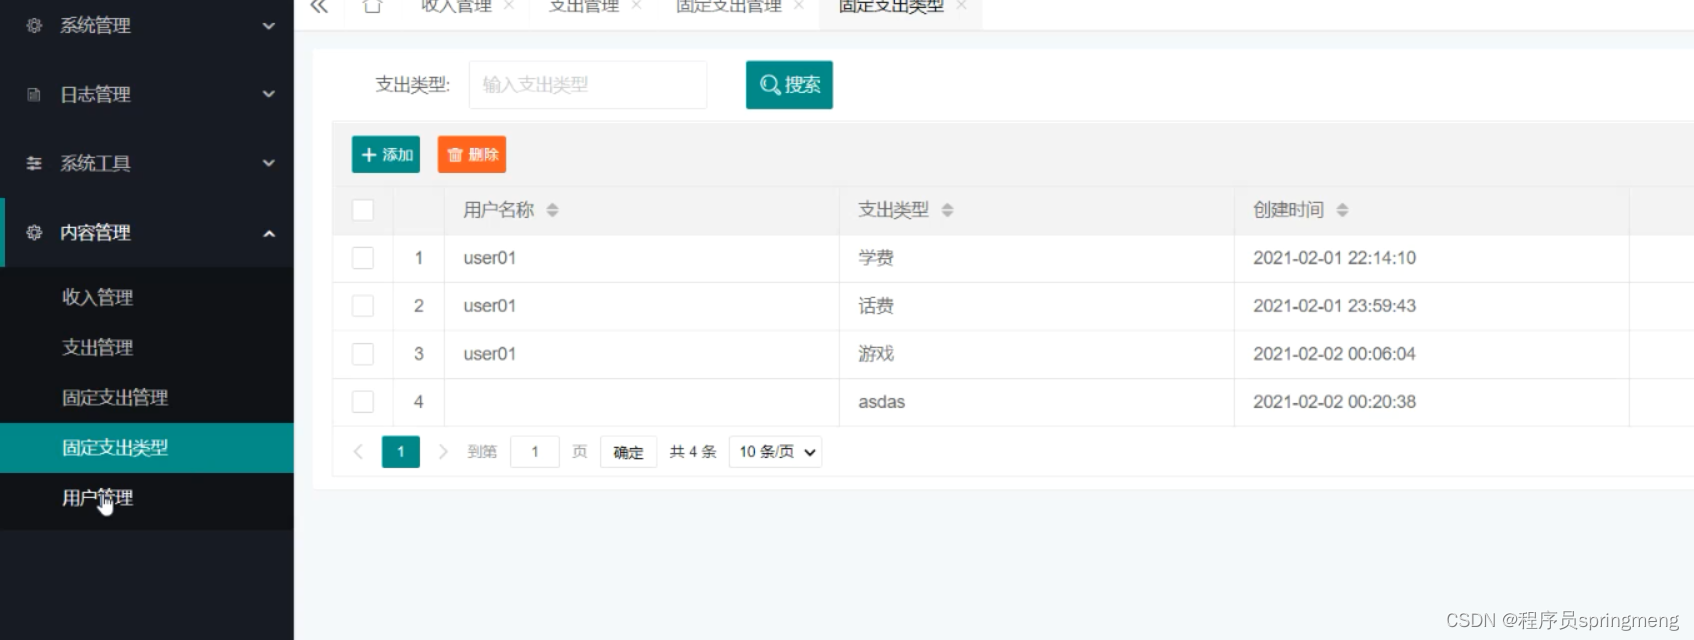
作为首页,肯定在打开网址后就看得到对应信息。那么作为APP管理平台,这个信息自然而然的表现成了APP列表。那么依据现有各大应用市场需要分为已上线和未上线。但是在实际做的时候没有区分,这次项目中将所有新增的APP都展示了。区分布局就决定了上下,上面是个TAB,用于切换;下面是个LIST,用于展示列表。
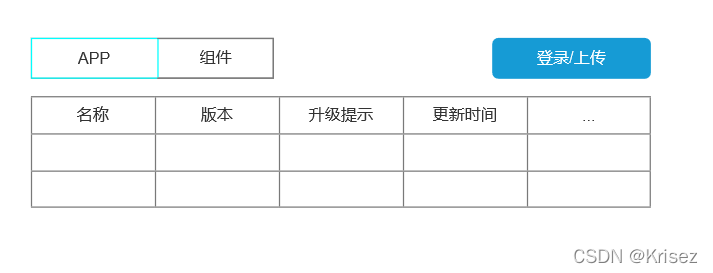
APP顾名思义就是上传的各种APP数据,组件是团队内部使用的nexus仓库上的自构仓库,由于APP业务是组件化,所以存在业务组件和功能组件,但是组件数量太多,所以就顺便挂了出来,并且查看最新版本也相较于方便了(做个归纳)。
那么,利用React的特性拆分一下,分为Top,MainList,和Home
export default function Home () {return (<div><PageTop /><MainList /></div>)
}
在顶层只有一个菜单和登录按钮(如果已经登录就是上传按钮),这里用cookie是否包含userId信息为区分
//import { AppstoreOutlined, AppstoreAddOutlined } from '@ant-design/icons';
function PageTop (props) {//import { useNavigate } from 'react-router-dom';//获取路由组件,通过之前的APP.js定义的进行路由跳转var navigate = useNavigate();//这里的路由将在后面篇章说明,本章只处理首页const loginBtn = (!cookie.get("userId")) ?<Button onClick={() => navigate('/login')}>登录</Button> :<Button onClick={() => navigate('/upload')}>上传</Button>;return (<div className='top'><MenuselectedKeys='app'mode="horizontal"className='topMenu'><Menu.Item key="app" icon={<AppstoreOutlined />}>APP</Menu.Item><Menu.Item key="module" icon={<AppstoreAddOutlined />}>组件</Menu.Item></Menu><div className='loginOrUpload'>{loginBtn}</div></div>)
}
import cookie from 'js-cookie';//获取cookie的组件库 — 地址
npm i js-cookie
npm start 一下,样子已经有了。
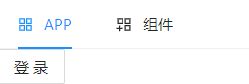
诶,登录应该与菜单在同一条线上,那么就需要将整个布局改成横的。
.top {display: flex;margin :10px;
}

发现菜单的显示有问题,猜测应该是组件的宽度有问题,并且将top改成了flex的显示方式,那么子元素也改成flex的相关方式。
.topMenu{flex: auto;
}.loginOrUpload button{width: 64px;height: 36px;margin: 2px;
}

代码中看到Menu已经设置了相关配置,由于需要与MainList数据联动,因此相关处理参数由上层组件传递下来,也就是Home
function PageTop(props){...//这里通过props传递进来<MenuonClick={props.onClick}selectedKeys={[props.type]}mode="horizontal"...
}export default function Home () {const [type, setType] = useState('app');const handleMenu = e => {setType(e.key);//e为Menu传递回的Item信息}return (<div><PageTop type={type}onClick={handleMenu}/><MainList /></div>)
}
运行一下,点击Menu正常表现。
接下来列表的展示了,Antd有个Table组件,用进来。
function MainList (props) {const list = props.mainList;const appColums = [{title: '名字',dataIndex: 'name',key: 'name'},{title: '版本',dataIndex: 'appVersion',key: 'appVersion'},{title: '业务线条',dataIndex: 'business',key: 'business'},{title: '操作',dataIndex: 'id',key: 'op',width: 400,render: (text, record) => {let id = record.id;return (<div><Button onClick={() =>navigate('/detail/' + id)} type='link'>详情</Button><Button type='link' href={record.downloadUrl}>下载</Button></div>)}}];const handleKey = record => {return record.id}return (<Table columns={appColums} dataSource={list} bordered={true} rowKey={handleKey} className='mainTable' />)
}
只需要这样按照官网文档塞数据就好了,展示效果:

列表数据是通过props.list传递进来的,也就是在上一层,那也需要处理下。
export default function Home () {
...const [mainList, setMainList] = useState([]);const handleMenu = e => {setMainList([]);//重置数据,防止切换的时候会有上一个数据遗留的动效...}...<MainList mainList={mainList} type={type} />
...
}
如此将列表和菜单给联系起来了,接着就是写网络请求,将数据加载出来。
export default function Home () {
...const handleMenu = e => {setMainList([]);//重置数据,防止切换的时候会有上一个数据遗留的动效setType(e.key);didMount(e.key);//加载数据}const didMount = (t) => {fetch("/api/" + t + "/list").then(response => response.json()).then(json => {setMainList(json.detail.list)}).catch(e => setMainList([]));}
...
}
//请求结束了,那在列表那也需要处理两种列表
function MainList (props) {
...const moduleColumns = [{title: 'GroupId',dataIndex: 'groupId',key: 'groupId'},{title: 'ArtifactId',dataIndex: 'artifactId',key: 'artifactId'},{title: '版本',dataIndex: 'version',key: 'version'},{title: '更新时间',dataIndex: 'updateTime',key: 'updateTime',}];...//更改确定columns用的具体索引方式return (<Table columns={props.type === 'app' ? appColums : moduleColumns} dataSource={list} pagination={{ pageSize: 100 }} bordered={true} rowKey={handleKey} className='mainTable' />)
...
}
然后现在点击App / Module 两个按钮将请求不同的数据,

如此。整个首页就有了菜单,登录按钮,列表三个元素,接下来就是用户信息了,需要登录后才能进行具体的操作嘛。
前端篇●二