redis软件下载地址:Redis
redis支持的数据类型:
• 字符串(strings)
• 散列(hashes)
• 列表(lists)
• 集合(sets)
• 有序集合(sorted sets)
redis常用命令:
| config get * | 查看配置 |
| select 1 | 选择数据库 |
| flushdb | 清空当前数据库 |
| flushall | 清空所有数据库 |
| move key 1 | 移动key |
| del key | 删除 |
| rename oldkey newkey | 改名 |
| expire key 10 | 设置过期时间 |
| persist key | 设置持久化 |
| keys user* | 查询 |
| exists key | 判断是否存在 |
主从复制
[root@server1 ~]# scp westos@172.25.52.250:/home/westos/Downloads/qq-files/3459494803/file_recv/redis-6.2.4.tar.gz .
westos@172.25.52.250's password:
redis-6.2.4.tar.gz                                               100% 2400KB  74.1MB/s   00:00
[root@server1 ~]# tar -zxvf redis-6.2.4.tar.gz
[root@server1 ~]# cd redis-6.2.4/
[root@server1 redis-6.2.4]# ls
[root@server1 redis-6.2.4]# make
[root@server1 redis-6.2.4]# make install

[root@server1 redis-6.2.4]# vim utils/install_server.sh ###将78-84行注释掉
[root@server1 redis-6.2.4]# cd utils/
[root@server1 utils]# ./install_server.sh ##执行脚本
Welcome to the redis service installer
This script will help you easily set up a running redis serverPlease select the redis port for this instance: [6379]
Selecting default: 6379
Please select the redis config file name [/etc/redis/6379.conf]
Selected default - /etc/redis/6379.conf
Please select the redis log file name [/var/log/redis_6379.log]
Selected default - /var/log/redis_6379.log
Please select the data directory for this instance [/var/lib/redis/6379]
Selected default - /var/lib/redis/6379
Please select the redis executable path [/usr/local/bin/redis-server]
Selected config:
Port           : 6379
Config file    : /etc/redis/6379.conf
Log file       : /var/log/redis_6379.log
Data dir       : /var/lib/redis/6379
Executable     : /usr/local/bin/redis-server
Cli Executable : /usr/local/bin/redis-cli
Is this ok? Then press ENTER to go on or Ctrl-C to abort.
Copied /tmp/6379.conf => /etc/init.d/redis_6379
Installing service...
Successfully added to chkconfig!
Successfully added to runlevels 345!
Starting Redis server...
Installation successful!
[root@server1 utils]# ls
build-static-symbols.tcl  hyperloglog            speed-regression.tcl
cluster_fail_time.tcl     install_server.sh      srandmember
corrupt_rdb.c             lru                    systemd-redis_multiple_servers@.service
create-cluster            redis-copy.rb          systemd-redis_server.service
generate-command-help.rb  redis_init_script      tracking_collisions.c
gen-test-certs.sh         redis_init_script.tpl  whatisdoing.sh
graphs                    redis-sha1.rb
hashtable                 releasetools
[root@server1 utils]# cd /etc/redis/
[root@server1 redis]# ls
6379.conf
[root@server1 redis]# vim 6379.conf 76 bind 0.0.0.0
[root@server1 redis]# /etc/init.d/redis_6379 restart
Stopping ...
Redis stopped
Starting Redis server...
[root@server1 redis]# netstat -anttlp
[root@server1 redis-6.2.4]# redis-cli ###登陆 

 在server2中:
[root@server2 ~]# tar -zxvf redis-6.2.4.tar.gz
[root@server2 ~]# cd redis-6.2.4/
[root@server2 redis-6.2.4]# make[root@server2 redis-6.2.4]# ls
[root@server2 redis-6.2.4]# make install[root@server2 redis-6.2.4]# vim utils/install_server.sh ###将其注释


[root@server2 utils]# ./install_server.sh ##执行脚本

[root@server2 utils]# cd /etc/redis/
[root@server2 redis]# ls
6379.conf
[root@server2 redis]# vim 6379.conf 76 bind 0.0.0.0479 replicaof 172.25.52.1 6379[root@server2 redis]# /etc/init.d/redis_6379 restart
Stopping ...
Redis stopped
Starting Redis server...
[root@server2 redis]# netstat -anttlp


测试:


[root@server1 redis-6.2.4]# ps aux | grep redis
root      8266  0.1  0.4 198016 10100 ?        Ssl  10:36   0:04 /usr/local/bin/redis-server 0.0.0.0:6379
root      8307  0.0  0.0 112708   972 pts/0    R+   11:32   0:00 grep --color=auto redis
[root@server1 redis-6.2.4]# /etc/init.d/redis_6379 stopn    ###stop停止
Stopping ...
Redis stopped
[root@server1 redis-6.2.4]# cat /var/log/redis_6379.log ##查看日志

将server3也添加slave
在server2中:
[root@server2 ~]# scp redis-6.2.4.tar.gz server3: ##传给server3

在server3中:
[root@server3 ~]# tar zxf redis-6.2.4.tar.gz
[root@server3 ~]# yum install -y gcc make
[root@server3 ~]# ls
anaconda-screenshots  redis-6.2.4  redis-6.2.4.tar.gz
[root@server3 ~]# cd redis-6.2.4/
[root@server3 redis-6.2.4]# make && make install
[root@server3 redis-6.2.4]# cd utils/
[root@server3 utils]# vim install_server.sh    ####注释78 #if [ "${_pid_1_exe##*/}" = systemd ]79 #then80 #       echo "This systems seems to use systemd."81 #       echo "Please take a look at the provided example service unit files in this directory, a    nd adapt and install them. Sorry!"82 #       exit 183 #fi
[root@server3 utils]# ./install_server.sh  ##执行脚本


[root@server3 utils]# vim /etc/redis/6379.conf bind 0.0.0.06379 replicaof 172.25.52.1 6379[root@server3 utils]# /etc/init.d/redis_6379 restart    ##重启
[root@server3 utils]# ps ax | grep redis8093 ?        Ssl    0:00 /usr/local/bin/redis-server 0.0.0.0:63798099 pts/0    S+     0:00 grep --color=auto redis
[root@server3 utils]# netstat -antlp   ##查看端口
已经搭建好了主从,测试一下:


在server2中:
[root@server2 ~]# redis-cli ###查看master
127.0.0.1:6379> info

在server3中:
[root@server3 utils]# redis-cli ###查看master
127.0.0.1:6379> info


主从切换--- 配置sentinel
[root@server1 redis-6.2.4]# ls
00-RELEASENOTES  CONTRIBUTING  INSTALL    README.md   runtest-cluster    sentinel.conf  TLS.md
BUGS             COPYING       Makefile   redis.conf  runtest-moduleapi  src            utils
CONDUCT          deps          MANIFESTO  runtest     runtest-sentinel   tests
[root@server1 redis-6.2.4]# cp sentinel.conf /etc/redis/
[root@server1 redis-6.2.4]# cd /etc/redis/
[root@server1 redis]# ls
6379.conf  sentinel.conf
[root@server1 redis]# vim sentinel.conf    ##修改之后传给server2和servver3,注意要在重启之前26 daemonize no    84 sentinel monitor mymaster 172.25.52.1 6379 2125 sentinel down-after-milliseconds mymaster 10000[root@server1 redis]# ls
6379.conf  sentinel.conf
[root@server1 redis]# pwd
/etc/redis
[root@server1 redis]# scp sentinel.conf server2:/etc/redis/
[root@server1 redis]# scp sentinel.conf server3:/etc/redis/ 

[root@server2 redis]# redis-sentinel /etc/redis/sentinel.conf 
 [root@server3 utils]# redis-sentinel /etc/redis/sentinel.conf

将server1停掉:
[root@server1 ~]# redis-cli
127.0.0.1:6379> SHUTDOWN
not connected> exit
[root@server1 ~]# ps ax | grep redis8451 ?        Ssl    0:06 redis-sentinel *:26379 [sentinel]8662 pts/1    S+     0:00 grep --color=auto redis
[root@server1 ~]#
然后去看监控:------>可以看到master变了,3经过投票变为新的master
测试是否切换成功:
[root@server3 ~]# redis-cli ###在server3查看信息
127.0.0.1:6379> info

[root@server2 ~]# redis-cli
127.0.0.1:6379> info

[root@server1 ~]# /etc/init.d/redis_6379 start
Starting Redis server...
[root@server1 ~]# ps ax | grep redis
8451 ? Ssl 0:09 redis-sentinel *:26379 [sentinel]
8687 ? Ssl 0:00 /usr/local/bin/redis-server 0.0.0.0:6379
8695 pts/1 S+ 0:00 grep --color=auto redis
[root@server1 ~]# redis-cli ###将server1启动之后,会自动变成slave端连接在master(server3)上
127.0.0.1:6379> info


建立集群
[root@server3 utils]# netstat -antlp | grep :6379
[root@server1 redis]# iptables -L
[root@server1 redis]# /etc/init.d/redis_6379 stop
Stopping ...
Redis stopped
[root@server1 redis]# cd
[root@server1 ~]# cd redis-6.2.4/
[root@server1 redis-6.2.4]# ls
[root@server1 redis-6.2.4]# cd utils/
[root@server1 utils]# cd create-cluster/
[root@server1 create-cluster]# ls
create-cluster  README
[root@server1 create-cluster]# ./create-cluster start
Starting 30001
Starting 30002
Starting 30003
Starting 30004
Starting 30005
Starting 30006
[root@server1 create-cluster]# ps ax | grep redis

[root@server1 create-cluster]# pwd
/root/redis-6.2.4/utils/create-cluster
[root@server1 create-cluster]# ls
[root@server1 create-cluster]# cat 30001.log   ###日志文件
[root@server1 create-cluster]# sysctl -w vm.overcommit_memory=1  ##
vm.overcommit_memory = 1
[root@server1 create-cluster]# cat appendonly-30001.aof
[root@server1 create-cluster]# ls
[root@server1 create-cluster]# ./create-cluster createCan I set the above configuration? (type 'yes' to accept): yes

[root@server1 create-cluster]# redis-cli --cluster check 127.0.0.1:30001
生成三组:

30005对应的master是30002,30004对应的master是30001,30006对应的master是30003
root@server1 create-cluster]# redis-cli -c -p 30001
127.0.0.1:30001> get name
-> Redirected to slot [5798] located at 127.0.0.1:30002
(nil)
127.0.0.1:30002> set name westos
OK
127.0.0.1:30002> get name
"westos"
127.0.0.1:30002> info
[root@server1 create-cluster]# redis-cli -c -p 30004
127.0.0.1:30004> get name
-> Redirected to slot [5798] located at 127.0.0.1:30002
"westos"
127.0.0.1:30002> info 

[root@server1 create-cluster]# pwd
/root/redis-6.2.4/utils/create-cluster
[root@server1 create-cluster]# redis-cli -c -p 30002
127.0.0.1:30002> get name
"redhat"
127.0.0.1:30002> SHUTDOWN     #####将2down掉
not connected> exit
[root@server1 create-cluster]# ps ax
[root@server1 create-cluster]# ./create-cluster start
[root@server1 create-cluster]# redis-cli --cluster check 127.0.0.1:30003  ##可以看到30005变为master


将5和2都SHUTDOWN:
[root@server1 create-cluster]# redis-cli -c -p 30005
127.0.0.1:30005> SHUTDOWN
not connected> exit
[root@server1 create-cluster]# redis-cli -c -p 30002
127.0.0.1:30002> get name
"redhat"
127.0.0.1:30002> SHUTDOWN
not connected> exit
[root@server1 create-cluster]# redis-cli --cluster check 127.0.0.1:30003

测试:一组出问题------->全部崩
解决:重新开启
注意:哈西槽一定要够,否则会崩盘,删除一组就崩盘

配置文件改为8就一次产生8个


[root@server1 create-cluster]# redis-cli --cluster add-node 127.0.0.1:30007 ##添加master7127.0.0.1:30001
[root@server1 create-cluster]# redis-cli --cluster check 127.0.0.1:30003添加30007的slave 30008:
[root@server1 create-cluster]# redis-cli --cluster add-node 127.0.0.1:30008 127.0.0.1:30001 --cluster-slave --cluster-master-id 6d173bb37636898319d71d063bb3f06a84ea8dd7


[root@server1 create-cluster]# redis-cli --cluster check 127.0.0.1:30003 ###8个

给30007分配哈西槽:
[root@server1 create-cluster]# redis-cli --cluster reshard 127.0.0.1:30003
How many slots do you want to move (from 1 to 16384)? 1000
What is the receiving node ID? 6d173bb37636898319d71d063bb3f06a84ea8dd7
Please enter all the source node IDs.Type 'all' to use all the nodes as source nodes for the hash slots.Type 'done' once you entered all the source nodes IDs.
Source node #1: all[root@server1 create-cluster]# redis-cli --cluster check 127.0.0.1:30003  ###去测试添加是否成功


[root@server1 create-cluster]# redis-cli -c -p 30003

PHP与redis连接
[root@server1 create-cluster]# ./create-cluster stop
[root@server2 redis]# /etc/init.d/redis_6379 stop
留下server3(master)
[root@server4 local]# yum install -y mariadb-server
[root@server4 local]# systemctl start mariadb.service
[root@server4 local]# cd /var/lib/mysql/
[root@server4 mysql]# mysql

[root@server2 redis]# /etc/init.d/redis_6379 stop
Stopping ...
Redis stopped
[root@server2 redis]# cd
[root@server2 ~]# ls
anaconda-screenshots  mysql-5.7.31  mysql-boost-5.7.31.tar.gz  redis-6.2.4  redis-6.2.4.tar.gz
[root@server2 ~]# scp westos@172.25.52.250:/home/westos/Downloads/qq-files/3459494803/file_recv/php-fpm-5.4.16-46.el7.x86_64.rpm .
westos@172.25.52.250's password:
php-fpm-5.4.16-46.el7.x86_64.rpm                                       100% 1451KB  66.5MB/s   00:00
[root@server2 ~]# ps ax
[root@server2 ~]# netstat -antlp   ###确保实验环境干净
[root@server2 ~]# yum install -y php-fpm-5.4.16-46.el7.x86_64.rpm[root@server2 ~]# cd /etc/php-fpm.d/
[root@server2 php-fpm.d]# ls
www.conf
[root@server2 php-fpm.d]# vim www.conf ; Unix user/group of processes
; Note: The user is mandatory. If the group is not set, the default user's group
;       will be used.
; RPM: apache Choosed to be able to access some dir as httpd
user = nginx
; RPM: Keep a group allowed to write in log dir.
group = nginx

安装nginx:
[root@server2 php-fpm.d]# cd
[root@server2 ~]# scp westos@172.25.52.250:/home/westos/Desktop/企业部分/软件包/nginx-1.20.2.tar.gz .
westos@172.25.52.250's password:
nginx-1.20.2.tar.gz                                                    100% 1037KB  26.9MB/s   00:00
[root@server2 ~]# ls
anaconda-screenshots  mysql-boost-5.7.31.tar.gz  php-fpm-5.4.16-46.el7.x86_64.rpm  redis-6.2.4.tar.gz
mysql-5.7.31          nginx-1.20.2.tar.gz        redis-6.2.4
[root@server2 ~]# tar zxf nginx-1.20.2.tar.gz
[root@server2 ~]# cd nginx-1.20.2/
[root@server2 nginx-1.20.2]# ls
auto  CHANGES  CHANGES.ru  conf  configure  contrib  html  LICENSE  man  README  src
[root@server2 nginx-1.20.2]# yum install -y gcc pcre-devel zlib-devel openssl-devel
[root@server2 nginx-1.20.2]# ./configure --with-http_ssl_module
[root@server2 nginx-1.20.2]# make && make install
[root@server2 nginx-1.20.2]# ln -s /usr/local/nginx/sbin/nginx /usr/local/bin/
[root@server2 nginx-1.20.2]# which nginx
/usr/local/bin/nginx
[root@server2 conf]# useradd -s /sbin/nologin -M -d /user/local/nginx nginx
[root@server2 conf]# id nginx
uid=1001(nginx) gid=1001(nginx) groups=1001(nginx)
[root@server2 conf]# ls
[root@server2 conf]# vim nginx.conf
[root@server2 conf]# nginx -t
nginx: the configuration file /usr/local/nginx/conf/nginx.conf syntax is ok
nginx: configuration file /usr/local/nginx/conf/nginx.conf test is successful
[root@server2 conf]# nginx
[root@server2 conf]# ps ax | grep nginx
[root@server2 conf]# curl localhost 


[root@server2 conf]# cd /etc/php-fpm.d/
[root@server2 php-fpm.d]# ls
www.conf
[root@server2 php-fpm.d]# vim www.conf
[root@server2 php-fpm.d]# systemctl start php-fpm  ##开启
[root@server2 php-fpm.d]# ps ax    ##查看进程
[root@server2 php-fpm.d]# netstat -antlp 


[root@server2 ~]# scp westos@172.25.52.250:/home/westos/Downloads/qq-files/3459494803/file_recv/test* .
westos@172.25.52.250's password:
test                                                                   100% 5020     4.4MB/s   00:00
test.php                                                               100% 1369   297.6KB/s   00:00
test.sql                                                               100%  502   649.5KB/s   00:00
[root@server2 ~]# ls
[root@server2 ~]# cp test.php /usr/local/nginx/html/
[root@server2 ~]# cd /usr/local/nginx/html/
[root@server2 html]# vim test.php
[root@server3 ~]# /etc/init.d/redis_6379 start
Starting Redis server...
[root@server3 ~]# redis-cli
127.0.0.1:6379> info


[root@server2 ~]# scp test.sql server4:

[root@server4 mysql]# cd
[root@server4 ~]# vim test.sql
[root@server4 ~]# cat test.sql
[root@server4 ~]# mysql test < test.sql
[root@server4 ~]# mysqlMariaDB [(none)]> use testMariaDB [test]> show tables;MariaDB [test]> select * from test;MariaDB [test]> grant all on test.* to redis@'%' identified by 'westos';


[root@server2 ~]# yum install -y php
[root@server2 ~]# php -m | grep php
[root@server2 ~]# php -m | grep mysql
[root@server2 ~]# yum install -y php-mysql

[root@server2 ~]# php -m | grep mysql
mysql
mysqli
pdo_mysql
[root@server2 ~]# ls
[root@server2 ~]# php -m | grep redis
[root@server2 ~]# scp westos@172.25.52.250:/home/westos/Downloads/qq-files/3459494803/file_recv/php-pecl-redis-* .
westos@172.25.52.250's password:
php-pecl-redis-2.2.8-1.el7.x86_64.rpm                                  100%  155KB  46.6MB/s   00:00
[root@server2 ~]# scp westos@172.25.52.250:/home/westos/Downloads/qq-files/3459494803/file_recv/php-pecl-igbinary* .
westos@172.25.52.250's password:
php-pecl-igbinary-1.2.1-1.el7.x86_64.rpm                               100%   38KB  21.9MB/s   00:00
[root@server2 ~]# ls
anaconda-screenshots       nginx-1.20.2.tar.gz                    redis-6.2.4.tar.gz
mysql-5.7.31               php-fpm-5.4.16-46.el7.x86_64.rpm       test
mysql-boost-5.7.31.tar.gz  php-pecl-redis-2.2.8-1.el7.x86_64.rpm  test.php
nginx-1.20.2               redis-6.2.4                            test.sql[root@server2 ~]# yum install -y php-pecl-redis-2.2.8-1.el7.x86_64.rpm php-pecl-igbinary-1.2.1-1.el7.x86_64.rpm


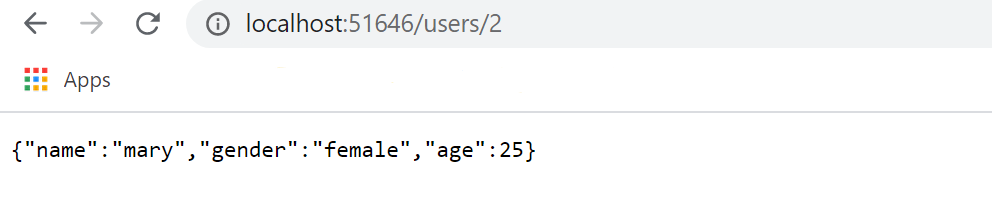
在浏览器中访问:http://172.25.52.2/test.php


在server4中修改之后:: 
[root@server3 ~]# redis-cli    ###redis 不变
127.0.0.1:6379> get 1
"test1"
127.0.0.1:6379> get 2
"test2"
127.0.0.1:6379> get 3
"test3"
127.0.0.1:6379> get 4
"test4"
127.0.0.1:6379> get 1    ###数据库修改后客户端没有同步
"test1"
127.0.0.1:6379> del 1   ##redis删除之后会重新从数据库加载数据到用户端(网页)
(integer) 1
127.0.0.1:6379> get 1
(nil)
127.0.0.1:6379> get 1
(nil)
127.0.0.1:6379> get 2
"test2"
127.0.0.1:6379> set 1 test1     ###在redis中修改数据后,客户端会立即更新
OK
127.0.0.1:6379>


redis中删除之后会重新从数据库加载数据到用户端(网页)

在redis中修改数据后,客户端会立即更新:

没有实现mysql数据库与redis的数据同步,后续补充。