ProxyChains遵循GNU协议的一款适用于linux系统的网络代理设置工具。强制由任一程序发起的TCP连接请求必须通过诸如TOR 或 SOCKS4, SOCKS5 或HTTP(S) 代理。支持的认证方式包括:SOCKS4/5的用户/密码认证,HTTP的基本认证。允许TCP和DNS通过代理隧道,并且可配置多个代理。注意:ProxyChains支持:git、apt等HTTP请求。不支持:ping 走的是ICMP,故不可用。1.redhat系列
1.1 安装proxychains工具
官方rpm中没这个工具需使用epel下载安装。epel 源配置
# 需要epel源
yum install -y proxychains-ng# 查看proxychains是否安装
which proxychains
1.2 修改配置文件两步
vi /etc/proxychains.conf第1步:拉到最下面,将已有的socks(如下)隐藏#socks4         127.0.0.1 9050
第2步:添加代理(如下示例)http 10.68.0.0 8080修改完毕示例:[root@localhost ~]# cat /etc/proxychains.conf
# proxychains.conf  VER 4.x
#
#        HTTP, SOCKS4a, SOCKS5 tunneling proxifier with DNS.# The option below identifies how the ProxyList is treated.
# only one option should be uncommented at time,
# otherwise the last appearing option will be accepted
#
#dynamic_chain
#
# Dynamic - Each connection will be done via chained proxies
# all proxies chained in the order as they appear in the list
# at least one proxy must be online to play in chain
# (dead proxies are skipped)
# otherwise EINTR is returned to the app
#
strict_chain
#
# Strict - Each connection will be done via chained proxies
# all proxies chained in the order as they appear in the list
# all proxies must be online to play in chain
# otherwise EINTR is returned to the app
#
#round_robin_chain
#
# Round Robin - Each connection will be done via chained proxies
# of chain_len length
# all proxies chained in the order as they appear in the list
# at least one proxy must be online to play in chain
# (dead proxies are skipped).
# the start of the current proxy chain is the proxy after the last
# proxy in the previously invoked proxy chain.
# if the end of the proxy chain is reached while looking for proxies
# start at the beginning again.
# otherwise EINTR is returned to the app
# These semantics are not guaranteed in a multithreaded environment.
#
#random_chain
#
# Random - Each connection will be done via random proxy
# (or proxy chain, see  chain_len) from the list.
# this option is good to test your IDS :)# Make sense only if random_chain or round_robin_chain
#chain_len = 2# Quiet mode (no output from library)
#quiet_mode## Proxy DNS requests - no leak for DNS data
# (disable all of the 3 items below to not proxy your DNS requests)# method 1. this uses the proxychains4 style method to do remote dns:
# a thread is spawned that serves DNS requests and hands down an ip
# assigned from an internal list (via remote_dns_subnet).
# this is the easiest (setup-wise) and fastest method, however on
# systems with buggy libcs and very complex software like webbrowsers
# this might not work and/or cause crashes.
proxy_dns# method 2. use the old proxyresolv script to proxy DNS requests
# in proxychains 3.1 style. requires `proxyresolv` in $PATH
# plus a dynamically linked `dig` binary.
# this is a lot slower than `proxy_dns`, doesn't support .onion URLs,
# but might be more compatible with complex software like webbrowsers.
#proxy_dns_old# method 3. use proxychains4-daemon process to serve remote DNS requests.
# this is similar to the threaded `proxy_dns` method, however it requires
# that proxychains4-daemon is already running on the specified address.
# on the plus side it doesn't do malloc/threads so it should be quite
# compatible with complex, async-unsafe software.
# note that if you don't start proxychains4-daemon before using this,
# the process will simply hang.
#proxy_dns_daemon 127.0.0.1:1053# set the class A subnet number to use for the internal remote DNS mapping
# we use the reserved 224.x.x.x range by default,
# if the proxified app does a DNS request, we will return an IP from that range.
# on further accesses to this ip we will send the saved DNS name to the proxy.
# in case some control-freak app checks the returned ip, and denies to
# connect, you can use another subnet, e.g. 10.x.x.x or 127.x.x.x.
# of course you should make sure that the proxified app does not need
# *real* access to this subnet.
# i.e. dont use the same subnet then in the localnet section
#remote_dns_subnet 127
#remote_dns_subnet 10
remote_dns_subnet 224# Some timeouts in milliseconds
tcp_read_time_out 15000
tcp_connect_time_out 8000### Examples for localnet exclusion
## localnet ranges will *not* use a proxy to connect.
## note that localnet works only when plain IP addresses are passed to the app,
## the hostname resolves via /etc/hosts, or proxy_dns is disabled or proxy_dns_old used.## Exclude connections to 192.168.1.0/24 with port 80
# localnet 192.168.1.0:80/255.255.255.0## Exclude connections to 192.168.100.0/24
# localnet 192.168.100.0/255.255.255.0## Exclude connections to ANYwhere with port 80
# localnet 0.0.0.0:80/0.0.0.0
# localnet [::]:80/0## RFC6890 Loopback address range
## if you enable this, you have to make sure remote_dns_subnet is not 127
## you'll need to enable it if you want to use an application that
## connects to localhost.
# localnet 127.0.0.0/255.0.0.0
# localnet ::1/128## RFC1918 Private Address Ranges
# localnet 10.0.0.0/255.0.0.0
# localnet 172.16.0.0/255.240.0.0
# localnet 192.168.0.0/255.255.0.0### Examples for dnat
## Trying to proxy connections to destinations which are dnatted,
## will result in proxying connections to the new given destinations.
## Whenever I connect to 1.1.1.1 on port 1234 actually connect to 1.1.1.2 on port 443
# dnat 1.1.1.1:1234  1.1.1.2:443## Whenever I connect to 1.1.1.1 on port 443 actually connect to 1.1.1.2 on port 443
## (no need to write :443 again)
# dnat 1.1.1.2:443  1.1.1.2## No matter what port I connect to on 1.1.1.1 port actually connect to 1.1.1.2 on port 443
# dnat 1.1.1.1  1.1.1.2:443## Always, instead of connecting to 1.1.1.1, connect to 1.1.1.2
# dnat 1.1.1.1  1.1.1.2# ProxyList format
#       type  ip  port [user pass]
#       (values separated by 'tab' or 'blank')
#
#       only numeric ipv4 addresses are valid
#
#
#        Examples:
#
#                socks5    192.168.67.78    1080    lamer    secret
#        http    192.168.89.3    8080    justu    hidden
#         socks4    192.168.1.49    1080
#            http    192.168.39.93    8080
#
#
#       proxy types: http, socks4, socks5, raw
#         * raw: The traffic is simply forwarded to the proxy without modification.
#        ( auth types supported: "basic"-http  "user/pass"-socks )
#
[ProxyList]
# add proxy here ...
# meanwile
# defaults set to "tor"
#socks4     127.0.0.1 9050
http 10.168.0.0 8080
1.3 使用
使用格式:
proxychains4 yum install net-tools例:root@localhost ~]# proxychains4 yum install net-tools[proxychains] config file found: /etc/proxychains.conf[proxychains] preloading /usr/lib64/proxychains-ng/libproxychains4.so[proxychains] DLL init: proxychains-ng 4.16Last metadata expiration check: 3:16:32 ago on Mon Feb  6 10:04:01 2023.Package net-tools-2.0-0.62.20160912git.el9.x86_64 is already installed.Dependencies resolved.Nothing to do.Complete![root@localhost ~]#
2.debian系列
2.1 安装
1.sudo apt install proxychains2.sudo vim /etc/proxychains.conf3.1)拉倒最下面,将已有的socks(如下)隐藏#socks4 127.0.0.1 9050 2)添加代理(如下示例),判断这个代理是否可用就是通过设置中的代理设置看能都联网。http 10.68.0.0 80804.应用方式:
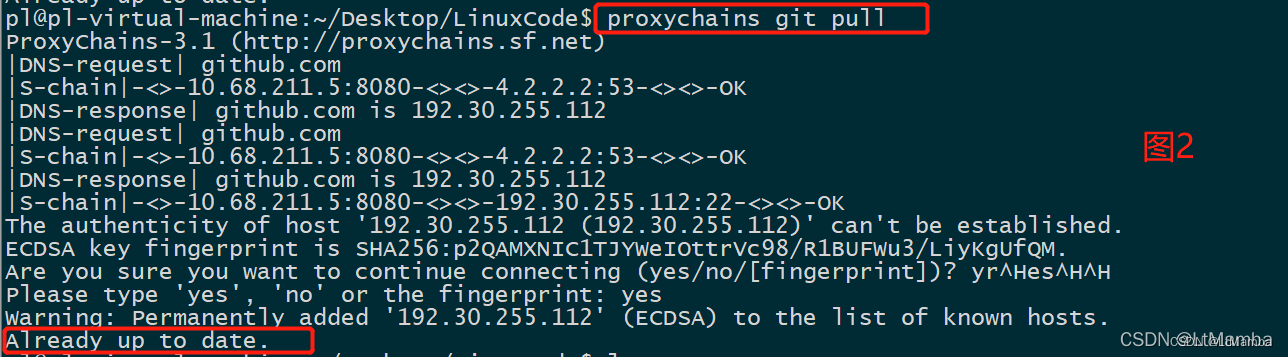
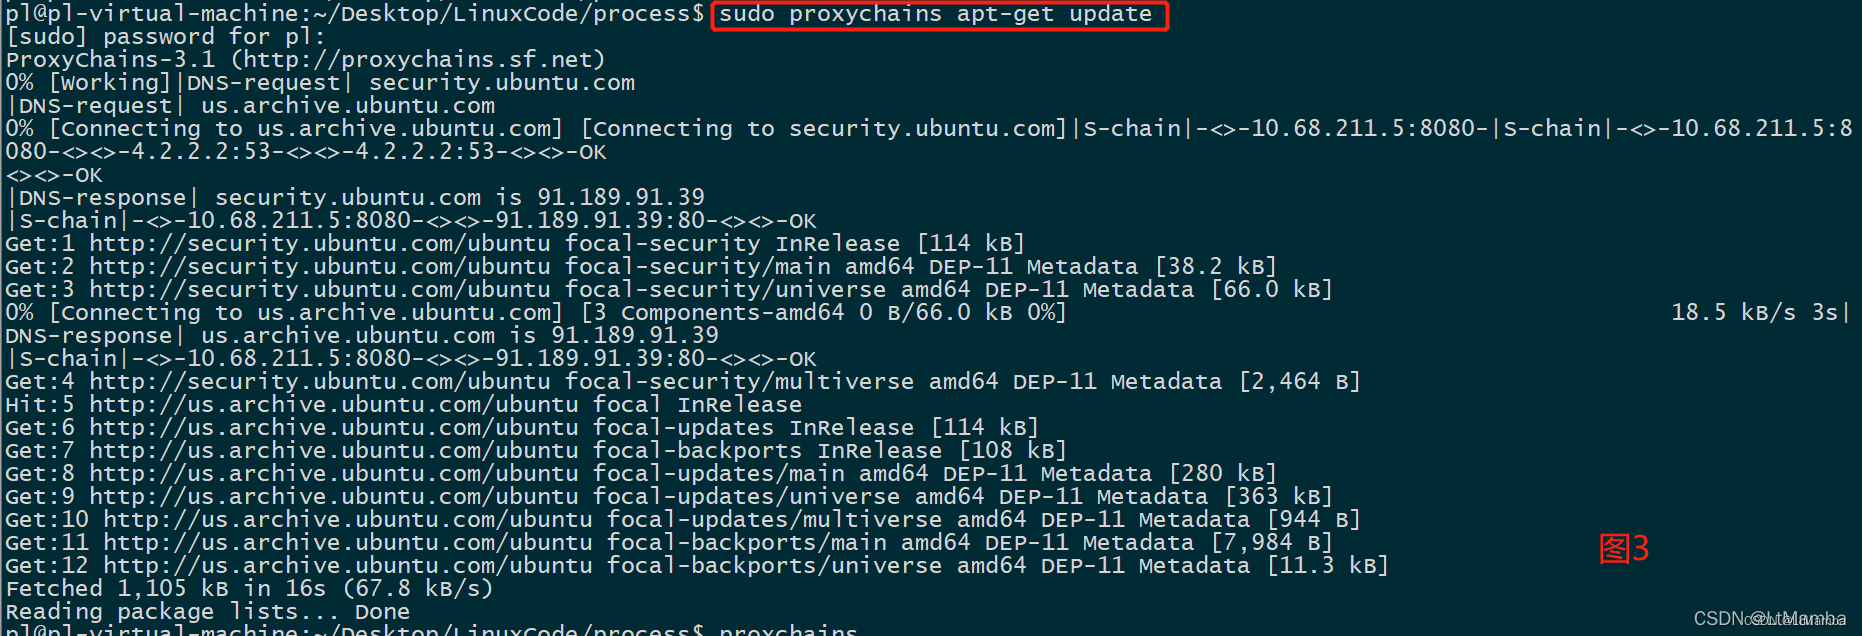
usage:proxychains <prog> [args]demo:1)proxychains git pull #下图22)sudo proxychains apt-get update #下图3#这个地方sudo的位置一定不要写错了,否则会出错。注:虚拟机使用桥接网络时,IPv4时一定要选Automatic(DHCP),如果使用Manaul会有问题。