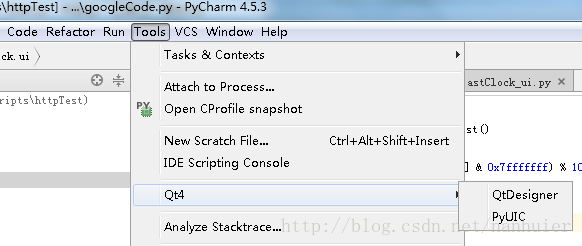
因为想跨平台,所以考虑Qt,又想结合脚本的便捷。考虑PyQt
网上搜索了一下,资料挺少的。有的还是以前的资料。
参考这里 http://www.noktec.be/python/how-to-install-pyqt4-on-osx
0:下载安装xcode
1:下载安装Qt
http://qt-project.org/downloads
我下载的是Qt 5.0.2 for Mac (404 MB) (Info)
安装起来还挺方便的。不说了
2:下载SIP
http://www.riverbankcomputing.co.uk/software/sip/download
我下载的是 sip-4.16
下载以后解压
- cd sip-4.16
- python configure.py -d /Library/Python/2.7/site-packages --arch=i386
- make
- sudo make install
安装起来没问题。
3:下载PyQt4
http://www.riverbankcomputing.co.uk/software/pyqt/download
下载后解压安装配置这里要参考改版后的配置文档,新版本用的是configure-ng.py:
http://pyqt.sourceforge.net/Docs/PyQt4/installation.html#configuring-pyqt4
命令:
python configure-ng.py -q /Users/wjqfkfyh/Qt5.0.2/5.0.2/clang_64/bin/qmake -d /Library/Python/2.7/site-packages/ --sip /System/Library/Frameworks/Python.framework/Versions/2.7/bin/sip --sysroot /System/Library/Frameworks/Python.framework/Versions/2.7
- cd PyQt-mac-gpl-4.11
- python configure-ng.py -q /Users/watsy/Qt5.0.2/5.0.2/clang_64/bin/qmake -d /Library/Python/2.7/site-packages/ --sip /System/Library/Frameworks/Python.framework/Versions/2.7/bin/sip --sysroot /System/Library/Frameworks/Python.framework/Versions/2.7
- make
- sudo make install
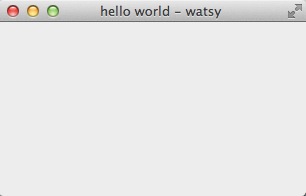
- #!/usr/bin/python
- # -*- coding: utf-8 -*-
- """
- ZetCode PyQt4 tutorial
- In this example, we create a simple
- window in PyQt4.
- author: Jan Bodnar
- website: zetcode.com
- last edited: October 2011
- """
- import sys
- from PyQt4 import QtGui
- def main():
- app = QtGui.QApplication(sys.argv)
- w = QtGui.QWidget()
- w.resize(250, 150)
- w.move(300, 300)
- w.setWindowTitle('Simple')
- w.show()
- sys.exit(app.exec_())
- if __name__ == '__main__':
- main()
执行得到如下错误
- Traceback (most recent call last):
- File "pyqtDemo.py", line 16, in <module>
- from PyQt4 import QtGui
- ImportError: dlopen(/Library/Python/2.7/site-packages/sip.so, 2): no suitable image found. Did find:
- /Library/Python/2.7/site-packages/sip.so: mach-o, but wrong architecture
在考虑是什么问题
查看
- lipo -info /Library/Python/2.7/site-packages/sip.so
得到
- Non-fat file: /Library/Python/2.7/site-packages/sip.so is architecture: i386
想来现在机器用的是64位系统了。
修改 sip的配置从新编译
- cd sip-4.16
- python configure.py -d /Library/Python/2.7/site-packages --arch=x86_64
- make
- sudo make install
注意:1、如果需要卸载安装的PyQt4,使用如下命令:
sudo make uninstall
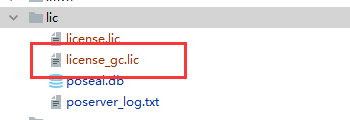
2、下载sip和PyQt必须使用GPL版本,商业版是需要证书的。
3、sip和PyQt最好使用相近的版本!!!!
4、在编译PyQt4时候出错,且出现“sipQtCoreQSysInfo.cpp文件中没有定义:MV_10_9、MV_10_10等“,解决方法是将../QtCore/sipQtCoreQSysInfo.cpp文件中的对应行删除!!!!
5、安装时候不能包含中文目录!
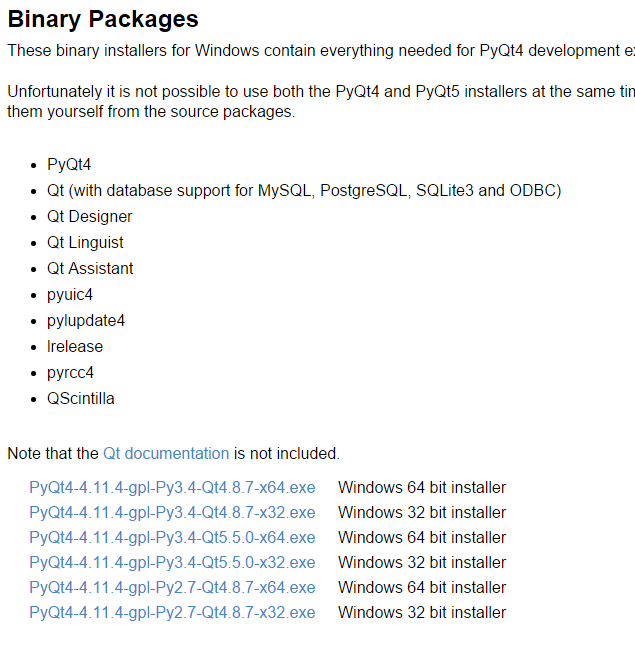
4:sip和PyQt下载地址
PyQt4:http://sourceforge.net/projects/pyqt/files/PyQt4/
sip:http://sourceforge.net/projects/pyqt/files/sip/
5:参考资料
Installing PyQt4
Downloading SIP
SIP must be installed before building and using PyQt4. You can get the latest release of the SIP source code from http://www.riverbankcomputing.com/software/sip/download.
The SIP documentation can be found at http://pyqt.sourceforge.net/Docs/sip4/.
Downloading PyQt4
You can get the latest release of the GPL version of the PyQt4 source code from http://www.riverbankcomputing.com/software/pyqt/download.
If you are using the commercial version of PyQt4 then you should use the download instructions which were sent to you when you made your purchase. You must also download your license file.
Configuring PyQt4
After unpacking the source package (either a .tar.gz or a .zip file depending on your platform) you should then check for any README files that relate to your platform.
If you are using the commercial version of PyQt4 then you must copy your license file to the sip directory, or to the directory specified by the --license-dir option of configure-ng.py.
You need to make sure your environment variables are set properly for your development environment.
In order to configure the build of PyQt4 you need to run either the configure-ng.py or the configure.py script.
configure.py is the original configuration script that uses the build system of SIP v4 (i.e. the sip.sipconfig module). It will be supported for the life of PyQt4.
configure-ng.py is the new configuration script that uses Qt’s qmake program to do all the heavy lifting. It has the following advantages:
- it supports cross-compilation
- it is the basis of PyQt5’s configuration script
- generated Makefiles have an uninstall target
- it will work with SIP v5 (which will have no build system).
Users are encouraged to switch to using configure-ng.py in order to ease the future transition to SIP v5 and/or PyQt5.
Using configure-ng.py
New in version 4.10.1.
The configure-ng.py script is used to configure PyQt4 as follows:
python configure-ng.py
This assumes that the Python interpreter is on your path. Something like the following may be appropriate on Windows:
c:\python34\python configure-ng.py
If you have multiple versions of Python installed then make sure you use the interpreter for which you wish to build PyQt4 for.
The full set of command line options is:
-
Normally Qt is checked to see if it has been built as shared libraries. Some Linux distributions configure their Qt builds to make this check unreliable. This option ignores the result of the check and assumes that Qt has been built as shared libraries.
--assume-shared -
The pyuic4, pyrcc4 and pylupdate4 utilities will be installed in the directory
<DIR>.
--bindir <DIR> , -b <DIR> ¶ -
The C++ source files for a Python module will be concatenated. This results in significantly reduced compilation times. Most, but not all, C++ compilers can handle the large files that result. See also the
--concatenate-splitoption.
--concatenate , -c -
If the
--concatenateoption is used to concatenate the C++ source files then this option determines how many files are created. The default is 1.
--concatenate-split <N> , -j <N> ¶ -
<FILE>contains the configuration of the PyQt4 build to be used instead of dynamically introspecting the system and is typically used when cross-compiling. See Configuring with Configuration Files.
--configuration <FILE> ¶ -
Using this confirms that you accept the terms of the PyQt4 license.
--confirm-license -
The
dbus-python.hheader file of the dbus-python package can be found in the directory<DIR>/dbus.
--dbus <DIR> , -s <DIR> ¶ -
The PyQt4 modules will be built with debugging symbols. On Windows this requires that a debug version of Python is installed.
--debug , -u -
The Python plugin for Qt Designer will be installed in the directory
<DIR>.
--designer-plugindir <DIR> ¶ -
The PyQt4 Python package will be installed in the directory
<DIR>. The default is the Python installation’ssite-packagesdirectory. If you use this option then thePYTHONPATHenvironment variable must include<DIR>.
--destdir <DIR> , -d <DIR> ¶ -
Normally all PyQt4 modules are enabled and are built if the corresponding Qt library can be found. Using this option only those modules specifically enabled will be checked for and built. The option may be specified any number of times.
--enable <MODULE> , -e <MODULE> ¶ -
Display a help message.
--help , -h -
The license files needed by the commercial version of PyQt4 can be found in the directory
<DIR>.
--license-dir <DIR> ¶ -
All Qt v4 features that have been deprecated in Qt v5 will be disabled. This is useful when porting PyQt4 applications to PyQt5.
--no-deprecated -
The Qt Designer plugin will not be built.
--no-designer-plugin -
The PyQt4 modules will not contain automatically generated docstrings.
--no-docstrings -
The Qt support for the standard Python DBus bindings is disabled.
--no-python-dbus -
The
PyQt4.apiQScintilla API file is not installed even if QScintilla does appear to be installed.
--no-qsci-api -
The
.sipfiles for the PyQt4 modules will not be installed.
--no-sip-files -
New in version 4.11.
The
pyuic4,pyrcc4andpylupdate4tools will not be built.
--no-tools -
Normally the header comments of each generated C/C++ source file includes a timestamp corresponding to when the file was generated. This option suppresses the inclusion of the timestamp.
--no-timestamp , -T -
If Qt has been built as static libraries then the static plugin
<PLUGIN>will be linked with the appropriate PyQt4 module. The option may be specified any number of times.
--plugin <PLUGIN> , -t <PLUGIN> ¶ -
On certain platforms the size of PyQt4 modules can be significantly reduced by redefining the C++
protectedkeyword aspublicduring compilation. This option enables this behaviour and is the default on Linux and MacOS/X.
--protected-is-public -
The default redefinition of
protectedtopublicduring compilation on Linux and MacOS/X is disabled.
--protected-not-public -
<FILE>is the name of the Python interpreter used in the pyuic4 wrapper. The default is platform dependent.
--pyuic4-interpreter <FILE> ¶ -
Qt’s qmake program is used to determine how your Qt installation is laid out. Normally qmake is found on your
PATH. This option can be used to specify a particular instance of qmake to use. This option is not available on Windows where qmake must be onPATH.
--qmake <FILE> , -q <FILE> ¶ -
The
PyQt4.apiQScintilla API file is installed even if QScintilla does not appear to be installed. This option is implied if the--qsci-api-destdiroption is specified.
--qsci-api , -a -
The QScintilla API file will be installed in the
pythonsubdirectory of theapisubdirectory of the directory<DIR>.
--qsci-api-destdir <DIR> , -n <DIR> ¶ -
The sip program is used to generate PyQt4’s C++ source code. Normally sip is found on your
PATH. This option can be used to specify a particular instance of sip to use.
--sip <FILE> ¶ -
The
sip.hheader file can be found in the directory<DIR>.
--sip-incdir <DIR> ¶ -
The
.sipfiles for the PyQt4 modules will be installed in the directory<DIR>.
--sipdir <DIR> , -v <DIR> ¶ -
The argument
-spec SPECwill be passed to qmake. The default behaviour is platform specific. On Windows configure-ng.py will choose the value that is correct for the version of Python that is being used. (However if you have built Python yourself then you may need to explicitly specify<SPEC>.) On MacOS configure-ng.py will try and avoidmacx-xcodeif possible.)
--spec <SPEC> ¶ -
The PyQt4 modules will be built as static libraries. This is useful when building a custom interpreter with the PyQt4 modules built in to the interpreter.
--static , -k -
New in version 4.11.
<DIR>is the name of an optional directory that replacessys.prefixin the names of other directories (specifically those specifying where the various PyQt4 components will be installed and where the Python include and library directories can be found). It is typically used when cross-compiling or when building a static version of PyQt4. See Configuring with Configuration Files.
--sysroot <DIR> ¶ -
New in version 4.11.
<VERSION>is the major and minor version (e.g.3.4) of the version of Python being targetted. By default the version of Python being used to run the configure.py script is used. It is typically used when cross-compiling. See Configuring with Configuration Files.
--target-py-version <VERSION> ¶ -
The generated PyQt4 modules contain additional tracing code that is enabled using SIP’s
sip.settracemask()function.
--trace , -r -
Compiler commands and any output issued during configuration is displayed instead of being suppressed. Use this if configure-ng.py is having problems to see what exactly is going wrong.
--verbose , -w -
Display the PyQt4 version number.
--version Any remaining command line arguments are expected to be in the form name=value or name+=value. Such arguments are added to any qmake .pro file created by configure-ng.py.
Using configure.py
The configure.py script is used to configure PyQt4 as follows:
python configure.py
This assumes that the Python interpreter is on your path. Something like the following may be appropriate on Windows:
c:\python34\python configure.py
If you have multiple versions of Python installed then make sure you use the interpreter for which you wish to build PyQt4 for.
The full set of command line options is:
-
Normally Qt is checked to see if it has been built as shared libraries. Some Linux distributions configure their Qt builds to make this check unreliable. This option ignores the result of the check and assumes that Qt has been built as shared libraries.
--assume-shared -
The pyuic4, pyrcc4 and pylupdate4 utilities will be installed in the directory
<DIR>.
--bindir <DIR> , -b <DIR> ¶ -
The C++ source files for a Python module will be concatenated. This results in significantly reduced compilation times. Most, but not all, C++ compilers can handle the large files that result. See also the
--concatenate-splitoption.
--concatenate , -c -
If the
--concatenateoption is used to concatenate the C++ source files then this option determines how many files are created. The default is 1.
--concatenate-split <N> , -j <N> ¶ -
Using this confirms that you accept the terms of the PyQt4 license.
--confirm-license -
Normally each PyQt4 module (except for the
Qtmodule) is linked against the corresponding Qt library. This option creates a module called_qtwhich is linked against all the required Qt libraries and the other modules are stub modules that populate their module dictionaries from this one. This is useful when linking against static Qt libraries to eliminate the need to distribute the Qt libraries while minimising the memory footprint of the PyQt4 modules.
--consolidate , -g -
The
dbus-python.hheader file of the dbus-python package can be found in the directory<DIR>/dbus.
--dbus <DIR> , -s <DIR> ¶ -
The PyQt4 modules will be built with debugging symbols. On Windows this requires that a debug version of Python is installed.
--debug , -u -
The PyQt4 Python package will be installed in the directory
<DIR>. The default is the Python installation’ssite-packagesdirectory. If you use this option then thePYTHONPATHenvironment variable must include<DIR>.
--destdir <DIR> , -d <DIR> ¶ -
Normally all PyQt4 modules are enabled and are built if the corresponding Qt library can be found. Using this option only those modules specifically enabled will be checked for and built. The option may be specified any number of times.
--enable <MODULE> , -e <MODULE> ¶ -
Display a help message.
--help , -h -
All Qt v4 features that have been deprecated in Qt v5 will be disabled. This is useful when porting PyQt4 applications to PyQt5.
--no-deprecated -
The Qt Designer plugin will not be built.
--no-designer-plugin -
The PyQt4 modules will not contain automatically generated docstrings.
--no-docstrings -
The
PyQt4.apiQScintilla API file is not installed even if QScintilla does appear to be installed.
--no-qsci-api -
The
.sipfiles for the PyQt4 modules will not be installed.
--no-sip-files -
Normally the header comments of each generated C/C++ source file includes a timestamp corresponding to when the file was generated. This option suppresses the inclusion of the timestamp.
--no-timestamp , -T -
If Qt has been built as static libraries then the static plugin
<PLUGIN>will be linked with the appropriate PyQt4 module. The option may be specified any number of times.
--plugin <PLUGIN> , -t <PLUGIN> ¶ -
The Qt Designer plugin that manages plugins implemented in Python will be installed in the
designersubdirectory of the directory<DIR>.
--plugin-destdir <DIR> , -p <DIR> ¶ -
On certain platforms the size of PyQt4 modules can be significantly reduced by redefining the C++
protectedkeyword aspublicduring compilation. This option enables this behaviour and is the default on Linux and MacOS/X.
--protected-is-public -
The default redefinition of
protectedtopublicduring compilation on Linux and MacOS/X is disabled.
--protected-not-public -
Qt’s qmake program is used to determine how your Qt installation is laid out. Normally qmake is found on your
PATH. This option can be used to specify a particular instance of qmake to use. This option is not available on Windows.
--qmake <FILE> , -q <FILE> ¶ -
The
PyQt4.apiQScintilla API file is installed even if QScintilla does not appear to be installed. This option is implied if the--qsci-api-destdiroption is specified.
--qsci-api , -a -
The QScintilla API file will be installed in the
pythonsubdirectory of theapisubdirectory of the directory<DIR>.
--qsci-api-destdir <DIR> , -n <DIR> ¶ -
The
.sipfiles for the PyQt4 modules will be installed in the directory<DIR>.
--sipdir <DIR> , -v <DIR> ¶ -
The PyQt4 modules will be built as static libraries. This is useful when building a custom interpreter with the PyQt4 modules built in to the interpreter.
--static , -k -
The generated PyQt4 modules contain additional tracing code that is enabled using SIP’s
sip.settracemask()function.
--trace , -r -
When pyuic4 calls the Python interpreter on MacOS it will be run using the architecture
<ARCH>. See the section Configuring SIP and PyQt4 for MacOS.
--use-arch <ARCH> ¶ -
Compiler commands and any output issued during configuration is displayed instead of being suppressed. Use this if configure.py is having problems to see what exactly is going wrong.
--verbose , -w -
Display the PyQt4 version number.
--version Configuring SIP and PyQt4 for MacOS
Note that this section only applies if you are using the configure.py script to configure PyQt4. The configure-ng.py script leaves it to Qt’s qmake program to handle the details. configure-ng.py does not support the creation of universal binaries.
Building applications for MacOS can be a complex process. Typically the following need to be taken into account:
- the architectures (i.e. i386, x86_64, ppc) that you want to support
- the earliest version of MacOS you want to support (i.e. the deployment target)
- the version of the SDK you want to use.
If you are using a binary installer for Python and/or Qt then you also need to consider how they have been built regarding the above, and what bugs they have.
SIP’s and PyQt4’s configure.py scripts provide the necessary command line options to allow the correct configurations to be specified - the trick is to work out which options to use depending on the versions of Python and Qt you have installed.
SIP provides the following command line options to its configure.py script.
--arch <ARCH>specifies the target architecture and may be specified a number of times.--universalis a shortcut for--arch i386 --arch ppc.--deployment-target <VERSION>specifies the earliest version of MacOS you want to support. This sets theMACOSX_DEPLOYMENT_TARGETenvironment variable and should be used rather than setting the environment variable in the shell (to work around bugs in some versions of Python).--sdk <SDK>specifies the SDK to use.
PyQt4 provides the --use-arch option that specifies which architecture certain PyQt4 tools (actually only pyuic4 at the moment) will use when running Python. For example, if your Qt installation is 32 bits, and your Python installation is 32 bits and 64 bits then you will need to specify --use-arch i386 to ensure that pyuic4 runs the 32 bit version of Python.
Building PyQt4
The next step is to build PyQt4 by running your platform’s make command. For example:
make
The final step is to install PyQt4 by running the following command:
make install
(Depending on your system you may require root or administrator privileges.)
This will install the various PyQt4 components.
Configuring with Configuration Files
The configure.py script normally introspects the Python installation of the interpreter running it in order to determine the names of the various files and directories it needs. This is fine for a native build of PyQt4 but isn’t appropriate when cross-compiling. In this case it is possible to supply a configuration file, specified using the --configuration option, which contains definitions of all the required values.
A configuration file is made up of a number of named sections each of which contains a number of configuration items. The format of a configuration file is as follows:
- a section name is a single line with the name enclosed between
[and] - a configuration item is a single line containing a name/value pair separated by
= - values may be extended to lines immediately following if they are indented by at least one space
- a value may include another value by embedding the name of that value enclosed between
%(and) - comments begin with
#and continue to the end of the line - blank lines are ignored.
Those configuration items that appear before the first section name are automatically added to all sections.
A configuration file defines a section for each version of Qt that requires a different configuration. configure.py will choose the most appropriate section according to the version of Qt you are actually using. For example, if a configuration file contains sections for Qt v5.3 and Qt v5.1 and you are using Qt v5.2.1 then the section for Qt v5.1 will be chosen.
configure.py provides the following preset values for a configuration:
- is the major version number of the target Python installation.
- is the minor version number of the target Python installation.
- is the name of the system root directory. This is specified with the
--sysrootoption.
py_major py_minor sysroot The following is an example configuration file:
# The target Python installation.
py_platform = linux
py_inc_dir = %(sysroot)/usr/include/python%(py_major).%(py_minor)
py_pylib_dir = %(sysroot)/usr/lib/python%(py_major).%(py_minor)/config
py_pylib_lib = python%(py_major).%(py_minor)mu# The target PyQt installation.
pyqt_module_dir = %(sysroot)/usr/lib/python%(py_major)/dist-packages
pyqt_bin_dir = %(sysroot)/usr/bin
pyqt_sip_dir = %(sysroot)/usr/share/sip/PyQt4
pyuic_interpreter = /usr/bin/python%(py_major).%(py_minor)
pyqt_disabled_features = PyQt_Desktop_OpenGL PyQt_qreal_double# Qt configuration common to all versions.
qt_shared = True[Qt 5.1]
pyqt_modules = QtCore QtDBus QtDesigner QtGui QtHelp QtMultimediaQtMultimediaWidgets QtNetwork QtOpenGL QtPrintSupport QtQml QtQuickQtSensors QtSerialPort QtSql QtSvg QtTest QtWebKit QtWebKitWidgetsQtWidgets QtXmlPatterns _QOpenGLFunctions_ES2
This example contains a section for Qt v5.1. We have defined a number of values before the start of the section as they are not specific to any particular version of Qt. Note that if you use this configuration with a version of Qt earlier than v5.1 then you will get an error.
The following values can be specified in the configuration file:
- is set if Qt has been built as shared libraries. The default value is
False. - is the target Python platform.
- is the target Python include directory, i.e. the directory containing the
Python.hfile. - is the target Python library directory.
- is the target Python interpreter library. It should not include any platform-specific prefix or suffix.
- is the space separated list of features (as defined by SIP’s
%Featuredirective) that should be disabled. - is the target directory where the PyQt4 modules will be installed. It can be overridden by the
--destdiroption. - is the space separated list of PyQt4 modules that will be built. It can be overridden by the
--enableoption. - is the name of the target directory where the PyQt4 related executables will be installed. It can be overridden by the
--bindiroption. - is the name of the target directory where the PyQt4
.sipfiles will be installed. It can be overridden by the--sipdiroption. - is the name of the Python interpreter (as it would be called from the target system) that will be used to run pyuic4. It can be overridden by the
--pyuic4-interpreteroption.
qt_shared py_platform py_inc_dir py_pylib_dir py_pylib_lib pyqt_disabled_features pyqt_module_dir pyqt_modules pyqt_bin_dir pyqt_sip_dir pyuic_interpreter