一、PreferenceFragment样式修改

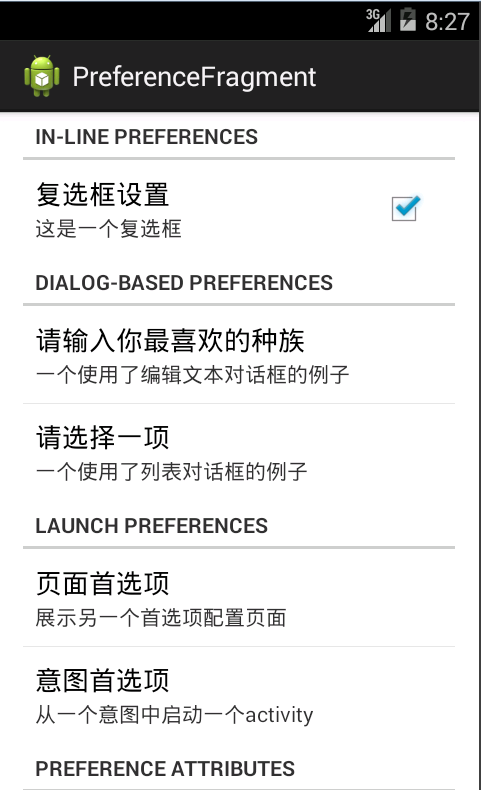
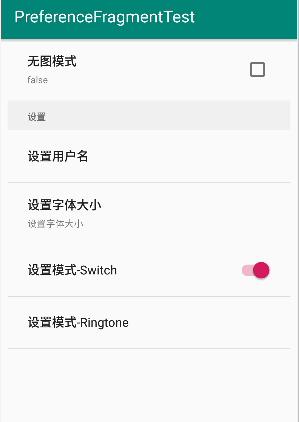
直接上图,原样式为白色样式,即为PreferenceFragment的默认样式:
① 白底黑字;② SwitchPreference开关默认为蓝色;
③ ListPreference列表默认为白色,选中状态为蓝色;④ 每个设置选项标题颜色为蓝色
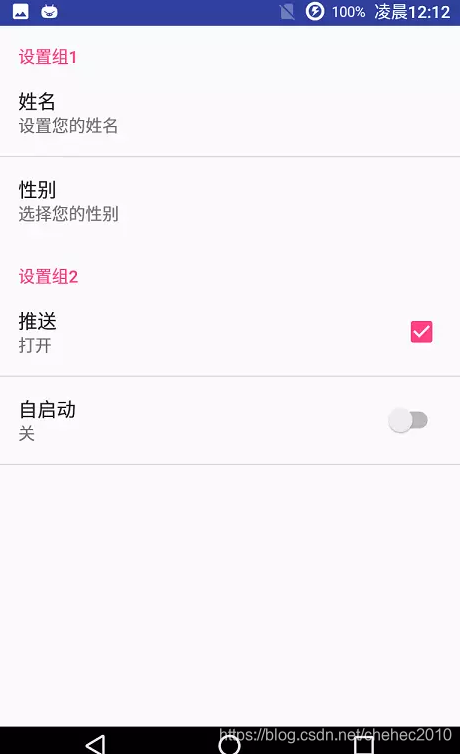
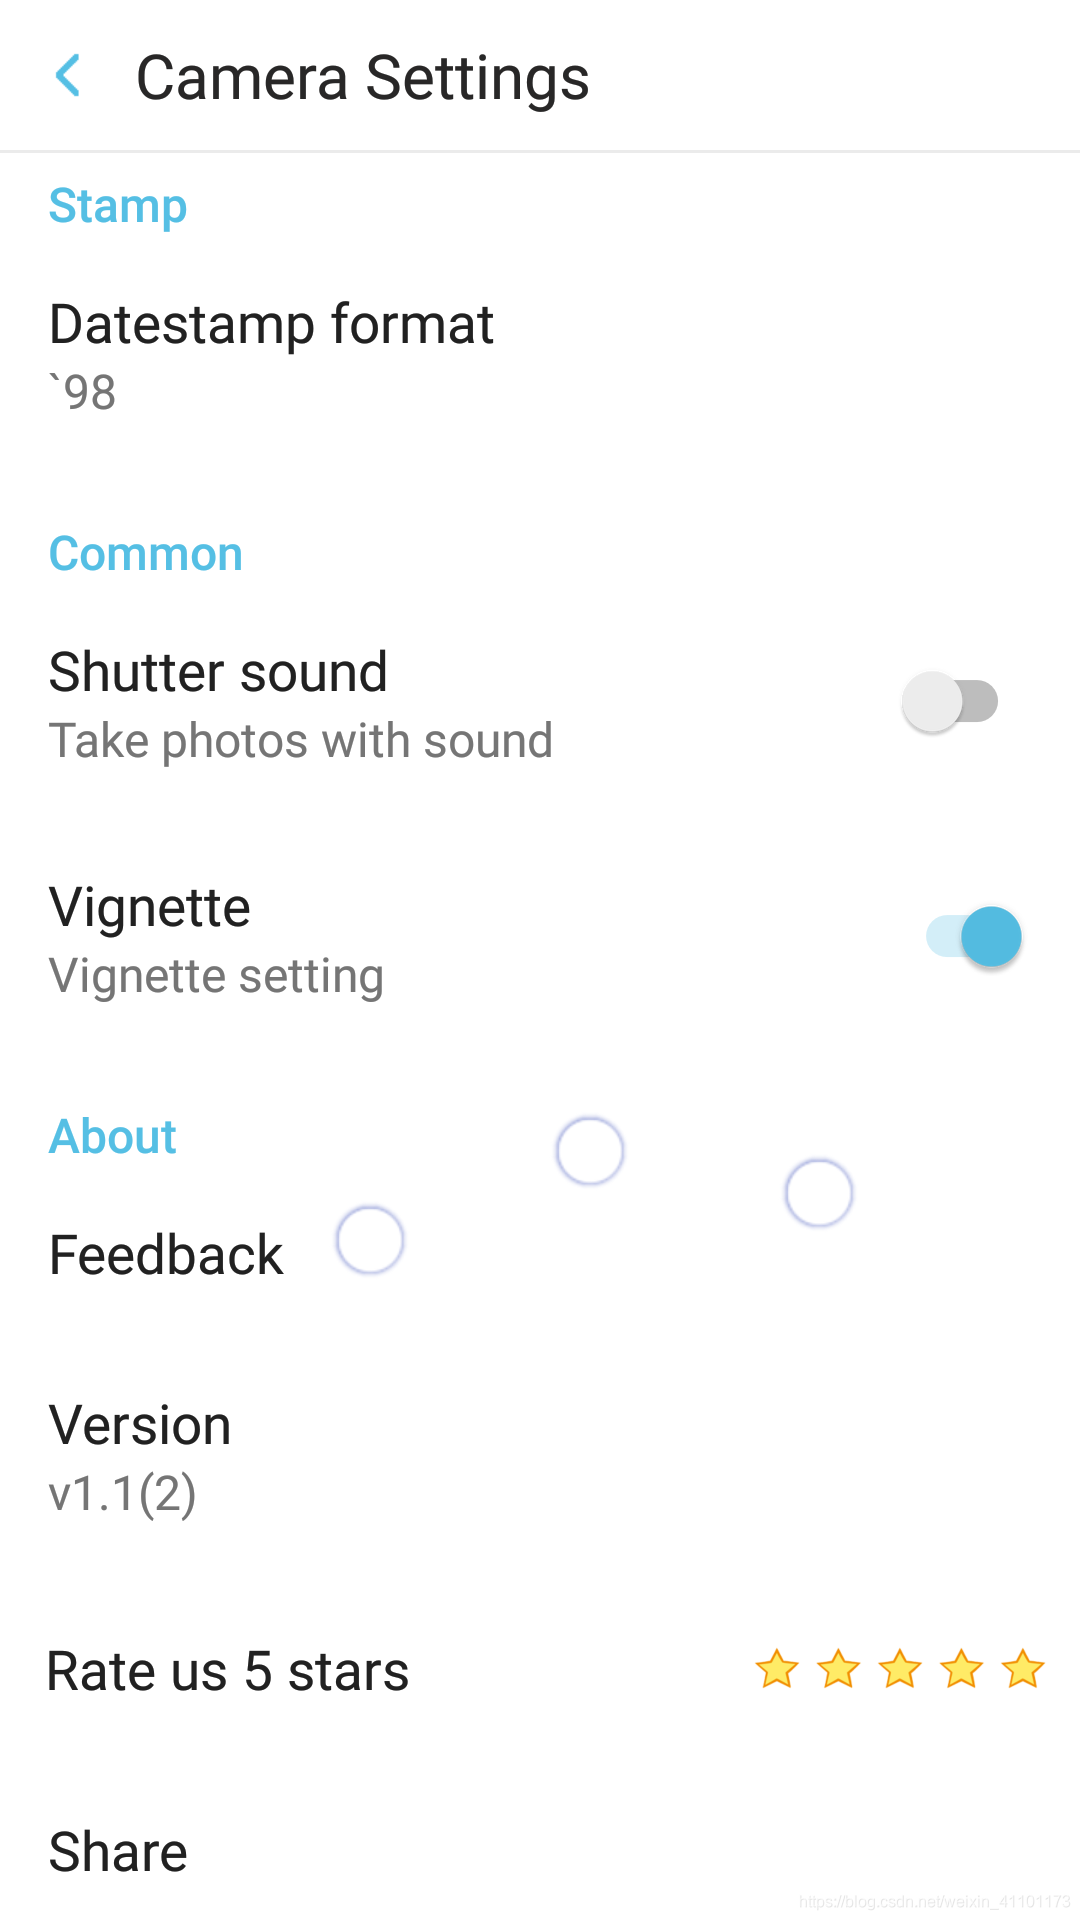
下图为新样式,彻底变换:
① 黑底白色; ② SwitchPreference开关使用自定义颜色
③ ListPrefence列表选中状态使用自定义颜色; ④ 每个设置选项标题的颜色使用自定义颜色
原样式使用的XML为:
<?xml version="1.0" encoding="utf-8"?>
<PreferenceScreen xmlns:android="http://schemas.android.com/apk/res/android"android:key="preference_screen"><PreferenceCategoryandroid:key="preference_stamp"android:title="@string/preference_stamp"><ListPreferenceandroid:defaultValue="@string/preference_stamp_dateformat_default_value"android:entries="@array/preference_stamp_dateformat_entries"android:entryValues="@array/preference_stamp_dateformat_values"android:key="preference_stamp_dateformat"android:title="@string/preference_stamp_dateformat" /></PreferenceCategory><!--通用--><PreferenceCategoryandroid:key="preference_common"android:title="@string/preference_common"><!--快门音保留--><SwitchPreferenceandroid:defaultValue="false"android:key="preference_shutter_sound"android:summary="@string/preference_shutter_sound_summary"android:title="@string/preference_shutter_sound" /><!--新增 暗角设置--><SwitchPreferenceandroid:defaultValue="false"android:key="preference_vignette"android:summary="@string/preference_vignette"android:title="@string/preference_vignette_setting" /></PreferenceCategory><!--关于--><PreferenceCategoryandroid:key="preference_about"android:title="@string/preference_about"><Preferenceandroid:key="preference_feedback"android:title="@string/preference_feedback" /><Preferenceandroid:key="preference_version"android:title="@string/preference_version" /><Preferenceandroid:icon="@drawable/preference_rate_icon"android:key="preference_rate"android:layout="@layout/preference"android:title="@string/preference_rate" /><Preferenceandroid:key="preference_share"            android:title="@string/preference_share" /></PreferenceCategory>
</PreferenceScreen>
下面对样式进行修改:
1)改变整个界面使用的背景色,由白色改为黑色:
在Fragment中重写onResume()方法,然后在里面加入代码:
getView().setBackgroundColor(getResources().getColor(R.color.app_color));
或者,直接使用默认颜色
getView().setBackgroundColor(Color.BLACK);
两个方法都可以改变整个Fragment的颜色。这一步做完,整个界面的颜色即改为黑色。
2)改变界面出现的String字符串的颜色,由黑色改为白色:
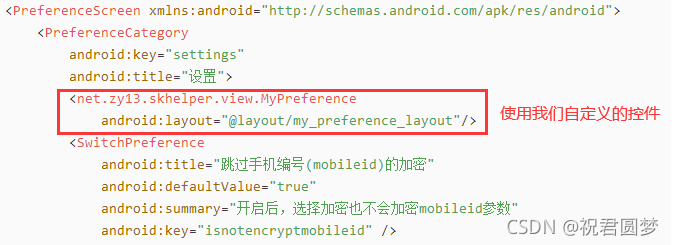
这一步修改,涉及到PreferenceFragment的源码,我们自定义一个新的布局:custom_switch_preferece.XML,如下:
<LinearLayout xmlns:android="http://schemas.android.com/apk/res/android"android:layout_width="match_parent"android:layout_height="wrap_content"android:gravity="center_vertical"android:minHeight="?android:attr/listPreferredItemHeight"android:background="@color/gary_shadow"android:paddingEnd="?android:attr/scrollbarSize"><RelativeLayoutandroid:layout_width="0dp"android:layout_height="wrap_content"android:layout_marginBottom="6dp"android:layout_marginStart="15dp"android:layout_marginEnd="6dp"android:layout_marginTop="6dp"android:layout_weight="1"><TextViewandroid:id="@+android:id/title"android:layout_width="wrap_content"android:layout_height="wrap_content"android:ellipsize="marquee"android:fadingEdge="horizontal"android:singleLine="true"android:textAppearance="?android:attr/textAppearanceLarge"android:textColor="@color/white"android:textSize="16sp"/><TextViewandroid:id="@+android:id/summary"android:layout_width="wrap_content"android:layout_height="wrap_content"android:layout_alignStart="@android:id/title"android:layout_below="@android:id/title"android:maxLines="4"android:textAppearance="?android:attr/textAppearanceSmall"android:textColor="#B8B8B8"android:textSize="14sp"/></RelativeLayout><!-- Preference should place its actual preference widget here. --><LinearLayoutandroid:id="@+android:id/widget_frame"android:layout_width="wrap_content"android:layout_height="match_parent"android:gravity="center_vertical"android:orientation="vertical" />
</LinearLayout>
可以看到,里面置入了两个TextView,第一个TextView是设置主选项String的字体颜色的,我们设为白色;第二个TextView是设置主选项提示字符的String颜色的,这里设为灰色。同时,我们设置了不同的字体大小。最后将写好的布局,设置给所有的Preference,包括SwitchPreference、ListPreference。
<Preferenceandroid:key="preference_share" android:layout="@layout/custom_switch_preferece" android:title="@string/preference_share" />至此,修改完所有String的颜色。
3)修改SwitchPreference选项卡开关的选中颜色和ListPreference选项选中的颜色:
系统Switch默认使用“colorPrimary”作为Switch打开的颜色和List列表选项选中的颜色,所以只要重新定义颜色,然后设置给Activity即可。这里,定义一个新的style,然后作为theme设置给Activity,新style中重新定义“colorPrimary”的颜色。
<item name="colorPrimary">#ffff00</item>
<item name="colorAccent">#ffff00</item>4)修改每个选项卡标题的颜色,由蓝色改为自定义颜色:
修改 Stamp Common About 三个String的颜色 对应于 PreferenceCategory,
自定义MyPreferenceCategory,如下:
public class MyPreferenceCategory extends PreferenceCategory {public MyPreferenceCategory(Context context, AttributeSet attrs) {super(context, attrs);}@Overrideprotected void onBindView(View view) {super.onBindView(view);if (view instanceof TextView) {TextView tv = (TextView) view;tv.setTextColor(Color.parseColor("#ffffff"));//设置title文本的颜色}}
}
我们在自定义的PreferenceCategory,重新指定标题的颜色(字体大小、字体style),即可实现我们想要的效果。
到此,做完以上,就可以实现将一个默认样式的PreferenceFragment修改为想要的效果。给出变换后的XML:
<?xml version="1.0" encoding="utf-8"?>
<PreferenceScreen xmlns:android="http://schemas.android.com/apk/res/android"android:key="preference_screen"><com.camera.function.main.ui.MyPreferenceCategoryandroid:key="preference_stamp"android:title="@string/preference_stamp"><ListPreferenceandroid:defaultValue="@string/preference_stamp_dateformat_default_value"android:entries="@array/preference_stamp_dateformat_entries"android:entryValues="@array/preference_stamp_dateformat_values"android:key="preference_stamp_dateformat"android:layout="@layout/custom_switch_preferece"android:title="@string/preference_stamp_dateformat" /></com.camera.function.main.ui.MyPreferenceCategory><!--通用--><com.camera.function.main.ui.MyPreferenceCategoryandroid:key="preference_common"android:title="@string/preference_common"><!--快门音保留--><SwitchPreferenceandroid:defaultValue="false"android:key="preference_shutter_sound"android:layout="@layout/custom_switch_preferece"android:summary="@string/preference_shutter_sound_summary"android:title="@string/preference_shutter_sound" /><!--新增 暗角设置--><SwitchPreferenceandroid:defaultValue="false"android:key="preference_vignette"android:layout="@layout/custom_switch_preferece"android:summary="@string/preference_vignette"android:title="@string/preference_vignette_setting" /></com.camera.function.main.ui.MyPreferenceCategory><!--关于--><com.camera.function.main.ui.MyPreferenceCategoryandroid:key="preference_about"android:title="@string/preference_about"><Preferenceandroid:key="preference_feedback"android:layout="@layout/custom_preference"android:title="@string/preference_feedback" /><Preferenceandroid:key="preference_version"android:layout="@layout/custom_switch_preferece"android:title="@string/preference_version" /><Preferenceandroid:icon="@drawable/preference_rate_icon"android:key="preference_rate"android:layout="@layout/preference"android:title="@string/preference_rate" /><Preferenceandroid:key="preference_share"android:layout="@layout/custom_preference"android:title="@string/preference_share" /></com.camera.function.main.ui.MyPreferenceCategory>
</PreferenceScreen>
二、全局设置应用字体的样式
解决方案来自开源项目:
android-typeface-helper
真正做到全局设置字体样式,每个Activity,每个界面,每个View都可以自定义字体样式,再也不用一个TextView一个TextView去设置了。

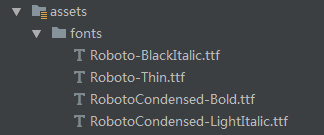
本例中,一共设置了四种字体作为测试:
1)将开源项目的以下代码放入自己的项目中:
① TypefaceHelper; ② TypefaceCollection (文末给出)
2)自定义Application,做字体初始化:
public class MyApplication extends Application {/** Multiple custom typefaces support */private TypefaceCollection mJuiceTypeface;/** Multiple custom typefaces support */private TypefaceCollection mArchRivalTypeface;/** Multiple custom typefaces support */private TypefaceCollection mActionManTypeface;/** Multiple custom typefaces support */private TypefaceCollection mSystemDefaultTypeface;@Override public void onCreate() {super.onCreate();// Load helper with default custom typeface (single custom typeface)TypefaceHelper.init(new TypefaceCollection.Builder().set(Typeface.NORMAL, Typeface.createFromAsset(getAssets(), "fonts/Roboto-BlackItalic.ttf")).create());// Multiple custom typefaces supportmJuiceTypeface = new TypefaceCollection.Builder().set(Typeface.NORMAL, Typeface.createFromAsset(getAssets(), "fonts/RobotoCondensed-Bold.ttf")).create();// Multiple custom typefaces supportmArchRivalTypeface = new TypefaceCollection.Builder().set(Typeface.NORMAL, Typeface.createFromAsset(getAssets(), "fonts/RobotoCondensed-LightItalic.ttf")).create();// Multiple custom typefaces supportmActionManTypeface = new TypefaceCollection.Builder().set(Typeface.NORMAL, Typeface.createFromAsset(getAssets(), "fonts/Roboto-Thin.ttf")).create();// Multiple custom typefaces supportmSystemDefaultTypeface = TypefaceCollection.createSystemDefault();}/** Multiple custom typefaces support */public TypefaceCollection getJuiceTypeface() {return mJuiceTypeface;}/** Multiple custom typefaces support */public TypefaceCollection getArchRivalTypeface() {return mArchRivalTypeface;}/** Multiple custom typefaces support */public TypefaceCollection getActionManTypeface() {return mActionManTypeface;}/** Multiple custom typefaces support */public TypefaceCollection getSystemDefaultTypeface() {return mSystemDefaultTypeface;}}使用Builder模式进行构建,一共使用了四种字体,注意使用中英文都适用的字体,比如roboto系列:
3)Activity中使用:
public class HorCenterActivity extends AppCompatActivity implements View.OnClickListener {private HorizontalScrollView hor;private LinearLayout ll;private TextView txt,txt1,txt2,txt3,txt4,txt5;@Overrideprotected void onCreate(@Nullable Bundle savedInstanceState) {super.onCreate(savedInstanceState);setContentView(R.layout.activity_hor);txt = findViewById(R.id.txt);txt1 = findViewById(R.id.txt_1);txt2 = findViewById(R.id.txt_2);txt3 = findViewById(R.id.txt_3);txt4 = findViewById(R.id.txt_4);txt5 = findViewById(R.id.txt_5);hor = findViewById(R.id.hor);ll = findViewById(R.id.ll);for (int i = 0; i < ll.getChildCount(); i++) {ll.getChildAt(i).setOnClickListener(this);}MyApplication myApp = (MyApplication) getApplication();// 设置Activity全局字体为默认字体typeface(this);// 设置Activity全局字体为其他字体typeface(this,myApp.getActionManTypeface());// 设置单个View的字体typeface(hor,myApp.getActionManTypeface());typeface(txt1,myApp.getArchRivalTypeface());typeface(txt2,myApp.getActionManTypeface());typeface(txt3,myApp.getSystemDefaultTypeface());typeface(txt4,myApp.getJuiceTypeface());}}
如上:我们可以直接设置Activity的全局字体,也可以单独设置任何View的字体,使用非常方便。
开源项目源码 — ①TypefaceHelper
import android.app.Activity;
import android.content.Context;
import android.graphics.Paint;
import android.graphics.Typeface;
import android.text.Spannable;
import android.text.SpannableString;
import android.text.TextPaint;
import android.text.style.MetricAffectingSpan;
import android.view.View;
import android.view.ViewGroup;
import android.widget.TextView;/*** Helper class for setting custom typefaces to {@link android.view.View} and* {@link android.view.ViewGroup}. Supports String styling using {@link android.text.SpannableString}** Applies typeface to all child views recursively.** For detailed information and guide: https://github.com/jskierbi/android-typeface-helper** @author Jakub Skierbiszewski*/
public class TypefaceHelper {private static TypefaceCollection sDefaultTypefaceCollection;/*** Initialize helper with typeface collection.* This should be called inside {@link android.app.Application#onCreate()}* @param typefaceCollection*/public static void init(TypefaceCollection typefaceCollection) {sDefaultTypefaceCollection = typefaceCollection;}/*** Return spannable string with default typeface style (style: Typeface.NORMAL)* see: http://stackoverflow.com/questions/8607707/how-to-set-a-custom-font-in-the-actionbar-title** @param context to obtain string resource* @param strResId string resource id, content** @throws IllegalStateException {@link #init(TypefaceCollection)} has not been called* @return SpannableString that can be used in TextView.setText() method*/public static SpannableString typeface(Context context, int strResId) {if (sDefaultTypefaceCollection == null) {throw new IllegalStateException("Default typeface collection not initialized. Forgot to call init()?");}return typeface(context.getString(strResId), sDefaultTypefaceCollection, Typeface.NORMAL);}/*** Return spannable string with typeface in certain style* see: http://stackoverflow.com/questions/8607707/how-to-set-a-custom-font-in-the-actionbar-title** @param context to obtain string resource* @param strResId string resource id, content* @param style    Typeface.NORMAL, Typeface.BOLD, Typeface.ITALIC or Typeface.BOLD_ITALIC** @throws IllegalStateException {@link #init(TypefaceCollection)} has not been calledC* @return SpannableString that can be used in TextView.setText() method*/public static SpannableString typeface(Context context, int strResId, int style) {if (sDefaultTypefaceCollection == null) {throw new IllegalStateException("Default typeface collection not initialized. Forgot to call init()?");}return typeface(context.getString(strResId), sDefaultTypefaceCollection, style);}/*** Return spannable string with typeface in certain style* see: http://stackoverflow.com/questions/8607707/how-to-set-a-custom-font-in-the-actionbar-title** @param sequence to typeface typeface to* @param style    Typeface.NORMAL, Typeface.BOLD, Typeface.ITALIC or Typeface.BOLD_ITALIC** @throws IllegalStateException {@link #init(TypefaceCollection)} has not been calledC* @return SpannableString that can be used in TextView.setText() method*/public static SpannableString typeface(CharSequence sequence, int style) {if (sDefaultTypefaceCollection == null) {throw new IllegalStateException("Default typeface collection not initialized. Forgot to call init()?");}return typeface(sequence, sDefaultTypefaceCollection, style);}/*** Return spannable string with typeface in certain style* see: http://stackoverflow.com/questions/8607707/how-to-set-a-custom-font-in-the-actionbar-title** @param context to obtain string resource* @param strResId string resource id, content* @param collection TypefaceCollection instance* @param style    Typeface.NORMAL, Typeface.BOLD, Typeface.ITALIC or Typeface.BOLD_ITALIC** @return SpannableString that can be used in TextView.setText() method*/public static SpannableString typeface(Context context, int strResId, TypefaceCollection collection, int style) {return typeface(context.getString(strResId), collection, style);}/*** Return spannable string with default typeface style (style: Typeface.NORMAL)* see: http://stackoverflow.com/questions/8607707/how-to-set-a-custom-font-in-the-actionbar-title** @param sequence to typeface typeface to** @throws IllegalStateException {@link #init(TypefaceCollection)} has not been called* @return SpannableString that can be used in TextView.setText() method*/public static SpannableString typeface(CharSequence sequence) {if (sDefaultTypefaceCollection == null) {throw new IllegalStateException("Default typeface collection not initialized. Forgot to call init()?");}return typeface(sequence, sDefaultTypefaceCollection, Typeface.NORMAL);}/*** Return spannable string with applied typeface in certain style* see: http://stackoverflow.com/questions/8607707/how-to-set-a-custom-font-in-the-actionbar-title** @param sequence    content* @param typefaceCollection Collection of typefaces* @param style     Typeface.NORMAL, Typeface.BOLD, Typeface.ITALIC or Typeface.BOLD_ITALIC* @throws IllegalArgumentException when invalid style is passed* @return SpannableString that can be used in TextView.setText() method*/public static SpannableString typeface(CharSequence sequence, TypefaceCollection typefaceCollection, int style) {checkTypefaceStyleThrowing(style);SpannableString s = new SpannableString(sequence);s.setSpan(new TypefaceSpan(typefaceCollection.getTypeface(style)), 0, s.length(), Spannable.SPAN_EXCLUSIVE_EXCLUSIVE);return s;}/*** Return spannable string with default typeface style (style: Typeface.NORMAL)* see: http://stackoverflow.com/questions/8607707/how-to-set-a-custom-font-in-the-actionbar-title** @param sequence    content* @param typefaceCollection Collection of typefaces* @return SpannableString that can be used in TextView.setText() method*/public static SpannableString typeface(CharSequence sequence, TypefaceCollection typefaceCollection) {return typeface(sequence, typefaceCollection, Typeface.NORMAL);}/*** Apply typefaces to main acitivty view (android.R.id.content).* @throws IllegalStateException {@link #init(TypefaceCollection)} has not been called* @param activity to typeface custom typefaces to*/public static void typeface(Activity activity) {if (sDefaultTypefaceCollection == null) {throw new IllegalStateException("Default typeface collection not initialized. Forgot to call init()?");}typeface(activity.findViewById(android.R.id.content), sDefaultTypefaceCollection);}/*** Apply typefaces to view* @throws IllegalStateException {@link #init(TypefaceCollection)} has not been called* @param view to typeface custom typefaces to*/public static void typeface(View view) {if (sDefaultTypefaceCollection == null) {throw new IllegalStateException("Default typeface collection not initialized. Forgot to call init()?");}typeface(view, sDefaultTypefaceCollection);}/*** Apply typefaces to main acitivty view (android.R.id.content).* @param activity to typeface custom typefaces to* @param typefaceCollection to obtain typefaces SparseArray.*/public static void typeface(Activity activity, TypefaceCollection typefaceCollection) {typeface(activity.findViewById(android.R.id.content), typefaceCollection);}/*** Apply fonts from map to all children of view (or view itself)** @param view view for which to typeface fonts* @param typefaceCollection Collection of typefaces*/public static void typeface(View view, TypefaceCollection typefaceCollection) {if (view instanceof ViewGroup) {applyTypeface((ViewGroup) view, typefaceCollection);} else {applyForView(view, typefaceCollection);}}/*** Check if typeface style int is one of:* <ul>*      <li>{@link android.graphics.Typeface#NORMAL}</li>*      <li>{@link android.graphics.Typeface#BOLD}</li>*      <li>{@link android.graphics.Typeface#ITALIC}</li>*      <li>{@link android.graphics.Typeface#BOLD_ITALIC}</li>* </ul>* @param style*/private static void checkTypefaceStyleThrowing(int style) {switch (style) {case Typeface.NORMAL:case Typeface.BOLD:case Typeface.ITALIC:case Typeface.BOLD_ITALIC:break;default:throw new IllegalArgumentException("Style have to be in (Typeface.NORMAL, Typeface.BOLD, Typeface.ITALIC, Typeface.BOLD_ITALIC)");}}/*** Apply typeface to all ViewGroup childs** @param viewGroup to typeface typeface* @param typefaceCollection typeface collection*/private static void applyTypeface(ViewGroup viewGroup, TypefaceCollection typefaceCollection) {for (int i = 0; i < viewGroup.getChildCount(); i++) {View childView = viewGroup.getChildAt(i);if (childView instanceof ViewGroup) {applyTypeface((ViewGroup) childView, typefaceCollection);} else {applyForView(childView, typefaceCollection);}}}/*** Apply typeface to single view** @param view      to typeface typeface* @param typefaceCollection typeface collection*/private static void applyForView(View view, TypefaceCollection typefaceCollection) {if (view instanceof TextView) {TextView textView = (TextView) view;Typeface oldTypeface = textView.getTypeface();final int style = oldTypeface == null ? Typeface.NORMAL : oldTypeface.getStyle();textView.setTypeface(typefaceCollection.getTypeface(style));textView.setPaintFlags(textView.getPaintFlags() | Paint.SUBPIXEL_TEXT_FLAG);}}private static class TypefaceSpan extends MetricAffectingSpan {Typeface typeface;TypefaceSpan(Typeface typeface) {this.typeface = typeface;}@Overridepublic void updateMeasureState(TextPaint p) {p.setTypeface(typeface);p.setFlags(p.getFlags() | Paint.SUBPIXEL_TEXT_FLAG);}@Overridepublic void updateDrawState(TextPaint tp) {tp.setTypeface(typeface);tp.setFlags(tp.getFlags() | Paint.SUBPIXEL_TEXT_FLAG);}}
}
开源项目 — ②TypefaceCollection
package com.example.administrator.testapplication.second_row.nueight;import android.graphics.Typeface;
import android.util.SparseArray;/*** Represents collection of typefaces. This includes 4 variants (styles):* <ul>*      <li>{@link android.graphics.Typeface#NORMAL}</li>*      <li>{@link android.graphics.Typeface#BOLD}</li>*      <li>{@link android.graphics.Typeface#ITALIC}</li>*      <li>{@link android.graphics.Typeface#BOLD_ITALIC}</li>* </ul>* @author Jakub Skierbiszewski*/
public class TypefaceCollection {/** Builder interface */public static class Builder {/*** This typeface is set in fist {@link #set(int, android.graphics.Typeface)}* call and is used for all unset styles in {@link #create()} call*/private Typeface mDefaultTypeface;private TypefaceCollection mCollection = new TypefaceCollection();/*** Sets typeface for certain style.** @param typefaceStyle one of:* <ul>*      <li>{@link android.graphics.Typeface#NORMAL}</li>*      <li>{@link android.graphics.Typeface#BOLD}</li>*      <li>{@link android.graphics.Typeface#ITALIC}</li>*      <li>{@link android.graphics.Typeface#BOLD_ITALIC}</li>* </ul>* @throws IllegalArgumentException when invalid typefaceStyle is passed* @return self*/public Builder set(int typefaceStyle, Typeface typeface) {validateTypefaceStyle(typefaceStyle);if (mDefaultTypeface == null) {mDefaultTypeface = typeface;}mCollection.mTypefaces.put(typefaceStyle, typeface);return this;}/*** Creates typeface collection.* If not all styles are set, uses fist typeface that has been set* for all unset styles.* @throws IllegalStateException when no {@link android.graphics.Typeface}*         has been set via {@link #set(int, android.graphics.Typeface)}* @return TypefaceCollection*/public TypefaceCollection create() {if (mDefaultTypeface == null) {throw new IllegalStateException("At least one typeface style have to be set!");}if (mCollection.mTypefaces.get(Typeface.NORMAL) == null) {mCollection.mTypefaces.put(Typeface.NORMAL, mDefaultTypeface);}if (mCollection.mTypefaces.get(Typeface.BOLD) == null) {mCollection.mTypefaces.put(Typeface.BOLD, mDefaultTypeface);}if (mCollection.mTypefaces.get(Typeface.ITALIC) == null) {mCollection.mTypefaces.put(Typeface.ITALIC, mDefaultTypeface);}if (mCollection.mTypefaces.get(Typeface.BOLD_ITALIC) == null) {mCollection.mTypefaces.put(Typeface.BOLD_ITALIC, mDefaultTypeface);}TypefaceCollection collection = mCollection;mCollection = null;return collection;}}/*** Creates default typeface collection, containing system fonts:* <ul>*     <li>{@link android.graphics.Typeface#DEFAULT}</li>*     <li>{@link android.graphics.Typeface#DEFAULT_BOLD}</li>* </ul>* @return typeface collection*/public static TypefaceCollection createSystemDefault() {return new Builder().set(Typeface.NORMAL, Typeface.DEFAULT).set(Typeface.BOLD, Typeface.DEFAULT_BOLD).set(Typeface.ITALIC, Typeface.DEFAULT).set(Typeface.BOLD_ITALIC, Typeface.DEFAULT_BOLD).create();}private SparseArray<Typeface> mTypefaces = new SparseArray<Typeface>(4);private TypefaceCollection() {}/**** @param typefaceStyle* <ul>*      <li>{@link android.graphics.Typeface#NORMAL}</li>*      <li>{@link android.graphics.Typeface#BOLD}</li>*      <li>{@link android.graphics.Typeface#ITALIC}</li>*      <li>{@link android.graphics.Typeface#BOLD_ITALIC}</li>* </ul>* @throws IllegalArgumentException when invalid typefaceStyle is passed** @return selected Typeface*/Typeface getTypeface(int typefaceStyle) {validateTypefaceStyle(typefaceStyle);return mTypefaces.get(typefaceStyle);}private static void validateTypefaceStyle(int typefaceStyle) {switch (typefaceStyle) {case Typeface.NORMAL:case Typeface.BOLD:case Typeface.ITALIC:case Typeface.BOLD_ITALIC:break;default:throw new IllegalArgumentException("Invalid typeface style! Have to be one of " +"Typeface.NORMAL, Typeface.BOLD, Typeface.ITALIC or Typeface.BOLD_ITALIC");}}
}