文章目录
- Android 沉浸式状态栏
- 前提
- 情况一:使用FrameLayout
- 情况二:使用CoordinatorLayout
- fitsSystemWindows属性原理
- 情况三:在CoordinatorLayout中添加子控件
- 问题:
- 解决:
- 情况四:使用FrameLayout实现沉浸式效果
- 颜色相近时,修改状态栏图标颜色
- 代码下载
- 其他资料
Android 沉浸式状态栏
前提
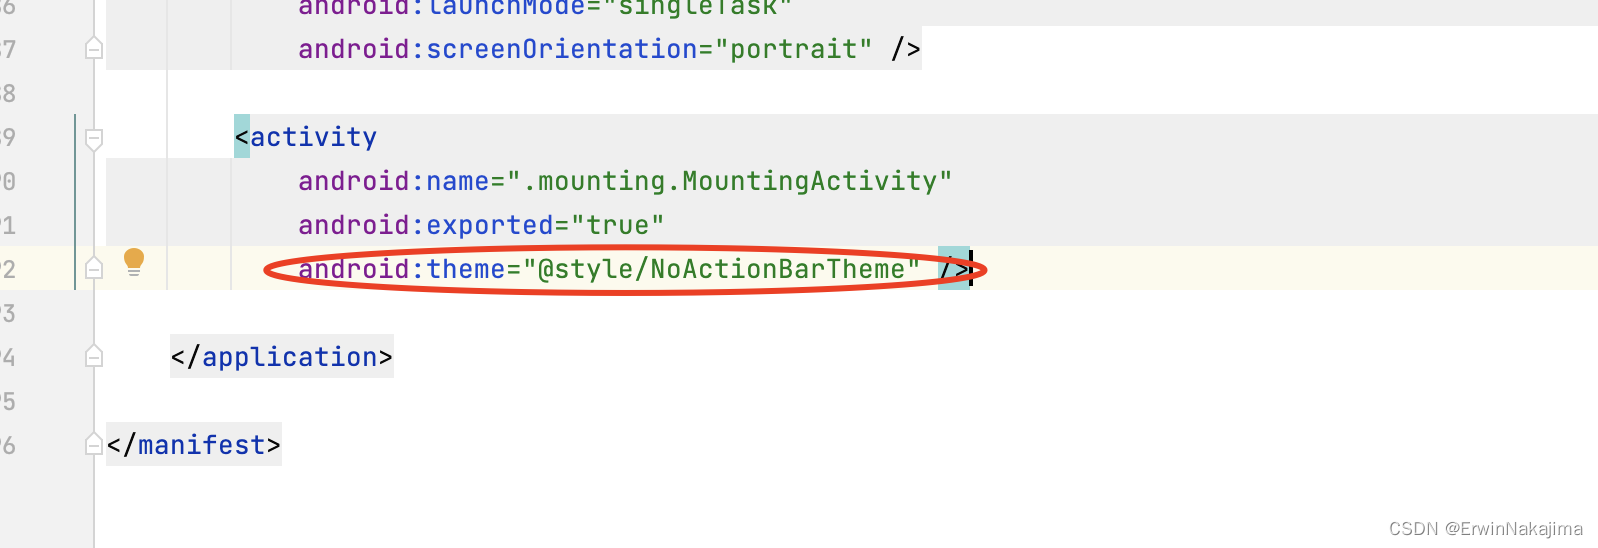
给Activity或Application设置NoActionBar的主题
<style name="NoActionBarTheme" parent="Theme.MaterialComponents.DayNight.NoActionBar"><!-- Primary brand color. --><item name="colorPrimary">@color/purple_500</item><item name="colorPrimaryVariant">@color/purple_700</item><item name="colorOnPrimary">@color/white</item><!-- Secondary brand color. --><item name="colorSecondary">@color/teal_200</item><item name="colorSecondaryVariant">@color/teal_700</item><item name="colorOnSecondary">@color/black</item><!-- 设置状态栏颜色: --><item name="android:statusBarColor">@android:color/transparent</item>
</style>
情况一:使用FrameLayout
代码如下:
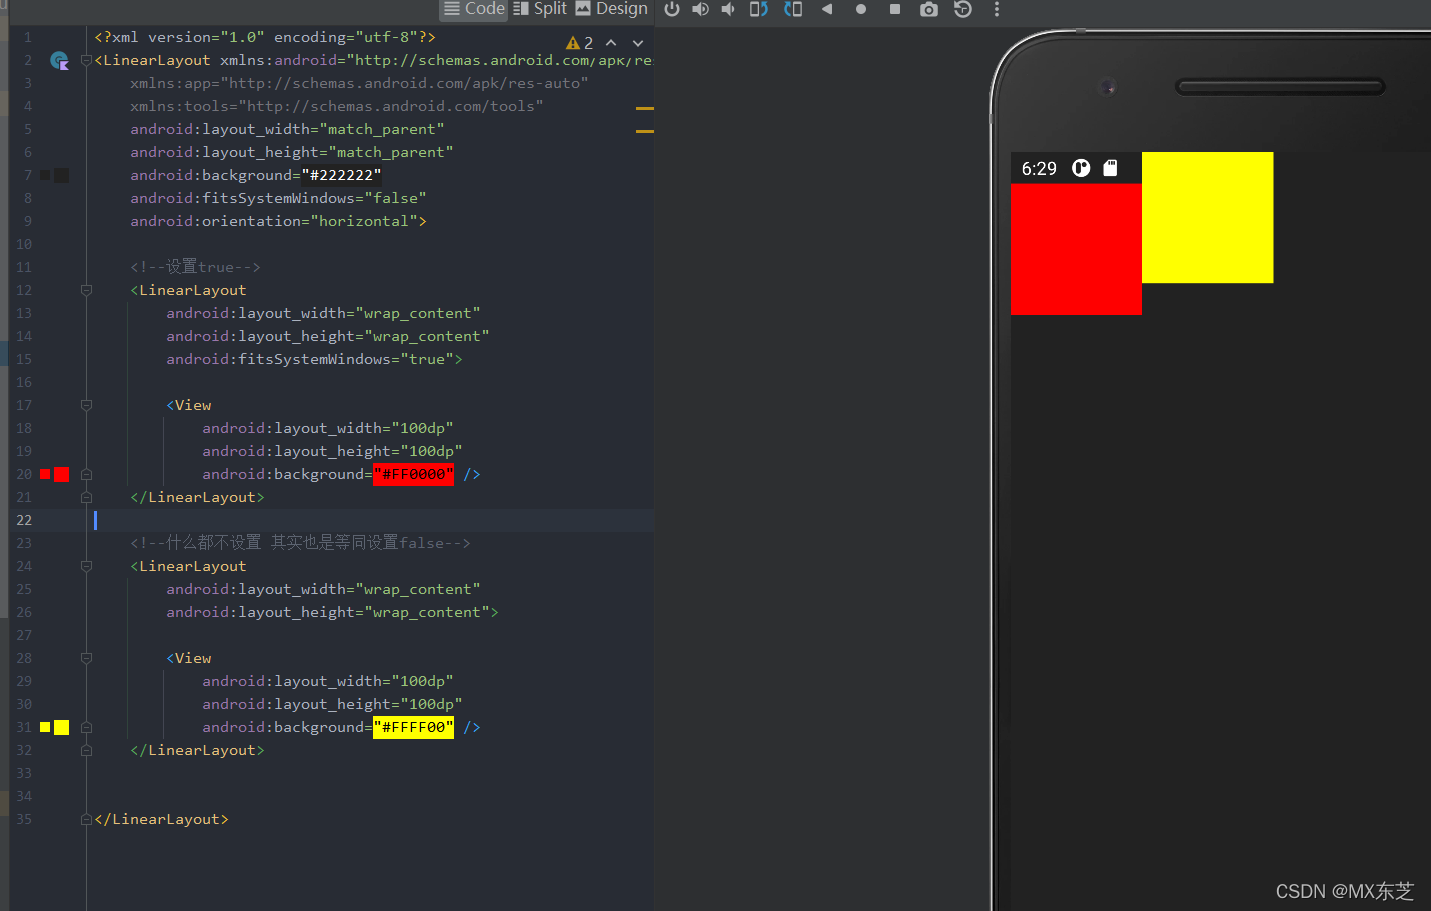
class ImmersionActivity1 : BaseActivity() {override fun onCreate(savedInstanceState: Bundle?) {super.onCreate(savedInstanceState)setContentView(R.layout.activity_immersion1)window.statusBarColor = Color.TRANSPARENT}
}
<?xml version="1.0" encoding="utf-8"?>
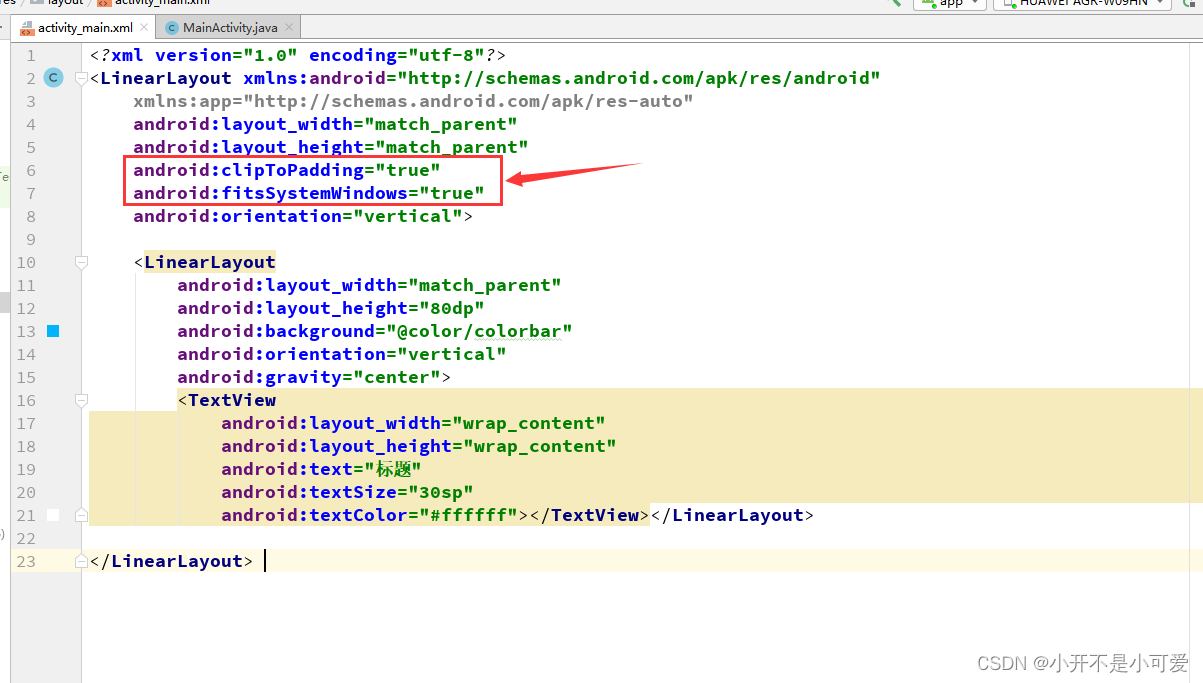
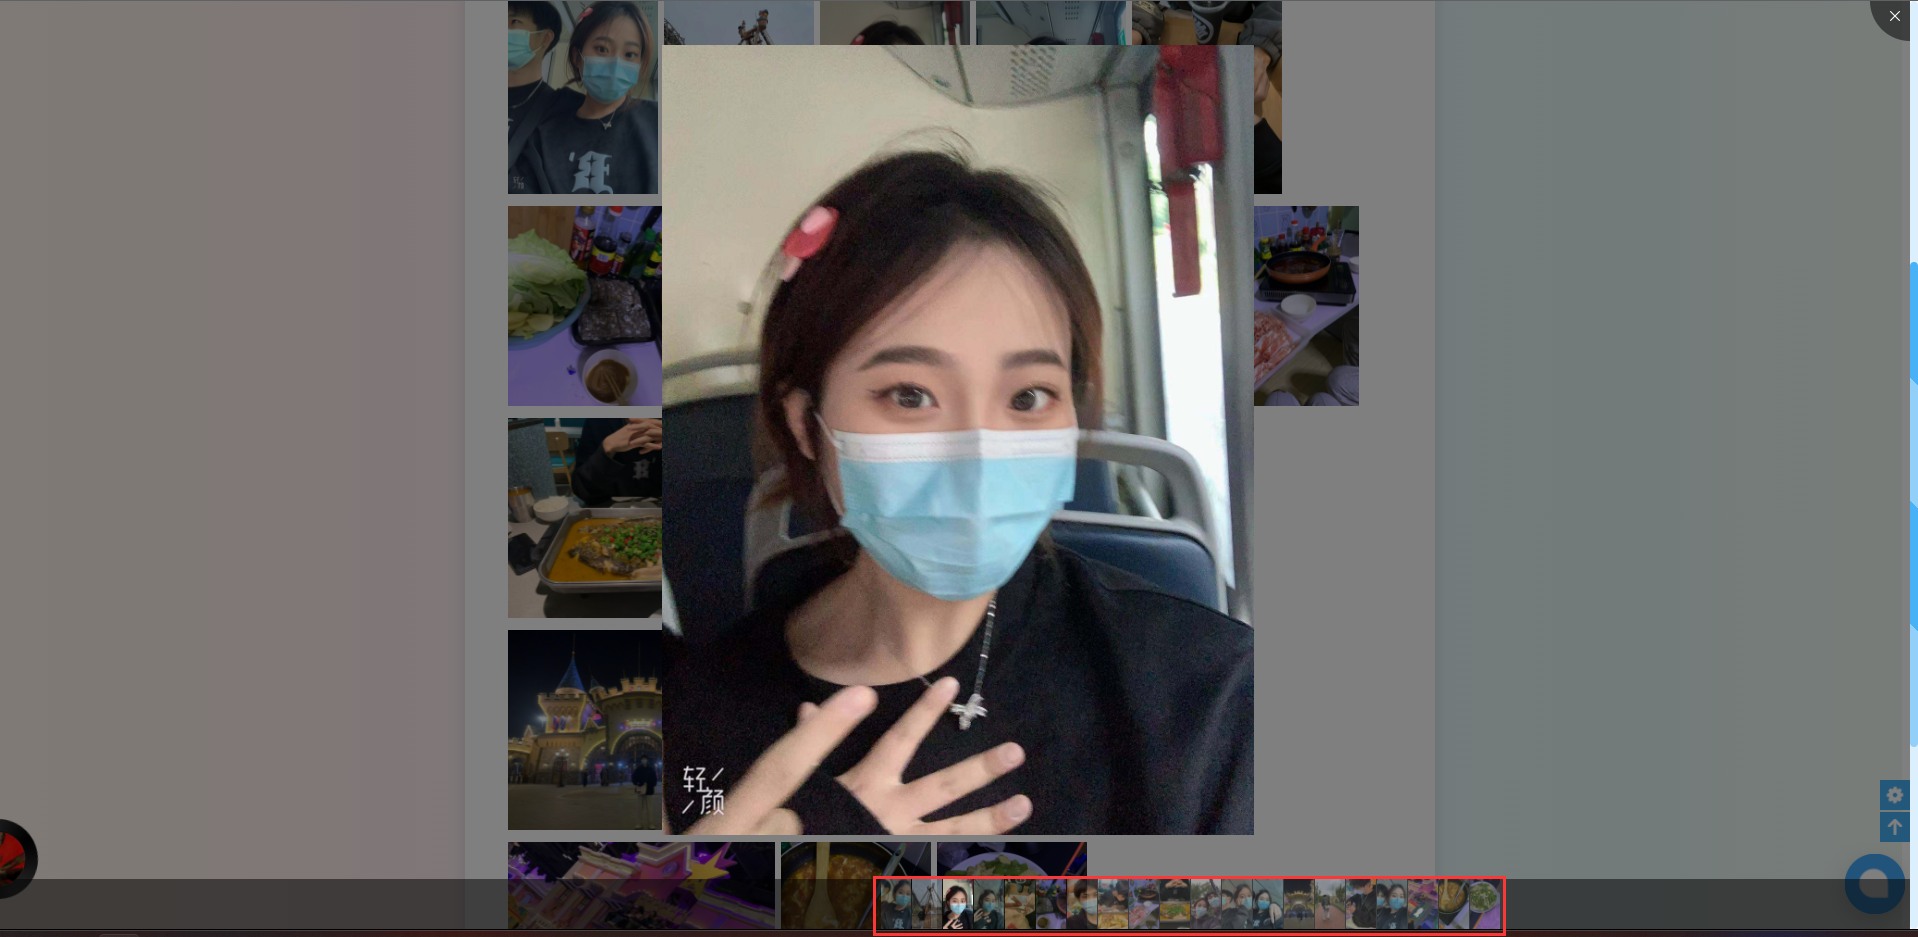
<FrameLayout xmlns:android="http://schemas.android.com/apk/res/android"xmlns:app="http://schemas.android.com/apk/res-auto"xmlns:tools="http://schemas.android.com/tools"android:layout_width="match_parent"android:layout_height="match_parent"android:background="@color/pink"android:fitsSystemWindows="true"tools:context=".immersion.ImmersionActivity1"></FrameLayout>
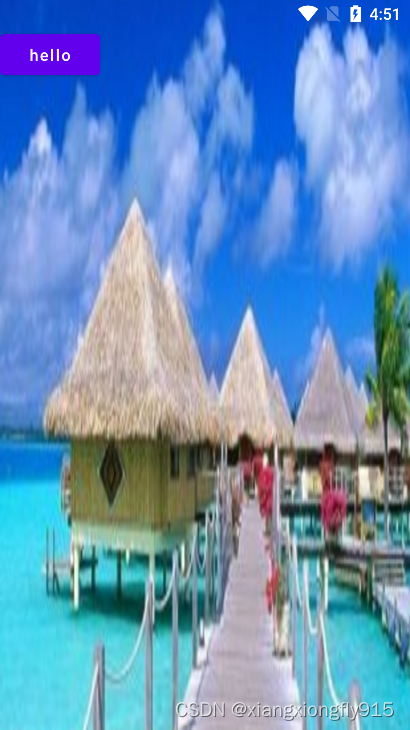
效果如下:
说明:
状态栏部分没有被颜色,说明沉浸式效果没有达到。
情况二:使用CoordinatorLayout
将FrameLayout替换为CoordinatorLayout布局。
代码如下:
<?xml version="1.0" encoding="utf-8"?>
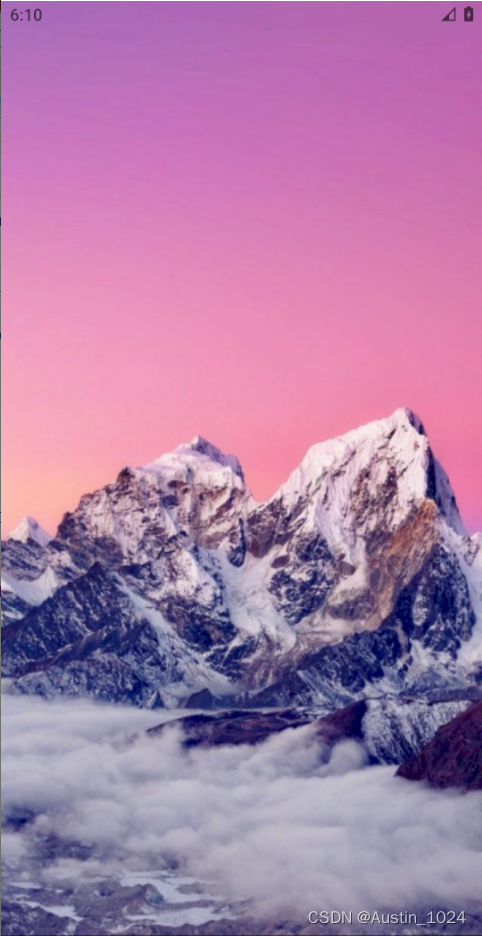
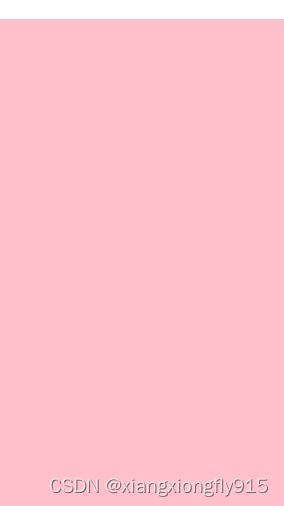
<androidx.coordinatorlayout.widget.CoordinatorLayout xmlns:android="http://schemas.android.com/apk/res/android"xmlns:app="http://schemas.android.com/apk/res-auto"xmlns:tools="http://schemas.android.com/tools"android:layout_width="match_parent"android:layout_height="match_parent"android:background="@color/pink"android:fitsSystemWindows="true"tools:context=".immersion.ImmersionActivity1"></androidx.coordinatorlayout.widget.CoordinatorLayout>
效果如下:
说明:
状态栏有被颜色,说明沉浸式效果已经达到了。
fitsSystemWindows属性原理
为什么根布局是FrameLayout时,fitsSystemWindows属性不生效,而使用CoordinatorLayout布局时才能生效。
这是因为CoordinatorLayout布局对这个属性进行了处理,其核心代码如下:
private void setupForInsets() {if (Build.VERSION.SDK_INT < 21) {return;}if (ViewCompat.getFitsSystemWindows(this)) {if (mApplyWindowInsetsListener == null) {mApplyWindowInsetsListener =new androidx.core.view.OnApplyWindowInsetsListener() {@Overridepublic WindowInsetsCompat onApplyWindowInsets(View v,WindowInsetsCompat insets) {return setWindowInsets(insets);}};}// 核心代码ViewCompat.setOnApplyWindowInsetsListener(this, mApplyWindowInsetsListener);// 核心代码setSystemUiVisibility(View.SYSTEM_UI_FLAG_LAYOUT_STABLE| View.SYSTEM_UI_FLAG_LAYOUT_FULLSCREEN);} else {ViewCompat.setOnApplyWindowInsetsListener(this, null);}
}
情况三:在CoordinatorLayout中添加子控件
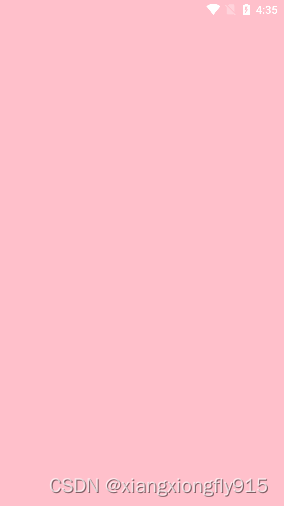
问题:
根布局为CoordinatorLayout,子控件Button和ImageView没有延伸到状态栏区域。
<?xml version="1.0" encoding="utf-8"?>
<androidx.coordinatorlayout.widget.CoordinatorLayout xmlns:android="http://schemas.android.com/apk/res/android"xmlns:app="http://schemas.android.com/apk/res-auto"xmlns:tools="http://schemas.android.com/tools"android:layout_width="match_parent"android:layout_height="match_parent"android:background="@color/pink"android:fitsSystemWindows="true"tools:context=".immersion.ImmersionActivity3"><Buttonandroid:layout_width="wrap_content"android:layout_height="wrap_content"android:text="hello" /><ImageViewandroid:layout_width="match_parent"android:layout_height="match_parent"android:fitsSystemWindows="true"android:scaleType="fitXY"android:src="@drawable/a" /></androidx.coordinatorlayout.widget.CoordinatorLayout>
解决:
可以使用CollapsingToolbarLayout控件解决。
<?xml version="1.0" encoding="utf-8"?>
<androidx.coordinatorlayout.widget.CoordinatorLayout xmlns:android="http://schemas.android.com/apk/res/android"xmlns:app="http://schemas.android.com/apk/res-auto"xmlns:tools="http://schemas.android.com/tools"android:layout_width="match_parent"android:layout_height="match_parent"android:background="@color/pink"android:fitsSystemWindows="true"tools:context=".immersion.ImmersionActivity3"><com.google.android.material.appbar.CollapsingToolbarLayoutandroid:layout_width="match_parent"android:layout_height="match_parent"android:fitsSystemWindows="true"><ImageViewandroid:layout_width="match_parent"android:layout_height="match_parent"android:fitsSystemWindows="true"android:scaleType="fitXY"android:src="@drawable/a" /></com.google.android.material.appbar.CollapsingToolbarLayout><Buttonandroid:layout_width="wrap_content"android:layout_height="wrap_content"android:text="hello" /></androidx.coordinatorlayout.widget.CoordinatorLayout>
情况四:使用FrameLayout实现沉浸式效果
<?xml version="1.0" encoding="utf-8"?>
<FrameLayout xmlns:android="http://schemas.android.com/apk/res/android"xmlns:app="http://schemas.android.com/apk/res-auto"xmlns:tools="http://schemas.android.com/tools"android:id="@+id/frame_layout"android:layout_width="match_parent"android:layout_height="match_parent"tools:context=".immersion.ImmersionActivity4"><ImageViewandroid:layout_width="match_parent"android:layout_height="match_parent"android:scaleType="fitXY"android:src="@drawable/a" /><Buttonandroid:id="@+id/button"android:layout_width="wrap_content"android:layout_height="wrap_content"android:text="hello" /></FrameLayout>
override fun onCreate(savedInstanceState: Bundle?) {super.onCreate(savedInstanceState)setContentView(R.layout.activity_immersion4)window.statusBarColor = Color.TRANSPARENTval frameLayout: FrameLayout = findViewById(R.id.frame_layout)val button: Button = findViewById(R.id.button)//沉浸式效果:frameLayout.systemUiVisibility =SYSTEM_UI_FLAG_LAYOUT_STABLE or SYSTEM_UI_FLAG_LAYOUT_FULLSCREEN//状态栏遮挡问题:ViewCompat.setOnApplyWindowInsetsListener(button, object : OnApplyWindowInsetsListener {override fun onApplyWindowInsets(view: View,insets: WindowInsetsCompat): WindowInsetsCompat {val layoutParams = view.layoutParams as FrameLayout.LayoutParamslayoutParams.topMargin = insets.systemWindowInsetTopreturn insets}})
}

颜色相近时,修改状态栏图标颜色
当状态栏图标的颜色和背景图颜色非常接近时,会导致部分内容看不清的情况。
这事可以借助Palette库识别状态栏区域的颜色,如果是浅色将状态栏图标的颜色改为黑色,否则改为白色。
添加依赖库:
implementation 'androidx.palette:palette:1.0.0'
工具类:
/*** 状态栏工具类*/
object StatusBarUtils {/*** 获取状态栏高度*/fun getStatusBarHeight(context: Context): Int {var result = 0val resourceId = context.resources.getIdentifier("status_bar_height", "dimen", "android")if (resourceId > 0) {result = context.resources.getDimensionPixelSize(resourceId)}return result}/*** 亮色状态栏,图片和文字是黑色的*/fun setLightStatusBar(activity: Activity) {val flags = activity.window.decorView.systemUiVisibilityactivity.window.decorView.systemUiVisibility = flags or View.SYSTEM_UI_FLAG_LIGHT_STATUS_BAR}/*** 暗色状态栏,图片和文字是白色的*/fun setDarkStatusBar(activity: Activity) {val flags =activity.window.decorView.systemUiVisibility or View.SYSTEM_UI_FLAG_LIGHT_STATUS_BARactivity.window.decorView.systemUiVisibility =flags xor View.SYSTEM_UI_FLAG_LIGHT_STATUS_BAR}
}
/*** 屏幕工具类*/
object ScreenUtils {/*** 获取屏幕宽度*/fun getScreenWidth(context: Context): Int {val displayMetrics = context.resources.displayMetricsreturn displayMetrics.heightPixels}
}
代码实现:
class ImmersionActivity5 : BaseActivity() {private lateinit var imageView: ImageViewoverride fun onCreate(savedInstanceState: Bundle?) {super.onCreate(savedInstanceState)setContentView(R.layout.activity_immersion5)val btnDarkImage = findViewById<Button>(R.id.btn_dark_image)val btnLightImage = findViewById<Button>(R.id.btn_light_image)imageView = findViewById(R.id.imageView)btnDarkImage.setOnClickListener {setImageByResource(R.drawable.dark_image)}btnLightImage.setOnClickListener {setImageByResource(R.drawable.light_image)}setImageByResource(R.drawable.light_image)}private fun setImageByResource(@DrawableRes imageResource: Int) {val bitmap = BitmapFactory.decodeResource(resources, imageResource)imageView.setImageBitmap(bitmap)detectBitmapColor(bitmap)}/*** 检测Bitmap颜色*/private fun detectBitmapColor(bitmap: Bitmap) {val colorCount = 5val left = 0val top = 0val right = ScreenUtils.getScreenWidth(this)val bottom = StatusBarUtils.getStatusBarHeight(this)Palette.from(bitmap).maximumColorCount(colorCount).setRegion(left, top, right, bottom).generate(object : Palette.PaletteAsyncListener {override fun onGenerated(palette: Palette?) {var mostPopularSwatch: Palette.Swatch? = nullif (palette != null) {for (swatch in palette.swatches) {if (mostPopularSwatch == null|| swatch.population > mostPopularSwatch.population) {mostPopularSwatch = swatch}}}mostPopularSwatch?.let { swatch ->val luminance = ColorUtils.calculateLuminance(swatch.rgb)if (luminance < 0.5) {StatusBarUtils.setDarkStatusBar(mActivity)} else {StatusBarUtils.setLightStatusBar(mActivity)}}}})}
}
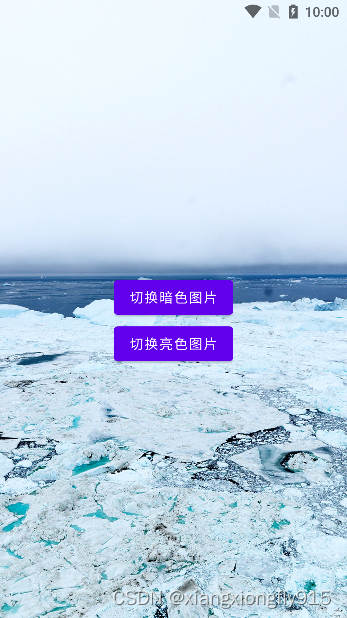
效果:
点击“切换暗色图片”按钮:

点击“切换亮色图片”按钮:
代码下载
其他资料
优秀博客推荐
第三方框架推荐(ImmersionBar)
第三方框架推荐(UltimateBarX)