本节带来Paint API系列的最后一个API,Typeface(字型),由字义,我们大概可以猜到,这个 API是用来设置字体以及字体风格的,使用起来也非常的简单!下面我们来学习下Typeface的一些相关 的用法!
官方API文档:Typeface~
1.字体的可选风格
四个整型常量:
- BOLD:加粗
- ITALIC:斜体
- BOLD_ITALIC:粗斜体
- NORMAL:正常
2.可选字体对象(Typeface)
Android系统默认支持三种字体,分别为:sans,serif,monospace 而提供的可选静态对象值有五个:
- DEFAULT:默认正常字体对象
- DEFAULT_BOLD:默认的字体对象,注意:这实际上不可能是粗体的,这取决于字体设置。 由getStyle()来确定
- MONOSPACE:monospace 字体风格
- SANS_SERIF:sans serif字体风格
- SERIF:serif字体风格
3.自定义创建字型
可能默认的三种字体并不能满足你,可能你喜欢MAC的字体——Monaco字体,你想让你APP 里的文字可以用这种字体,首先准备好我们的TTF文件,然后丢到assets/font/目录下 然后创建对应对象,关键代码如下:
Typeface typeFace =Typeface.createFromAsset(getAssets(),"font/MONACO.ttf");
4.使用代码示例:
运行效果图:
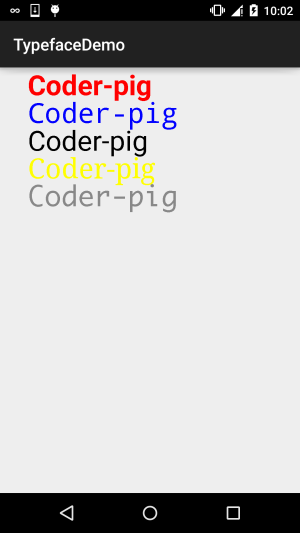
自定义的View类:MyView.java:
/*** Created by Jay on 2015/11/5 0005.*/
public class MyView extends View{private Paint mPaint1,mPaint2,mPaint3,mPaint4,mPaint5;private Context mContext;public MyView(Context context) {this(context,null);}public MyView(Context context, AttributeSet attrs) {super(context, attrs);mContext = context;init();}public MyView(Context context, AttributeSet attrs, int defStyleAttr) {super(context, attrs, defStyleAttr);}private void init(){mPaint1 = new Paint();mPaint2 = new Paint();mPaint3 = new Paint();mPaint4 = new Paint();mPaint5 = new Paint();mPaint1.setColor(Color.RED);mPaint2.setColor(Color.BLUE);mPaint3.setColor(Color.BLACK);mPaint4.setColor(Color.YELLOW);mPaint5.setColor(Color.GRAY);mPaint1.setTextSize(100);mPaint2.setTextSize(100);mPaint3.setTextSize(100);mPaint4.setTextSize(100);mPaint5.setTextSize(100);mPaint1.setTypeface(Typeface.DEFAULT_BOLD);mPaint2.setTypeface(Typeface.MONOSPACE);mPaint3.setTypeface(Typeface.SANS_SERIF);mPaint4.setTypeface(Typeface.SERIF);mPaint5.setTypeface(Typeface.createFromAsset(mContext.getAssets(), "font/MONACO.ttf"));}@Overrideprotected void onDraw(Canvas canvas) {canvas.drawText("Coder-pig", 100, 100, mPaint1);canvas.drawText("Coder-pig", 100, 200, mPaint2);canvas.drawText("Coder-pig", 100, 300, mPaint3);canvas.drawText("Coder-pig", 100, 400, mPaint4);canvas.drawText("Coder-pig", 100, 500, mPaint5);}
}