引言
流媒体文件是目前非常流行的网络媒体格式之一,这种文件允许用户一边下载一边播放,从而大大减少了用户等待播放的时间。另外通过网络播放流媒体文件时,文件本身不会在本地磁盘中存储,这样就节省了大量的磁盘空间开销。正是这些优点,使得流媒体文件被广泛应用于网络播放。
流媒体服务器是通过建立发布点来发布流媒体内容和管理用户连接的。流媒体服务器能够发布从视频采集卡或摄像机等设备中传来的实况流,也可以发布事先存储的流媒体文件,并且发布实况流和流媒体文件的结合体。一个媒体流可以由一个媒体文件构成,也可以由多个媒体文件组合而成,还可以由一个媒体文件目录组成。
Flash Media Server,简称 FMS,是 Flash 大家庭里的一员,被称为是目前开发 Web 音视频应用程序(比如,视频聊天室、视频会议系统、播客系统、音视频留言等等)的最方便最快捷的解决方案。也在 web 应用程序开发上有着越来越广泛的应用。当然 FMS 这种优良功能并不是免费提供给广大用户的,几千美金每个点的价格让很多开发人员望而却步。于是,大家开始尝试寻找一种更合适的解决方案,开源的 Red5 便成为了人们的新宠。
Red5 是一个采用 Java 开发的开源的 Flash 流媒体服务器,功能上与 FMS 类似。它支持:把音频(MP3)和视频(FLV)转换成播放流;录制客户端播放流(只支持 FLV);共享对象;现场直播流发布;远程调用。Red5 使用 RSTP 作为流媒体传输协议,包括在线录制,Flash 流媒体播放,在线聊天,视频会议等一些基本功能。国内外基于 Red5 的流媒体应用产品也在不断推广,例如在线视频会议 Openmeeting,大型 Flash 网游功夫之王 2。
Red5 概述
Red5 是一个采用 Java 开发开源的 Flash 流媒体服务器。免费开源使软件更加容易扩展,下载后你可以对源代码进行修改;更加经济,比起 FMS 高昂的费用,Red5 能为一般的应用节约大笔费用;同时服务器端的 Java 面向对象语言比起 FMS 服务器端的 ActionScript2 语言更加成熟。鉴于 Red5 的种种优势,推出不久便被广大用户所接受。
Red 5 支持:
1. 把音频(MP3)和视频(FLV, F4V, MP4, 3GP)转换成播放流;
2. 录制客户端播放流, 把摄像头,麦克风等传入的音频视频录制保存到服务器;
3. 共享对象;
4. 现场直播流发布;
5. 远程调用;
6. 协议:RTMP, RTMPT, RTMPS, and RTMPE。
Red5 服务器搭建
JDK自行安装
下载Red5
https://github.com/Red5/red5-server/releases
解压到自己的一个能记住的文件夹中 eg:F:\Red5
配置Red5相关参数
修改red5.properties配置文件..\conf\red5.properties
只需要配置HTTP 和RMTP节点的host和port即可 默认也行host配置成0.0.0.0 输入局域网IP或者127.0.0.1都可以正常访问
-
# Socket policy -
policy.host=0.0.0.0 -
policy.port=843 -
# HTTP -
http.host=0.0.0.0 -
http.port=8855 -
https.port=5443 -
http.URIEncoding=UTF-8 -
http.max_keep_alive_requests=-1 -
http.max_threads=20 -
http.acceptor_thread_count=10 -
http.processor_cache=20 -
# RTMP -
rtmp.host=0.0.0.0 -
rtmp.port=1935 -
rtmp.io_threads=16 -
rtmp.send_buffer_size=65536 -
rtmp.receive_buffer_size=65536 -
rtmp.ping_interval=1000 -
rtmp.max_inactivity=60000 -
rtmp.max_handshake_time=5000 -
rtmp.tcp_nodelay=true -
rtmp.tcp_keepalive=false -
rtmp.default_server_bandwidth=10000000 -
rtmp.default_client_bandwidth=10000000 -
rtmp.client_bandwidth_limit_type=2 -
rtmp.bandwidth_detection=false -
rtmp.encoder_base_tolerance=5000 -
rtmp.encoder_drop_live_future=false -
# traffic optimization hinting. to disable set traffic class set to -1 -
# low delay + high throughput == 24 (0x18) -
rtmp.traffic_class=-1 -
# requested maximum length of the queue of incoming connections -
rtmp.backlog=32 -
# the interval (seconds) between each throughput calculation -
rtmp.thoughput_calc_interval=15 -
# enable use of the default mina acceptor -
rtmp.default_acceptor=true -
# socket i/o pool sizes used when default acceptor is disabled -
rtmp.initial_pool_size=0 -
rtmp.max_pool_size=2 -
rtmp.max_processor_pool_size=16 -
rtmp.executor_keepalive_time=60000 -
mina.logfilter.enable=false -
# scheduler configs (per application) -
rtmp.scheduler.pool_size=16 -
rtmp.deadlockguard.sheduler.pool_size=16 -
# message executor configs (per application) - adjust these as needed if you get tasks rejected -
rtmp.executor.core_pool_size=4 -
rtmp.executor.max_pool_size=32 -
rtmp.executor.queue_capacity=64 -
# drop audio packets when queue is almost full, to disable this, set to 0 -
rtmp.executor.queue_size_to_drop_audio_packets=60 -
# maximum amount of time allotted to process a single rtmp message / packet in milliseconds, set it as 0 to disable timeout -
rtmp.max_handling_time=2000 -
# connection tweaks - dont modify unless you know what you're doing -
rtmp.channel.initial.capacity=3 -
rtmp.channel.concurrency.level=1 -
rtmp.stream.initial.capacity=1 -
rtmp.stream.concurrency.level=1 -
rtmp.pending.calls.initial.capacity=3 -
rtmp.pending.calls.concurrency.level=1 -
rtmp.reserved.streams.initial.capacity=1 -
rtmp.reserved.streams.concurrency.level=1 -
# RTMPS -
rtmps.host=0.0.0.0 -
rtmps.port=8443 -
rtmps.ping_interval=5000 -
rtmps.max_inactivity=60000 -
rtmps.max_keep_alive_requests=-1 -
rtmps.max_threads=20 -
rtmps.acceptor_thread_count=2 -
rtmps.processor_cache=20 -
# RTMPS Key and Trust store parameters -
rtmps.keystorepass=password -
rtmps.keystorefile=conf/keystore.jks -
rtmps.truststorepass=password -
rtmps.truststorefile=conf/truststore.jks -
# RTMPT -
rtmpt.host=0.0.0.0 -
rtmpt.port=8088 -
rtmpt.ping_interval=5000 -
rtmpt.max_inactivity=60000 -
rtmpt.max_handshake_time=5000 -
rtmpt.max_keep_alive_requests=-1 -
rtmpt.max_threads=20 -
rtmpt.acceptor_thread_count=2 -
rtmpt.processor_cache=20 -
rtmpt.encoder_base_tolerance=5000 -
rtmpt.encoder_drop_live_future=true -
# better setting for streaming media -
rtmpt.target_reponse_size=32768 -
# best setting for small messages or shared objects -
#rtmpt.target_reponse_size=8192 -
# max incoming messages to process at a time. the most that FP appears to send is 166 -
rtmpt.max_in_msg_process=166 -
# max time in millis that we will wait when offering data to the in or out queue -
rtmpt.max_queue_offer_time=125 -
# max offer attempts -
rtmpt.max_queue_offer_attempts=4 -
# WebSocket -
ws.host=0.0.0.0 -
ws.port=8081 -
# Debug proxy (needs to be activated in red5-core.xml) -
proxy.source_host=127.0.0.1 -
proxy.source_port=1936 -
proxy.destination_host=127.0.0.1 -
proxy.destination_port=1935 -
# JMX -
jmx.rmi.host=localhost -
jmx.rmi.port=9999 -
jmx.rmi.sport=9998 -
jmx.rmi.port.remoteobjects= -
jmx.keystorepass=password -
jmx.mina.monitor.enable=false -
jmx.mina.poll.interval=1000 -
# Whether to always create the registry in-process, not attempting to -
# locate an existing registry at the specified port. Set to "true" in order -
# to avoid the overhead of locating an existing registry when you always intend -
# to create a new registry in any case. -
jmx.registry.create=true -
# Whether or not the MBeanServerFactoryBean should attempt to locate a running -
# MBeanServer before creating one -
jmx.reuse.existing.server=true -
# Whether to register the MBeanServer with the MBeanServerFactory, making it -
# available through MBeanServerFactory.findMBeanServer() -
jmx.register.factory=true -
# Whether any threads started for the JMXConnectorServer should be started as daemon threads -
jmx.daemon=true -
# Whether the JMXConnectorServer should be started in a separate thread -
jmx.threaded=true -
# Server properties -
# max events to send in a single update -
so.max.events.per.update=64 -
so.scheduler.pool_size=4 -
keyframe.cache.entry.max=500 -
war.deploy.server.check.interval=600000 -
fileconsumer.delayed.write=true -
fileconsumer.queue.size=120 -
subscriberstream.buffer.check.interval=5000 -
subscriberstream.underrun.trigger=100 -
broadcaststream.auto.record=false
启动Red5
双击red.bat即可启动Red5服务器
浏览器访问查看是否搭建成功
http://localhost:port(localhost、port为配置文件中设置) 正确如下图所示

视频直播开始准备
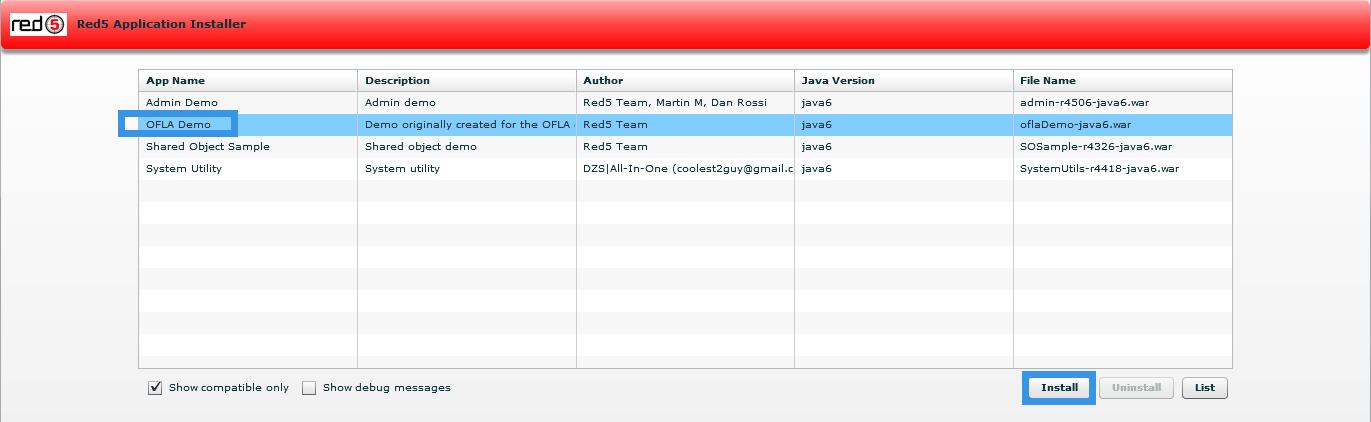
下载demo
上图可以看到install红色的那行字。点击进去。选择OLFA 安装
如果下载不成功请看这里
确定webapps下面没有oflaDemo文件夹。下载小帅丶准备好的压缩包解压放进去即可
下载地址链接: https://pan.baidu.com/s/1Qd0UggtEhBv5nbVxQGPSzQ 密码: 4xqf
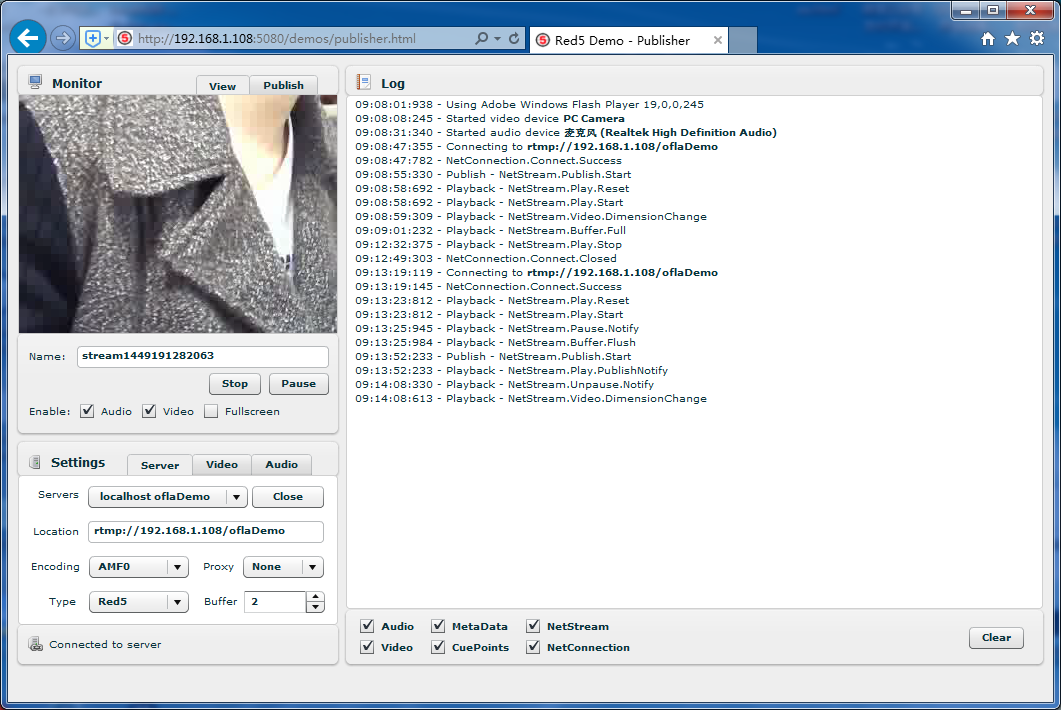
设置信息发布直播
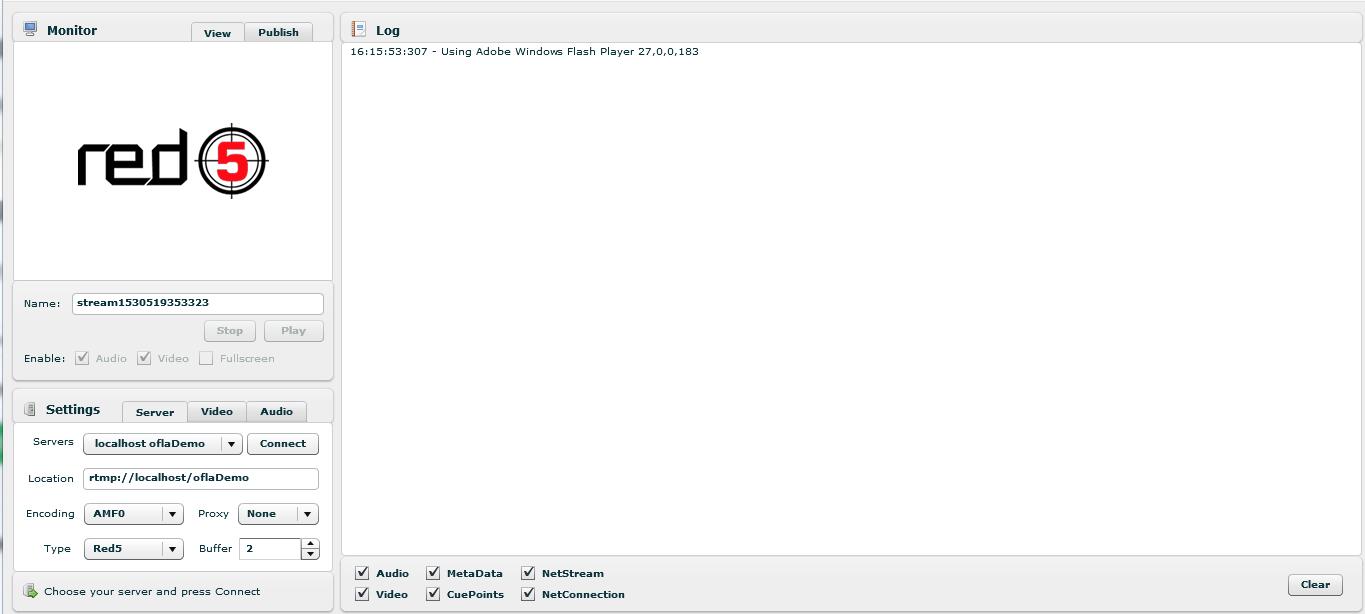
进入发布设置界面:http://localhost:port/demos/publisher.html
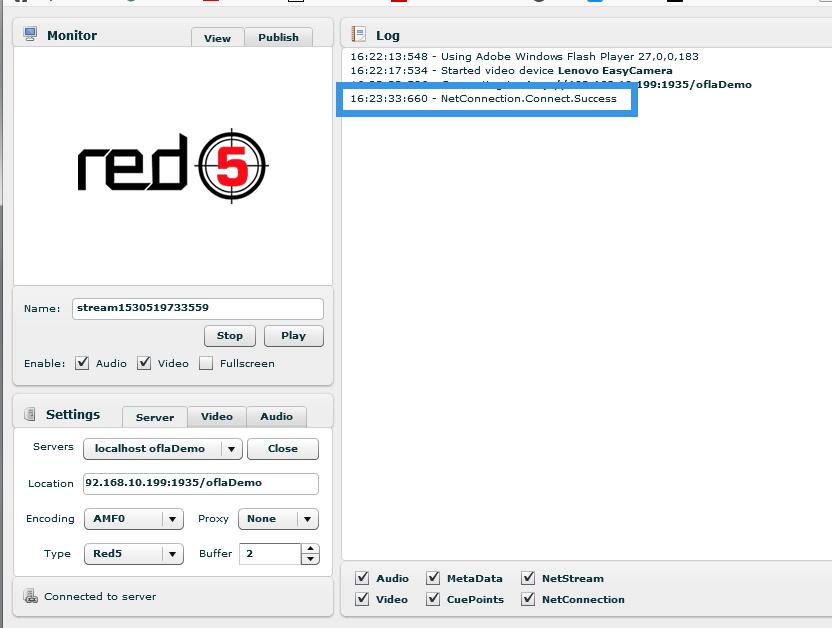
查看Settings区域。选择Video后在Device中选择摄像头,并点击Start,出现视频画面(有可能会提示是否允许。选择允许即可)
Server设置
回到Server画面,在Location中输入rtmp://localhost:1935/oflaDemo,地址与red5.properties中的rtmp协议的设置必须相同。
点击Connect
右侧出现NetConnection.Connect.Success ,说明连接服务器成功。
推送视频流
切换到Video点击Publish页面中的Publish按钮即可对外发布直播
查看视频流
切换到Server点击play即可看推送的视频流
用自己的页面观看直播
需要jwplayer。为了方便大家已经放在oflaDemo里面。在上面的百度云链接下载即可。
修改相关内容 file的值是直播页面的Name的值。streamer则为Location里面的URL
-
<html> -
<head> -
<title>Red5 - OFLADemo</title> -
<script type='text/javascript' src='jwplayer.js'></script> -
</head> -
<body> -
<div id="player"> -
<script type='text/javascript'> -
jwplayer('player').setup({ -
'flashplayer': 'player.swf', -
'file': '直播页面的Name', -
'streamer': 'rtmp://自己服务的IP:1935/oflaDemo', -
'controlbar': 'bottom', -
'width': '848', -
'height': '360' -
}); -
</script> -
</div> -
</body> -
</html>
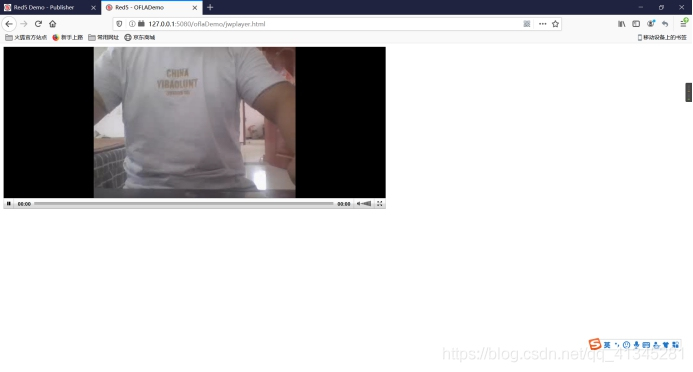
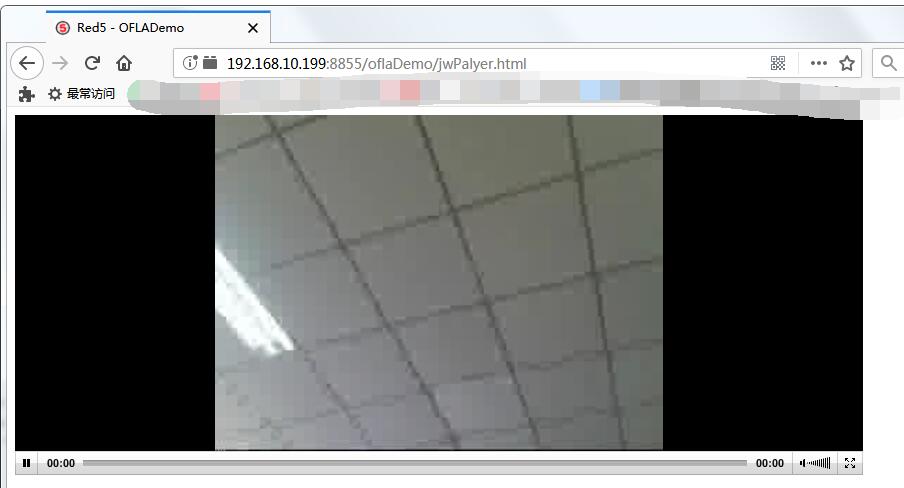
使用浏览器观看
输入地址 http://localhost:port/oflaDemo/jwPalyer.html 即可查看
以上就是Red5的服务器搭建步骤