使用 xunit 编写测试代码
Intro
xunit 是 .NET 里使用非常广泛的一个测试框架,有很多测试项目都是在使用 xunit 作为测试框架,不仅仅有很多开源项目在使用,很多微软的项目也在使用 xunit 来作为测试框架。
Get Started
在 xunit 中不需要标记测试类,所有 public 的类似都可以作为测试类,测试方法需要使用 Fact 或者 Theory 注解来标注方法,来看一个基本的使用示例:
首先准备了几个要测试的方法:
internal class Helper
{public static int Add(int x, int y){return x + y;}public static void ArgumentExceptionTest() => throw new ArgumentException();public static void ArgumentNullExceptionTest() => throw new ArgumentNullException();
}
测试代码:
public class BasicTest
{[Fact]public void AddTest(){Assert.Equal(4, Helper.Add(2, 2));Assert.NotEqual(3, Helper.Add(2, 2));}[Theory][InlineData(1, 2)][InlineData(2, 2)]public void AddTestWithTestData(int num1, int num2){Assert.Equal(num1 + num2, Helper.Add(num1, num2));}
}
使用 Fact 标记的测试方法不能有方法参数,只有标记 Theory 的方法可以有方法参数
使用 Assert 来断言结果是否符合预期,xunit 提供了很丰富的 Assert 方法,可以使得我们的测试代码更加简洁。
Exception Assert
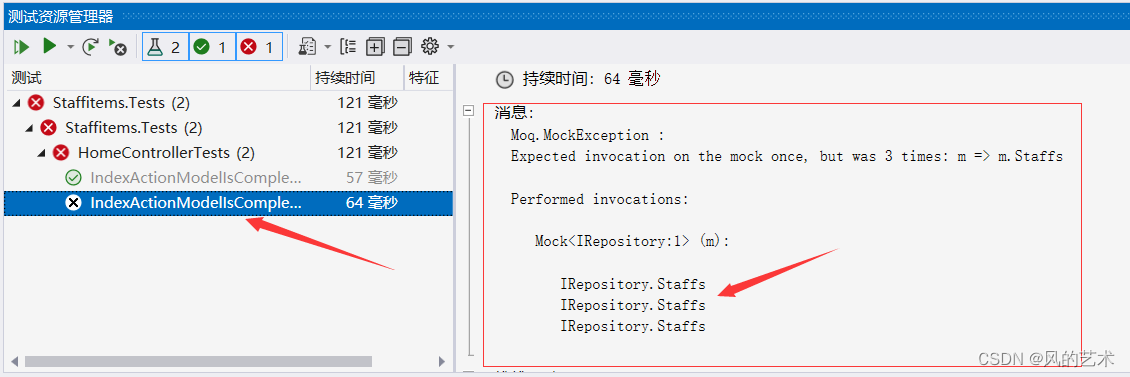
除了一般的结果断言,xunit 也支持 exception 断言,主要支持两大类,Assert.Throw/Assert.Throw<TExceptionType>/Assert.ThrowAny<TExceptionType>,对应的也有 Async 版本
[Fact]
public void ExceptionTest()
{var exceptionType = typeof(ArgumentException);Assert.Throws(exceptionType, Helper.ArgumentExceptionTest);Assert.Throws<ArgumentException>(testCode: Helper.ArgumentExceptionTest);
}[Fact]
public void ExceptionAnyTest()
{Assert.Throws<ArgumentNullException>(Helper.ArgumentNullExceptionTest);Assert.ThrowsAny<ArgumentNullException>(Helper.ArgumentNullExceptionTest);Assert.ThrowsAny<ArgumentException>(Helper.ArgumentNullExceptionTest);
}
Assert.Throw(exceptionType, action) 和 Assert.Throw<TExceptionType>(action) 这样的 exception 类型只能是这个类型,继承于这个类型的不算,会 fail,而 Assert.ThrowAny<TExceptionType>(action) 则更包容一点,是这个类型或者是继承于这个类型的都可以。
Comparisons
很多人已经在使用其他的测试框架,如何迁移呢,xunit 也给出了与 nunit 和 mstest 的对比,详细可以参考下面的对比,具体可以参考 https://xunit.net/docs/comparisons:
| NUnit 3.x | MSTest 15.x | xUnit.net 2.x | Comments |
|---|---|---|---|
[Test] | [TestMethod] | [Fact] | Marks a test method. |
[TestFixture] | [TestClass] | n/a | xUnit.net does not require an attribute for a test class; it looks for all test methods in all public (exported) classes in the assembly. |
Assert.That Record.Exception | [ExpectedException] | Assert.Throws Record.Exception | xUnit.net has done away with the ExpectedException attribute in favor of Assert.Throws. See Note 1 |
[SetUp] | [TestInitialize] | Constructor | We believe that use of [SetUp] is generally bad. However, you can implement a parameterless constructor as a direct replacement. See Note 2 |
[TearDown] | [TestCleanup] | IDisposable.Dispose | We believe that use of [TearDown] is generally bad. However, you can implement IDisposable.Dispose as a direct replacement. See Note 2 |
[OneTimeSetUp] | [ClassInitialize] | IClassFixture<T> | To get per-class fixture setup, implement IClassFixture<T> on your test class. See Note 3 |
[OneTimeTearDown] | [ClassCleanup] | IClassFixture<T> | To get per-class fixture teardown, implement IClassFixture<T> on your test class. See Note 3 |
| n/a | n/a | ICollectionFixture<T> | To get per-collection fixture setup and teardown, implement ICollectionFixture<T> on your test collection. See Note 3 |
[Ignore("reason")] | [Ignore] | [Fact(Skip="reason")] | Set the Skip parameter on the [Fact] attribute to temporarily skip a test. |
[Property] | [TestProperty] | [Trait] | Set arbitrary metadata on a test |
[Theory] | [DataSource] | [Theory] [XxxData] | Theory (data-driven test). See Note 4 |
Data Driven Test
测试框架大多提供数据驱动测试的支持,简单的就如开篇中的 Theory 示例,我们再来看一些稍微复杂一些的示例,一起来看下:
要使用数据驱动的方式写测试方法,测试方法应该标记为 Theory,并且将测试数据作为测试方法的方法参数
InlineData
最基本数据驱动的方式当属 InlineData,添加多个 InlineData 即可使用不同的测试数据进行测试
[Theory]
[InlineData(1)]
[InlineData(2)]
[InlineData(3)]
public void InlineDataTest(int num)
{Assert.True(num > 0);
}
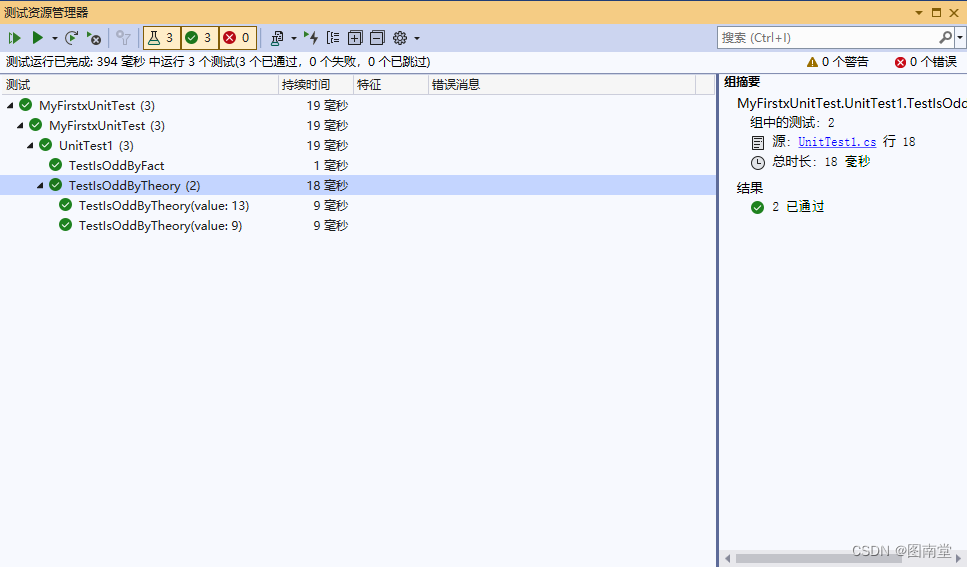
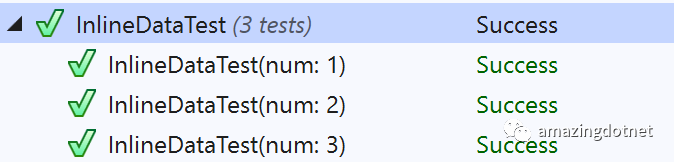
InlineData 有其限制,只能使用一些常量,想要更灵活的方式需要使用别的方式,测试结果:
MemberData
MemberData 可以一定程度上解决 InlineData 存在的问题,MemberData 支持字段、属性或方法,且需要满足下面两个条件:
需要是
public的需要是
static的可以隐式转换为
IEnumerable<object[]>或者方法返回值可以隐式转换为IEnumerable<object[]>
来看下面的示例:
[Theory]
[MemberData(nameof(TestMemberData))]
public void MemberDataPropertyTest(int num)
{Assert.True(num > 0);
}public static IEnumerable<object[]> TestMemberData =>Enumerable.Range(1, 10).Select(x => new object[] { x }).ToArray();[Theory]
[MemberData(nameof(TestMemberDataField))]
public void MemberDataFieldTest(int num)
{Assert.True(num > 0);
}public static readonly IList<object[]> TestMemberDataField = Enumerable.Range(1, 10).Select(x => new object[] { x }).ToArray();[Theory]
[MemberData(nameof(TestMemberDataMethod), 10)]
public void MemberDataMethodTest(int num)
{Assert.True(num > 0);
}public static IEnumerable<object[]> TestMemberDataMethod(int count)
{return Enumerable.Range(1, count).Select(i => new object[] { i });
}
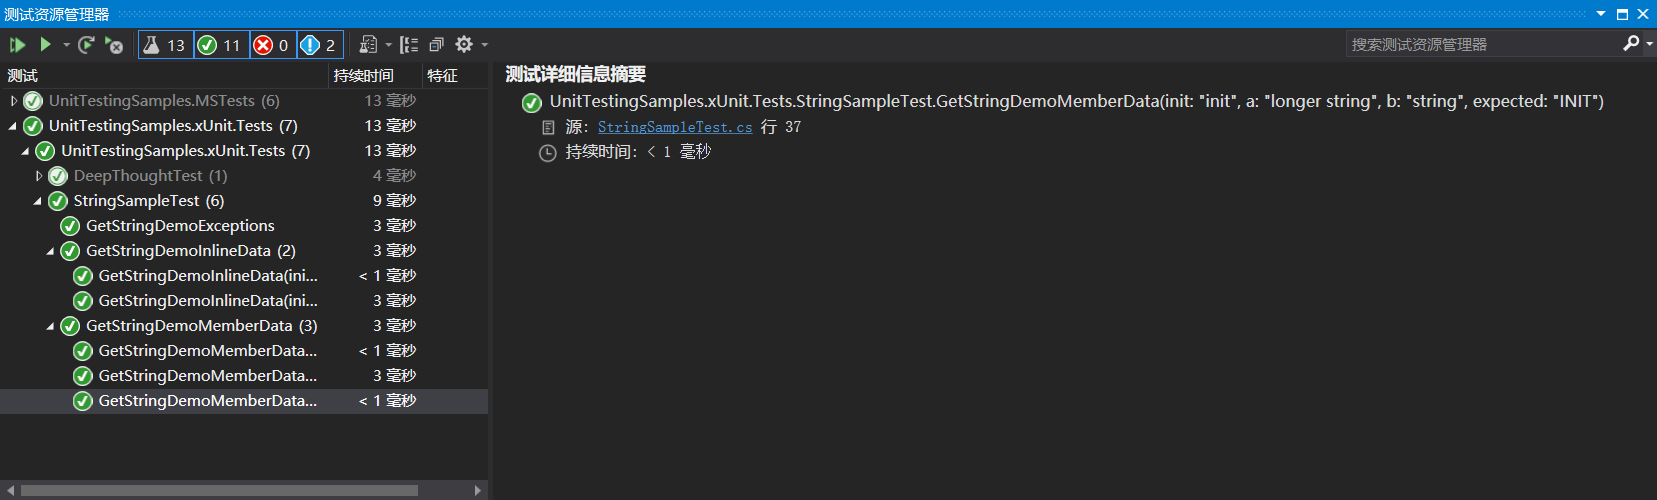
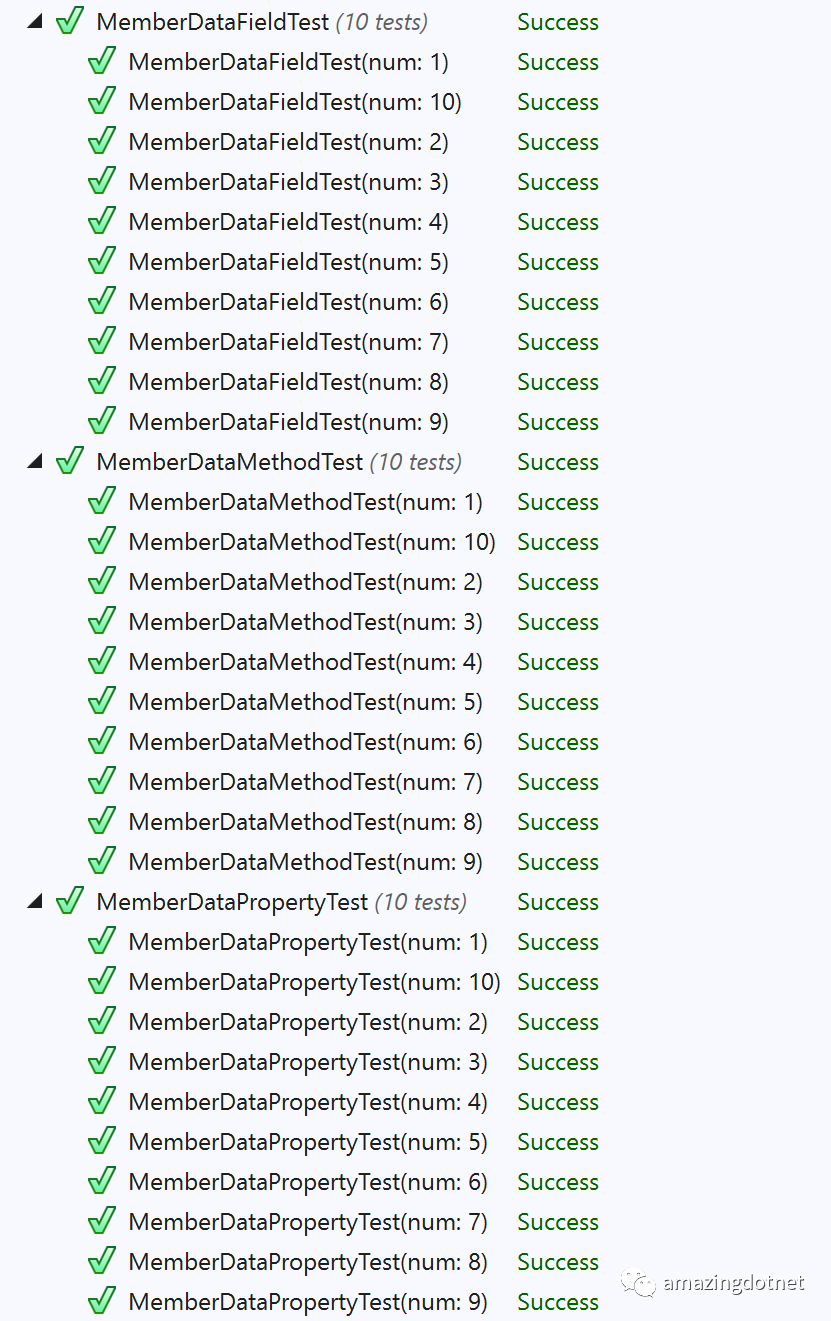
测试结果:
Custom Data Source
MemberData 相比之下提供了更大的便利和可自定义程度,只能在当前测试类中使用,想要跨测试类还是不行,xunit 还提供了 DataAttribute ,使得我们可以通过自定义方式实现测试方法数据源,甚至也可以从数据库里动态查询出数据,写了一个简单的示例,可以参考下面的示例:
自定义数据源:
public class NullOrEmptyStringDataAttribute : DataAttribute
{public override IEnumerable<object[]> GetData(MethodInfo testMethod){yield return new object[] { null };yield return new object[] { string.Empty };}
}
测试方法:
[Theory]
[NullOrEmptyStringData]
public void CustomDataAttributeTest(string value)
{Assert.True(string.IsNullOrEmpty(value));
}
测试结果:

Output
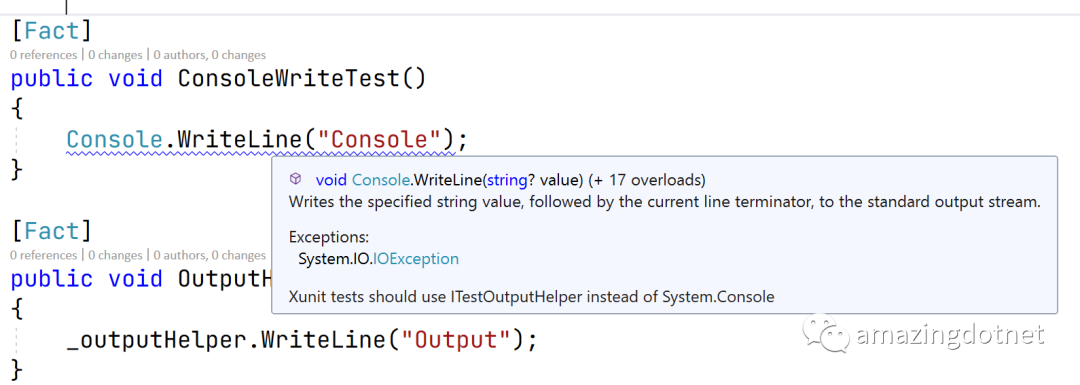
在测试方法中如果想要输出一些测试信息,直接是用 Console.Write/Console.WriteLine 是没有效果的,在测试方法中输出需要使用 ITestoutputHelper 来输出,来看下面的示例:
public class OutputTest
{private readonly ITestOutputHelper _outputHelper;public OutputTest(ITestOutputHelper outputHelper){_outputHelper = outputHelper;}[Fact]public void ConsoleWriteTest(){Console.WriteLine("Console");}[Fact]public void OutputHelperTest(){_outputHelper.WriteLine("Output");}
}
测试方法中使用 Console.Write/Console.WriteLine 的时候会有一个提示:
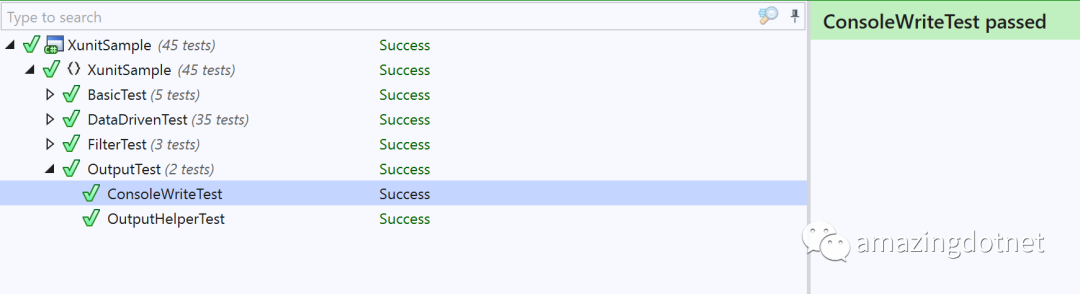
测试输出结果:

Test Filter
xunit 提供了 BeforeAfterTestAttribute 来让我们实现一些自定义的逻辑来在测试运行前和运行后执行,和 mvc 里的 action filter 很像,所以这里我把他称为 test filter,来看下面的一个示例,改编自 xunit 的示例:
/// <summary>
/// Apply this attribute to your test method to replace the
/// <see cref="Thread.CurrentThread" /> <see cref="CultureInfo.CurrentCulture" /> and
/// <see cref="CultureInfo.CurrentUICulture" /> with another culture.
/// </summary>
[AttributeUsage(AttributeTargets.Class | AttributeTargets.Method)]
public class UseCultureAttribute : BeforeAfterTestAttribute
{private readonly Lazy<CultureInfo> _culture;private readonly Lazy<CultureInfo> _uiCulture;private CultureInfo _originalCulture;private CultureInfo _originalUiCulture;/// <summary>/// Replaces the culture and UI culture of the current thread with/// <paramref name="culture" />/// </summary>/// <param name="culture">The name of the culture.</param>/// <remarks>/// <para>/// This constructor overload uses <paramref name="culture" /> for both/// <see cref="Culture" /> and <see cref="UICulture" />./// </para>/// </remarks>public UseCultureAttribute(string culture): this(culture, culture) { }/// <summary>/// Replaces the culture and UI culture of the current thread with/// <paramref name="culture" /> and <paramref name="uiCulture" />/// </summary>/// <param name="culture">The name of the culture.</param>/// <param name="uiCulture">The name of the UI culture.</param>public UseCultureAttribute(string culture, string uiCulture){_culture = new Lazy<CultureInfo>(() => new CultureInfo(culture, false));_uiCulture = new Lazy<CultureInfo>(() => new CultureInfo(uiCulture, false));}/// <summary>/// Gets the culture./// </summary>public CultureInfo Culture { get { return _culture.Value; } }/// <summary>/// Gets the UI culture./// </summary>public CultureInfo UICulture { get { return _uiCulture.Value; } }/// <summary>/// Stores the current <see cref="Thread.CurrentPrincipal" />/// <see cref="CultureInfo.CurrentCulture" /> and <see cref="CultureInfo.CurrentUICulture" />/// and replaces them with the new cultures defined in the constructor./// </summary>/// <param name="methodUnderTest">The method under test</param>public override void Before(MethodInfo methodUnderTest){_originalCulture = Thread.CurrentThread.CurrentCulture;_originalUiCulture = Thread.CurrentThread.CurrentUICulture;Thread.CurrentThread.CurrentCulture = Culture;Thread.CurrentThread.CurrentUICulture = UICulture;CultureInfo.CurrentCulture.ClearCachedData();CultureInfo.CurrentUICulture.ClearCachedData();}/// <summary>/// Restores the original <see cref="CultureInfo.CurrentCulture" /> and/// <see cref="CultureInfo.CurrentUICulture" /> to <see cref="Thread.CurrentPrincipal" />/// </summary>/// <param name="methodUnderTest">The method under test</param>public override void After(MethodInfo methodUnderTest){Thread.CurrentThread.CurrentCulture = _originalCulture;Thread.CurrentThread.CurrentUICulture = _originalUiCulture;CultureInfo.CurrentCulture.ClearCachedData();CultureInfo.CurrentUICulture.ClearCachedData();}
}
这里实现了一个设置测试用例运行过程中 Thread.CurrentThread.Culture 的属性,测试结束后恢复原始的属性值,可以用作于 Class 也可以用在测试方法中,使用示例如下:
[UseCulture("en-US", "zh-CN")]
public class FilterTest
{[Fact][UseCulture("en-US")]public void CultureTest(){Assert.Equal("en-US", Thread.CurrentThread.CurrentCulture.Name);}[Fact][UseCulture("zh-CN")]public void CultureTest2(){Assert.Equal("zh-CN", Thread.CurrentThread.CurrentCulture.Name);}[Fact]public void CultureTest3(){Assert.Equal("en-US", Thread.CurrentThread.CurrentCulture.Name);Assert.Equal("zh-CN", Thread.CurrentThread.CurrentUICulture.Name);}
}
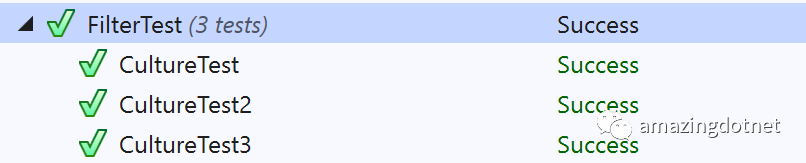
测试结果如下:
Shared Context
单元测试类通常共享初始化和清理代码(通常称为“测试上下文”)。xunit 提供了几种共享初始化和清理代码的方法,具体取决于要共享的对象的范围。
构造器和
Dispose方法 (共享初始化和 Dispose,不需要共享对象)Class Fixtures (同一个测试类中共享对象)
Collection Fixtures (同一个 Collection 中(可以是多个测试类)中共享对象实例)
通常我们可以使用 Fixture 来实现依赖注入,但是我更推荐使用 Xunit.DependencyInjection 这个项目来实现依赖注入,具体使用可以参考之前的文章 在 xunit 测试项目中使用依赖注入 中的介绍
More
希望对你使用 xunit 有所帮助
文章中的示例代码可以从 https://github.com/WeihanLi/SamplesInPractice/tree/master/XunitSample 获取
xunit 还有很多可以扩展的地方,更多可以参考 xunit 的示例 https://github.com/xunit/samples.xunit
References
https://github.com/WeihanLi/SamplesInPractice/tree/master/XunitSample
https://github.com/xunit/samples.xunit
https://xunit.net/#documentation
https://xunit.net/docs/comparisons
https://xunit.net/docs/shared-context
在 xunit 测试项目中使用依赖注入