一、简述
今天文章讲述的是如何用Qt实现图片轮播的效果,其实我们经常在网页中看到各种广告就是使用了图片轮播,实现小区域内嵌入多个广告的效果。
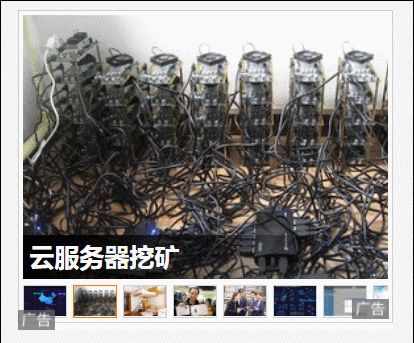
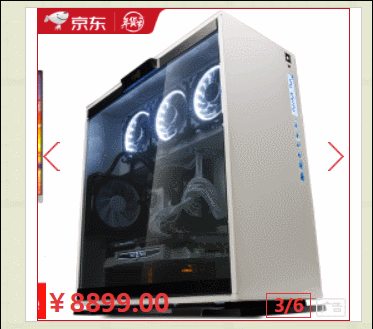
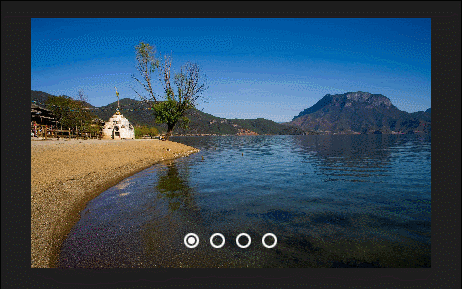
下面是CSDN页面中两种常见的图片轮播效果。基本上就是定时自动切换广告页面,或者手动点击选择切换页面。
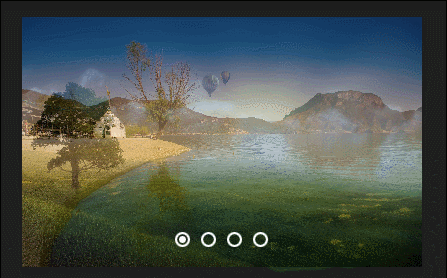
其实实现起来也不难,只要使用Qt的动画类即可实现类似的效果。之前做了一个,效果不佳,今天重新写了一遍,实现了类似上面第一种的效果,通过Qt的动画类修改透明度来实现上下两张图片的切换效果,下面上效果图。
二、代码之路
看了上面效果图,大家可以自己心里先思考一下其中实现的原理,如果自己有想法,可以先按照自己的想法实现一遍,然后再来看文章中的代码。如果自己在没看文章代码之前有了更好的实现思路,也可以评论与我一起交流。如果还没想到好的方法可以参考文章中的代码,有问题or有想法call me。
我相信每个人都有自己独特的想法,所以如果一上来就直接看文章中的代码,那么可能错失了一次思考的机会,同时可能失去了一个更好的想法。哈哈,这里也是提一个 个人建议,成长之路都是自己一步一步走出来的,也是自己不断思考,不断总结,不断成长才能够在这条路上稳健地走下去。
####Tip
实现原理简单梳理一下,主要是提供接口设置图片列表的路径,然后通过动画类来修改图片的透明度来达到切换的动画效果。而图片是直接通过paintEvent事件进行绘制的,同时绘制两张图片,先绘制下一张图片,然后再根据动画类返回的透明度绘制当前图片。图片自动切换通过一个时钟来搞定。也可以手动点击白色小按钮进行图片切换。
这里重写了mousePressEvent事件,我们看到web页面上的图片轮播,可以对当前图片进行点击然后触发每个图片对应的效果,一般都是弹出广告页面,这里大家可以根据需求自定义功能。
下面就看一下图片轮播的实现。
CarouselImageWindow.h
#include <QWidget>
#include <QScrollArea>
#include <QTimer>
#include <QPropertyAnimation>
#include <QPushButton>class CarouselImageWindow : public QWidget
{Q_OBJECTpublic:CarouselImageWindow(QWidget *parent = NULL);~CarouselImageWindow();// 设置图片列表;void setImageList(QStringList imageFileNameList);// 添加图片;void addImage(QString imageFileName);// 开始播放;void startPlay();private:// 初始化图片切换按钮;void initChangeImageButton();// 绘图事件;void paintEvent(QPaintEvent *event);// 鼠标点击事件;void mousePressEvent(QMouseEvent* event);public slots:// 图片切换时钟;void onImageChangeTimeout();// 图片切换按钮点击;void onImageSwitchButtonClicked(int buttonId);private:// 用来做图片切换滑动效果,目前以透明度作为切换效果;QScrollArea* m_imagePlayWidget;// 图片列表;QList<QString> m_imageFileNameList;// 图片切换时钟;QTimer m_imageChangeTimer;// 当前显示图片index;int m_currentDrawImageIndx;// 切换图片;QPixmap m_currentPixmap;QPixmap m_nextPixmap;// 图片切换动画类;QPropertyAnimation* m_opacityAnimation;// 按钮列表;QList<QPushButton*> m_pButtonChangeImageList;
};
CarouselImageWindow.cpp
#include "CarouselImageWindow.h"
#include <QHBoxLayout>
#include <QPainter>
#include <QDebug>
#include <QButtonGroup>CarouselImageWindow::CarouselImageWindow(QWidget *parent): QWidget(parent), m_currentDrawImageIndx(0)
{// 添加ImageOpacity属性;this->setProperty("ImageOpacity", 1.0);// 动画切换类;m_opacityAnimation = new QPropertyAnimation(this, "ImageOpacity");// 这里要设置的动画时间小于图片切换时间;m_opacityAnimation->setDuration(1500);// 设置ImageOpacity属性值的变化范围;m_opacityAnimation->setStartValue(1.0);m_opacityAnimation->setEndValue(0.0);// 透明度变化及时更新绘图;connect(m_opacityAnimation, SIGNAL(valueChanged(const QVariant&)), this, SLOT(update()));// 设置图片切换时钟槽函数;connect(&m_imageChangeTimer, SIGNAL(timeout()), this, SLOT(onImageChangeTimeout()));this->setFixedSize(QSize(400, 250));this->setWindowFlags(Qt::FramelessWindowHint);
}CarouselImageWindow::~CarouselImageWindow()
{}void CarouselImageWindow::initChangeImageButton()
{// 注意图片过多按钮可能放置不下;QButtonGroup* changeButtonGroup = new QButtonGroup;QHBoxLayout* hLayout = new QHBoxLayout();hLayout->addStretch();for (int i = 0; i < m_imageFileNameList.count(); i++){QPushButton* pButton = new QPushButton;pButton->setFixedSize(QSize(16, 16));pButton->setCheckable(true);pButton->setStyleSheet("QPushButton{border-image:url(:/Resources/select1.png);}\QPushButton:checked{border-image:url(:/Resources/select2.png);}");changeButtonGroup->addButton(pButton, i);m_pButtonChangeImageList.append(pButton);hLayout->addWidget(pButton);}hLayout->addStretch();hLayout->setSpacing(10);hLayout->setMargin(0);connect(changeButtonGroup, SIGNAL(buttonClicked(int)), this, SLOT(onImageSwitchButtonClicked(int)));QVBoxLayout* mainLayout = new QVBoxLayout(this);mainLayout->addStretch();mainLayout->addLayout(hLayout);mainLayout->setContentsMargins(0, 0, 0, 20);
}void CarouselImageWindow::setImageList(QStringList imageFileNameList)
{m_imageFileNameList = imageFileNameList;
}void CarouselImageWindow::addImage(QString imageFileName)
{m_imageFileNameList.append(imageFileName);
}void CarouselImageWindow::startPlay()
{// 添加完图片之后,根据图片多少设置图片切换按钮;initChangeImageButton();if (m_imageFileNameList.count() == 1){m_pButtonChangeImageList[m_currentDrawImageIndx]->setChecked(true);}else if (m_imageFileNameList.count() > 1){m_pButtonChangeImageList[m_currentDrawImageIndx]->setChecked(true);m_currentPixmap = QPixmap(m_imageFileNameList.at(m_currentDrawImageIndx));m_imageChangeTimer.start(2000);update();}
}void CarouselImageWindow::onImageChangeTimeout()
{// 设置前后的图片;m_currentPixmap = QPixmap(m_imageFileNameList.at(m_currentDrawImageIndx));m_currentDrawImageIndx++;if (m_currentDrawImageIndx >= m_imageFileNameList.count()){m_currentDrawImageIndx = 0;}m_nextPixmap = QPixmap(m_imageFileNameList.at(m_currentDrawImageIndx));m_pButtonChangeImageList[m_currentDrawImageIndx]->setChecked(true);// 动画类重新开始; m_opacityAnimation->start();
}void CarouselImageWindow::paintEvent(QPaintEvent *event)
{QPainter painter(this);QRect imageRect = this->rect();// 如果图片列表为空,显示默认图片;if (m_imageFileNameList.isEmpty()){QPixmap backPixmap = QPixmap(":/Resources/CarouselImageBack.png");painter.drawPixmap(imageRect, backPixmap.scaled(imageRect.size()));}// 如果只有一张图片;else if (m_imageFileNameList.count() == 1){QPixmap backPixmap = QPixmap(m_imageFileNameList.first());painter.drawPixmap(imageRect, backPixmap.scaled(imageRect.size()));}// 多张图片;else if (m_imageFileNameList.count() > 1){float imageOpacity = this->property("ImageOpacity").toFloat();painter.setOpacity(1);painter.drawPixmap(imageRect, m_nextPixmap.scaled(imageRect.size()));painter.setOpacity(imageOpacity);painter.drawPixmap(imageRect, m_currentPixmap.scaled(imageRect.size()));}
}void CarouselImageWindow::onImageSwitchButtonClicked(int buttonId)
{m_currentDrawImageIndx = buttonId - 1;if (m_currentDrawImageIndx == -1){m_currentDrawImageIndx = m_imageFileNameList.count() - 1;}onImageChangeTimeout();m_imageChangeTimer.start(2000);update();
}void CarouselImageWindow::mousePressEvent(QMouseEvent* event)
{// 这里可以对当前图片进行点击然后触发每个图片对应的效果;// 比如web上好多类似的弹出对应的广告页面等功能;qDebug() << m_currentDrawImageIndx;return __super::mousePressEvent(event);
}
测试代码
int main(int argc, char *argv[])
{QApplication a(argc, argv);CarouselImageWindow w;w.addImage(":/Resources/image1.jpg");w.addImage(":/Resources/image2.jpg");w.addImage(":/Resources/image3.jpg");w.addImage(":/Resources/image4.jpg");w.startPlay();w.show();return a.exec();
}
尾
文章到这里也就结束了,此篇文章介绍了通过透明度的方法来实现切换效果,上面提到了另一种滑动效果,这里可以使用QScrollArea来实现类似的效果,如果后面有时间我也会再次详细地介绍如果实现滑动效果。
如需具体工程代码请加左方联系群。