文章目录
- 1、gVerify插件
- 1.1 源代码
- 1.2 属性及方法
- 1.3 使用
- 2、vue-puzzle-vcode插件
- 2.1 安装
- 2.2 参数与事件
- 2.3 使用
- 3、vue2-verify
- 3.1 安装
- 3.2 参数
- 3.3 使用
- 4、vue-monoplasty-slide-verify
- 4.1 安装
- 4.2 引入
- 4.3 参数与事件
- 4.4 使用
1、gVerify插件
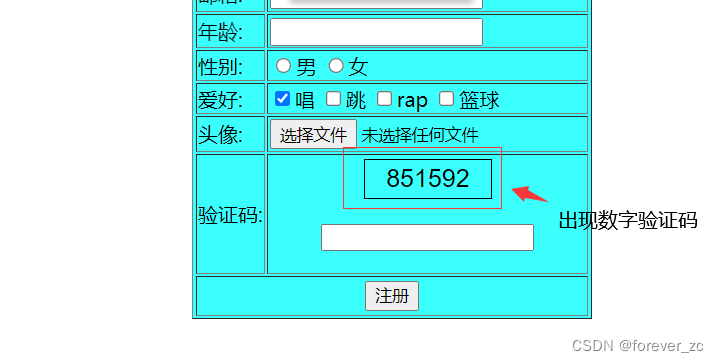
(常规验证码)
1.1 源代码
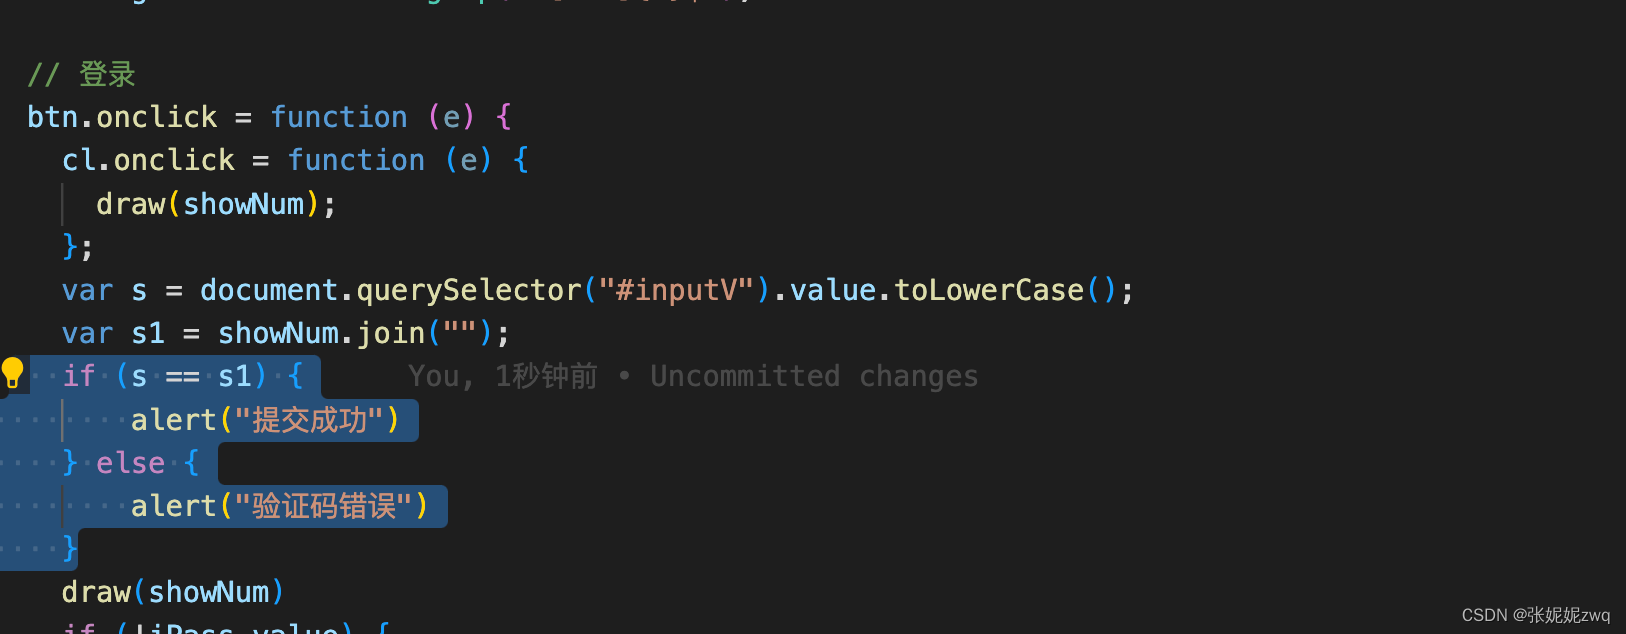
// 验证码插件
!(function(window, document) {function GVerify(options) { //创建一个图形验证码对象,接收options对象为参数this.options = { //默认options参数值id: "", //容器IdcanvasId: "verifyCanvas", //canvas的IDwidth: "100", //默认canvas宽度height: "30", //默认canvas高度type: "blend", //图形验证码默认类型blend:数字字母混合类型、number:纯数字、letter:纯字母code: ""}if(Object.prototype.toString.call(options) == "[object Object]"){//判断传入参数类型for(var i in options) { //根据传入的参数,修改默认参数值this.options[i] = options[i];}}else{this.options.id = options;}this.options.numArr = "0,1,2,3,4,5,6,7,8,9".split(",");this.options.letterArr = getAllLetter();this._init();this.refresh();}GVerify.prototype = {/**版本号**/version: '1.0.0',/**初始化方法**/_init: function() {var con = document.getElementById(this.options.id);var canvas = document.createElement("canvas");this.options.width = con.offsetWidth > 0 ? con.offsetWidth : "100";this.options.height = con.offsetHeight > 0 ? con.offsetHeight : "30";canvas.id = this.options.canvasId;canvas.width = this.options.width;canvas.height = this.options.height;canvas.style.cursor = "pointer";canvas.innerHTML = "您的浏览器版本不支持canvas";con.appendChild(canvas);var parent = this;canvas.onclick = function(){parent.refresh();}},/**生成验证码**/refresh: function() {this.options.code = "";var canvas = document.getElementById(this.options.canvasId);if(canvas.getContext) {var ctx = canvas.getContext('2d');}else{return;}ctx.textBaseline = "middle";ctx.fillStyle = randomColor(180, 240);ctx.fillRect(0, 0, this.options.width, this.options.height);if(this.options.type == "blend") { //判断验证码类型var txtArr = this.options.numArr.concat(this.options.letterArr);} else if(this.options.type == "number") {var txtArr = this.options.numArr;} else {var txtArr = this.options.letterArr;}for(var i = 1; i <= 4; i++) {var txt = txtArr[randomNum(0, txtArr.length)];this.options.code += txt;ctx.font = randomNum(this.options.height/2, this.options.height) + 'px SimHei'; //随机生成字体大小ctx.fillStyle = randomColor(50, 160); //随机生成字体颜色        ctx.shadowOffsetX = randomNum(-3, 3);ctx.shadowOffsetY = randomNum(-3, 3);ctx.shadowBlur = randomNum(-3, 3);ctx.shadowColor = "rgba(0, 0, 0, 0.3)";var x = this.options.width / 5 * i;var y = this.options.height / 2;var deg = randomNum(-30, 30);/**设置旋转角度和坐标原点**/ctx.translate(x, y);ctx.rotate(deg * Math.PI / 180);ctx.fillText(txt, 0, 0);/**恢复旋转角度和坐标原点**/ctx.rotate(-deg * Math.PI / 180);ctx.translate(-x, -y);}/**绘制干扰线**/for(var i = 0; i < 4; i++) {ctx.strokeStyle = randomColor(40, 180);ctx.beginPath();ctx.moveTo(randomNum(0, this.options.width), randomNum(0, this.options.height));ctx.lineTo(randomNum(0, this.options.width), randomNum(0, this.options.height));ctx.stroke();}/**绘制干扰点**/for(var i = 0; i < this.options.width/4; i++) {ctx.fillStyle = randomColor(0, 255);ctx.beginPath();ctx.arc(randomNum(0, this.options.width), randomNum(0, this.options.height), 1, 0, 2 * Math.PI);ctx.fill();}},/**验证验证码**/validate: function(code){var code = code.toLowerCase();var v_code = this.options.code.toLowerCase();console.log(v_code);if(code == v_code){return true;}else{this.refresh();return false;}}}/**生成字母数组**/function getAllLetter() {var letterStr = "a,b,c,d,e,f,g,h,i,j,k,l,m,n,o,p,q,r,s,t,u,v,w,x,y,z,A,B,C,D,E,F,G,H,I,J,K,L,M,N,O,P,Q,R,S,T,U,V,W,X,Y,Z";return letterStr.split(",");}/**生成一个随机数**/function randomNum(min, max) {return Math.floor(Math.random() * (max - min) + min);}/**生成一个随机色**/function randomColor(min, max) {var r = randomNum(min, max);var g = randomNum(min, max);var b = randomNum(min, max);return "rgb(" + r + "," + g + "," + b + ")";}window.GVerify = GVerify;
})(window, document);
1.2 属性及方法
const verifyCode = new GVerify(params)
-
params:
String:表示渲染的元素ID
Object:
id——元素ID,
type——图形验证码类型(blend-数字字母混合类型,默认)、number-纯数字、letter-纯字母)
-
verifyCode.refresh()
刷新验证码
-
verifyCode.validate(‘验证的值’)
校验验证码,正确返回为true,错误返回false
-
verifyCode实例对象解析

1.3 使用
<template><div><p id="verifyCode"></p><input v-model="value"/><button @click="check">验证</button></div>
</template>
<script>
import '@/utils/gVerify'
export default {data(){return {value: "",verifyCode: ""}   },mounted(){// 生成验证码 (绑定ID)this.verifyCode = new GVerify({id: "verifyCode",type: "blend"})// 打印验证码console.log(this.verifyCode.options.code)},methods:{check(){const t = this.verifyCode.validate(this.value)if(t) console.log("验证成功")else console.log("验证失败")}}
}
</script>
2、vue-puzzle-vcode插件
(拼图验证码)
网站链接:https://gitee.com/beeworkshop/vue-puzzle-vcode?_from=gitee_search
2.1 安装
npm install vue-puzzle-vcode --save
2.2 参数与事件
| 参数 | 默认值 | 说明 |
|---|---|---|
| show | false | 是否显示验证码弹框 |
| canvasWidth | 310 | 验证码宽度 |
| canvasHeight | 160 | 验证码高度 |
| imgs | null | 自定义验证码图片 |
| successText | “验证通过!” | 成功的提示文字 |
| failText | “验证失败,请重试” | 失败的提示文字 |
| sliderText | “拖动滑块完成拼图” | 下方滑条的显示内容 |
| 事件名称 | 说明 |
|---|---|
| success | 验证成功时触发,返回移动距离与目标距离的偏差值px |
| fail | 验证失败时会触发,返回移动距离与目标距离的偏差值px |
| close | 点击遮罩层的回调 |
2.3 使用
<template><div><vcode:show="isShow"@success="success"@close="close"></vcode><button @click="change">点击</button></div>
</template>
<script>
import vcode from 'vue-puzzle-vcode'
export default {components: {vcode,},data(){return {isShow: false,}},methods: {// 验证成功success(){this.close()},// 关闭验证close(){this.isShow = false},// 开启验证change(){this.isShow = true  },}
}
</script>
3、vue2-verify
(该插件主要用于定制验证码,包含各种验证码方式——常规、运算、滑动、拼图和选字)
网站链接:https://github.com/mizuka-wu/vue2-verify
3.1 安装
npm install vue2-verify --save
3.2 参数
通用:
| 参数 | 说明 |
|---|---|
| type | 类型,可以写数值或字符串(1/picture-常规;2/compute-运算;3/slide-滑动;4/puzzle-拼图;5/pick-选字) |
常规验证码:
width、height:验证码的宽、高,可以使用百分比
fontSize:验证码的字体大小
codeLength:验证码显示的个数,默认为6
运算验证码:
width、height:验证码的宽、高,可以使用百分比
fontSize:验证码的字体大小
showButton:是否显示确认按钮,默认true
figure:验证码位数,默认两位,如果需要调整为三位:figure:1000
arith:算法选择,支持加、减、乘。设置为1至3分别代表加减乘,0为随机切换。
滑动验证码:
vOffset:滑动验证码的误差量,如:误差量为5px就能完成验证,设置vOffset:5。
explain:滑动条内的提示,不设置默认是:向右滑动完成验证
barSize:包含了width、height两个参数,分别代表滑动条的宽度和高度,支持百分比方式设置
showButton:是否显示确认按钮,默认true
拼图验证码:
vOffset:滑动验证码的误差量,如:误差量为5px就能完成验证,设置vOffset:5。
explain:滑动条内的提示,不设置默认是:向右滑动完成验证
barSize:包含了width、height两个参数,分别代表滑动条的宽度和高度,支持百分比方式设置
showButton:是否显示确认按钮,默认true
mode:验证码的显示方式,弹出式pop,固定fixed,默认是:mode : ‘fixed’
vSpace:验证码图片和移动条容器的间隔,单位px
imgUrl:背景图片的地址,默认’images/’
imgName:验证码背景图的数组集合,默认从images目录中进行读取
imgSize:和barSize相同,代表滑动条的宽度和高度
blockSize:和barSize相同,代表拼图块的宽度和高度
选字验证码:
vSpace:验证码图片和移动条容器的间隔,单位px
mode:验证码的显示方式,弹出式pop,固定fixed,默认是:mode : ‘fixed’
imgUrl:背景图片的地址,默认’images/’
imgName:验证码背景图的数组集合,默认从images目录中进行读取
imgSize:和barSize相同,代表滑动条的宽度和高度
barSize:包含了width、height两个参数,分别代表滑动条的宽度和高度,支持百分比方式设置
showButton:是否显示确认按钮,默认true
defauleNum:验证码中出现的文字数量,如要默认4个字
checkNum:验证码中要求比对的文字数量,如要按序比对2个字
事件:
| 事件名称 | 描述 |
|---|---|
| ready | 验证码初始化成功的回调函数 |
| success | 验证成功的回调函数,如要重新初始化:success:function(obj){obj.refresh();} |
| error | 验证失败的回调函数 |
3.3 使用
<template><Verify @success="action('success')" @error="action('error')" :type="1"></Verify>
</template>
<script>
import Verify from 'vue2-verify'
export default {methods: {action(text) {console.log(text)}},components: {Verify}
}
</script>
4、vue-monoplasty-slide-verify
网站链接:https://gitee.com/monoplasty/vue-monoplasty-slide-verify
4.1 安装
npm install vue-monoplasty-slide-verify --save
4.2 引入
import Vue from 'vue'
import slideVerify from 'vue-monoplasty-slide-verify'Vue.use(slideVerify)
4.3 参数与事件
| 参数 | 描述 |
|---|---|
| l | 长度 |
| r | 圆角 |
| w | 画布的宽度 |
| h | 画布的高度 |
| slideText | 滑动条显示的内容,默认:‘向右滑动’ |
| imgs | 背景图数组,默认[] |
| accuracy | 滑动验证的误差范围,默认值 5 |
| show | 是否显示刷新按钮,默认值 true |
| 回调函数 | 说明 |
|---|---|
| success | 验证成功,返回时间参数,单位毫秒 |
| fail | 验证失败 |
| again | 检测到非人为操作滑动时触发的回调函数 |
| refresh | 点击刷新按钮后的回调函数 |
| fulfilled | 刷新成功之后的回调函数 |
4.4 使用
<template>
<slide-verify :l="42":r="10":w="310":h="155"slider-text="向右滑动"@success="onSuccess"@fail="onFail"@refresh="onRefresh"></slide-verify>
<div>{{msg}}</div>
</template>
<script>
export default {data(){return {msg: '',}},methods: {onSuccess(){this.msg = 'login success'},onFail(){this.msg = ''},onRefresh(){this.msg = ''}}
}
</script>