首先在Webx中,使用WebxContextLoaderListener替代Spring的ContextLoaderListener:
<listener><listener-class>com.alibaba.citrus.webx.context.WebxContextLoaderListener</listener-class></listener><filter><filter-name>webx</filter-name><filter-class>com.alibaba.citrus.webx.servlet.WebxFrameworkFilter</filter-class></filter>其中因为在Servlet定义中,listener的初始化先于filter,所以先从WebxContextLoaderListener看起:
首先ContextLoaderListener的功能是初始化IoC容器,那么WebxContextLoaderListener也应该具有初始化IoC容器的功能:
/*** 用来启动root context的listener。* <p>* 和Spring {@link ContextLoaderListener}类似,listener将读取* <code>/WEB-INF/web.xml</code>中context param <code>contextClass</code>* 所指定的类名,作为root <code>ApplicationContext</code>的实现类。假如未明确指定,则使用默认值* {@link WebxApplicationContext}。* </p>* <p>* 默认值可以通过覆盖<code>getDefaultContextClass()</code>来改变。* </p>** @author Michael Zhou*/
public class WebxContextLoaderListener extends ContextLoaderListener {@Overrideprotected final ContextLoader createContextLoader() {return new WebxComponentsLoader() {@Overrideprotected Class<? extends WebxComponentsContext> getDefaultContextClass() {Class<? extends WebxComponentsContext> defaultContextClass = WebxContextLoaderListener.this.getDefaultContextClass();if (defaultContextClass == null) {defaultContextClass = super.getDefaultContextClass();}return defaultContextClass;}};}protected Class<? extends WebxComponentsContext> getDefaultContextClass() {return null;}
}
从源码可以看出:WebxContextLoaderListener 继承于ContextLoaderListener ,所以也具有ContextLoaderListener的功能
// 继承自ServletContextListener
public class ContextLoaderListener implements ServletContextListener {private ContextLoader contextLoader;// Spring初始化IoC容器的入口:public void contextInitialized(ServletContextEvent event) {// WebxContextLoaderListener 重写了createContextLoader方法,其返回类型为WebxComponentsLoader,说明WebxComponentsLoader为ContextLoader的派生类。this.contextLoader = createContextLoader();// 执行WebxComponentsLoader的初始化ApplicationContext操作this.contextLoader.initWebApplicationContext(event.getServletContext());}...
}
接下来看看contextLoader的initWebApplicationContext方法执行了什么步骤
/*** Initialize Spring's web application context for the given servlet context* 在指定Servlet上下文中初始化Spring的应用上下文*/public WebApplicationContext initWebApplicationContext(ServletContext servletContext)throws IllegalStateException, BeansException {...try {ApplicationContext parent = loadParentContext(servletContext);this.context = createWebApplicationContext(servletContext, parent);//指定Spring上下文名称servletContext.setAttribute(WebApplicationContext.ROOT_WEB_APPLICATION_CONTEXT_ATTRIBUTE, this.context);currentContextPerThread.put(Thread.currentThread().getContextClassLoader(), this.context);...return this.context;}catch (...) {...}}现在看一下WebxComponentsContext 的实现代码:
/*** 用来初始化<code>WebxComponents</code>。** @author Michael Zhou*/
public class WebxComponentsContext extends WebxApplicationContext {private WebxComponentsLoader componentsLoader;public WebxComponentsLoader getLoader() {return assertNotNull(componentsLoader, ILLEGAL_STATE, "no WebxComponentsLoader set");}public void setLoader(WebxComponentsLoader loader) {this.componentsLoader = loader;}/** 取得所有的components。 */public WebxComponents getWebxComponents() {return getLoader().getWebxComponents();}// Webx重写Spring方法@Overrideprotected void postProcessBeanFactory(ConfigurableListableBeanFactory beanFactory) {super.postProcessBeanFactory(beanFactory);getLoader().postProcessBeanFactory(beanFactory);}// Webx重写Spring方法@Overrideprotected void finishRefresh() {super.finishRefresh();getLoader().finishRefresh();}/** 在创建子容器时,给parent一个设置子context的机会。 */protected void setupComponentContext(WebxComponentContext componentContext) {}
}
在刚才的createContextLoader方法中,生成WebxComponentsContext 实例,其继承了WebxApplicationContext,而WebxApplicationContext->ResourceLoadingXmlWebApplicationContext->XmlWebApplicationContext->org.springframework.web.context.support.XmlWebApplicationContext,对于这么一条继承关系,
在Spring的WebApplicationContext 中,比较重要的refresh函数,是整个IoC容器资源加载以及注册的关键,先回顾一下refresh函数:
public void refresh() throws BeansException, IllegalStateException {//refresh过程是同步的,线程安全synchronized (this.startupShutdownMonitor) {//容器启动的预先准备,设置startup date等prepareRefresh();//创建BeanFactory,如果已存在就先销毁。BeanFactory装载BeanDefinitionConfigurableListableBeanFactory beanFactory = obtainFreshBeanFactory();//配置BeanFactory的标准上下文特性prepareBeanFactory(beanFactory);try {//在bean开始装载后,提供一个修改BeanFactory的接口postProcessBeanFactory(beanFactory);//调用postBeanBeanFactoryinvokeBeanFactoryPostProcessors(beanFactory);//注册BeanPostProcessor,可以再bean初始化前后定制一些功能registerBeanPostProcessors(beanFactory);//初始化消息源initMessageSource();//初始化事件监听器集合initApplicationEventMulticaster();//用于扩展实现一些特殊的bean的初始化,默认什么都不做onRefresh();//注册监听器registerListeners();//初始化其余非延迟加载的beanfinishBeanFactoryInitialization(beanFactory);//最后一步:调用onRefresh方法,并发布ContextRefreshedEvent事件finishRefresh();}catch (BeansException ex) {...}}}回到Webx重写Spring的方法,都先执行了Spring的WebApplicationContext方法,然后执行了Webx定义的getLoader得到的WebxComponentsLoader的postProcessBeanFactory方法
@Overrideprotected void postProcessBeanFactory(ConfigurableListableBeanFactory beanFactory) {super.postProcessBeanFactory(beanFactory);getLoader().postProcessBeanFactory(beanFactory);}@Overrideprotected void finishRefresh() {super.finishRefresh();getLoader().finishRefresh();}进入WebxComponentsLoader ,其实它继承自ContextLoader :
/*** 用来装载webx components的装载器。** @author Michael Zhou*/
public class WebxComponentsLoader extends ContextLoader {...private ServletContext        servletContext;private WebApplicationContext componentsContext;private WebxComponentsImpl    components;.../*** 在创建beanFactory之初被调用。** @param webxComponentsContext*/public void postProcessBeanFactory(ConfigurableListableBeanFactory beanFactory) {// 由于初始化components依赖于webxConfiguration,而webxConfiguration可能需要由PropertyPlaceholderConfigurer来处理,// 此外,其它有一些BeanFactoryPostProcessors会用到components,// 因此components必须在PropertyPlaceholderConfigurer之后初始化,并在其它BeanFactoryPostProcessors之前初始化。//// 下面创建的WebxComponentsCreator辅助类就是用来确保这个初始化顺序:// 1. PriorityOrdered - PropertyPlaceholderConfigurer// 2. Ordered - WebxComponentsCreator// 3. 普通 - 其它BeanFactoryPostProcessorsBeanDefinitionBuilder builder = BeanDefinitionBuilder.genericBeanDefinition(WebxComponentsCreator.class);builder.addConstructorArgValue(this);BeanDefinition componentsCreator = builder.getBeanDefinition();componentsCreator.setAutowireCandidate(false);BeanDefinitionRegistry registry = (BeanDefinitionRegistry) beanFactory;String name = SpringExtUtil.generateBeanName(WebxComponentsCreator.class.getName(), registry);registry.registerBeanDefinition(name, componentsCreator);}// WebxComponentsCreator 辅助类public static class WebxComponentsCreator implements BeanFactoryPostProcessor, Ordered {private final WebxComponentsLoader loader;public WebxComponentsCreator(WebxComponentsLoader loader) {this.loader = assertNotNull(loader, "WebxComponentsLoader");}public void postProcessBeanFactory(ConfigurableListableBeanFactory beanFactory) throws BeansException {if (loader.components == null) {WebxComponentsImpl components = loader.createComponents(loader.getParentConfiguration(), beanFactory);AbstractApplicationContext wcc = (AbstractApplicationContext) components.getParentApplicationContext();wcc.addApplicationListener(new SourceFilteringListener(wcc, components));loader.components = components;}}public int getOrder() {return Ordered.LOWEST_PRECEDENCE;}}/** 初始化所有components。 */public void finishRefresh() {components.getWebxRootController().onFinishedProcessContext();// 遍历子模块,并且执行refresh,相当于每个子模块都有一个ApplicationContextfor (WebxComponent component : components) {...WebxComponentContext wcc = (WebxComponentContext) component.getApplicationContext();WebxController controller = component.getWebxController();// refresh就是刚才提到的WebApplicationContext的那个重要的函数wcc.refresh();controller.onFinishedProcessContext();}...}/** 初始化components。 */private WebxComponentsImpl createComponents(WebxConfiguration parentConfiguration,ConfigurableListableBeanFactory beanFactory) {ComponentsConfig componentsConfig = getComponentsConfig(parentConfiguration);// 假如isAutoDiscoverComponents==true,试图自动发现componentsMap<String, String> componentNamesAndLocations = findComponents(componentsConfig, getServletContext());// 取得特别指定的componentsMap<String, ComponentConfig> specifiedComponents = componentsConfig.getComponents();// 实际要初始化的comonents,为上述两种来源的并集Set<String> componentNames = createTreeSet();componentNames.addAll(componentNamesAndLocations.keySet());componentNames.addAll(specifiedComponents.keySet());// 创建root controller,WebxRootController 在后面会分析到WebxRootController rootController = componentsConfig.getRootController();if (rootController == null) {rootController = (WebxRootController) BeanUtils.instantiateClass(componentsConfig.getRootControllerClass());}// 创建并将components对象置入resolvable dependencies,以便注入到需要的bean中WebxComponentsImpl components = new WebxComponentsImpl(componentsContext,componentsConfig.getDefaultComponent(), rootController, parentConfiguration);beanFactory.registerResolvableDependency(WebxComponents.class, components);// 初始化每个componentfor (String componentName : componentNames) {ComponentConfig componentConfig = specifiedComponents.get(componentName);String componentPath = null;WebxController controller = null;if (componentConfig != null) {componentPath = componentConfig.getPath();controller = componentConfig.getController();}if (controller == null) {controller = (WebxController) BeanUtils.instantiateClass(componentsConfig.getDefaultControllerClass());}// 每个WebxComponent就是一个子模块// 子模块的初始化WebxComponentImpl component = new WebxComponentImpl(components, componentName, componentPath,componentName.equals(componentsConfig.getDefaultComponent()), controller,getWebxConfigurationName());components.addComponent(component);prepareComponent(component, componentNamesAndLocations.get(componentName));}return components;}...
}
然后还有几个静态内部类:
1. WebxComponentsImpl(Root+子模块的集合)
2. RootComponentImpl(特殊的Component,公有共享)
3. WebxComponentImpl(子模块的Component,私有,每个子模块对应着特定的path模式)
到此,Spring初始化完成,Webx的子模块以及相关的实例也初始化完成
接下来看一下WebxFrameworkFilter的源码:
/*** 初始化spring容器的filter。** @author Michael Zhou*/
public class WebxFrameworkFilter extends FilterBean {private final Logger log = LoggerFactory.getLogger(getClass());private String           parentContextAttribute;private WebxComponents   components;private RequestURIFilter excludeFilter;private RequestURIFilter passthruFilter;private String           internalPathPrefix;.../** 初始化filter。 */@Overrideprotected final void init() throws Exception {WebApplicationContext parentContext = findParentContext();if (parentContext instanceof WebxComponentsContext) {components = ((WebxComponentsContext) parentContext).getWebxComponents();WebxConfiguration configuration = components.getParentWebxConfiguration();if (configuration != null) {internalPathPrefix = configuration.getInternalPathPrefix();internalPathPrefix = normalizeAbsolutePath(internalPathPrefix, true); // 规格化成/internal}}WebxRootController rootController = components.getWebxRootController();if (passthruFilter != null) {if (rootController instanceof PassThruSupportable) {((PassThruSupportable) rootController).setPassthruFilter(passthruFilter);} else {log.warn("You have specified Passthru Filter in /WEB-INF/web.xml.  "+ "It will not take effect because the implementation of WebxRootController ({}) does not support this feature.",rootController.getClass().getName());}}}// 过滤器过滤的逻辑@Overrideprotected void doFilter(HttpServletRequest request, HttpServletResponse response, FilterChain chain)throws IOException, ServletException {String path = getResourcePath(request);...try {// root+subModule->RootController->Service// 上面提到的WebxRootController被实例化,在此产生了作用getWebxComponents().getWebxRootController().service(request, response, chain);} catch (...) {...}}
}
WebxRootControllerImpl 继承自 AbstractWebxRootController
/*** 对<code>WebxRootController</code>的默认实现。** @author Michael Zhou*/
public class WebxRootControllerImpl extends AbstractWebxRootController {@Overrideprotected boolean handleRequest(RequestContext requestContext) throws Exception {HttpServletRequest request = requestContext.getRequest();// Servlet mapping有两种匹配方式:前缀匹配和后缀匹配。// 对于前缀匹配,例如:/servlet/aaa/bbb,servlet path为/servlet,path info为/aaa/bbb// 对于前缀匹配,当mapping pattern为/*时,/aaa/bbb,servlet path为"",path info为/aaa/bbb// 对于后缀匹配,例如:/aaa/bbb.html,servlet path为/aaa/bbb.html,path info为null//// 对于前缀匹配,取其pathInfo;对于后缀匹配,取其servletPath。String path = ServletUtil.getResourcePath(request);// 再根据path查找component(子模块)WebxComponent component = getComponents().findMatchedComponent(path);boolean served = false;if (component != null) {try {WebxUtil.setCurrentComponent(request, component);// 获取handleRequest执行结果served = component.getWebxController().service(requestContext);} finally {WebxUtil.setCurrentComponent(request, null);}}return served;}
}
先到AbstractWebxRootController 看一下Service方法的实现:
public final void service(HttpServletRequest request, HttpServletResponse response, FilterChain chain)throws Exception {RequestContext requestContext = null;try {requestContext = assertNotNull(getRequestContext(request, response), "could not get requestContext");// 如果请求已经结束,则不执行进一步的处理。例如,当requestContext已经被重定向了,则立即结束请求的处理。if (isRequestFinished(requestContext)) {return;}// 请求未结束,则继续处理...request = requestContext.getRequest();response = requestContext.getResponse();// 如果是一个内部请求,则执行内部请求if (handleInternalRequest(request, response)) {return;}// 如果不是内部的请求,并且没有被passthru,则执行handleRequestif (isRequestPassedThru(request) || !handleRequest(requestContext)) {// 如果请求被passthru,或者handleRequest返回false(即pipeline放弃请求),// 则调用filter chain,将控制交还给servlet engine。giveUpControl(requestContext, chain);}} catch (...) {...}}查看子模块源码:
public class WebxControllerImpl extends AbstractWebxController {// 管道private Pipeline pipeline;@Overridepublic void onRefreshContext() throws BeansException {super.onRefreshContext();initPipeline();}private void initPipeline() {pipeline = getWebxConfiguration().getPipeline();...}public boolean service(RequestContext requestContext) throws Exception {PipelineInvocationHandle handle = pipeline.newInvocation();handle.invoke();// 假如pipeline被中断,则视作请求未被处理。filter将转入chain中继续处理请求。return !handle.isBroken();}
}
查看一下Pipeline的实现:
/*** 代表一组顺序执行的操作,好象液体流过一根管道一样。** @author Michael Zhou*/
public interface Pipeline {/** 特殊的label,用来中断整个pipeline的执行。 */String TOP_LABEL = "#TOP";/*** 取得pipeline的标签。* <p>* 这是一个可选的参数,用来方便break中断指定label的pipeline。* </p>*/String getLabel();/** 创建一次新的执行。 */PipelineInvocationHandle newInvocation();/** 创建一次新的执行,并将此次执行看作另一个执行的子过程。 */PipelineInvocationHandle newInvocation(PipelineContext parentContext);
}
Pipline实现:
/*** 对<code>Pipeline</code>的实现。** @author Michael Zhou*/
public class PipelineImpl extends AbstractService<Pipeline> implements Pipeline {// 管道里面的元素private Valve[] valves;private String  label;@Overrideprotected void init() {if (valves == null) {valves = new Valve[0];}for (int i = 0; i < valves.length; i++) {assertNotNull(valves[i], "valves[%d] == null", i);}}/** 实现<code>PipelineContext</code>。 */private final class PipelineContextImpl implements PipelineContext, PipelineInvocationHandle {// pipline上下文private final PipelineContext parentContext;private final int             level;private int executedIndex  = -1;private int executingIndex = -1;private boolean             broken;private Map<String, Object> attributes;// 执行下一个valuepublic void invokeNext() {assertInitialized();if (broken) {return;}try {// 横向的下标自增executingIndex++;...// 暂不清楚这个记录什么executedIndex++;if (executingIndex < valves.length) {Valve valve = valves[executingIndex];try {...// 执行valuevalve.invoke(this);} catch (...) {...} finally {...}...} else {...}} finally {// 横向的下标自减executingIndex--;}}...public void invoke() throws IllegalStateException {// 初始化下标,每次请求只初始化一次executingIndex = executedIndex = -1;invokeNext();}...}
}
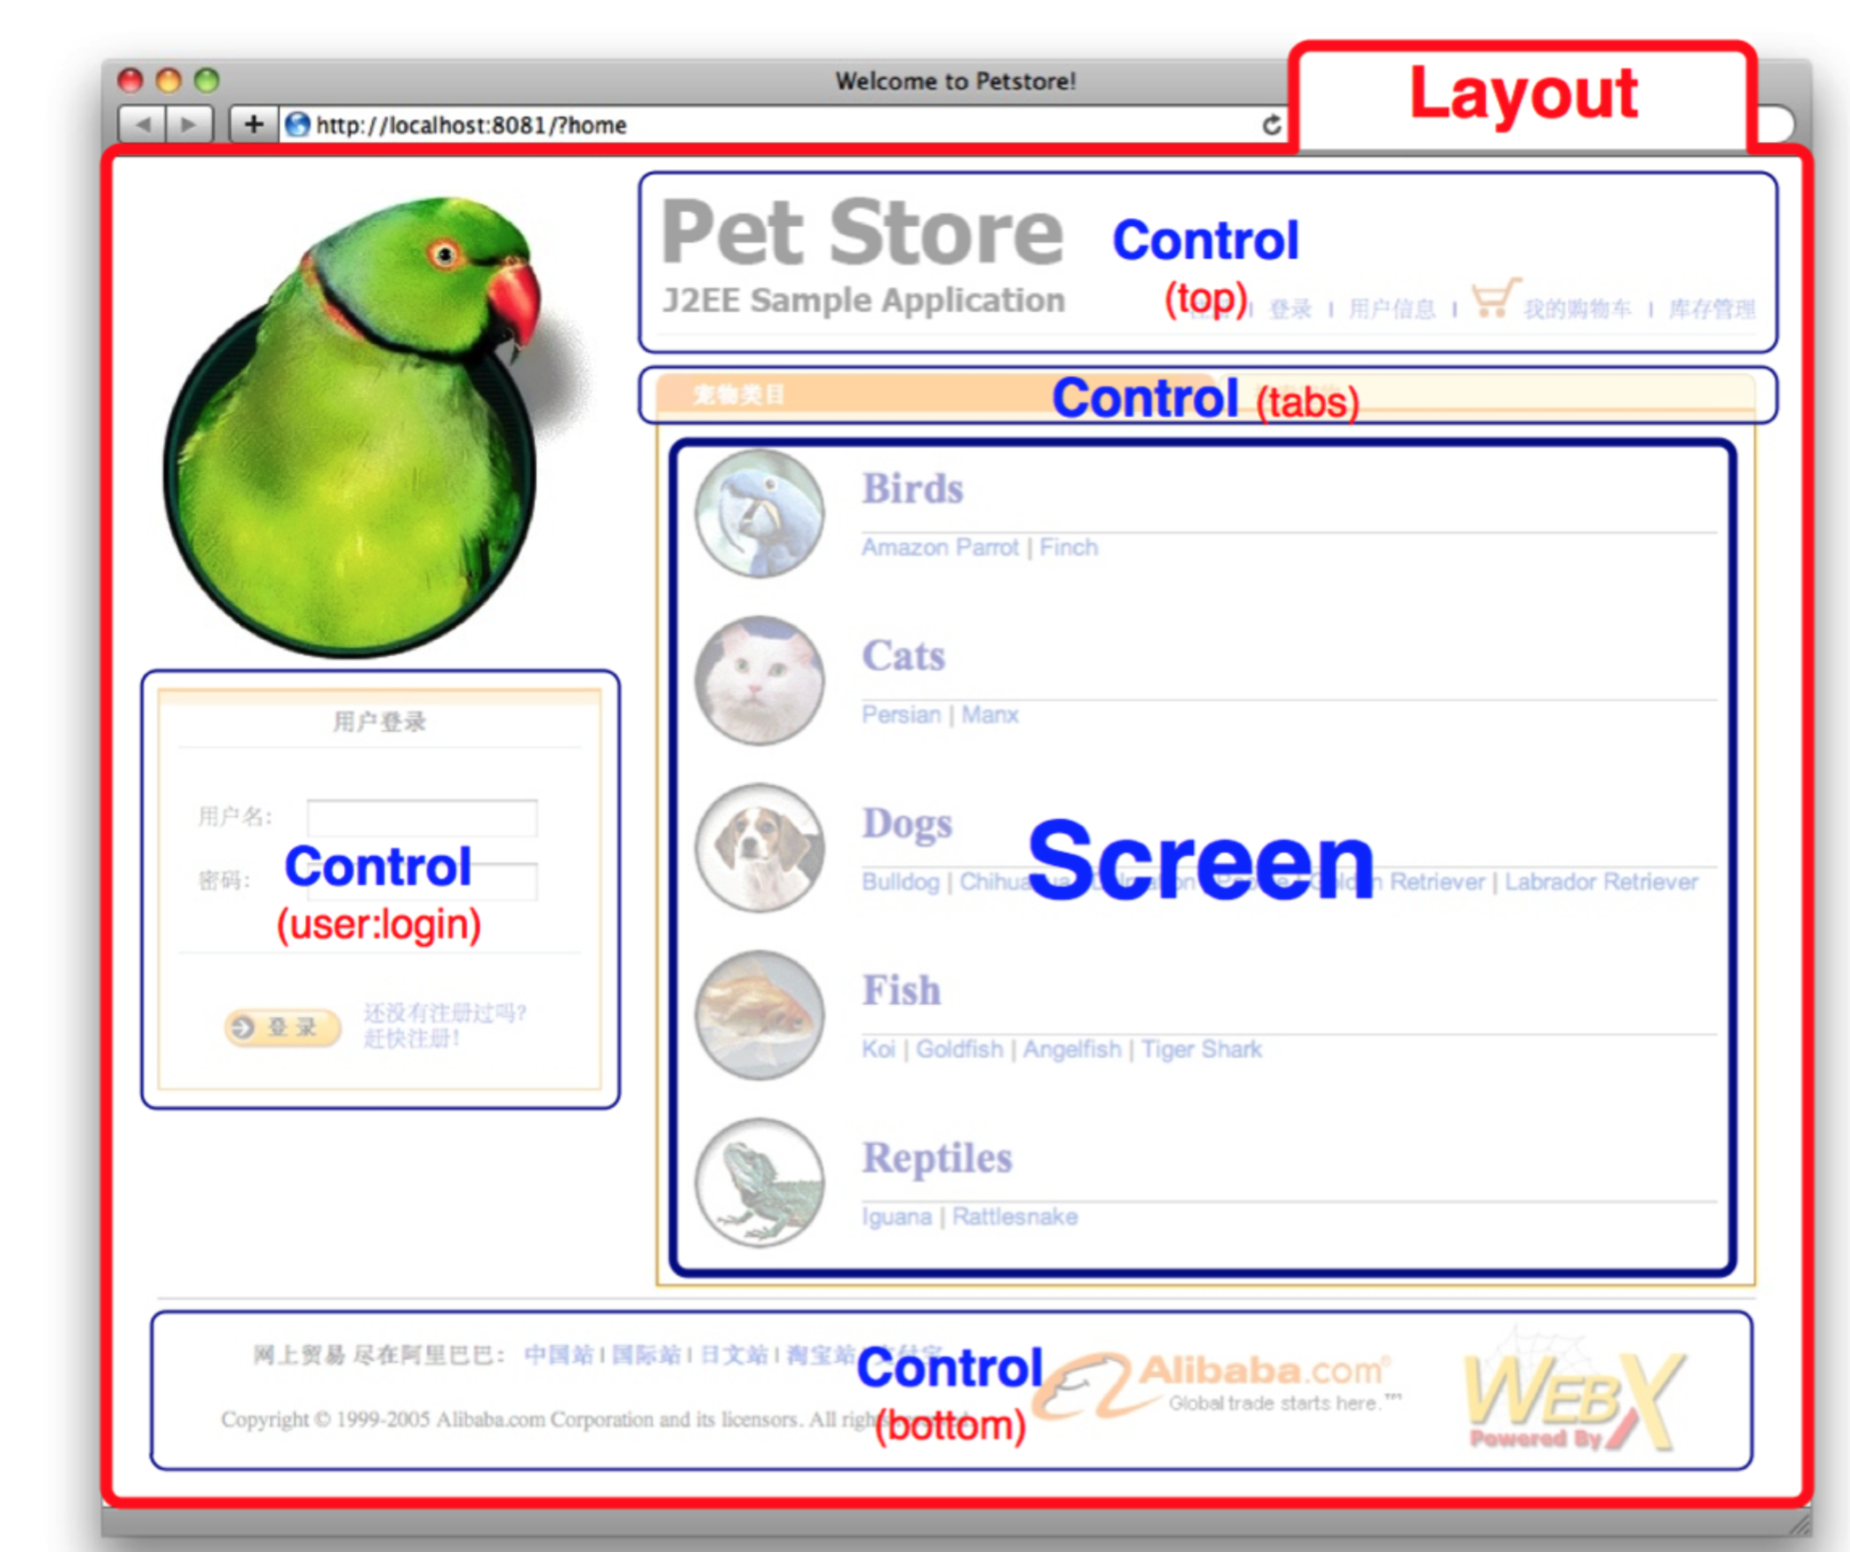
引入官网描述的一张图:

/*** 代表pipeline中的一个“阀门”。* <p>* 如同真实世界里的水管中的阀门,它可以控制和改变液体的流向,<code>Valve</code> 也可以控制pipeline中后续valves的执行。* <code>Valve</code>可以决定是否继续执行后续的valves,或是中断整个pipeline的执行。* </p>** @author Michael Zhou*/
public interface Valve {void invoke(PipelineContext pipelineContext) throws Exception;
}
通过上面的pipline的相关结构,其实和配置文件反应出来的是一样的,这是个有序的执行结构,而且可以通过配置文件的配置,改变其执行的顺序:
<services:pipeline xmlns="http://www.alibaba.com/schema/services/pipeline/valves"><!-- 初始化turbine rundata,并在pipelineContext中设置可能会用到的对象(如rundata、utils),以便valve取得。 --><prepareForTurbine /><!-- 设置日志系统的上下文,支持把当前请求的详情打印在日志中。 --><setLoggingContext /><!-- 分析URL,取得target。 --><analyzeURL homepage="homepage" /><!-- 检查csrf token,防止csrf攻击和重复提交。 --><checkCsrfToken /><loop><choose><when><!-- 执行带模板的screen,默认有layout。 --><pl-conditions:target-extension-condition extension="null, vm, jsp" /><performAction /><performTemplateScreen /><renderTemplate /></when><when><!-- 执行不带模板的screen,默认无layout。 --><pl-conditions:target-extension-condition extension="do" /><performAction /><performScreen /></when><otherwise><!-- 将控制交还给servlet engine。 --><exit /></otherwise></choose><!-- 假如rundata.setRedirectTarget()被设置,则循环,否则退出循环。 --><breakUnlessTargetRedirected /></loop></services:pipeline>
从配置文件,我们可以看到checkCsrfToken,那么它就是对应着一个Value,可以看看Value的实现:
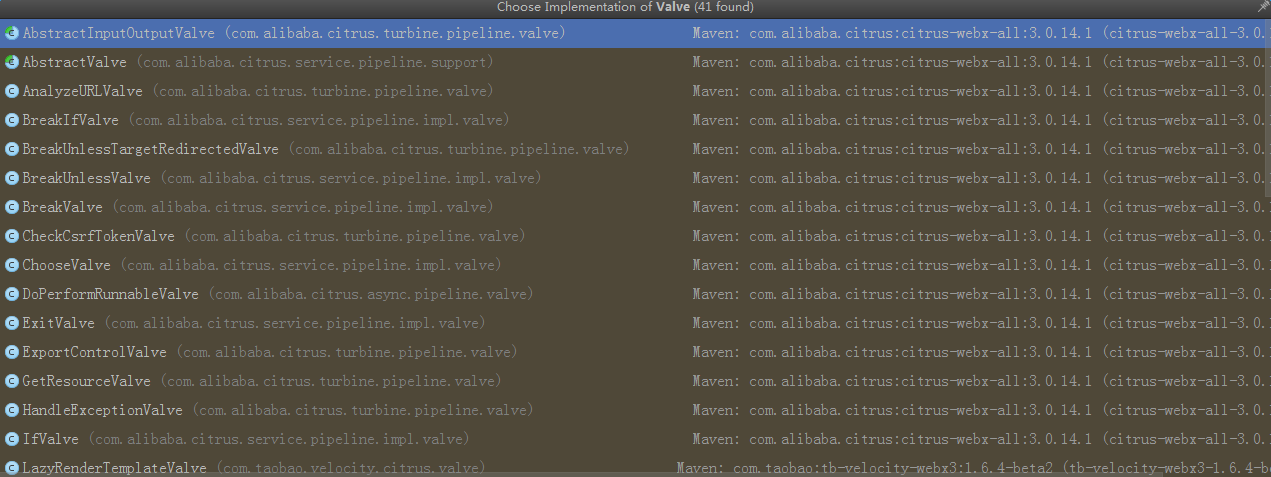
直接找一个比较容易理解的Value,那就是performActionValue,执行访问Screen/Module/的类的execute方法:
/*** 执行action module,通常用来处理用户提交的表单。** @author Michael Zhou*/
public class PerformActionValve extends AbstractValve {@Autowiredprivate HttpServletRequest request;@Autowiredprivate ModuleLoaderService moduleLoaderService;public void invoke(PipelineContext pipelineContext) throws Exception {TurbineRunData rundata = getTurbineRunData(request);// 检查重定向标志,如果是重定向,则不需要将页面输出。if (!rundata.isRedirected()) {String action = rundata.getAction();// 如果找到action,则执行之。if (!StringUtil.isEmpty(action)) {String actionKey = "_action_" + action;// 防止重复执行同一个action。if (rundata.getRequest().getAttribute(actionKey) == null) {rundata.getRequest().setAttribute(actionKey, "executed");try {moduleLoaderService.getModule(ACTION_MODULE, action).execute();} catch (...) {...}}}}// 执行接下面的Value,对应着上面的配置文件就是performScreenValuepipelineContext.invokeNext();}...
}
看看module是什么:
/*** 代表一个模块。** @author Michael Zhou*/
public interface Module {/** 执行模块。 */void execute() throws Exception;
}
看看exeute的实现:
public abstract class AbstractModuleEventAdapter extends AbstractDataBindingAdapterimplements InitializingBean, ModuleEvent {private final Map<String, MethodInvoker> handlers;private final MethodInvoker              preHandler;private final MethodInvoker              postHandler;@Autowiredprivate HttpServletRequest request;.../** 执行一个module。 */public void execute() throws ModuleEventException, ModuleEventNotFoundException {executeAndReturn();}/** 执行一个module,并返回值。 */public Object executeAndReturn() throws ModuleEventException, ModuleEventNotFoundException {Object result = null;String event = getEventName(request);MethodInvoker handler = null;// 查找精确匹配的方法if (event != null) {handler = handlers.get(event);}// 查找fallback methodif (handler == null) {handler = handlers.get(null);}...// 执行preHandlerif (preHandler != null) {...try {preHandler.invoke(moduleObject, log);} catch (...) {...}}ModuleEventException exception = null;try {// 执行event handler...try {result = handler.invoke(moduleObject, log);} catch (Exception e) {// 捕获异常exception = new ModuleEventException("Failed to execute handler: " + handler, e);}} finally {// 执行postHandlerif (postHandler != null) {...try {postHandler.invoke(moduleObject, log);} catch (Exception e) {if (exception == null) {// 捕获异常exception = new ModuleEventException("Failed to execute post-handler: " + postHandler, e);}}}}if (exception != null) {// 抛出异常throw exception;}return result;}...
}
整个Webx MVC的初始化以及访问大体完成了,剩下就是原路返回数据进行相关处理。