1.添加表头
sgc.PrimaryGrid.SelectionGranularity = SelectionGranularity.Row;//点击选中一行DevComponents.DotNetBar.SuperGrid.GridColumn gc = null;gc = new DevComponents.DotNetBar.SuperGrid.GridColumn("ID");sgc.PrimaryGrid.Columns.Add(gc);gc = new DevComponents.DotNetBar.SuperGrid.GridColumn("类型编码");sgc.PrimaryGrid.Columns.Add(gc);
2.添加数据 加一行
sgc.PrimaryGrid.Rows.Add(new GridRow(new object[] { "a", "b" }));//也就是加一个GrindRow对像
3.设点击选中一行后 取第一行第一列的值
SelectedElementCollection col = sgc.PrimaryGrid.GetSelectedRows();//选中的行集合if (col.Count > 0){GridRow gr = (col[0] as GridRow);//把第一行转为GridRow fac.ID = int.Parse(gr.Cells[0].Value.ToString());//取第一列的Value转一下//等效于int id= int.Parse((sgc.PrimaryGrid.GetSelectedRows()[0] as GridRow).Cells[0].Value.ToString());}
4.增加一个下拉框
4.1


using DevComponents.DotNetBar.SuperGrid;
using System;
using System.Windows.Forms;namespace TestForm
{public partial class Form1 : Form{public Form1(){InitializeComponent();this.Load += Form1_Load;}private void Form1_Load(object sender, EventArgs e){GridColumn col = new GridColumn("这是一个下拉框");col.HeaderText = "这是一个下拉框";col.Name = "这是一个下拉框";col.AutoSizeMode = ColumnAutoSizeMode.DisplayedCells;col.EditorType = typeof(DefineGridCB);col.EditorParams = new object[] { new object[] { "第一个", "第二个" } };superGridControl1.PrimaryGrid.Columns.Add(col);}//自定义控件public class DefineGridCB : GridComboBoxExEditControl{public DefineGridCB(object source){DataSource = source;}}//增加一行private void buttonItem1_Click(object sender, EventArgs e){superGridControl1.PrimaryGrid.NewRow(true);}}
}
View Code
4.2 方法二 上边不传值 直接给一个无参构造方法
public class ThisGridComboBoxControl : GridComboBoxExEditControl{public ThisGridComboBoxControl(){CustomList cl = new CustomList("BSC201Compare"); DataTable dt = cl.GetList();//这里我是执行了一个sql查询 有符号和名称两个列 反回一个dataTableDataSource = dt;DisplayMember = "名称";ValueMember = "符号";DropDownStyle = ComboBoxStyle.DropDownList;DropDownColumns = "名称|符号";MaxDropDownItems = 8;}}
4.2效果 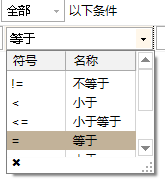
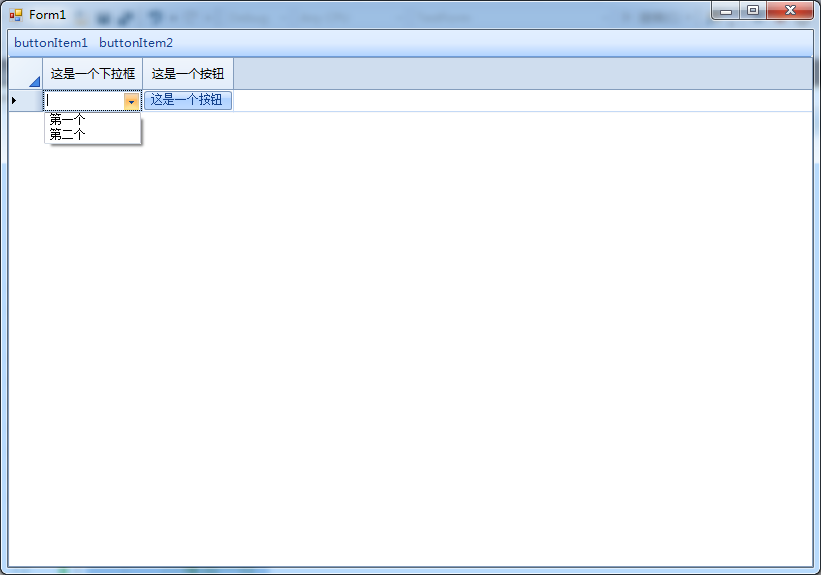
5.增加一个按钮
using DevComponents.DotNetBar.SuperGrid;
using System;
using System.Windows.Forms;
using DevComponents.DotNetBar.SuperGrid.Style;namespace TestForm
{public partial class Form1 : Form{public Form1(){InitializeComponent();this.Load += Form1_Load;}private void Form1_Load(object sender, EventArgs e){GridColumn col = new GridColumn("这是一个下拉框");col.HeaderText = "这是一个下拉框";col.Name = "这是一个下拉框";col.AutoSizeMode = ColumnAutoSizeMode.DisplayedCells;col.EditorType = typeof(DefineGridCB);col.EditorParams = new object[] { new object[] { "第一个", "第二个" } };superGridControl1.PrimaryGrid.Columns.Add(col);col = new GridColumn("这是一个按钮");col.AutoSizeMode = ColumnAutoSizeMode.DisplayedCells;col.EditorType = typeof(DefineGridButtonX);superGridControl1.PrimaryGrid.Columns.Add(col);}/// <summary>/// 自己定义按钮/// </summary>public class DefineGridButtonX : GridButtonXEditControl{public DefineGridButtonX(){this.Click += DefineGridButtonX_Click;}private void DefineGridButtonX_Click(object sender, EventArgs e){MessageBox.Show("1");}/// <summary>/// 控件属性/// </summary>/// <param name="cell"></param>/// <param name="style"></param>public override void InitializeContext(GridCell cell, CellVisualStyle style){base.InitializeContext(cell, style);this.Text = "这是一个按钮";}}//自定义下拉控件public class DefineGridCB : GridComboBoxExEditControl{public DefineGridCB(object source){DataSource = source;}}//增加一行private void buttonItem1_Click(object sender, EventArgs e){superGridControl1.PrimaryGrid.NewRow(true);}}
}
View Code
改变按钮颜色-依照别的列改变 在class的初始化中做如下操作
public override void InitializeContext(GridCell cell, CellVisualStyle style){base.InitializeContext(cell, style);BackColor = Color.Transparent;//这个必须加上 不然也没有效果if ((EditorCell.GridRow["这是一个下拉框"].Value ?? "").ToString() != ""){unchecked{ForeColor = Color.FromArgb(255, 135, 206, 235);BackColor = Color.FromArgb(255, 135, 206, 235);}ColorTable = eButtonColor.Blue;}}
4~5效果
5.superGridControl一列变化 另一列自动加载对应的数据 判断一下值变货的单元格(后来看了看还是用cellClick会更好一些)
private void SuperGridControl1_CellValueChanged(object sender, GridCellValueChangedEventArgs e){if (e.GridCell.GridColumn.Name == "下拉列"){superGridControl1.PrimaryGrid.Columns["下拉变动列"].EditorParams = new object[] { new object[] { "wf","HH"} };}}
6.自动行高
SPG.PrimaryGrid.DefaultRowHeight = 0;
7.去掉列头行头
sgcCondition.SPG.PrimaryGrid.ShowColumnHeader = false;// sgcCondition.SPG.PrimaryGrid.ColumnHeader.Visible = false;//效果ms和上边一个样。。。sgcCondition.SPG.PrimaryGrid.ShowRowHeaders = false;
8.选中行 默认选中首行
SPG.PrimaryGrid.SelectionGranularity = SelectionGranularity.Row;
SPG.PrimaryGrid.InitialSelection = RelativeSelection.Row;
9.增加一行
spgDetail.PrimaryGrid.NewRow(true);
10.删除选中行
SelectedElementCollection lstGR = spgDetail.PrimaryGrid.GetSelectedRows();if (lstGR != null)if (lstGR.Count > 0){foreach (GridRow gr in lstGR){spgDetail.PrimaryGrid.Rows.Remove(gr);}}
11.显示行号 且从1开始
SPG.PrimaryGrid.ShowRowGridIndex = true;
SPG.PrimaryGrid.RowHeaderIndexOffset=1;
12.交换两行数据 实现上移下移
public static object[] GetRowValues(GridContainer gcRow){object[] obj = new object[(gcRow as GridRow).Cells.Count];for (int i = 0; i < (gcRow as GridRow).Cells.Count; i++){obj[i] = (gcRow as GridRow)[i].Value;}return obj;}/// <summary>/// 上、下移动表格行 /// </summary>/// <param name="spg"></param>/// <param name="gr"></param>/// <param name="isUp"></param>public static bool MoveSPGRow(SuperGridControl spg, bool isUp = true){var atRow = spg.PrimaryGrid.ActiveRow;if (atRow == null){PublicProperties.ShowInformation("请先选中要移动的行", AlertImage.Alert, 2000);//这里是个吐司函数就是提示一下return false;}object[] objRow = GetRowValues(atRow);if (isUp){if (atRow.RowIndex == 0){PublicProperties.ShowInformation("已经是第一行了,无法再向上移动", AlertImage.Alert, 2000);//这里是个吐司函数就是提示一下return false;}var atTop = spg.PrimaryGrid.Rows[atRow.RowIndex - 1];object[] objTop = GetRowValues(atTop as GridRow);spg.PrimaryGrid.Rows[atRow.Index - 1] = new GridRow(objRow);spg.PrimaryGrid.Rows[atRow.Index] = new GridRow(objTop);spg.PrimaryGrid.SetActiveRow(spg.PrimaryGrid.Rows[atRow.Index - 1] as GridRow);spg.PrimaryGrid.SetSelected(spg.PrimaryGrid.Rows[atRow.Index] as GridRow, false);}else{if (atRow.RowIndex == spg.PrimaryGrid.Rows.Count - 1){PublicProperties.ShowInformation("已经是最后一行了,无法再向下移动", AlertImage.Alert, 2000);//这里是个吐司函数就是提示一下return false;}var atBottum = spg.PrimaryGrid.Rows[atRow.RowIndex + 1];object[] objBottum = GetRowValues(atBottum as GridRow);spg.PrimaryGrid.Rows[atRow.Index + 1] = new GridRow(objRow);spg.PrimaryGrid.Rows[atRow.Index] = new GridRow(objBottum);spg.PrimaryGrid.SetActiveRow(spg.PrimaryGrid.Rows[atRow.Index + 1] as GridRow);spg.PrimaryGrid.SetSelected(spg.PrimaryGrid.Rows[atRow.Index] as GridRow, false);}return true;}}
View Code
13.编辑superGridCell时 焦点没离开cell 点不失焦点的控件 如bar的buttonItem 那么cell里的值不会变,这里可用SetActive()函数 使焦点离开cell
SPG.PrimaryGrid.SetActive(false)
14.选中行自动行高
/// <summary>/// 只对选中行自动行高/// </summary>/// <param name="sender"></param>/// <param name="e"></param>private void SPG_RowActivated(object sender, GridRowActivatedEventArgs e){GridRow newrow = e.NewActiveRow == null ? new GridRow() : (e.NewActiveRow as GridRow);GridRow oldrow = e.OldActiveRow == null ? new GridRow() : e.OldActiveRow as GridRow;newrow.RowHeight = 0;if (newrow != oldrow){oldrow.RowHeight = 21;//原始宽度}}
15.superGrid 实现选中区域上下填充
/// <summary>/// 实现superGridControl选中区上下填充/// </summary>/// <param name="isDown">true 向下 false 向上</param>/// <param name="isFolowCursor">true激活行跟随 false 不跟随</param>private static void FillCells(SuperGridControl SPG, bool isDown = true, bool isFolowCursor = true){//var cellSel = spgData.SPG.GetSelectedCells();//if (cellSel != null)//{//}var cellSel = SPG.GetSelectedCells();if (cellSel == null){return;}int iFirst = (cellSel.First() as GridCell).RowIndex;int iEnd = (cellSel.Last() as GridCell).RowIndex;GridRow grFirst = SPG.PrimaryGrid.Rows[iFirst] as GridRow;GridRow grEnd = SPG.PrimaryGrid.Rows[iEnd] as GridRow;for (int j = iFirst; j <= iEnd; j++){GridRow gr = SPG.PrimaryGrid.Rows[j] as GridRow;GridRow grTmp = null;if (isDown)grTmp = grFirst;elsegrTmp = grEnd;for (int i = 0; i < SPG.PrimaryGrid.Columns.Count; i++){if (gr[i].IsSelected && gr[i].AllowEdit == true){gr[i].Value = grTmp[i].Value;}}if (isFolowCursor)gr.SetActive();}if (isFolowCursor)grFirst.SetActive();}
16.superGridControl出现滚动条时 追加数据 始终显示最后一条
//SPG.PrimaryGrid.ScrollToBottom()//这个不知为什么不行 看意思好像行的样子
//如果对spg有其他操作要刷新一下 spg.Refresh()不刷新下边的代码将不起作用
SPG.PrimaryGrid.LastOnScreenRowIndex = (SPG.PrimaryGrid.Rows.Last() as GridRow).Index;
17.superGridControl 列的数据居中对齐
spgLoginInfo.DefaultVisualStyles.CellStyles.Default.Alignment = DevComponents.DotNetBar.SuperGrid.Style.Alignment.MiddleCenter;
18.改变列头颜色
spgLoginInfo.DefaultVisualStyles.ColumnHeaderStyles.Default.Background.Color1 = Color.FromArgb(8, 47, 76);spgLoginInfo.DefaultVisualStyles.ColumnHeaderStyles.Default.Background.Color2 = Color.FromArgb(8, 47, 76);
19.superGridControl透明
//整体透明superGridControl1.BackColor = Color.Transparent;//面板透明superGridControl1.DefaultVisualStyles.GridPanelStyle.Background.Color1= Color.Transparent;//行透明superGridControl1.DefaultVisualStyles.RowStyles.Default.Background.Color1 = Color.Transparent;//单元格透明superGridControl1.DefaultVisualStyles.CellStyles.Default.Background.Color1 = Color.Transparent;//改变单个单元格颜色(superGridControl1.PrimaryGrid.Rows[0] as GridRow).Cells[0].CellStyles.Default.Background.Color1 = Color.Red;