通过前面的使用,我们可以看出Sails中MVC的结构更倾向于MVP的概念,Presenter在Sails中被称之为Actions:
They often act as a middleman between your models and views.
Controller层这个结构上的变化是Sails v1.0中新提出的方案,Action可以使用classic和actions2两种格式,另外,仍然兼容支持Sails v0.12上的Controller实现方式。相对于肿胀的Controller,将Controller拆分成多个Action可以更清晰的表达业务逻辑,其中actions2格式的Action更是一种半文档半校验器的形式,可以从接口描述、接口参数、参数校验、逻辑、退出方式等方面构建整个业务逻辑。
Actions
Action2 Action
Action2格式的action与Helper基本相似,需要做调整的主要是各种与Controller层职责相关的exit方式。我们来创建一个signup action:
sails generate action user/login
我们可以编写一个用于登录验证的action,从而实现登录业务逻辑:
- Model层
Model层我们使用前面案例中的User Model:
const crypto = require('crypto');
const uuid = require('node-uuid');module.exports = {primaryKey: 'uuid',attributes: {uuid: {type: 'string',required: true,},username: {type: 'string',required: true,allowNull: false,unique: true,},password: {type: 'string',required: true,allowNull: false,},},customToJSON: function() {return _.omit(this, ['password']);},beforeCreate: function (valuesToSet, proceed) {let md5 = crypto.createHash('md5');valuesToSet.uuid = uuid.v4();valuesToSet.password = md5.update(valuesToSet.password).digest('hex');return proceed();}};
身份验证主要通过对username和password的查询完成。
2. View层
首先在config/routes创建一个view路由:
 '/login': {view: 'pages/login',locals: {layout: 'layouts/users',errno: 0,},
},
该路由指定了模板为views/pages/login,layout为views/layouts/users(只有默认的ejs模板引擎支持此项配置),接下来我们分别创建layouts/users和pages/login:
layouts/users.ejs:
<!DOCTYPE html>
<html><head><title>Sails App</title><!-- Viewport mobile tag for sensible mobile support --><meta name="viewport" content="width=device-width, initial-scale=1, maximum-scale=1"><!--STYLES--><!--STYLES END--></head><body><%- body %></body>
</html>
pages/login.ejs:
<div class="container"><% if(errno == 1){ %><div class="alert alert-danger" role="alert">Username or password is error!</div><% } %><form method="POST" action="/user/login"><div class="form-group"><label for="username">Username</label><input type="text" class="form-control" id="username" name="username" placeholder="Enter username"></div><div class="form-group"><label for="password">Password</label><input type="password" class="form-control" id="password" name="password" placeholder="Password"></div><button type="submit" class="btn btn-primary">Submit</button></form>
</div>
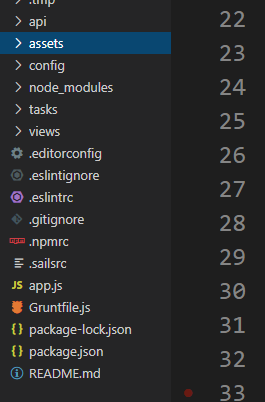
assets资源:
将bootstrap.min.css拷贝到assets/styles下,启动时grunt任务会将其自动注入到users.ejs的样式文件引用中。
- Controller层
api/controllers/user/login:
const crypto = require('crypto'); module.exports = {friendlyName: 'Login',description: 'Login user.',inputs: {username: {description: 'The username',type: 'string',required: true,},password: {description: 'The password',type: 'string',required: true,}},exits: {success: {responseType: 'view',viewTemplatePath: 'pages/welcome'},fail: {responseType: 'view',viewTemplatePath: 'pages/login'},err: {description: 'Occur error',responseType: 'notFound'}},fn: async function (inputs, exits) {let md5 = crypto.createHash('md5');let {username, password} = inputs;try{let user = await User.findOne({username, username});if(!user || user.password != md5.update(password).digest('hex')){return exits.fail({errno: 1});}return exits.success({errno: 0,msg: {username: username}});} catch(e) {sails.log(e.message);throw 'err';}}
};
可以看到与Helper的结构是一致的,唯一需要调整的是exit的方式,而exit方式主要是由responseType决定的:
responseType is one of the following:
- “” (the standard response: Determine an appropriate response based on context: this might send plain text, download a file, transmit data as JSON, or send no response body at all.)
- “view” (render and respond with a view; exit output will be provided as view locals)
- “redirect” (redirect to the URL returned as the exit output)
为action创建路由:
'post /user/login': 'user.login',
从代码可以看到,登录成功后,渲染模板pages/welcome,因此,我们创建对应的模板:
<h1>Welcome <%= msg.username %> !</h1>
接下来,我们启动测试以下:
-
创建一个测试user:
http://127.0.0.1:1337/user/create?username=admin&password=123456&uuid=auto -
登录错误:
http://127.0.0.1:1337/login

输入错误的username或password:

-
登录成功:
输入正确的username和password:

Classic Action
Classic action与v0.12版本中传统的Controller实现方式基本一致,将传统写在一个Controller中的业务逻辑拆分为单个的一个个action,更有利于业务的实现与维护。
sails generate action user/login--no-actions2
Controller
另外,你仍然可以使用传统的Controller方式实现所有业务逻辑:
module.exports = {login: function (req, res) { ... },logout: function (req, res) { ... },signup: function (req, res) { ... },
};
machine-as-action
你也可以将Controller的编写方式转换到action2的编写风格上来,请参考以下链接:
https://github.com/sailshq/machine-as-action