1 Consul简介
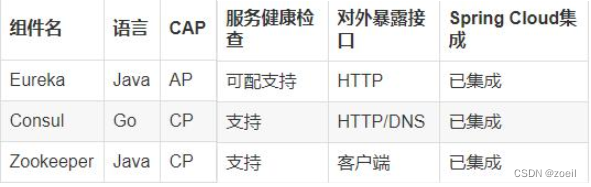
Consul 是 HashiCorp 公司推出的开源工具,用于实现分布式系统的服务发现与配置。与其他分布式服务注册与发现的方案,Consul的方案更“一站式”,内置了服务注册与发现框 架、分布一致性协议实现、健康检查、Key/Value存储、多数据中心方案,不再需要依赖其他工具(比如ZooKeeper等)。使用起来也较 为简单。Consul使用Go语言编写,因此具有天然可移植性(支持Linux、windows和Mac OS X);安装包仅包含一个可执行文件,方便部署,与Docker等轻量级容器可无缝配合 。
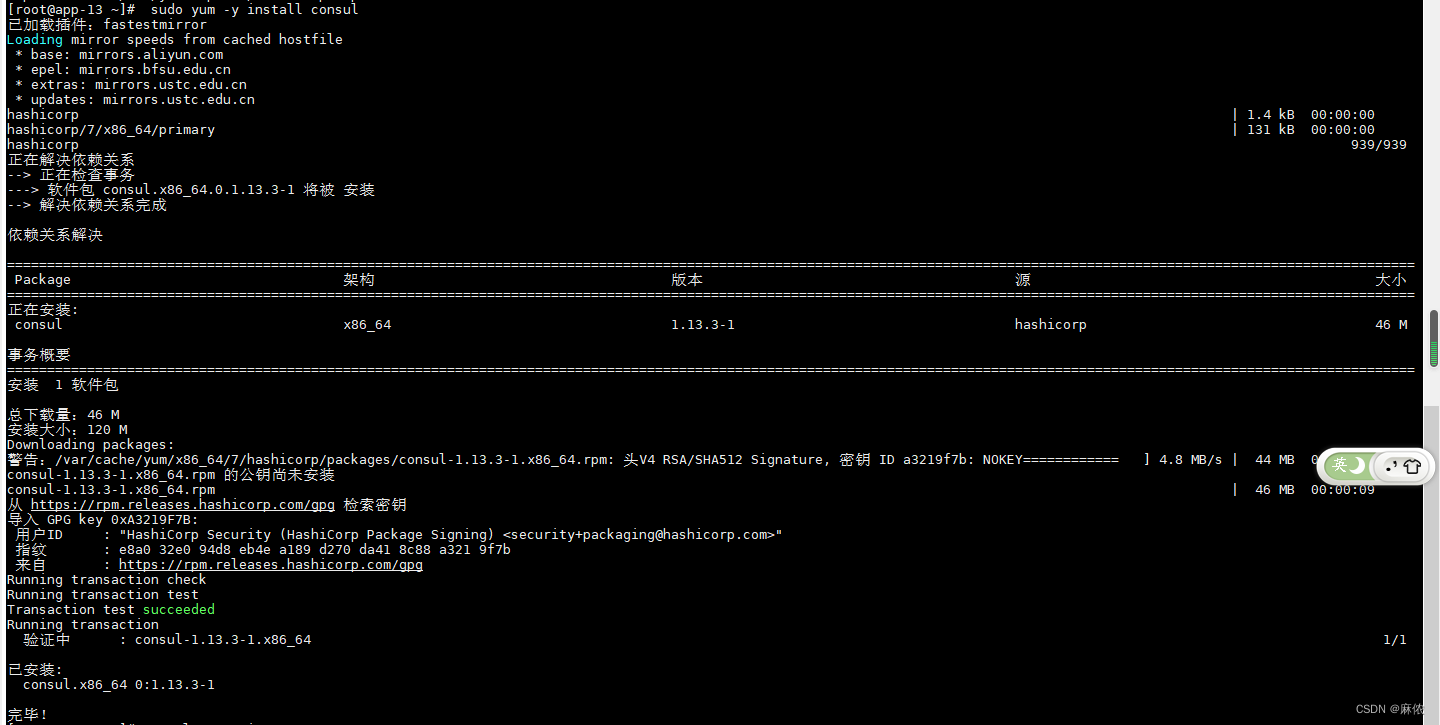
2 Consul安装
安装环境:
mac:64bit(查看mac位数:打开终端–>”uname -a”)
consul_0.6.4_darwin_amd64.zip和consul_0.6.4_web_ui.zip,从consul官网https://www.consul.io/downloads.html进行下载就好(选择好OS和位数)
1、解压consul_0.6.4_darwin_amd64.zip
2、将解压后的二进制文件consul(上边画红框的部分拷贝到/usr/local/bin下)
sudo scp consul /usr/local/bin/
说明:使用sudo是因为权限问题。
3、查看是否安装成功,
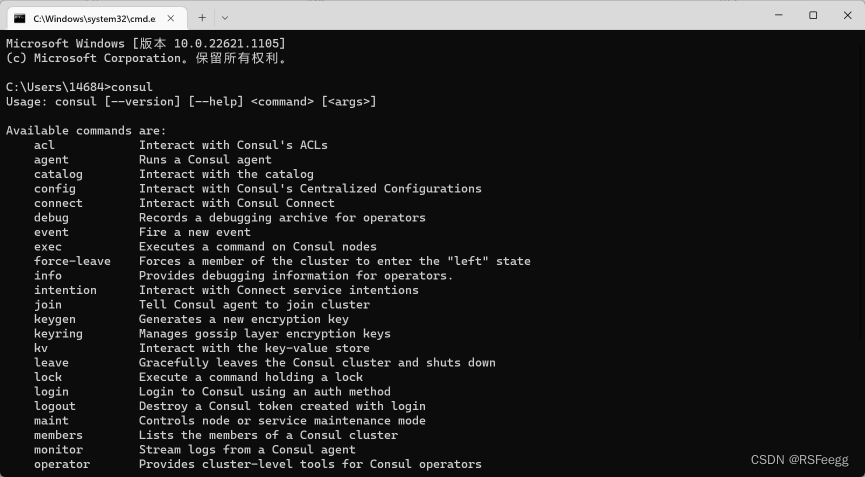
直接在家目录下执行consul命令即可。出现如下结果,表示安装成功。
lidongdeMacBook-Pro:bin lidong$ consul
usage: consul [--version] [--help] <command> [<args>]Available commands are:agent          Runs a Consul agentconfigtest     Validate config fileevent          Fire a new eventexec           Executes a command on Consul nodesforce-leave    Forces a member of the cluster to enter the "left" stateinfo           Provides debugging information for operatorsjoin           Tell Consul agent to join clusterkeygen         Generates a new encryption keykeyring        Manages gossip layer encryption keyskv             Interact with the key-value storeleave          Gracefully leaves the Consul cluster and shuts downlock           Execute a command holding a lockmaint          Controls node or service maintenance modemembers        Lists the members of a Consul clustermonitor        Stream logs from a Consul agentoperator       Provides cluster-level tools for Consul operatorsreload         Triggers the agent to reload configuration filesrtt            Estimates network round trip time between nodessnapshot       Saves, restores and inspects snapshots of Consul server stateversion        Prints the Consul versionwatch          Watch for changes in Consul
3 Consul 启动
1、执行命令
./consul agent -dev # -dev表示开发模式运行,另外还有-server表示服务模式运行查看显示结果:
lidongdeMacBook-Pro:bin lidong$ consul agent -dev
==> Starting Consul agent...
==> Starting Consul agent RPC...
==> Consul agent running!Version: 'v0.7.5'Node ID: 'c67a8d03-deac-35b8-8f68-06ff7b687215'Node name: 'lidongdeMacBook-Pro.local'Datacenter: 'dc1'Server: true (bootstrap: false)Client Addr: 127.0.0.1 (HTTP: 8500, HTTPS: -1, DNS: 8600, RPC: 8400)Cluster Addr: 127.0.0.1 (LAN: 8301, WAN: 8302)Gossip encrypt: false, RPC-TLS: false, TLS-Incoming: falseAtlas: <disabled>==> Log data will now stream in as it occurs:2017/03/13 12:44:31 [DEBUG] Using unique ID "c67a8d03-deac-35b8-8f68-06ff7b687215" from host as node ID2017/03/13 12:44:31 [INFO] raft: Initial configuration (index=1): [{Suffrage:Voter ID:127.0.0.1:8300 Address:127.0.0.1:8300}]2017/03/13 12:44:31 [INFO] raft: Node at 127.0.0.1:8300 [Follower] entering Follower state (Leader: "")2017/03/13 12:44:31 [INFO] serf: EventMemberJoin: lidongdeMacBook-Pro.local 127.0.0.12017/03/13 12:44:31 [INFO] consul: Adding LAN server lidongdeMacBook-Pro.local (Addr: tcp/127.0.0.1:8300) (DC: dc1)2017/03/13 12:44:31 [INFO] serf: EventMemberJoin: lidongdeMacBook-Pro.local.dc1 127.0.0.12017/03/13 12:44:31 [INFO] consul: Adding WAN server lidongdeMacBook-Pro.local.dc1 (Addr: tcp/127.0.0.1:8300) (DC: dc1)2017/03/13 12:44:36 [WARN] raft: Heartbeat timeout from "" reached, starting election2017/03/13 12:44:36 [INFO] raft: Node at 127.0.0.1:8300 [Candidate] entering Candidate state in term 22017/03/13 12:44:36 [DEBUG] raft: Votes needed: 12017/03/13 12:44:36 [DEBUG] raft: Vote granted from 127.0.0.1:8300 in term 2. Tally: 12017/03/13 12:44:36 [INFO] raft: Election won. Tally: 12017/03/13 12:44:36 [INFO] raft: Node at 127.0.0.1:8300 [Leader] entering Leader state2017/03/13 12:44:36 [INFO] consul: cluster leadership acquired2017/03/13 12:44:36 [INFO] consul: New leader elected: lidongdeMacBook-Pro.local2017/03/13 12:44:36 [DEBUG] consul: reset tombstone GC to index 32017/03/13 12:44:36 [INFO] consul: member 'lidongdeMacBook-Pro.local' joined, marking health alive2017/03/13 12:44:37 [INFO] agent: Synced service 'consul'2017/03/13 12:44:37 [DEBUG] agent: Node info in sync2017/03/13 12:44:39 [INFO] agent.rpc: Accepted client: 127.0.0.1:540952017/03/13 12:44:50 [DEBUG] http: Request GET /v1/catalog/datacenters (580.862µs) from=127.0.0.1:541142017/03/13 12:44:50 [DEBUG] http: Request GET /v1/catalog/datacenters (34.955µs) from=127.0.0.1:541142017/03/13 12:44:50 [DEBUG] http: Request GET /v1/internal/ui/nodes?dc=dc1&token=<hidden> (1.024476ms) from=127.0.0.1:541122017/03/13 12:44:50 [DEBUG] http: Request GET /v1/coordinate/nodes?dc=dc1&token=<hidden> (361.25µs) from=127.0.0.1:541112017/03/13 12:44:50 [DEBUG] http: Request GET /v1/internal/ui/services?dc=dc1&token=<hidden> (315.405µs) from=127.0.0.1:541112017/03/13 12:44:53 [DEBUG] http: Request GET /v1/internal/ui/nodes?dc=dc1&token=<hidden> (140.095µs) from=127.0.0.1:541112017/03/13 12:44:54 [DEBUG] http: Request GET /v1/kv/?keys&seperator=/&dc=dc1&token=<hidden> (1.368486ms) from=127.0.0.1:541112017/03/13 12:44:55 [DEBUG] http: Request GET /v1/acl/list?dc=dc1&token=<hidden> (9.253µs) from=127.0.0.1:541112017/03/13 12:44:57 [DEBUG] http: Request GET /v1/internal/ui/services?dc=dc1&token=<hidden> (109.196µs) from=127.0.0.1:541112017/03/13 12:44:59 [DEBUG] http: Request GET /v1/internal/ui/services?dc=dc1&token=<hidden> (98.48µs) from=127.0.0.1:541112017/03/13 12:45:58 [DEBUG] agent: Service 'consul' in sync2017/03/13 12:45:58 [DEBUG] agent: Node info in sync2017/03/13 12:47:55 [DEBUG] agent: Service 'consul' in sync2017/03/13 12:47:55 [DEBUG] agent: Node info in sync
说明:
-dev(该节点的启动不能用于生产环境,因为该模式下不会持久化任何状态),该启动模式仅仅是为了快速便捷的启动单节点consul
该节点处于server模式
该节点是leader
该节点是一个健康节点
2、查看consul cluster中的每一个consul节点的信息
lidongdeMacBook-Pro:~ lidong$ consul members
Node                       Address         Status  Type    Build  Protocol  DC
lidongdeMacBook-Pro.local  127.0.0.1:8301  alive   server  0.7.5  2         dc1
说明:
- Address:节点地址
- Status:alive表示节点健康
- Type:server运行状态是server状态
- DC:dc1表示该节点属于DataCenter1
注意:
members命令的输出是基于gossip协议的,并且是最终一致的(也就是说,某一个时刻你去运用该命令查到的consul节点的状态信息可能是有误的)
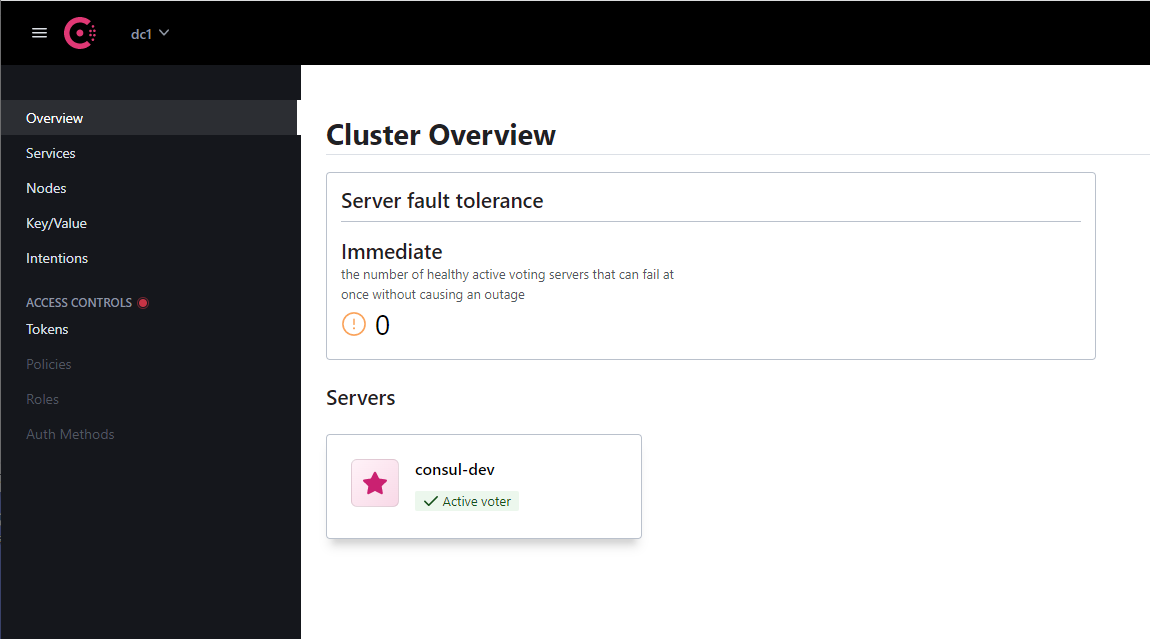
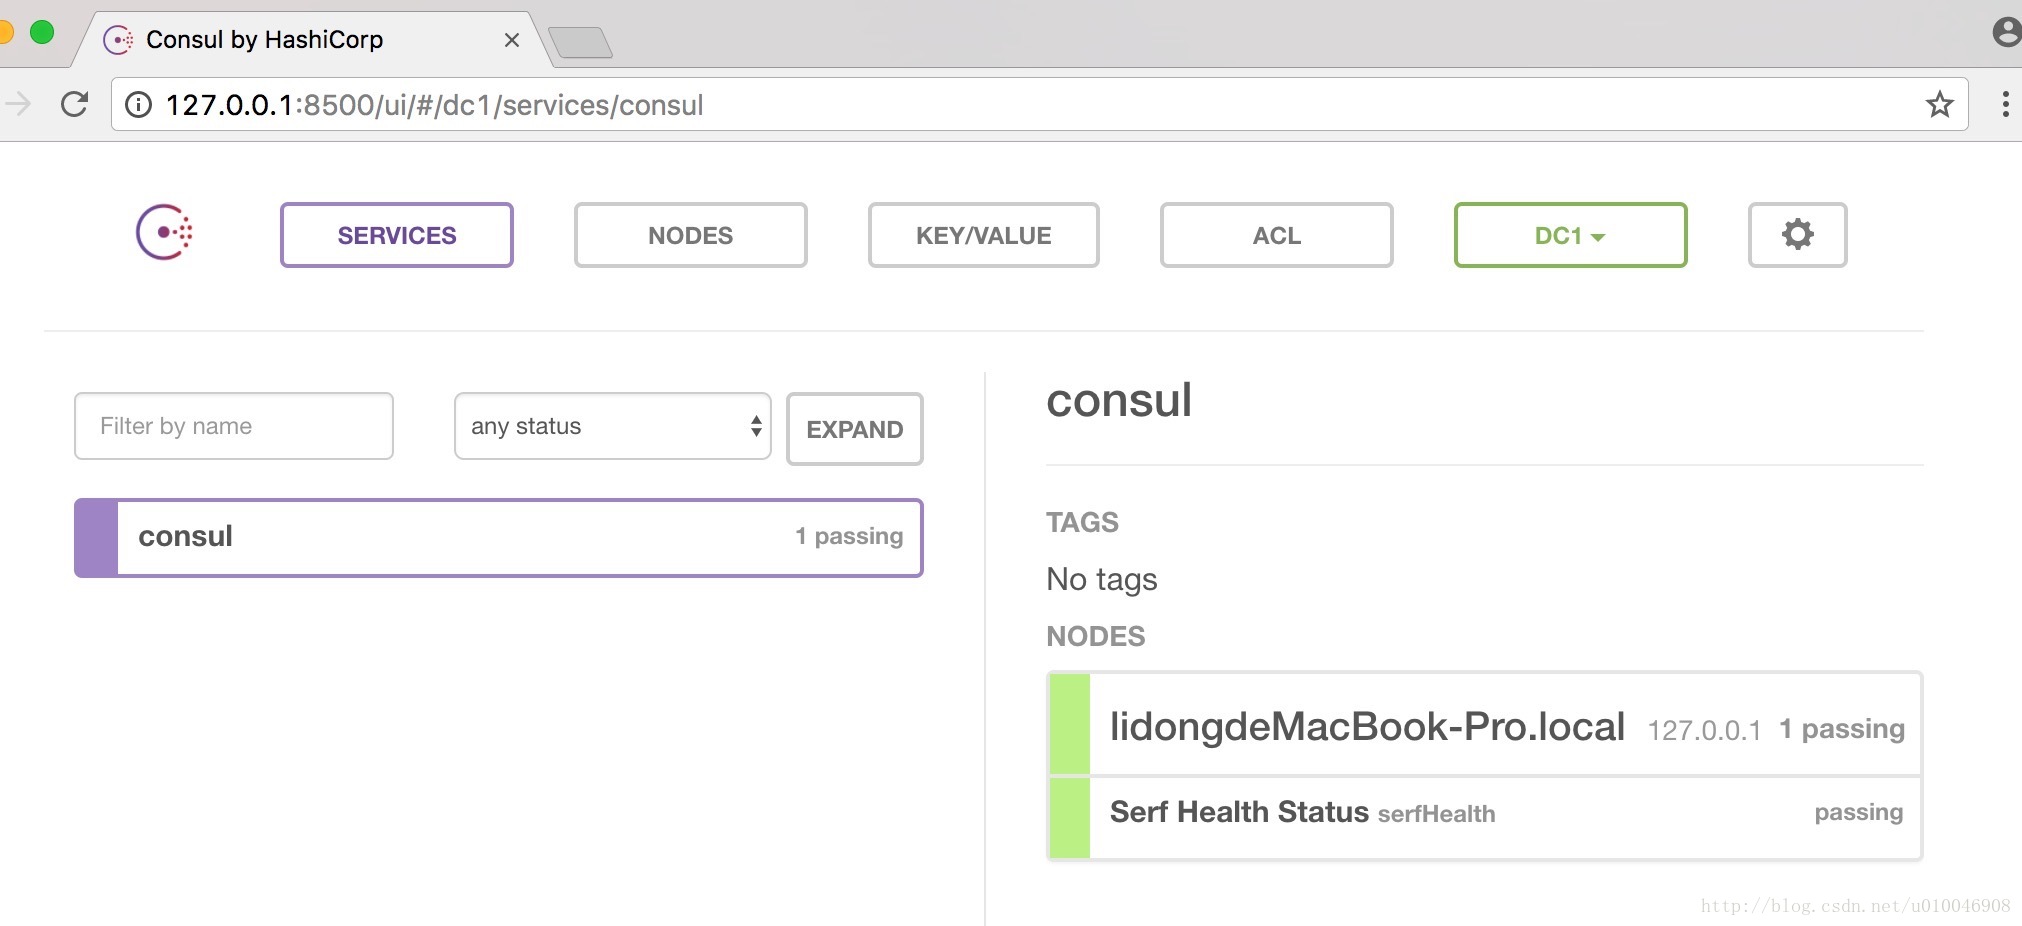
输入http://127.0.0.1:8500/ui/ 访问Consul,可查看到如下界面:
4 停止服务(优雅退出)
命令:CTRL+C
^C==> Caught signal: interrupt2017/03/13 12:50:42 [DEBUG] http: Shutting down http server (127.0.0.1:8500)2017/03/13 12:50:42 [INFO] agent: requesting shutdown2017/03/13 12:50:42 [INFO] consul: shutting down server2017/03/13 12:50:42 [WARN] serf: Shutdown without a Leave2017/03/13 12:50:42 [WARN] serf: Shutdown without a Leave2017/03/13 12:50:42 [ERR] dns: error starting tcp server: accept tcp 127.0.0.1:8600: use of closed network connection2017/03/13 12:50:42 [INFO] agent: shutdown complete
说明:
- 该节点离开后,会通知cluster中的其他节点
注意:
- 安装部分参考自:https://www.consul.io/intro/getting-started/install.html
- 启动和停止服务部分参考自:https://www.consul.io/intro/getting-started/agent.html
5 Consul常用命令
| 命令 | 解释 | 示例 |
|---|---|---|
| agent | 运行一个consul agent | consul agent -dev |
| join | 将agent加入到consul集群 | consul join IP |
| members | 列出consul cluster集群中的members | consul members |
| leave | 将节点移除所在集群 | consul leave |
consul agent 命令详解
输入consul agent --help ,可以看到consul agent 的选项,如下:
-advertise=addr Sets the advertise address to use-advertise-wan=addr Sets address to advertise on wan instead of advertise addr-atlas=org/name Sets the Atlas infrastructure name, enables SCADA.-atlas-join Enables auto-joining the Atlas cluster-atlas-token=token Provides the Atlas API token-atlas-endpoint=1.2.3.4 The address of the endpoint for Atlas integration.-bootstrap Sets server to bootstrap mode-bind=0.0.0.0 Sets the bind address for cluster communication-http-port=8500 Sets the HTTP API port to listen on-bootstrap-expect=0 Sets server to expect bootstrap mode.-client=127.0.0.1 Sets the address to bind for client access.This includes RPC, DNS, HTTP and HTTPS (if configured)-config-file=foo Path to a JSON file to read configuration from.This can be specified multiple times.-config-dir=foo Path to a directory to read configuration filesfrom. This will read every file ending in ".json"as configuration in this directory in alphabeticalorder. This can be specified multiple times.-data-dir=path Path to a data directory to store agent state-dev Starts the agent in development mode.-recursor=1.2.3.4 Address of an upstream DNS server.Can be specified multiple times.-dc=east-aws Datacenter of the agent (deprecated: use 'datacenter' instead).-datacenter=east-aws Datacenter of the agent.-encrypt=key Provides the gossip encryption key-join=1.2.3.4 Address of an agent to join at start time.Can be specified multiple times.-join-wan=1.2.3.4 Address of an agent to join -wan at start time.Can be specified multiple times.-retry-join=1.2.3.4 Address of an agent to join at start time withretries enabled. Can be specified multiple times.-retry-interval=30s Time to wait between join attempts.-retry-max=0 Maximum number of join attempts. Defaults to 0, whichwill retry indefinitely.-retry-join-wan=1.2.3.4 Address of an agent to join -wan at start time withretries enabled. Can be specified multiple times.-retry-interval-wan=30s Time to wait between join -wan attempts.-retry-max-wan=0 Maximum number of join -wan attempts. Defaults to 0, whichwill retry indefinitely.-log-level=info Log level of the agent.-node=hostname Name of this node. Must be unique in the cluster-protocol=N Sets the protocol version. Defaults to latest.-rejoin Ignores a previous leave and attempts to rejoin the cluster.-server Switches agent to server mode.-syslog Enables logging to syslog-ui Enables the built-in static web UI server-ui-dir=path Path to directory containing the Web UI resources-pid-file=path Path to file to store agent PIDconsul agent 命令的常用选项,如下:
- -data-dir
- 作用:指定agent储存状态的数据目录
- 这是所有agent都必须的
- 对于server尤其重要,因为他们必须持久化集群的状态
- -config-dir
- 作用:指定service的配置文件和检查定义所在的位置
- 通常会指定为”某一个路径/consul.d”(通常情况下,.d表示一系列配置文件存放的目录)
- -config-file
- 作用:指定一个要装载的配置文件
- 该选项可以配置多次,进而配置多个配置文件(后边的会合并前边的,相同的值覆盖)
- -dev
- 作用:创建一个开发环境下的server节点
- 该参数配置下,不会有任何持久化操作,即不会有任何数据写入到磁盘
- 这种模式不能用于生产环境(因为第二条)
- -bootstrap-expect
- 作用:该命令通知consul server我们现在准备加入的server节点个数,该参数是为了延迟日志复制的启动直到我们指定数量的server节点成功的加入后启动。
- -node
- 作用:指定节点在集群中的名称
- 该名称在集群中必须是唯一的(默认采用机器的host)
- 推荐:直接采用机器的IP
- -bind
- 作用:指明节点的IP地址
- 有时候不指定绑定IP,会报
Failed to get advertise address: Multiple private IPs found. Please configure one.的异常
- -server
- 作用:指定节点为server
- 每个数据中心(DC)的server数推荐至少为1,至多为5
- 所有的server都采用raft一致性算法来确保事务的一致性和线性化,事务修改了集群的状态,且集群的状态保存在每一台server上保证可用性
- server也是与其他DC交互的门面(gateway)
- -client
- 作用:指定节点为client,指定客户端接口的绑定地址,包括:HTTP、DNS、RPC
- 默认是127.0.0.1,只允许回环接口访问
- 若不指定为-server,其实就是-client
- -join
- 作用:将节点加入到集群
- -datacenter(老版本叫-dc,-dc已经失效)
- 作用:指定机器加入到哪一个数据中心中
使用-client 参数可指定允许客户端使用什么ip去访问,例如-client 192.168.11.143 表示可以使用http://192.168.11.143:8500/ui 去访问。
我们尝试一下:
consul agent -dev -client 192.168.11.143发现果然可以使用http://192.168.11.143:8500/ui 访问了。
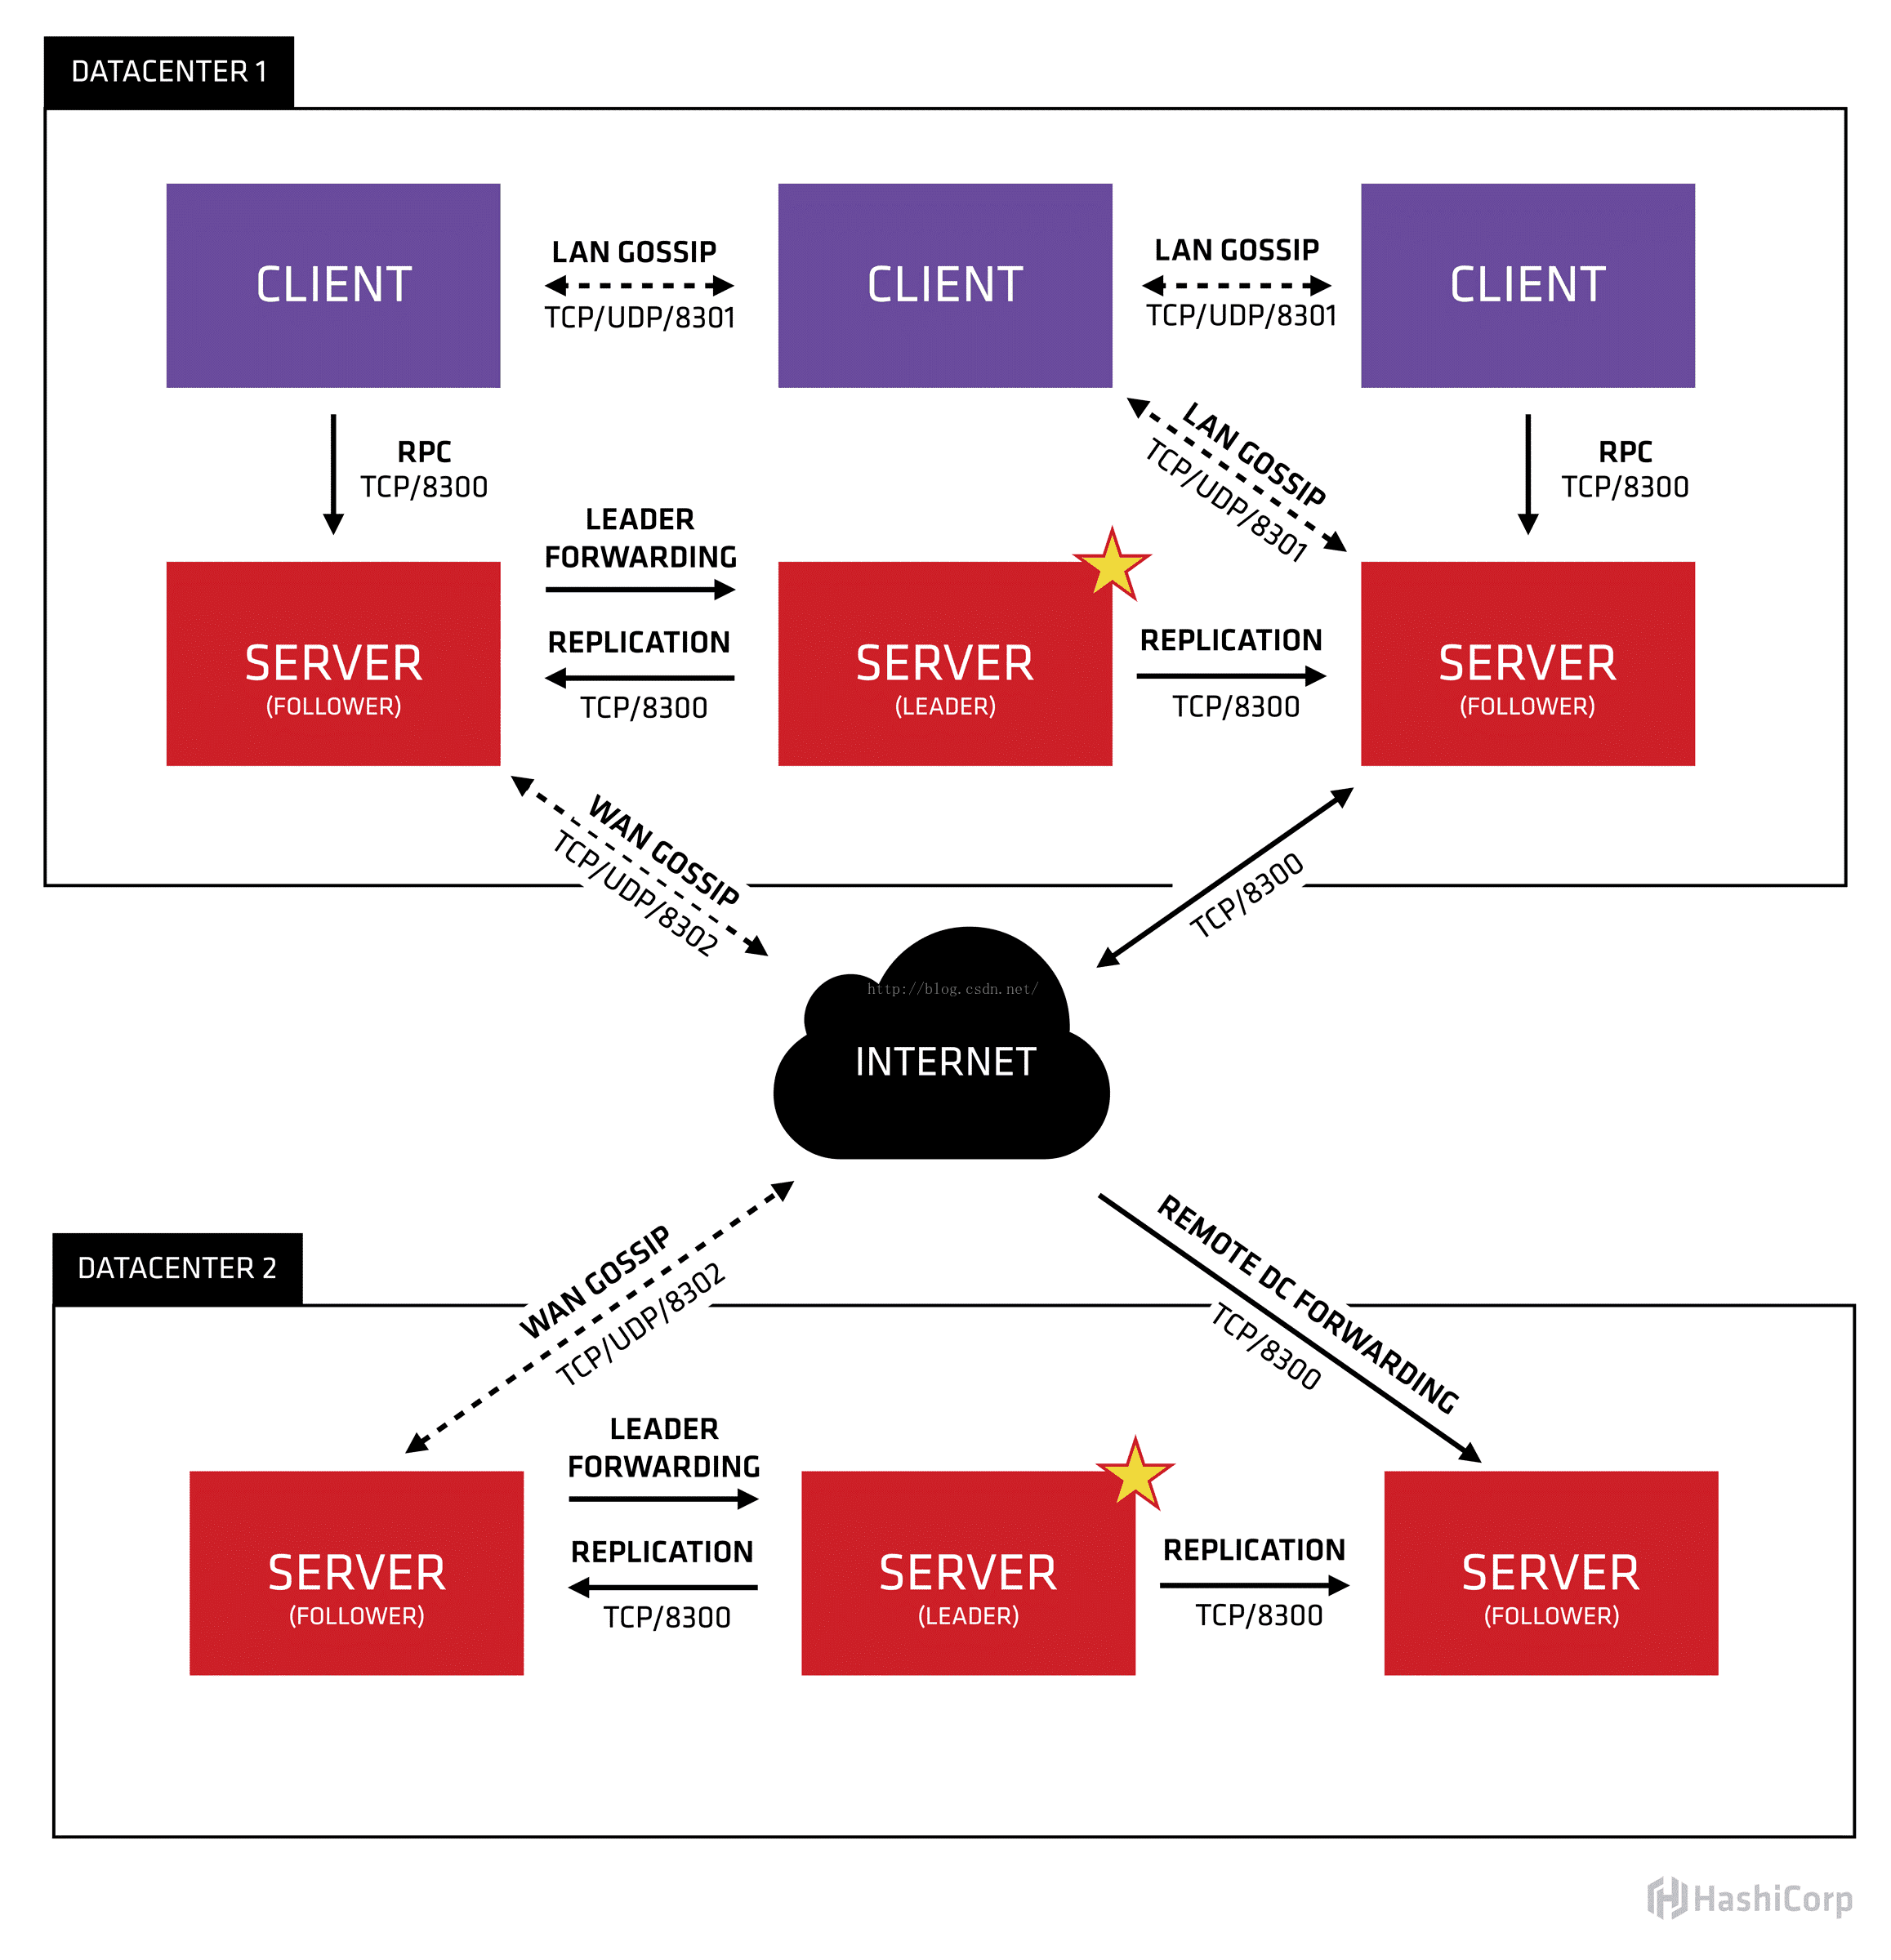
6 Consul 的高可用
Consul Cluster集群架构图如下:

这边准备了三台CentOS 7的虚拟机,主机规划如下,供参考:
| 主机名称 | IP | 作用 | 是否允许远程访问 |
|---|---|---|---|
| node0 | 192.168.11.143 | consul server | 是 |
| node1 | 192.168.11.144 | consul client | 否 |
| node2 | 192.168.11.145 | consul client | 是 |
6.1 搭建步骤:
- 启动node0机器上的Consul(node0机器上执行):
consul agent -data-dir /tmp/node0 -node=node0 -bind=192.168.11.143 -datacenter=dc1 -ui -client=192.168.11.143 -server -bootstrap-expect 1- 启动node1机器上的Consul(node1机器上执行):
consul agent -data-dir /tmp/node1 -node=node1 -bind=192.168.11.144 -datacenter=dc1 -ui- 启动node2机器上的Consul(node2机器上执行):
consul agent -data-dir /tmp/node2 -node=node2 -bind=192.168.11.145 -datacenter=dc1 -ui -client=192.168.11.145- 将node1节点加入到node0上(node1机器上执行):
consul join 192.168.11.143- 将node2节点加入到node0上(node2机器上执行):
consul join -rpc-addr=192.168.11.145:8400 192.168.11.143- 这样一个简单的Consul集群就搭建完成了,在node1上查看当前集群节点:
consul members -rpc-addr=192.168.11.143:8400结果如下:
Node   Address              Status  Type    Build  Protocol  DC
node0  192.168.11.143:8301  alive   server  0.7.0  2         dc1
node1  192.168.11.144:8301  alive   client  0.7.0  2         dc1
node2  192.168.11.145:8301  alive   client  0.7.0  2         dc1
说明集群已经搭建成功了。
我们分析一下,为什么第5步和第6步需要加-rpc-addr 选项,而第4步不需要加任何选项呢?原因是-client 指定了客户端接口的绑定地址,包括:HTTP、DNS、RPC,而consul join 、consul members 都是通过RPC与Consul交互的。
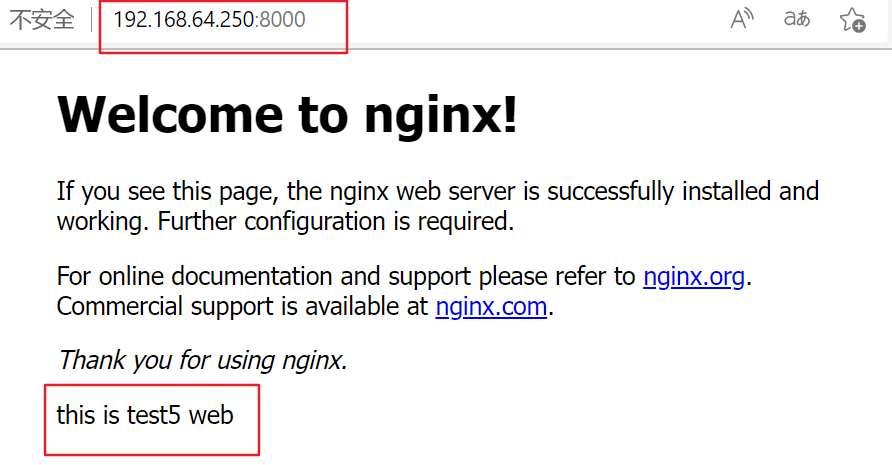
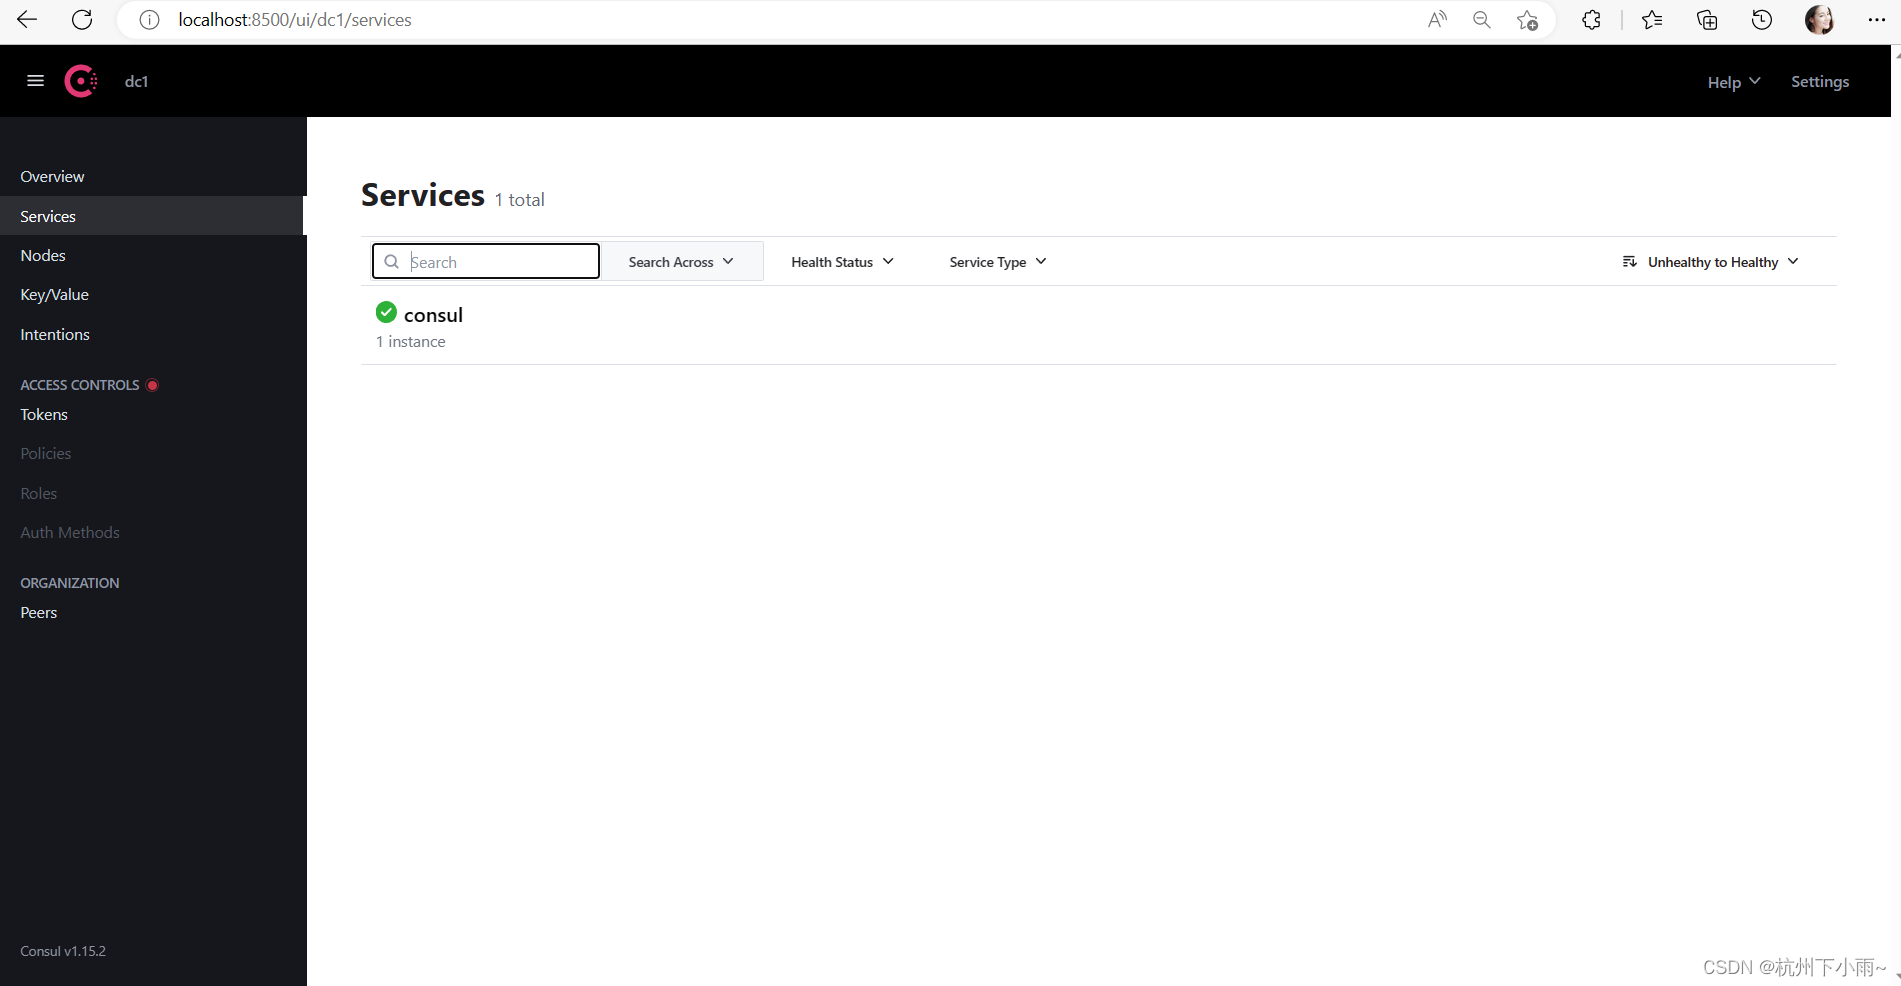
6.2 访问集群

如上,我们三个节点都加了-ui 参数启动了内建的界面。我们可以通过:http://192.168.11.143:8500/ui/ 或者http://192.168.11.145:8500/ui/进行访问,也可以在node1机器上通过http://127.0.0.1:8500/ui/ 进行访问,原因是node1没有开启远程访问 ,三种访问方式结果是一致的,如下:

7 参考文档:
Consul官方文档:https://www.consul.io/intro/getting-started/install.html
Consul 系列博文:http://www.cnblogs.com/java-zhao/archive/2016/04/13/5387105.html
使用consul实现分布式服务注册和发现:http://www.tuicool.com/articles/M3QFven