文章目录
- iOS应用间跳转简介
- 应用间跳转应用场景
- 应用间跳转实现步骤
- 跳转到本地或第三方应用的一些URL Schemes
iOS应用间跳转简介
- 在开发的过程中,我们经常会遇到需要从一个应用程序跳转到另一个应用程序的场景。这就需要我们掌握iOS应用程序之间的相互跳转知识。
应用间跳转应用场景
- 使用第三方用户登录,跳转到需授权的App。如QQ登录,微信登录等。需要用户授权,还需要"返回到调用的程序,同时返回授权的用户名、密码"。
- 应用程序推广,跳转到另一个应用程序(本机已经安装),或者跳转到iTunes并显示应用程序下载页面(本机没有安装)。
- 第三方支付,跳转到第三方支付App,如支付宝支付,微信支付。
- 内容分享,跳转到分享App的对应页面,如分享给微信好友、分享给微信朋友圈、分享到微博。
- 显示位置、地图导航,跳转到地图应用。
- 使用系统内置程序,跳转到打电话、发短信、发邮件、Safari打开网页等内置App中。
应用间跳转实现步骤
- 在iOS中打开一个应用程序只需要拿到这个应用程序的协议头即可,所以我们只需配置应用程序的协议头即可。
- 具体步骤
- 首先我们用Xcode创建两个iOS应用程序项目,项目名称分别为A_app、B_app。(A跳B)
- 选择项目TARGETS->B_app -> Info -> URL Types -> URL Schemes,设置B_app的URL Schemes为Bapp(也可以在B_app的info.plist文件里设置)。如下图:
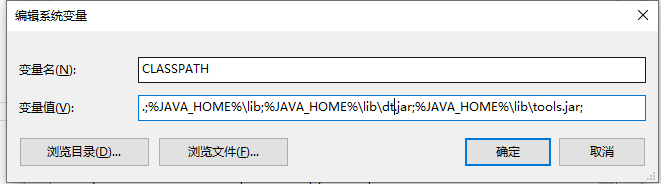
- 如果是iOS 9之后还需要在A_app的info.plist文件中添加B_app的URL Schemes白名单。因为在iOS9中,如果使用
canOpenURL:方法,该方法所涉及到的 URL Schemes 必须在"Info.plist"中将它们列为白名单,否则不能使用。key叫做LSApplicationQueriesSchemes,键值内容是对应应用程序的URL Schemes。具体设置如下图:
- 都设置完成后,A_app调用
UIApplication的canOpenURL方法,协议头后面可以拼接参数传递过去,如下所示:


NSURL * appurl = [NSURL URLWithString:@"Bapp://"];//判断是否安装了对应的应用,安装了就打开if ([[UIApplication sharedApplication] canOpenURL:appurl]) {[[UIApplication sharedApplication]openURL:appurl];}else{UIAlertView * alertV = [[UIAlertView alloc]initWithTitle:@"提示" message:@"请安装相应的应用" delegate:nil cancelButtonTitle:@"关闭" otherButtonTitles:nil, nil];[alertV show];}
5.当A_app调用了canOpenURL方法,B_app会响应- (BOOL)application:(UIApplication *)app openURL:(NSURL *)url options:(NSDictionary<UIApplicationOpenURLOptionsKey,id> *)options代理方法,在该代理方法中可以获取传过来的URL,通过拦截url传过来的参数可以处理跳到对应的模块。
- 主要示例如下:
A_app中Main.storyboard中添加三个按钮
相关按钮点击事件:

#import "ViewController.h"
@interface ViewController ()
@end
@implementation ViewController
- (IBAction)jumpToHome:(id)sender {//注意设置URL Schemes 事里面不要有“—”,否则可能会跳不过去NSURL * appurl = [NSURL URLWithString:@"Bapp://"];//判断是否安装了对应的应用,安装了就打开if ([[UIApplication sharedApplication] canOpenURL:appurl]) {[[UIApplication sharedApplication]openURL:appurl];}else{UIAlertView * alertV = [[UIAlertView alloc]initWithTitle:@"提示" message:@"请安装相应的应用" delegate:nil cancelButtonTitle:@"关闭" otherButtonTitles:nil, nil];[alertV show];}
}
- (IBAction)jumpToBlue:(id)sender {NSURL * appurl = [NSURL URLWithString:@"Bapp://BlueViewController"];if ([[UIApplication sharedApplication] canOpenURL:appurl]) {//iOS10以后过期[[UIApplication sharedApplication]openURL:appurl];}else{UIAlertView * alertV = [[UIAlertView alloc]initWithTitle:@"提示" message:@"请安装相应的应用" delegate:nil cancelButtonTitle:@"关闭" otherButtonTitles:nil, nil];[alertV show];}
}
- (IBAction)jumpToPurple:(id)sender {NSURL * appurl = [NSURL URLWithString:@"Bapp://SubViewController"];if ([[UIApplication sharedApplication]canOpenURL:appurl]) {//iOS10以后有效[[UIApplication sharedApplication]openURL:appurl options:nil completionHandler:nil];}
}
@end
应用程序B_app中文件结构和AppDelegate主要实现方法:
主要实现的代理方法:

#import "AppDelegate.h"
@interface AppDelegate ()
@end@implementation AppDelegate
- (BOOL)application:(UIApplication *)application didFinishLaunchingWithOptions:(NSDictionary *)launchOptions {self.window = [[UIWindow alloc]initWithFrame:[UIScreen mainScreen].bounds];self.window.backgroundColor = [UIColor whiteColor];UITabBarController * tabbarVC = [[UITabBarController alloc]init];NSArray * rootVCNameArray = [NSArray arrayWithObjects:@"RedViewController",@"GreenViewController",@"BlueViewController", nil];for (NSString * vcName in rootVCNameArray) {UIViewController * vc = [[NSClassFromString(vcName) alloc]init];UINavigationController * navVC = [[UINavigationController alloc]initWithRootViewController:vc];navVC.navigationBar.tintColor = [UIColor brownColor];navVC.title = vcName;[tabbarVC addChildViewController:navVC];}self.window.rootViewController = tabbarVC;[self.window makeKeyAndVisible];return YES;
}
//当其他应用跳转到当前应用就会调用该代理方法,iOS9及以后有效
- (BOOL)application:(UIApplication *)app openURL:(NSURL *)url options:(NSDictionary<UIApplicationOpenURLOptionsKey,id> *)options{//获取跟控制器UITabBarController * tabbarVC = (UITabBarController *)self.window.rootViewController;NSLog(@"scheme : %@",url.scheme);NSLog(@"absoluteString : %@",url.absoluteString);if ([url.absoluteString containsString:@"BlueViewController"]) {tabbarVC.selectedIndex = 2;}else if ([url.absoluteString containsString:@"SubViewController"]){tabbarVC.selectedIndex = 0;UIViewController * vc = [[NSClassFromString(@"SubViewController") alloc]init];[tabbarVC.childViewControllers.firstObject pushViewController:vc animated:YES];}return YES;
}
//-(BOOL)application:(UIApplication *)application openURL:(NSURL *)url sourceApplication:(NSString *)sourceApplication annotation:(id)annotation{
//    return YES;
//}
//-(BOOL)application:(UIApplication *)application handleOpenURL:(NSURL *)url{
//
//    return YES;
//}
@end
最终效果图:
如果想跳回A_app,可以添加A的URL Schemes,在B_app中添加白名单,调用openURL方法即可。

跳转到本地或第三方应用的一些URL Schemes
- 苹果自带应用URL Schemes:
@{"APP":@"打电话",@"Schemes":@"tel"},
@{@"APP":@"发短信",@"Schemes":@"sms"},
@{@"APP":@"打开日历",@"Schemes":@"calshow"},
@{@"APP":@"提醒",@"Schemes":@"x-apple-reminder"},
@{@"APP":@"邮件",@"Schemes":@"message"},
@{@"APP":@"iTunes Store",@"Schemes":@"itms"},
@{@"APP":@"App Store",@"Schemes":@"itms-apps"},
@{@"APP":@"iBooks",@"Schemes":@"ibooks"},
@{@"APP":@"Facetime",@"Schemes":@"facetime"}
- 一些常见的第三方应用URL Schemes:
<key>LSApplicationQueriesSchemes</key><array><!-- 微信 URL Scheme 白名单--><string>wechat</string><string>weixin</string><!-- 新浪微博 URL Scheme 白名单--><string>sinaweibohd</string><string>sinaweibo</string><string>sinaweibosso</string><string>weibosdk</string><string>weibosdk2.5</string><!-- QQ、Qzone URL Scheme 白名单--><string>mqqapi</string><string>mqq</string><string>mqqOpensdkSSoLogin</string><string>mqqconnect</string><string>mqqopensdkdataline</string><string>mqqopensdkgrouptribeshare</string><string>mqqopensdkfriend</string><string>mqqopensdkapi</string><string>mqqopensdkapiV2</string><string>mqqopensdkapiV3</string><string>mqzoneopensdk</string><string>wtloginmqq</string><string>wtloginmqq2</string><string>mqqwpa</string><string>mqzone</string><string>mqzonev2</string><string>mqzoneshare</string><string>wtloginqzone</string><string>mqzonewx</string><string>mqzoneopensdkapiV2</string><string>mqzoneopensdkapi19</string><string>mqzoneopensdkapi</string><string>mqzoneopensdk</string><!-- 支付宝  URL Scheme 白名单--><string>alipay</string><string>alipayshare</string>
</array>
- 如果跳苹果自带的应用则不需要在info.plist文件中添加白名单,其他的都需要添加白名单如下:
关键代码如下:

#import "ViewController.h"
@interface ViewController ()<UITableViewDataSource,UITableViewDelegate>
@property(nonatomic ,copy) NSArray * dataSource;
@end
@implementation ViewController
-(NSArray *)dataSource{if (!_dataSource) {_dataSource =  @[@{@"APP":@"打电话",@"Schemes":@"tel"},@{@"APP":@"发短信",@"Schemes":@"sms"},@{@"APP":@"打开日历",@"Schemes":@"calshow"},@{@"APP":@"提醒",@"Schemes":@"x-apple-reminder"},@{@"APP":@"邮件",@"Schemes":@"message"},@{@"APP":@"iTunes Store",@"Schemes":@"itms"},@{@"APP":@"App Store",@"Schemes":@"itms-apps"},@{@"APP":@"iBooks",@"Schemes":@"ibooks"},@{@"APP":@"Facetime",@"Schemes":@"facetime"},@{@"APP":@"微信",@"Schemes":@"wechat"},@{@"APP":@"微博",@"Schemes":@"sinaweibo"},@{@"APP":@"QQ",@"Schemes":@"mqq"},@{@"APP":@"支付宝",@"Schemes":@"alipay"},];}return _dataSource;
}-(NSInteger)tableView:(UITableView *)tableView numberOfRowsInSection:(NSInteger)section{return self.dataSource.count;
}
- (UITableViewCell *)tableView:(UITableView *)tableView cellForRowAtIndexPath:(NSIndexPath *)indexPath{UITableViewCell * cell = [tableView dequeueReusableCellWithIdentifier:@"JHCell"];NSDictionary * dic = self.dataSource[indexPath.row];cell.textLabel.text = [dic valueForKey:@"APP"];cell.detailTextLabel.text = [dic valueForKey:@"Schemes"];return cell;
}
-(void)tableView:(UITableView *)tableView didSelectRowAtIndexPath:(NSIndexPath *)indexPath{NSDictionary * dic = self.dataSource[indexPath.row];NSString * schemes = [dic valueForKey:@"Schemes"];NSURL * url = [NSURL URLWithString:[NSString stringWithFormat:@"%@://",schemes]];if ([[UIApplication sharedApplication] canOpenURL:url]) {[[UIApplication sharedApplication]openURL:url options:nil completionHandler:nil];}
}
@end
效果图如下:

- 相关原码下载:iOS应用间跳转
- 参考文档:
iOS开发–从一个应用跳转到设置选项(从一个应用跳转到另外一个应用)
iOS两个APP之间的跳转和传值
史上最全canOpenURL: failed问题解决办法