OptiX是英伟达专为光线追踪打造的SDK,但是他的官方案例都比较复杂,包含了大量初始化相关的代码,初学容易一头雾水。
本人跟着Github上的optiX7course一步步学习才算入门。这个课程是Siggraph 2019/2020上的OptiX课程,有源码,有PDF讲义,通过12个案例逐步搭建起optiX的框架,非常适合初学者。
考虑到国内访问Github速度较慢,我已将课程相关全部资料移植到Gitee和百度云。
【国内版】课程代码
【国内版】课程讲义+测试数据,提取码:kadz
Examples Overview
Example 1: Hello World
This is simplest example, that only initializes the OptiX Library, prints "hello world", and exits. It's pretty much testing only whether your SDK, driver, and PATH/LD_LIBRARY_PATH are properly set up to build, link, and run this tutorial.
This is how this should look like in Linux: 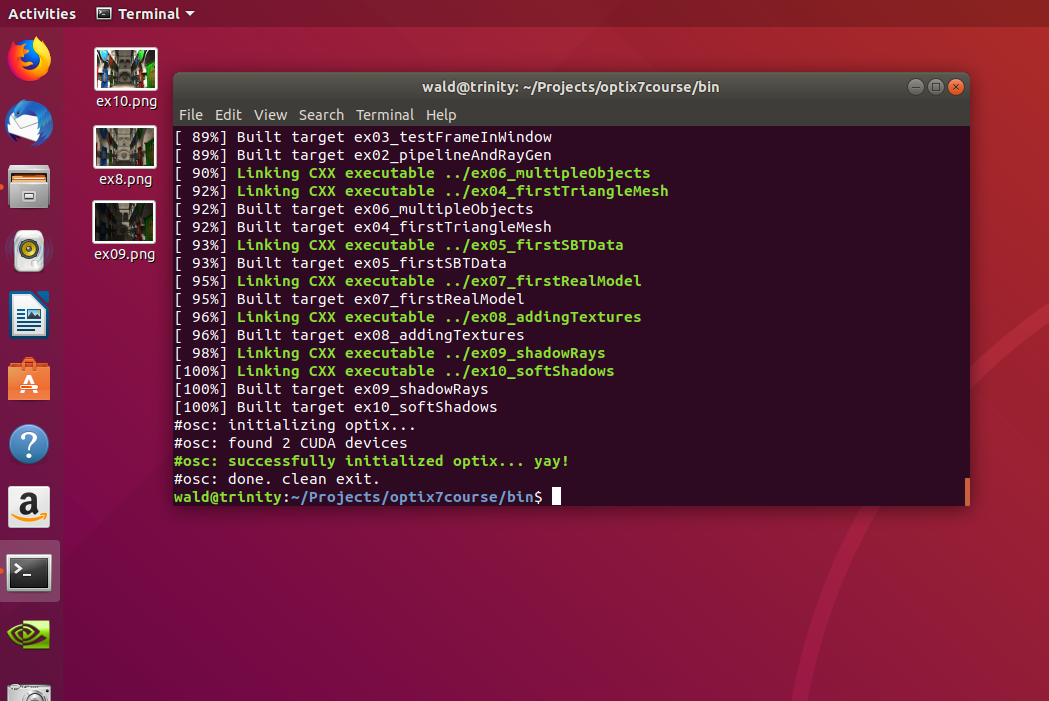
And here, in Windows: 
Note: if you do not see this output file, you may have a driver that does not work properly with OptiX 7 or some other cause. Normally the console window will disappear before you can see the error. To run and see the console window's messages, use the Visual Studio option "Start Without Debugging" (or hit Ctrl+F5), which will keep the console window visible after exit. The other option (or for Linux) is to run the program in a console window, e.g., run build\Debug\ex01_helloOptix.exe
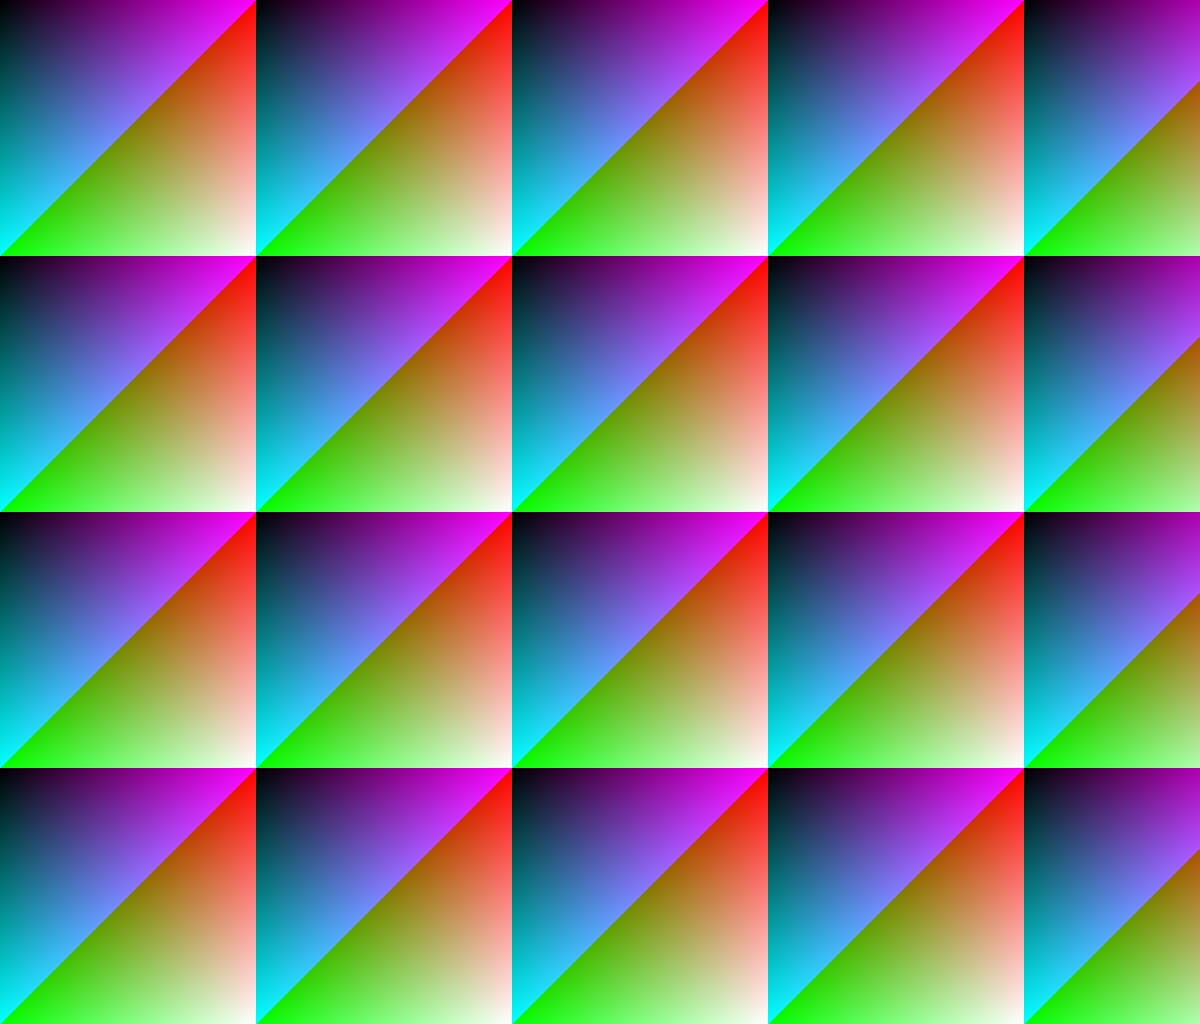
Example 2: First Pipeline Setup and Raygen Program
This is the first "real" OptiX example, and maybe somewhat surprisingly, the biggest "step" in all the examples.
The actual raygen program that this example launches is actually very (!) small, and pretty much trivial; and there are no other programs, not even geometry, nor a single ray being traced ... but to launch this simple raygen program we nevertheless have to go through the entire process of creating Modules, Programs, and, in particular, a valid "Shader Binding Table" (SBT), before we can launch our little raygen sample.
On the upside: Once this initial setup is done, everything will get much simpler in the following examples.
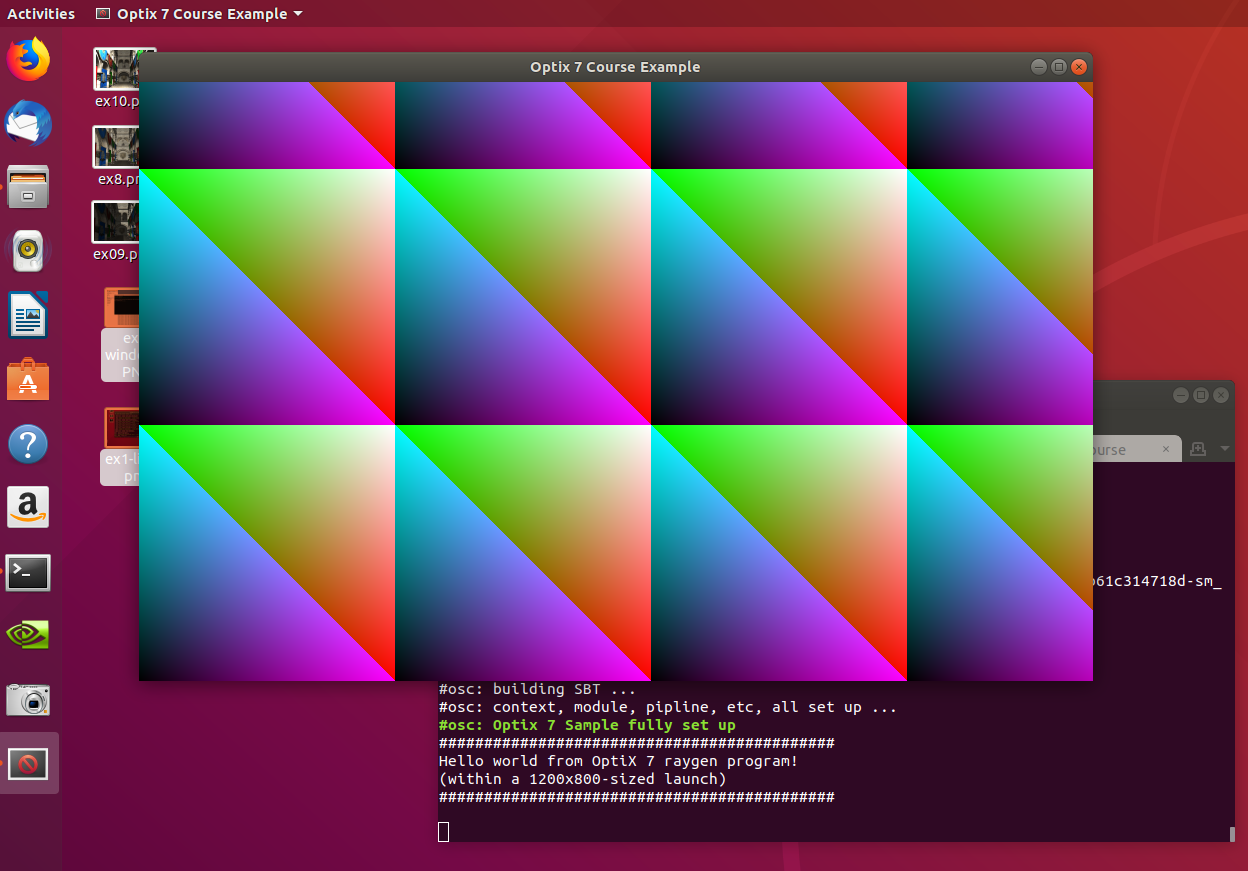
Example 3: Rendering in a GLFW Window
Rendering to files is nice and well, but probably you want to eventually do some online rendering; so this example moves the previous raygen example into a 3D viewer window (created and run using GLFW). For now this viewer just displays the rendered images, with no user interaction.
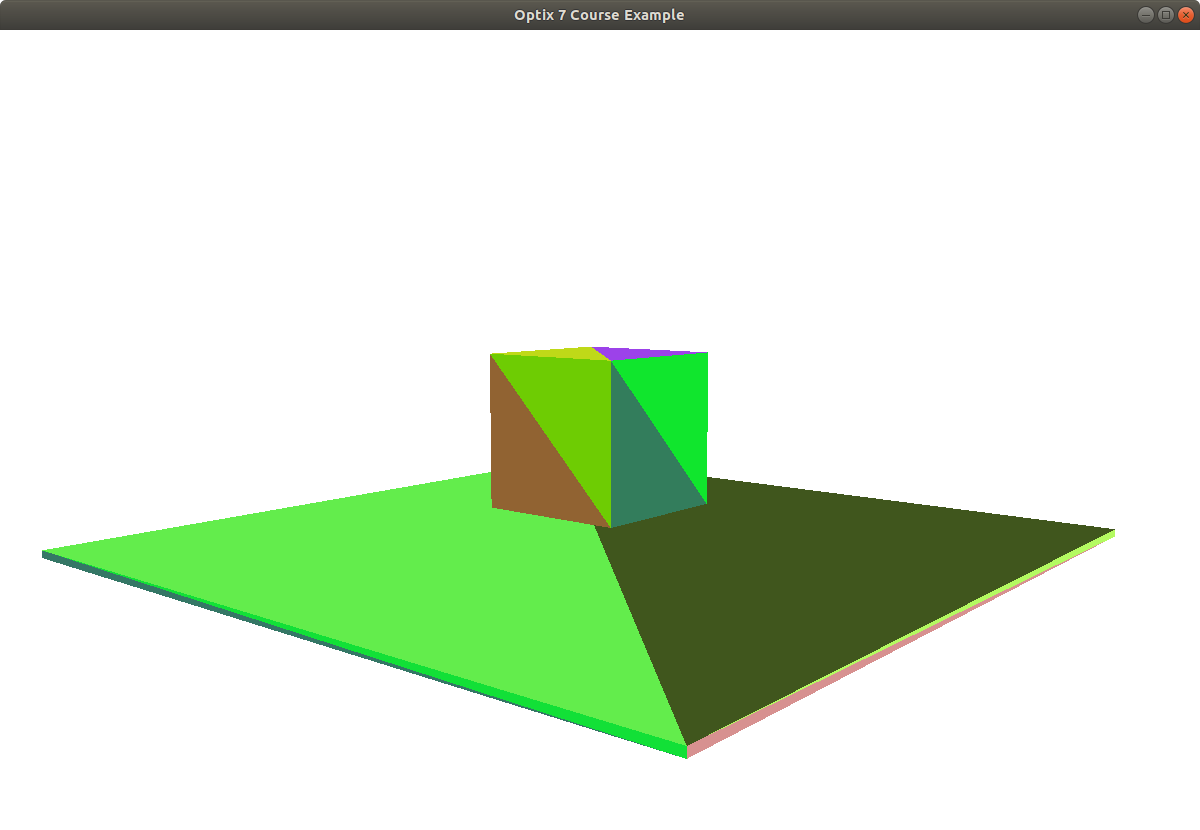
Example 4: Creating a first Triangle Mesh and Accel Struct
Though the previous setup steps were important to get right, eventually you want to use a ray tracer to trace some real rays against some real geometry.
This example introduces how to create some Triangle Mesh Geometry (in this example, two simple, hardcoded, cubes), how to build an Acceleration Structure over this "BuildInput", and how to trace rays against it. To do this we also need to introduce a simple camera model.
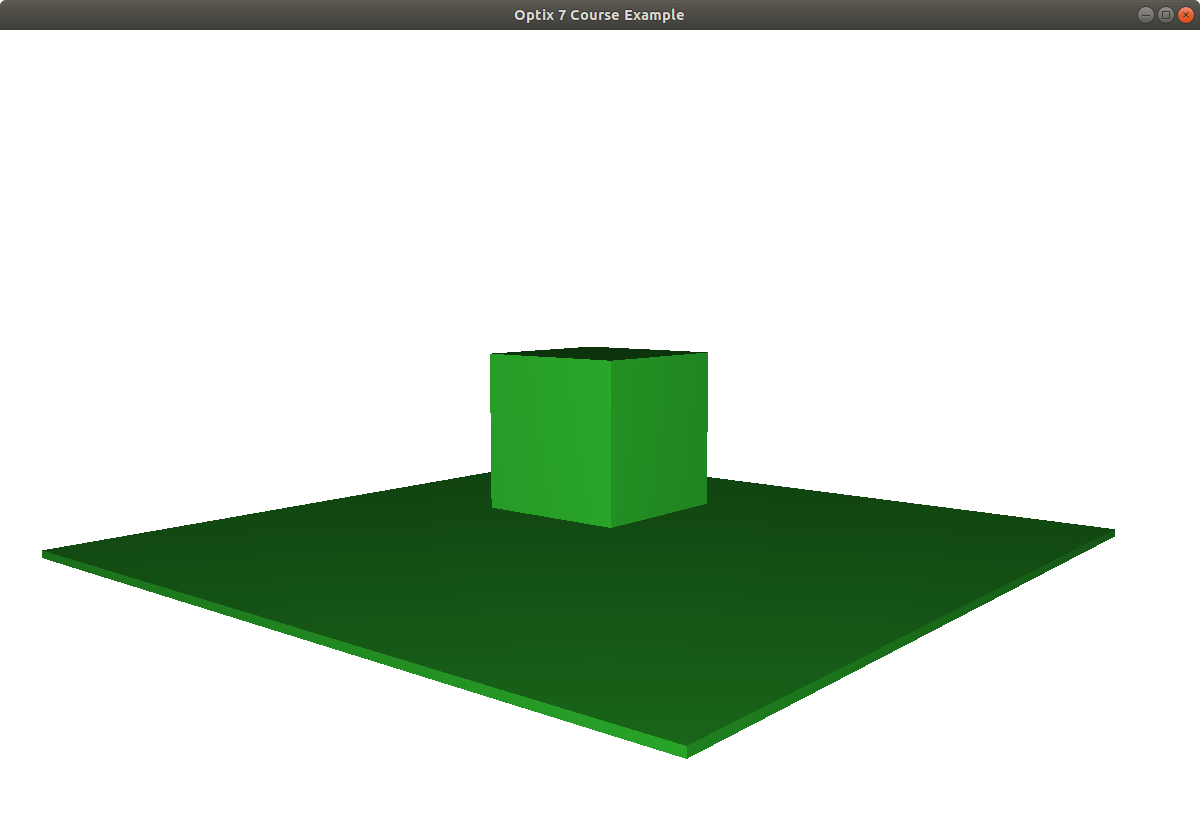
Example 5: First Shader Binding Table (SBT) Data
The earlier examples created an SBT (they had to, else they couldn't have executed any OptiX launch), but didn't actually put any data into the SBT. This example introduces how to do that, by putting just some simple constant per-object color into the mesh's SBT entry, then shading it based on the surface normal's angle to the view ray.
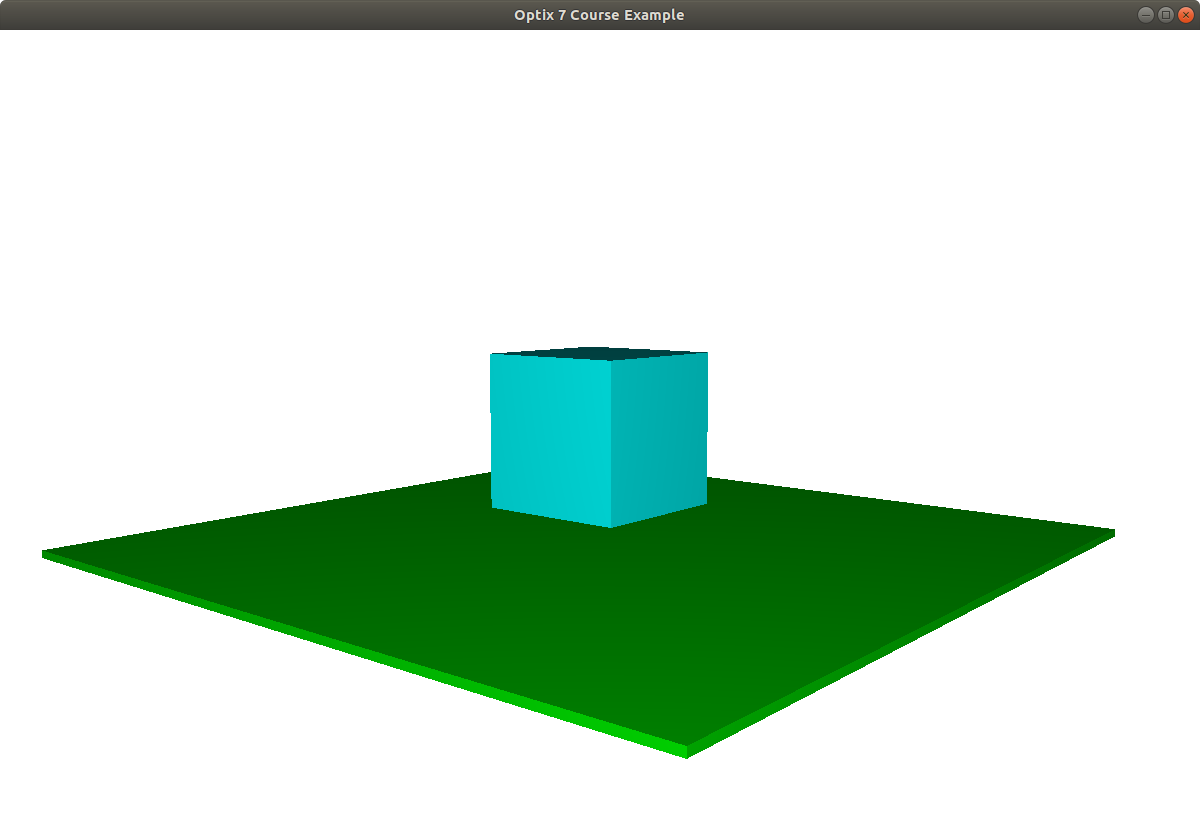
Example 6: Multiple Triangle Meshes
This example introduces the concept of having multiple different meshes (each with their own programs and SBT data) into the same accel structure. Whereas the previous example used two (same color) cubes in one triangle mesh, this example split this test scene into two meshes with one cube (and one color) each.
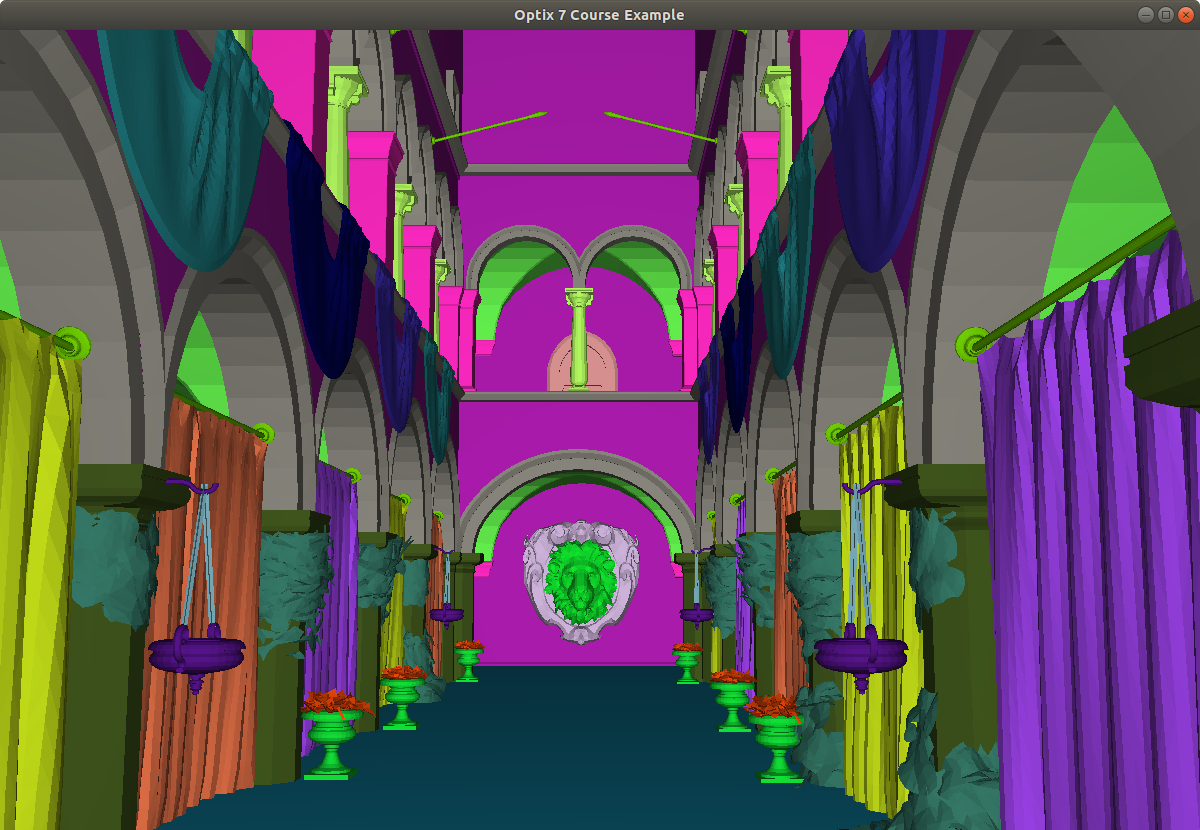
Example 7: First Real Model
This example takes the previous "multiple meshes" code unmodified, but introduces a simple OBJ file format parser (using Syoyo Fuyita's tinyobj, and hooks the resulting triangle meshes up to the previous example's render code.
For this example, you must download the Crytek Sponza model and unzip it to the (non-existent, until you create it) subdirectory optix7course/models.
And la-voila, with exactly the same render code from Sample 6, it suddenly starts to take shape:
Example 8: Adding Textures via CUDA Texture Objects
This example shows how to create and set up CUDA texture objects on the host, with the host passing those to the device via the SBT, and how to use those texture objects on the device. This one will take a bit of time to load in Debug - it's worth the wait! Or simply build and run in Release.
Example 9: Adding a second ray type: Shadows
This is the last example that focuses on host-side setup, in this case adding a second ray type (for shadow rays), which also requires changing the way the SBT is being built.
This sample also shows how to shoot secondary rays (the shadow rays) in device programs, how to use an any-hit program for the shadow rays, how to call optixTerminateRay from within an any-hit program, and how to use the optixTrace call's SBT index/offset values to specify the ray type.
Example 10: Soft Shadows
Whereas the first 9 examples focused on how to perform all the required host-side setup for various incremental features, this example can now start to focus more on the "ray tracing 101" style additions that focus what rays to trace to add certain rendering effects.
This simple example intentionally only adds soft shadows from area lights, but extending this to add reflections, refraction, diffuse bounces, better material models/BRDFs, etc., should from now on be straightforward.
Please feel free to play with adding these examples ... and share what you did!
Example 11: Simple Denoising (LDR, color only)
This example takes the code from the previous example and simply runs the optix denoiser on the final frame (ie, color) buffer computed by this optix launch. It does not store any albedo or normal buffers, not compute HDR intensity, etc.
To fully see the impact of denoising without progressive resampling, feel free to turn denoising and/or progressive refinemnt on and off via the 'd' (denoising) and 'a' (accumulate) keys.
Example 11, single sample per pixel, no denoising:
The same, with denoiser turned on:
Example 12: Denoising with HDR and separate Normal Channel
This example improves on the simple denoising by computing a separate normal buffer (which improves the denoiser quality), and by doing denoising in HDR, with an added gamma pass after denoising.
As with example 11, to fully see the impact of denoising without progressive resampling, feel free to turn denoising and/or progressive refinemnt on and off via the 'd' (denoising) and 'a' (accumulate) keys.
Example 12, single sample per pixel, no denoising:
The same, with denoiser turned on:
Example 13: It's up to you ...
From here on, there are multiple different avenues of how to add to this simple viewer, in terms of visual features, performance, kind and complexity of geometry, etc. In no particular order, and just to serve as inspiration:
- Performance
- Multi-GPU
- Denoising
- Better random numbers, better sampling, importance sampling, ...
- ...
- Shading Effects
- More/better light sources (eventually with importance sampling for multiple lights!)
- Better camera model, with depth of field
- Alpha/Transparency Textures for Cut-outs (Tip: often used in landscape scenes)
- Better material model / BRDF
- Indirect Illumination / path tracing
- ...
- Geometry-related Capabilities
- Instancing, possibly multi-level instancing
- Animation
- Motion Blur
- ...
- Viewer/app extensions
- Camera motion based on user input
- More importers (PBRT parser?)
- Picking and editing
- ...
Whichever of these - or other - features you might want to play around with: Let me know how it works out ... and have fun doing it!