中软国际实训第六天——SpringSecurity的架构与实现
- 实现SpringSecurity
- 导入依赖包
- 配置过滤器
- 添加配置文件
- 编码实现
在昨天实现了角色管理的增添查改与分页之后,在今天我们需要将不同的用户分类,以保证在用户是不同权限时,可以对所需的信息进行展示。
实现SpringSecurity
导入依赖包
在使用SpringSecurity时,首先要引入依赖。在我们昨天的项目中修改,首先在pom.xml的properties属性中加入此句
<spring.security.version>5.0.1.RELEASE</spring.security.version>
在dependency中加入我们需要的依赖
<dependency><groupId>org.springframework.security</groupId><artifactId>spring-security-web</artifactId><version>${spring.security.version}</version>
</dependency>
<dependency><groupId>org.springframework.security</groupId><artifactId>spring-security-config</artifactId><version>${spring.security.version}</version>
</dependency>
<dependency><groupId>org.springframework.security</groupId><artifactId>spring-security-core</artifactId><version>${spring.security.version}</version>
</dependency>
<dependency><groupId>org.springframework.security</groupId><artifactId>spring-security-taglibs</artifactId><version>${spring.security.version}</version>
</dependency>
导入之后等待项目自己下载好jar包
配置过滤器
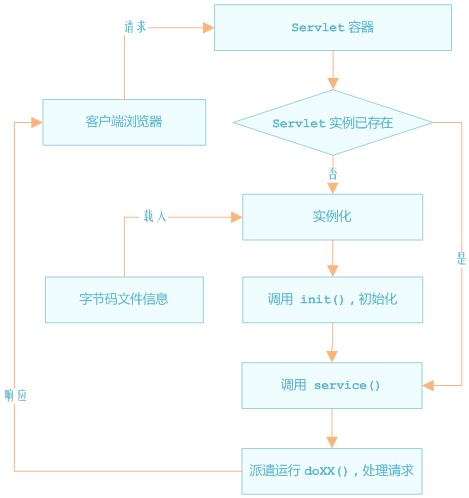
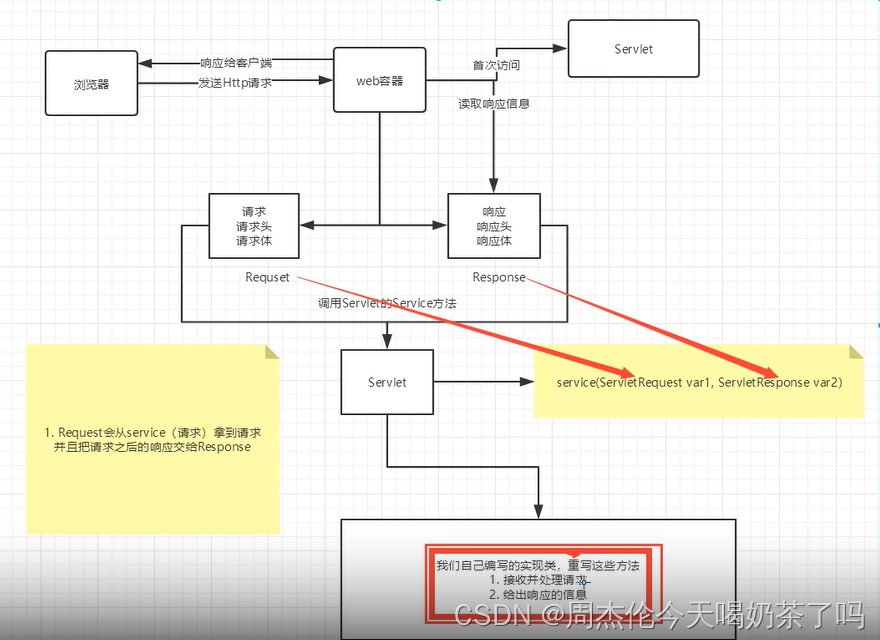
在导入jar包之后,我们就需要在web.xml中添加过滤器,过滤器实际上就是对web资源进行拦截,做一些处理后再交给下一个过滤器或servlet处理通常都是用来拦截request进行处理的,也可以对返回的response进行拦截处理。其原理如下图所示

在web.xml中的声明
<filter><filter-name>springSecurityFilterChain</filter-name><filter-class>org.springframework.web.filter.DelegatingFilterProxy</filter-class>
</filter>
<filter-mapping><filter-name>springSecurityFilterChain</filter-name><url-pattern>/*</url-pattern>
</filter-mapping>
添加配置文件
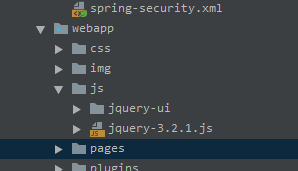
将老师给我们的权限文件夹中的spring-security.xml文件复制到resources文件夹下面,然后在web.xml中将我们刚刚添加的spring-security.xml的路径配置到里面。
<context-param><param-name>contextConfigLocation</param-name><param-value>classpath*:applicationContext.xml, classpath*:spring-security.xml</param-value>
</context-param>
编码实现
首先在IRoleDao中声明一个函数,用来返回查找到的。
List<Role> findRoleByUserId(int id);
然后在RoleMapper文件中添加查询语句。
<select id="findRoleByUserId" parameterType="int" resultType="com.zhongruan.bean.Role">select * from role where id in (select roleId from users_role where userId = #{userId})
</select>
由于将操作由spring-Security.xml实现的,因此我们需要将UserInfoController.java中的原本的跳转语句删除。
/*@RequestMapping("login.do")
public ModelAndView checkLogin(UserInfo userInfo){ModelAndView modelAndView = new ModelAndView();if(userInfo.getUsername() == null){modelAndView.setViewName("../index");return modelAndView;}else{boolean flag;flag = iUserInfoService.checkLogin(userInfo.getUsername(), userInfo.getPassword());if (flag == true){modelAndView.addObject("userInfo", userInfo);modelAndView.setViewName("main");//request.getSession().setAttribute("userinfo", userInfo);return modelAndView;}modelAndView.setViewName("../failer");return modelAndView;}
}*/
我们还需要将UserInfoService继承自UserDetailsService。
public interface IUserInfoService extends UserDetailsService {
...
}
数据操作在UserInfoServiceImpl.java中实现,其代码如下。
@Override
public UserDetails loadUserByUsername(String username) throws UsernameNotFoundException {UserInfo userInfo = iUserInfoDao.findUserByUsername(username);List<Role> roles = iRoleDao.findRoleByUserId(userInfo.getId());userInfo.setRoles(roles);User user = new User(userInfo.getUsername(), "{noop}"+userInfo.getPassword(), getAuthority(roles));return user;
}private Collection<? extends GrantedAuthority> getAuthority(List<Role> roles) {List<SimpleGrantedAuthority> list = new ArrayList<>();for(Role role:roles){list.add(new SimpleGrantedAuthority("ROLE_"+role.getRoleName()));}return list;
}
这样的话我们就可以实现我们需要的操作了,但现在我们在运行之后,无论是什么权限的用户,它都可以展示用户管理的界面,但我们只想拥有ADMIN的用户拥有此权限,因此我们还需要修改aside.xml文件,使其满足我们的需要。
首先在文件头部添加
<%@taglib prefix="security" uri="http://www.springframework.org/security/tags" %>
之后修改用户管理出标签,添加一个判断结构。
<li id="system-setting"><security:authorize access="hasRole('ADMIN')"><ahref="${pageContext.request.contextPath}/user/findAll.do?pages=1&size=5"> <iclass="fa fa-circle-o"></i> 用户管理</a></security:authorize>
</li>
这样的话,非ADMIN权限的用户登录后就不会显示用户管理界面标签了。

这样的话我们就实现了SpringSecurity来控制不同权限的用户不同的操作。