C3P0连接池的使用
- 什么是连接池?
- C3P0连接池的使用
- 什么是C3P0?
- 环境准备
- 手动配置
- 主要步骤
- 开始编写!
- 采用配置文件的方式
- 主要步骤
- 开始编写!
- 完整代码及运行结果
什么是连接池?
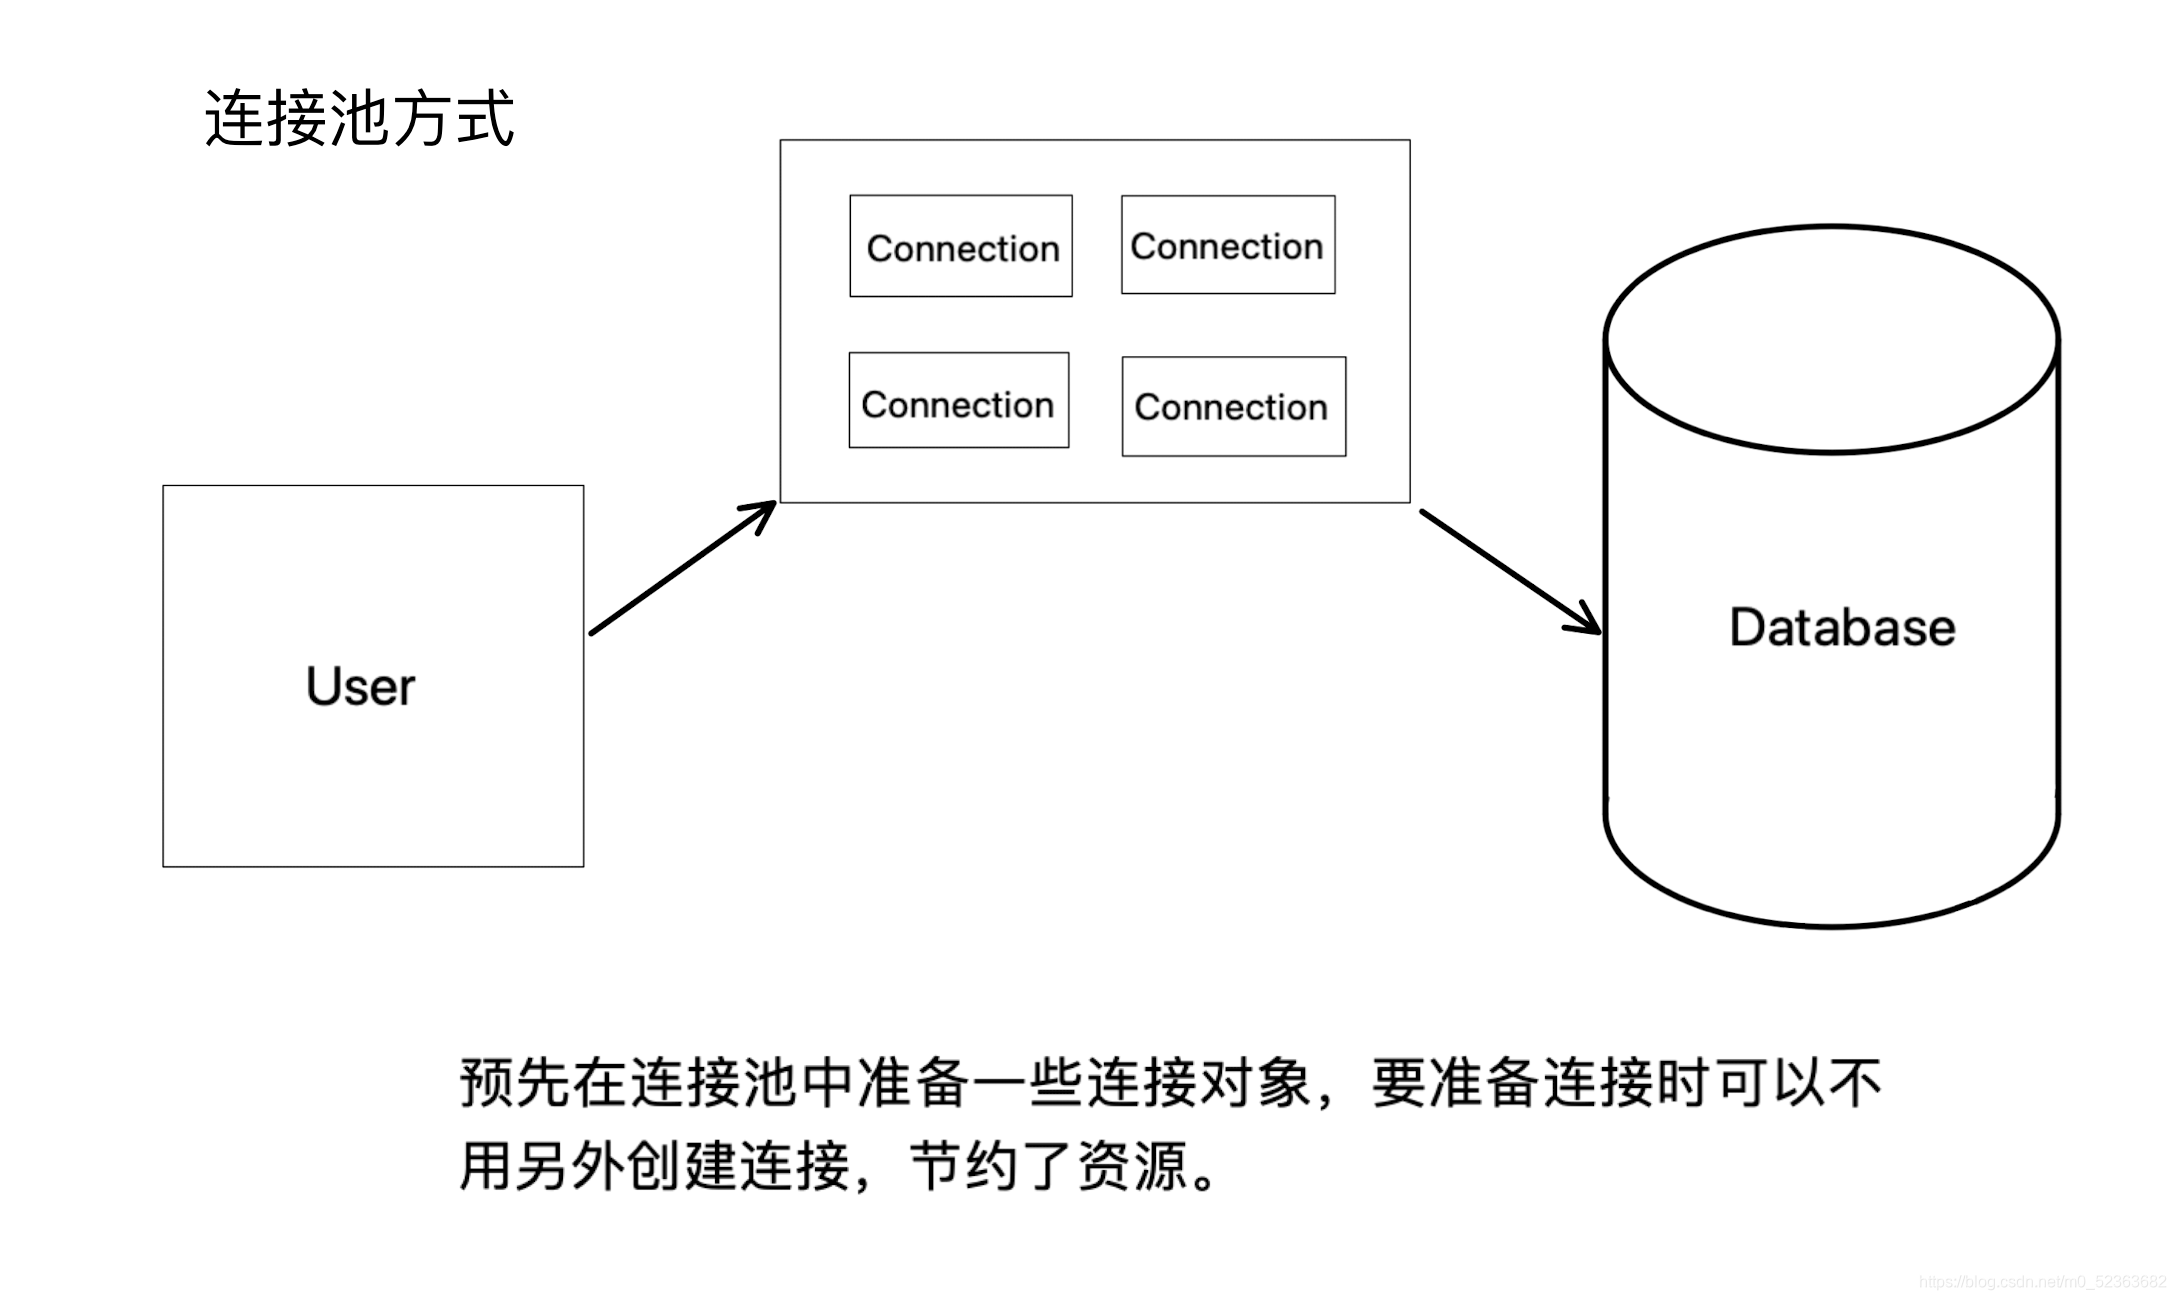
既然叫做池,那么连接池(Connection Pool)就是存在很多连接的一个“池塘”。它是一种创建和管理一个连接的缓冲池的技术,这些连接准备好被任何需要它们的线程使用。简单来说,连接池就是预先准备好了一些连接对象,当有需要的时候就可以直接用这些已经准备好的连接,无需重新创建连接,在有大量连接需求的场合非常适用。
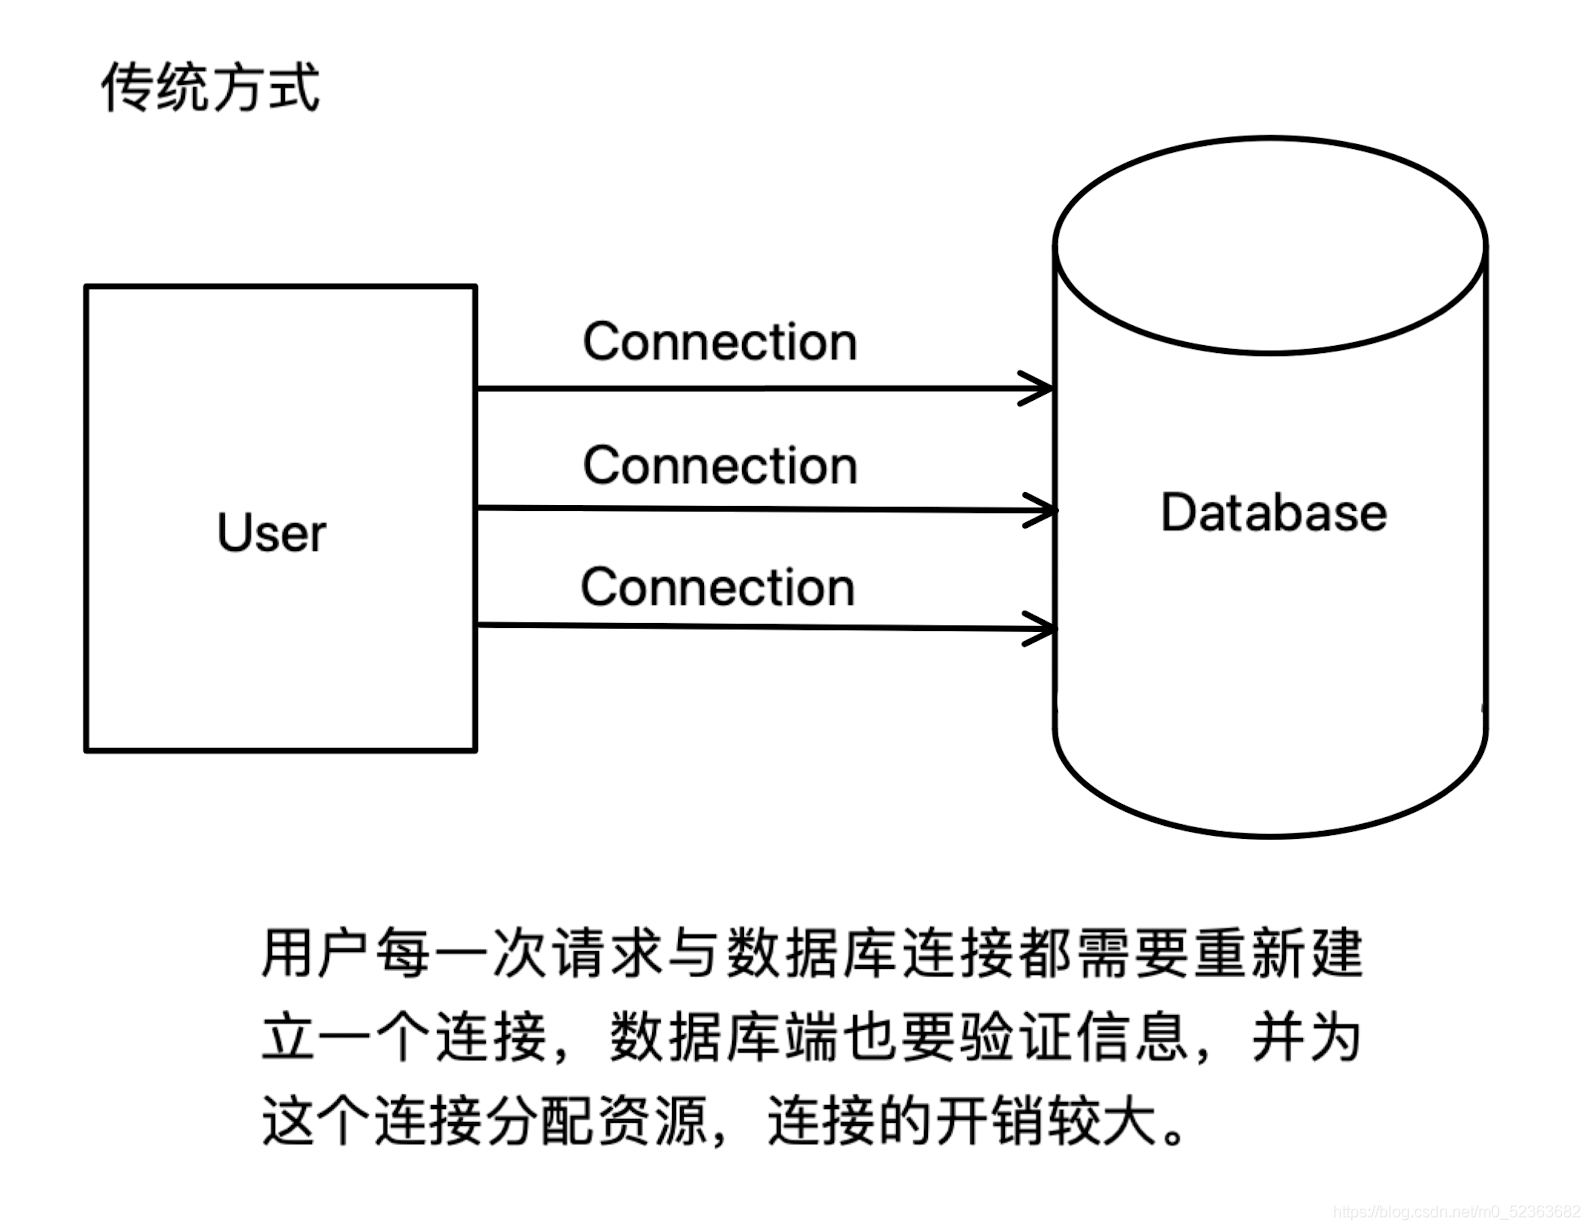
如下图,在传统的JDBC连接中,每一次请求访问数据库都要重新创建一个连接来连接数据库。
当我们使用连接池技术后,我们会在连接池中放入足够的待使用的连接。打个比方,有一间屋子(数据库),我们如果要进入这个屋子就需要向主人索要钥匙(数据库连接),一两个人主人可以接受,但要是想要进入这间屋子的人一多,主人就显得比较麻烦了,每次都需要给这些人重新配一把钥匙。于是主人为了方便,就在屋子外放了一个盒子(连接池),里面放了好几把提前配好的钥匙供他人使用。这样一来主人就不会那么麻烦了。
C3P0连接池的使用
什么是C3P0?
C3P0是一个开源的JDBC连接池,它实现了数据源和JNDI绑定,支持JDBC3规范和JDBC2的标准扩展。
环境准备
- 编译环境:Intelli IDEA
- 数据库:Mysql 5.7.28
- C3P0驱动包:c3p0-0.9.1.2.jar
- Mysql驱动包:mysql-connector-java-5.1.39-bin.jar
驱动包下载地址:https://pan.baidu.com/s/1IeI1r2wFjaxQntu7kS09iA
密码: u086
- jar包安装过程:详见JDBC入门程序详解
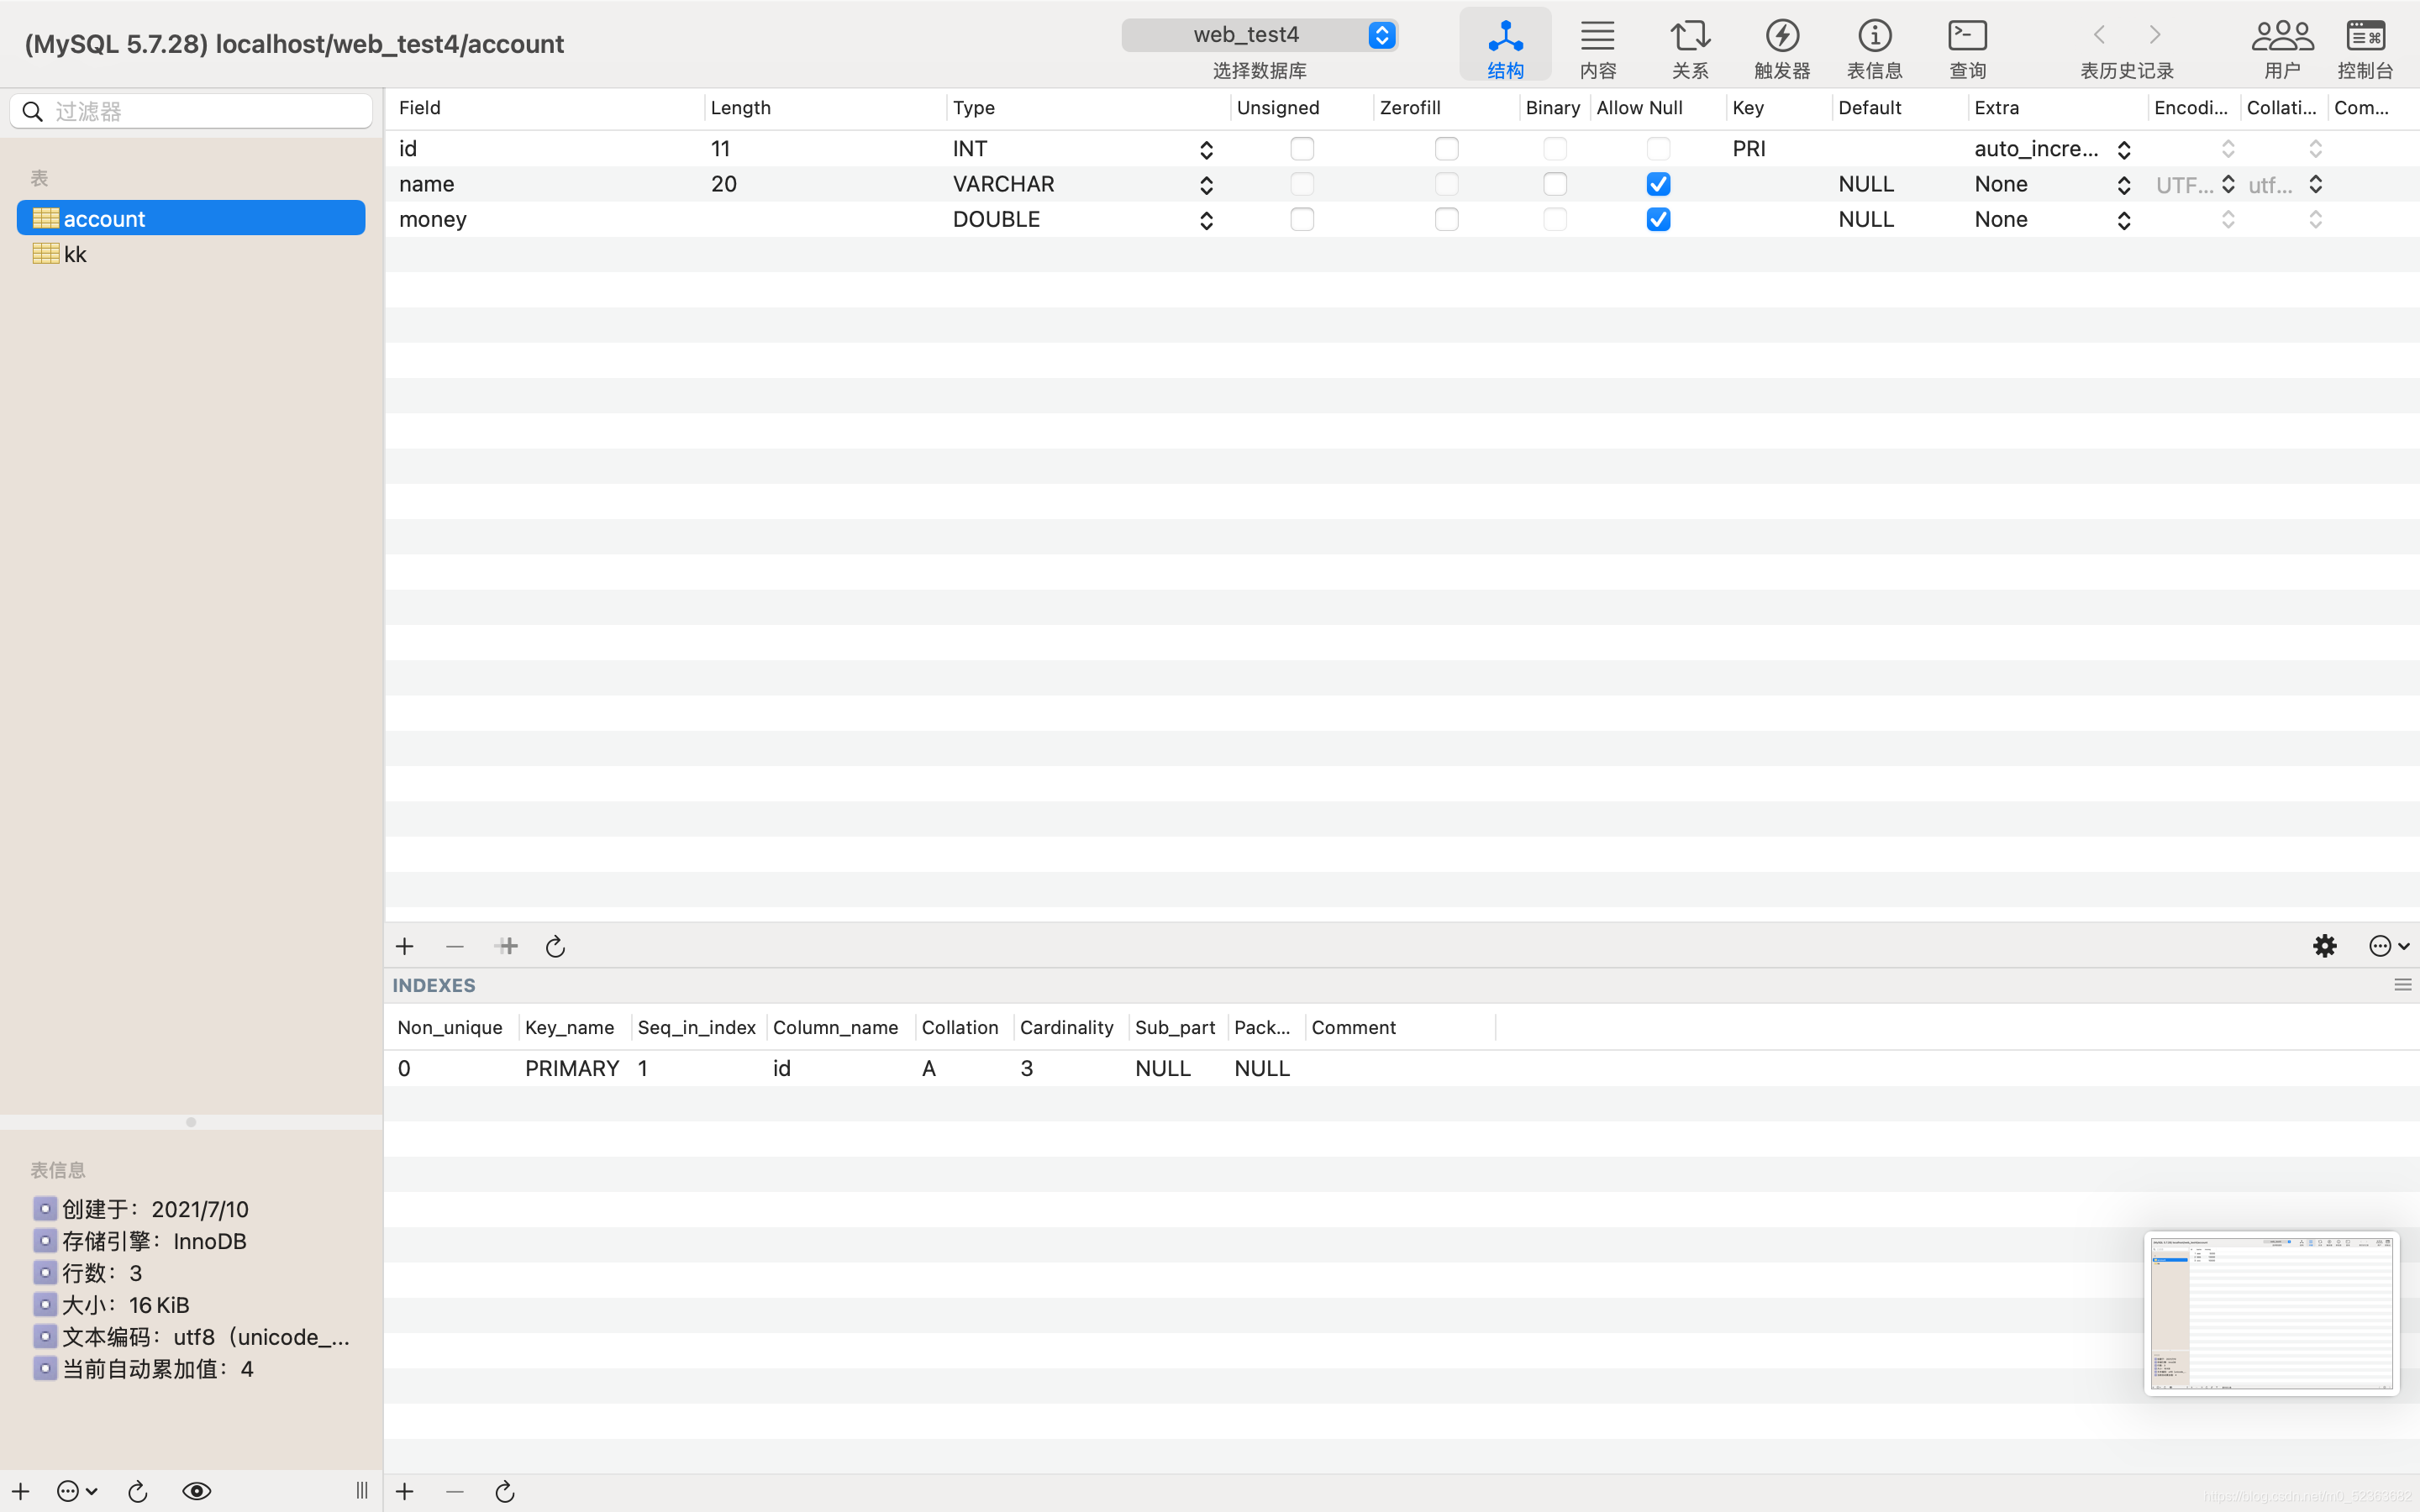
- 准备数据库数据

手动配置
主要步骤
- 创建连接池
- 设置连接参数
- 从连接池中获得连接
开始编写!
1.定义三个基础变量
Connection conn = null;
PreparedStatement pstmt = null;
ResultSet rs = null;
2.创建连接池
ComboPooledDataSource dataSource = new ComboPooledDataSource();
C3P0的核心类就是ComboPooledDataSource,我们首先将它实例化,就可以调用该类中用于连接数据库的方法。
3.设置连接参数
dataSource.setDriverClass("com.mysql.jdbc.Driver");
dataSource.setJdbcUrl("jdbc:mysql://localhost:3306/web_test4?useSSL=false");
dataSource.setUser("root");
dataSource.setPassword("Zjy9201141217");
setDriverClass用于加载mysql的驱动,作用与Class.forName("com.mysql.jdbc.Driver");相同。- 剩下的三个方法
setJdbcUrl、setUser、setPassword中所填的参数与DriverManager.getConnection(url,username,password)所需的三个参数相同,只不过分开填写了,这三个参数的具体的解释详见JDBC入门程序详解。
4.从连接池中获得连接
conn=dataSource.getConnection();
ComboPooledDataSource类中有不带参数的getConnection()方法,执行这一语句后开始向连接池中获取已有的连接。
采用配置文件的方式
主要步骤
- 编写 c3p0-config.xml 文件
- 创建连接池,默认去类路径查找c3p0-config.xml
- 从连接池中获得连接
开始编写!
在主要步骤中我们看到了一个新东西-----c3p0-config.xml,这是个什么东西?下面是C3P0的文档:
Named and Per-User configuration: Overriding c3p0 defaults via c3p0-config.xmlGo To Top.As of c3p0-0.9.1, you can define multiple configurations in an XML configuration file, and specify in your code which configuration to use. For any configurations (including the unnamed default configuration), you can define overrides for a particular database user. For example, if several applications access your database under different authentication credentials, you might define maxPoolSize to be 100 for user highVolumeApp, but only 10 for user lowLoadApp. (Recall that Connections associated with different authentication credentials are of necessity separated into separate pools, so it makes sense that these could be configured separately.)You can use the XML config file for all c3p0 configuration, including configuration of defaults. However, for users who don’t want or need the extra complexity, the c3p0.properties file will continue to be supported.By default, c3p0 will look for an XML configuration file in its classloader’s resource path under the name “/c3p0-config.xml”. That means the XML file should be placed in a directly or jar file directly named in your applications CLASSPATH, in WEB-INF/classes, or some similar location.If you prefer not to bundle your configuration with your code, you can specify an ordinary filesystem location for c3p0’s configuration file via the system property com.mchange.v2.c3p0.cfg.xml.
大概就是说,从c3p0-0.9.1开始,我们可以不用在每一次连接中去配置参数,而是可以在c3p0-config.xml中先配置好相关的参数,知道后C3P0可以在类路径查找c3p0-config.xml以获取相关的参数。那么这个xml文件应该放在哪里呢?文档中有这样一句话:
That means the XML file should be placed in a directly or jar file directly named in your applications CLASSPATH, in WEB-INF/classes, or some similar location.
所以我们可以直接将xml文件放到src目录下。下面我们看一下c3p0-config.xml中的代码:
<?xml version="1.0" encoding="UTF-8" ?><c3p0-config><default-config><property name="driverClass">com.mysql.jdbc.Driver</property><property name="jdbcUrl">jdbc:mysql://localhost:3306/web_test4?useSSL=false</property><property name="user">root</property><property name="password">Zjy9201141217</property></default-config><!-- This app is massive! --><named-config name="intergalactoApp"><property name="acquireIncrement">50</property><property name="initialPoolSize">100</property><property name="minPoolSize">50</property><property name="maxPoolSize">1000</property><!-- intergalactoApp adopts a different approach to configuring statement caching --><property name="maxStatements">0</property><property name="maxStatementsPerConnection">5</property><!-- he's important, but there's only one of him --><user-overrides user="master-of-the-universe"><property name="acquireIncrement">1</property><property name="initialPoolSize">1</property><property name="minPoolSize">1</property><property name="maxPoolSize">5</property><property name="maxStatementsPerConnection">50</property></user-overrides></named-config>
</c3p0-config>
「 解释一下xml文件中的部分标签 」
<default-config>标签用来编写默认数据库的具体参数<name-config>标签下用来编写备用的数据库<property>中则是具体的参数值,如url,username,password等initialPoolSize初始化时获取连接数,取值应在minPoolSize与maxPoolSize之间。默认值是3.minPoolSize连接池中保留的最小连接数。默认为:3maxPoolSize连接池中保留的最大连接数。默认为:15maxIdleTime最大空闲时间,多少秒内未使用则连接被丢弃。若为0则永不丢弃。默认值: 0maxStatementsc3p0全局的PreparedStatements缓存的大小。如果maxStatements与maxStatementsPerConnection均为0,则缓存不生效,只要有一个不为0,则语句的缓存就能生效。如果默认值: 0
配置完xml后,java代码就可以这样写:
//创建连接池默认去类路径查找c3p0-config.xml
ComboPooledDataSource dataSource = new ComboPooledDataSource();
//从连接池中获得连接
conn=dataSource.getConnection();
如果需要用备用的数据库,那吗就在ComboPooledDataSource()的中写上<name-config name="oracle">的name(oracle),ComboPooledDataSource dataSource = new ComboPooledDataSource("oracle");就可以加载相应的数据库。如果ComboPooledDataSource(...)找不到相应的备用数据库,那么就启用默认的数据库。
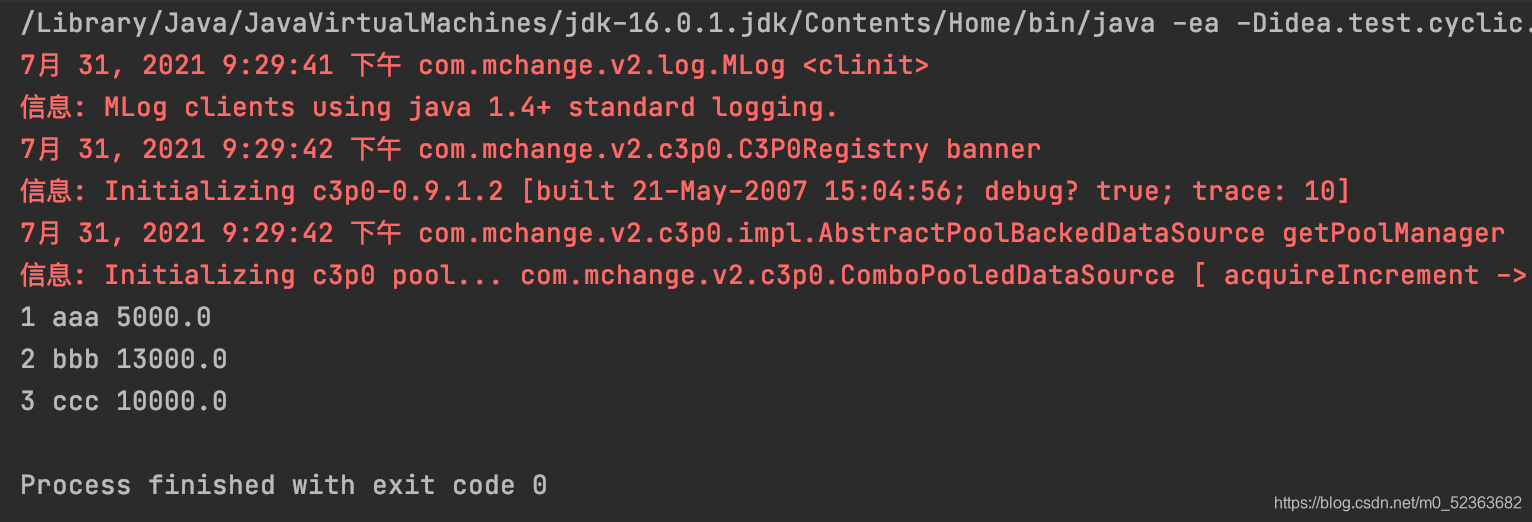
完整代码及运行结果
public class JDBCUtils {public static void release(ResultSet rs,Statement stmt,Connection conn) {if(stmt!=null) {try {stmt.close();} catch (SQLException e) {// TODO Auto-generated catch blocke.printStackTrace();}stmt=null;}if(conn!=null) {try {conn.close();} catch (SQLException e) {// TODO Auto-generated catch blocke.printStackTrace();}conn=null;}if(rs!=null) {try {rs.close();} catch (SQLException e) {// TODO Auto-generated catch blocke.printStackTrace();}rs=null;}}
}
}
import com.itheima.jdbc.utils.JDBCUtils;
import com.mchange.v2.c3p0.ComboPooledDataSource;
import org.junit.Test;import java.sql.Connection;
import java.sql.PreparedStatement;
import java.sql.ResultSet;/*** C3P0连接池的测试*/public class C3P0Demo1 {@Test/*** 配置文件方式*/public void demo2(){Connection conn = null;PreparedStatement pstmt = null;ResultSet rs = null;try{//获得连接:从连接池中获得//创建连接池://创建连接池默认去类路径查找c3p0-config.xmlComboPooledDataSource dataSource = new ComboPooledDataSource();//从连接池中获得连接conn=dataSource.getConnection();String sql = "select * from account";//预编译Sqlpstmt=conn.prepareStatement(sql);//执行SQlrs=pstmt.executeQuery();while (rs.next()){System.out.println(rs.getInt("id")+" "+rs.getString("name")+" "+rs.getDouble("money"));}}catch (Exception e){e.printStackTrace();}finally {JDBCUtils.release(rs,pstmt,conn);}}/*** 手动设置参数的方式*/public void demo1(){Connection conn = null;PreparedStatement pstmt = null;ResultSet rs = null;try{//获得连接:从连接池中获得//创建连接池ComboPooledDataSource dataSource = new ComboPooledDataSource();//设置连接参数dataSource.setDriverClass("com.mysql.jdbc.Driver");dataSource.setJdbcUrl("jdbc:mysql://localhost:3306/web_test4?useSSL=false");dataSource.setUser("root");dataSource.setPassword("Zjy9201141217");//从连接池中获得连接conn=dataSource.getConnection();String sql = "select * from account";//预编译Sqlpstmt=conn.prepareStatement(sql);//执行SQlrs=pstmt.executeQuery();while (rs.next()){System.out.println(rs.getInt("id")+" "+rs.getString("name")+" "+rs.getDouble("money"));}}catch (Exception e){e.printStackTrace();}finally {JDBCUtils.release(rs,pstmt,conn);}}
}