转载请标明出处:
http://blog.csdn.net/hai_qing_xu_kong/article/details/50997095
本文出自:【顾林海的博客】
##前言 随着项目越来越大,页面数也相应的增加,每个页面都需要顶部的ActionBar,如果在每个xml文件中去include我们的actionbar布局,工作量也是很大,而且不利于后期维护。今天这篇文章是教大家合理的管理我们的actionbar,代码很简单,主要是一个思路。
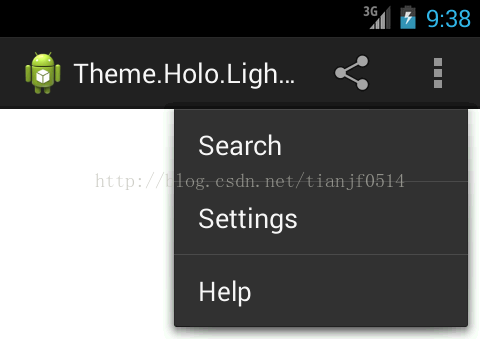
注意看actionbar,效果图:
##管理ActionBar
为了达到actionbar的统一管理,这里需要获取系统的ActionBar。通过以下方法进行布局的替换:
public abstract void setCustomView(View view, LayoutParams layoutParams);
1、先创建我们的actionbar布局,整体布局很简单,包含左边返回按钮、左边标题、中间标题和右边标题。具体情况以下common_action_bar.xml文件:
<?xml version="1.0" encoding="utf-8"?>
<RelativeLayout xmlns:android="http://schemas.android.com/apk/res/android"android:layout_width="match_parent"android:layout_height="57dp" ><LinearLayoutandroid:id="@+id/ll_common_back"android:layout_width="30dp"android:layout_height="57dp"android:gravity="center_vertical"android:orientation="horizontal" ><ImageViewandroid:id="@+id/iv_common_back"android:layout_width="wrap_content"android:layout_height="wrap_content"android:layout_marginLeft="10dp"android:src="@drawable/common_left" /></LinearLayout><TextViewandroid:id="@+id/tv_common_left_title"android:layout_width="wrap_content"android:layout_height="wrap_content"android:layout_centerVertical="true"android:layout_marginLeft="10dp"android:layout_toRightOf="@id/ll_common_back"android:singleLine="true"android:textColor="@android:color/black"android:textSize="16sp" /><TextViewandroid:id="@+id/tv_common_middle_title"android:layout_width="wrap_content"android:layout_height="wrap_content"android:layout_centerHorizontal="true"android:layout_centerVertical="true"android:layout_marginLeft="10dp"android:singleLine="true"android:textColor="@android:color/black"android:textSize="16sp" /><TextViewandroid:id="@+id/tv_common_right_title"android:layout_width="wrap_content"android:layout_height="wrap_content"android:layout_alignParentRight="true"android:layout_centerVertical="true"android:layout_marginRight="10dp"android:singleLine="true"android:textColor="@android:color/black"android:textSize="16sp" /></RelativeLayout>
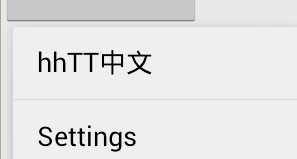
效果图如下:

2、创建完actionbar布局后,我们新建一个继承Activity的BaseActionBarActivity抽象类,获取系统actionbar,进行布局的替换:
mActionBar = getActionBar();if (mActionBar != null) {mActionBar.setDisplayShowCustomEnabled(true);mActionBar.setDisplayShowTitleEnabled(false);mActionBar.setDisplayShowHomeEnabled(false);mActionBar.setDisplayOptions(ActionBar.DISPLAY_SHOW_CUSTOM);mActionBar.setBackgroundDrawable(getResources().getDrawable(R.drawable.common_bg));initView(mCommonActionBar);ActionBar.LayoutParams params = new ActionBar.LayoutParams(LayoutParams.MATCH_PARENT, LayoutParams.WRAP_CONTENT);mActionBar.setCustomView(mCommonActionBar, params);
mCommonActionBar就是我们前面定义的actionbar布局View。
3、在BaseActionBarActivity中定义一些方法,用于子类调用,如下:
/*** 设置左边的标题* * @param leftTitle*/protected void setLeftTitle(String leftTitle) {tv_common_left_title.setText(leftTitle);}/*** 设置中间标题* * @param middleTitle*/protected void setMiddleTitle(String middleTitle) {tv_common_middle_title.setText(middleTitle);}/*** 设置右边标题* * @param rightTitle*/protected void setRightTitle(String rightTitle) {tv_common_middle_title.setText(rightTitle);}/*** 主页的Actionbar样式*/protected void setMainAction() {ll_common_back.setVisibility(View.GONE);}/*** 子页面通用样式*/protected void setCommonAction() {iv_common_back.setVisibility(View.VISIBLE);}
4、创建我们的点击事件的回调,在BaseActionBarActivity中定义一个抽象方法:
protected abstract void onClickActionBar(int type);
方法的具体实现由子类实现,type的值有以下几种:
protected final int ACTION_LEFT = 0x01;// 左边标题点击
protected final int ACTION_MIDDLE = 0x02;// 中间标题点击
protected final int ACTION_RIGHT = 0x03;// 右边标题点击
最后注册点击事件,调用相应的方法:
/*** 事件注册*/private void initEvent() {/*** 返回*/ll_common_back.setOnClickListener(new OnClickListener() {@Overridepublic void onClick(View v) {onBackPressed();}});/*** 右边标题点击*/tv_common_right_title.setOnClickListener(new OnClickListener() {@Overridepublic void onClick(View v) {onClickActionBar(ACTION_RIGHT);}});/*** 左边标题点击*/tv_common_left_title.setOnClickListener(new OnClickListener() {@Overridepublic void onClick(View v) {onClickActionBar(ACTION_LEFT);}});/*** 中间标题点击*/tv_common_middle_title.setOnClickListener(new OnClickListener() {@Overridepublic void onClick(View v) {onClickActionBar(ACTION_MIDDLE);}});}
5、到这里启动程序,会出现背景黑色闪屏,在style文件中定义以下:
<style name="TranslucentTheme" ><item name="android:windowContentOverlay">@null</item>
</style>
别忘了在AndroidManifest.xml中引用:
<applicationandroid:allowBackup="true"android:icon="@drawable/ic_launcher"android:label="@string/app_name"android:theme="@style/TranslucentTheme" ><activityandroid:name=".MainActivity"android:label="@string/app_name" ><intent-filter><action android:name="android.intent.action.MAIN" /><category android:name="android.intent.category.LAUNCHER" /></intent-filter></activity><activity android:name="com.example.actionbarbuildproject.SecondActivity"></activity>
</application>
##优雅的使用ActionBar
到这里定义的ActionBar已经创建完毕,接下来我们的子Activity继承我们的BaseActionBarActivity,如下:
package com.example.actionbarbuildproject;import android.content.Intent;
import android.os.Bundle;
import android.view.View;
import android.view.View.OnClickListener;
import android.widget.Button;
import android.widget.Toast;import com.example.actionbarbuildproject.base.BaseActionBarActivity;public class MainActivity extends BaseActionBarActivity {private Button btn_start;@Overrideprotected void onCreate(Bundle savedInstanceState) {super.onCreate(savedInstanceState);setContentView(R.layout.activity_main);setMainAction();setMiddleTitle("主页");initViews();initEvent();}private void initViews() {btn_start = (Button) findViewById(R.id.btn_start);}private void initEvent() {btn_start.setOnClickListener(new OnClickListener() {@Overridepublic void onClick(View v) {startActivity(new Intent(MainActivity.this,SecondActivity.class));}});}@Overrideprotected void onClickActionBar(int type) {if (type == ACTION_MIDDLE) {Toast.makeText(this, "点击了中间标题", Toast.LENGTH_SHORT).show();}}}
在onCreate方法中通过setMainAction和setMiddleTitle方法实现样式的订制,实现onClickActionBar抽象方法,根据type值获取的我们点击事件,由此ActionBar已经被我们统一管理了,最后使用是不是很简单,当然,这里只是一个思路,actionbar的样式可以根据业务需求来进行订制。
以下是完整的github项目地址,欢迎star,fork。
github项目源码地址:点击【项目源码】