制作QQ登录界面
- 实验名称
- 实验步骤
- 1.程序大致理解
- 2.代码实现
- 总结
实验名称
QQ登录界面
实验步骤
1.程序大致理解
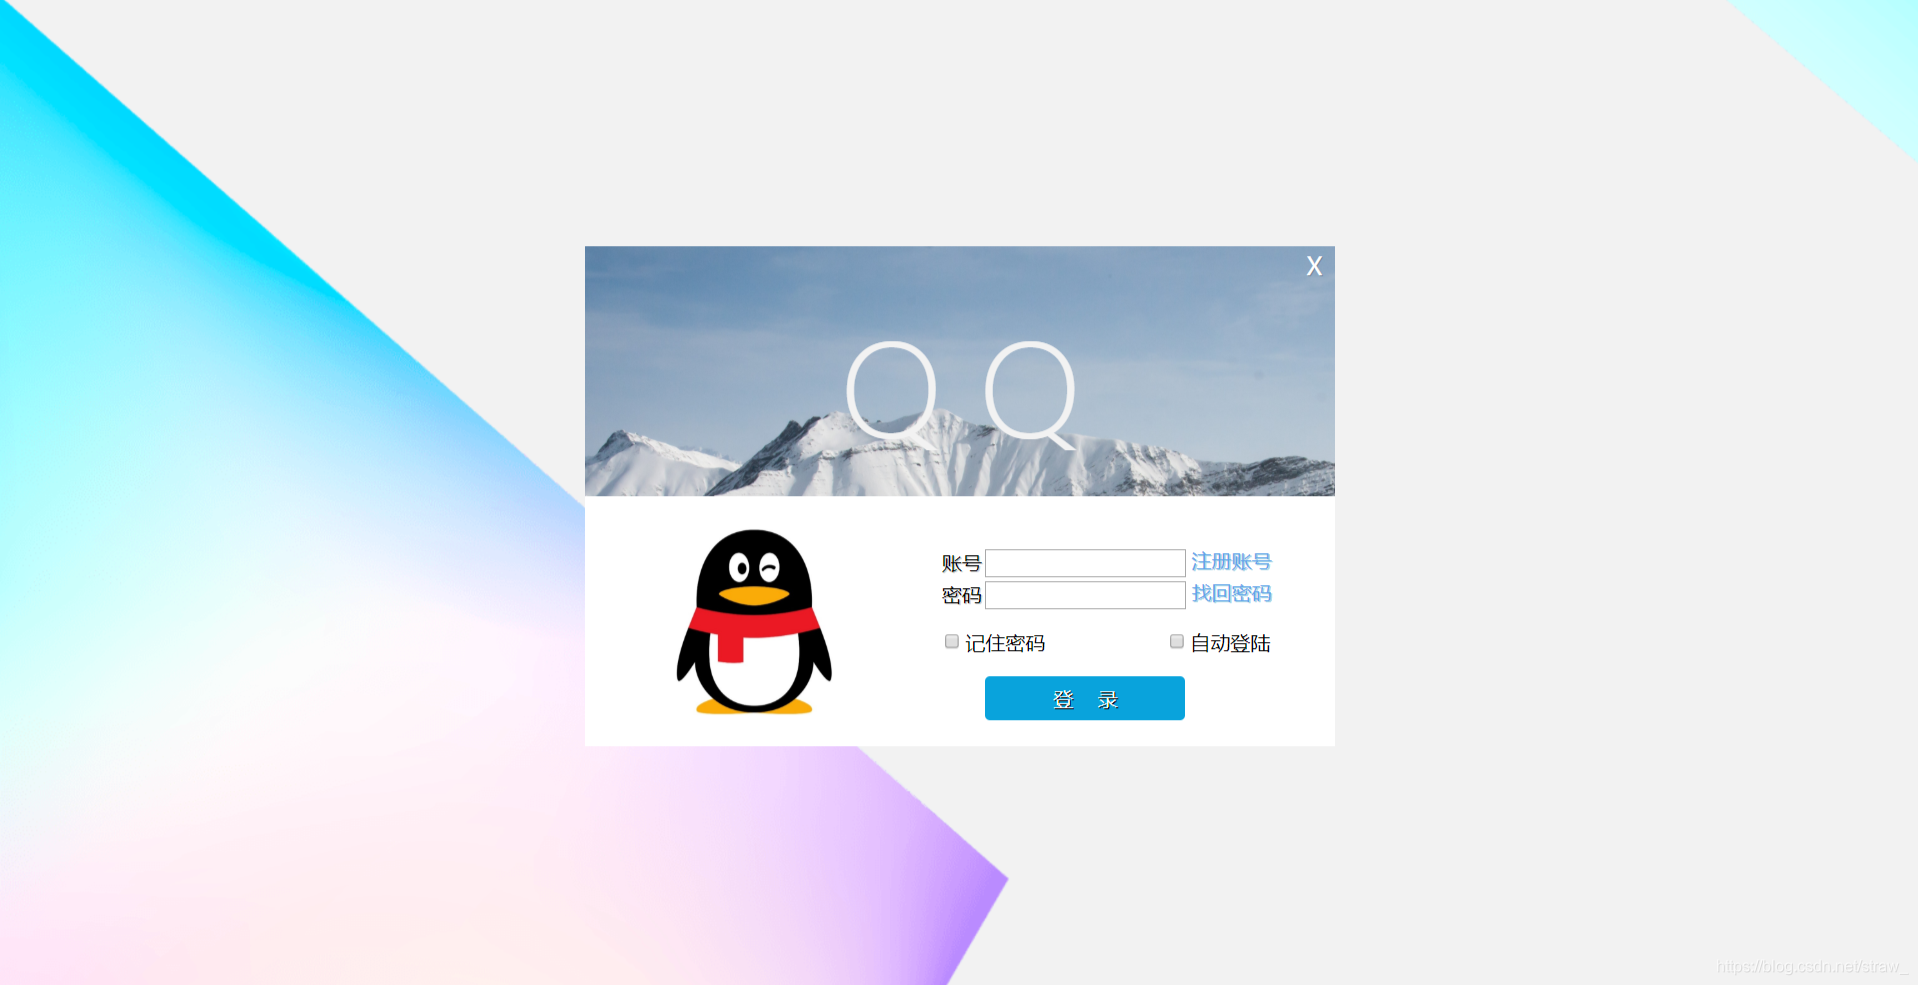
在构建UI界面时不要着急动手,首先要考虑准备哪些素材(如:图片资源),会用到哪些控件,把步骤想清楚再动手实践,养成良好的编程习惯在以后开发中会有很大帮助。现在先来看一下QQ登录界面,预览效果如下图所示。

从图中可以看出,该界面需要一张图片作为QQ头像,因此找到1张图片(head.png)放在drawable文件夹中。
然后分析该界面组成部分,从整体来看界面可分为三部分,第一部分放置1个ImageView控件用于显示头像。
第二部分使用两个水平的线性布局,每个水平布局放置1个TextView控件和1个EditText控件,分别用于显示标题和输入内容。
第三部分放置1个Button按钮用于实现登录。
2.代码实现
总的布局是RelativeLayout
<?xml version="1.0" encoding="utf-8"?><RelativeLayout xmlns:android="http://schemas.android.com/apk/res/android"xmlns:app="http://schemas.android.com/apk/res-auto"xmlns:tools="http://schemas.android.com/tools"android:layout_width="match_parent"android:layout_height="match_parent"tools:context=".MainActivity"android:orientation="vertical"></RelativeLayout>
第一部分的ImageView控件用来存放QQ头像
<ImageViewandroid:id="@+id/iv"android:layout_width="70dp"android:layout_height="70dp"android:layout_centerHorizontal="true"android:layout_marginTop="40dp"android:background="@drawable/head"/>
第二部分使用两个水平的线性布局,每个水平布局有1个TextView控件和1个EditView控件,分别用来显示标题和输入内容
<LinearLayoutandroid:id="@+id/ll_number"android:layout_width="match_parent"android:layout_height="wrap_content"android:layout_below="@+id/iv"android:layout_centerHorizontal="true"android:layout_marginBottom="5dp"android:layout_marginLeft="10dp"android:layout_marginRight="10dp"android:layout_marginTop="15dp"android:background="#ffffff"><TextViewandroid:id="@+id/tv_number"android:layout_width="wrap_content"android:layout_height="wrap_content"android:padding="10dp"android:text="账号:"android:textColor="#000"android:textSize="20sp"/><EditTextandroid:id="@+id/et_number"android:layout_width="match_parent"android:layout_height="wrap_content"android:layout_marginLeft="5dp"android:background="@null"android:padding="10dp"/></LinearLayout><LinearLayoutandroid:id="@+id/ll_password"android:layout_width="match_parent"android:layout_height="wrap_content"android:layout_below="@+id/ll_number"android:layout_centerVertical="true"android:layout_marginLeft="10dp"android:layout_marginRight="10dp"android:background="#ffffff"><TextViewandroid:id="@+id/tv_password"android:layout_width="wrap_content"android:layout_height="wrap_content"android:padding="10dp"android:text="密码:"android:textColor="#000"android:textSize="20sp"/><EditTextandroid:id="@+id/et_password"android:layout_width="match_parent"android:layout_height="wrap_content"android:layout_marginLeft="5dp"android:layout_toRightOf="@id/tv_password"android:background="@null"android:inputType="textPassword"android:padding="10dp"/></LinearLayout>
(4)第三部分放1个Button按钮用于实现登录
<Buttonandroid:id="@+id/btn_login"android:layout_width="match_parent"android:layout_height="wrap_content"android:layout_below="@+id/ll_password"android:layout_marginLeft="10dp"android:layout_marginRight="10dp"android:layout_marginTop="50dp"android:background="#3C8DC4"android:text="登录"android:textColor="#ffffff"android:textSize="20sp"/>
总结
最终效果如下:

上诉代码看似很多,其实并不复杂,只是把之前学到的知识结合在一起而已,再利用各控件中的属性调试它们的位置和样式。在EditText中android:backgroud="@null"属性值是去掉控件默认的下划线,而Button中android:backgroud="#3C8DC4"属性值为蓝色。
作者:苏思行
原文链接:https://blog.csdn.net/weixin_44719580/article/details/90549642