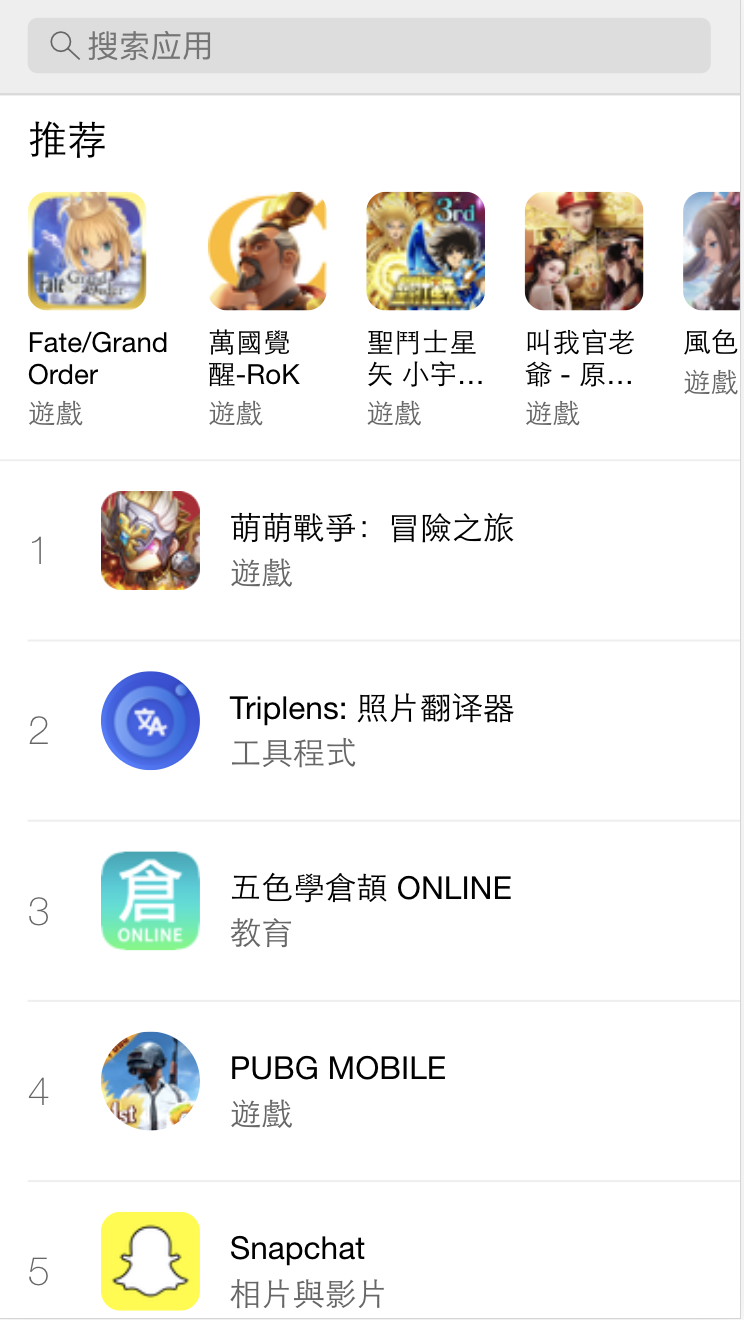
先看效果图
github地址
github仓库
在线访问
初始化项目
#创建项目
create-react-app applist
#如果没有安装create-react-app的话,先安装
npm install -g create-react-app
目录结构改造
|--config
|--node_modules
|--public
|--scripts
|--src|-----api   //api接口|-----components  //组件|-----pages  //页面|-----plugins   //插件相关 axios|-----router  //路由|-----store   //redux|-----styles   //公共样式|-----utils   //工具包|-----index.js   //入口
|--package.json
Vscode插件安装
所谓工欲善其事,必先利其器。这里我们推荐一些好用的vscode插件
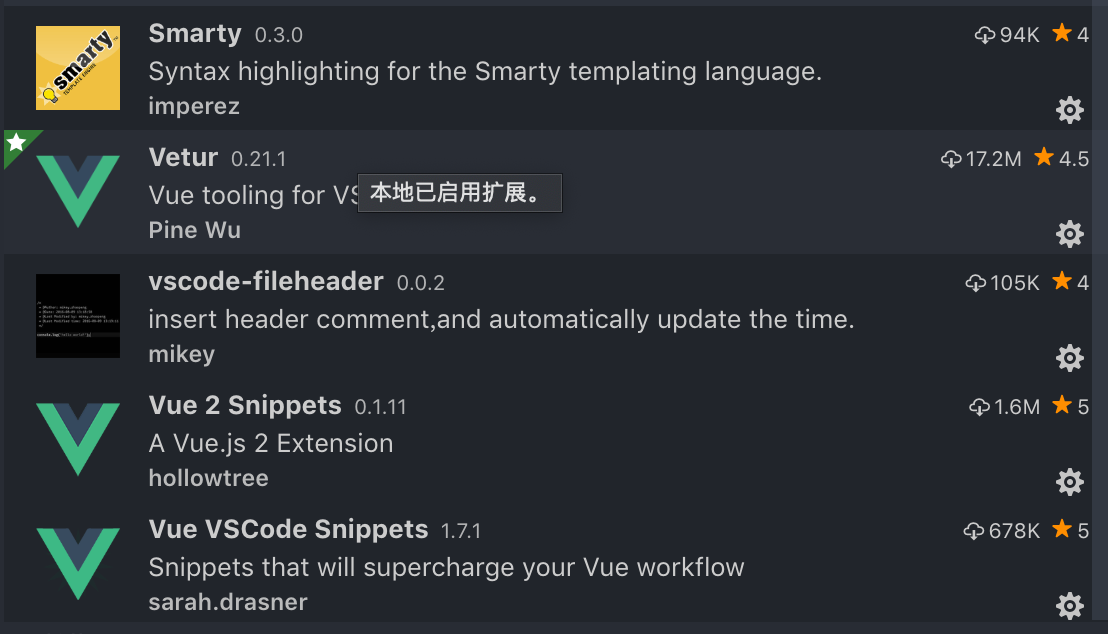
1. 代码提示类插件
1.1 Reactjs code snippets
1.2 React Redux ES6 Snippets
1.3 React-Native/React/Redux snippets for es6/es7
1.4 JavaScript (ES6) code snippets(es6代码片段)
1.5 Typescript React code snippets(这是tsx的react组件片段)2. 美化类插件
2.1 One Dark Pro(atom风格主题)
2.2 vscode-icons(文件图标)3. 其他实用类插件
3.1 Beautify css/sass/scss/less(样式代码格式化)
3.2 npm Intellisense(对package.json内中的依赖包的名称提示)
3.3 Path Intellisense(文件路径补全)
3.4 cssrem(px转换为rem)
3.5 CSS Modules(对使用了css modules的jsx标签的类名补全和跳转到定义位置)4.vscode配置设备同步
Settings Sync
有了它就不用每次换个开发环境又重新配置一遍vscode了5.另外,react的jsx补全html标签需要在vscode单独设置一下首选项-设置-搜索‘includeLanguages’-编辑settings.json添加如下代码即可
"emmet.includeLanguages": {"javascript": "javascriptreact"}
最后,安装完插件之后,以下两个快捷键可能会经常使用
rcc 生成有状态的组件代码块
rfc 生成无状态的组件代码块
使用axios插件请求数据并封装api请求
1、安装
npm isntall axios --save2、创建axios.js文件
主要是用来创建axios实例,添加请求拦截,全局处理一些业务逻辑,例如全局loading展示,返回状态码处理等 。
具体的配置可查看axios
3、创建api目录,并新建index.js文件
import axios from '../plugins/axios';let api = {// app列表appListData(params){return axios.get('/mock/appListData.json', params);},// 推荐recommendData(params) {return axios.get('/mock/recomendData.json', params);},// 搜索lookUp(params) {return axios.get('/mock/lookUp.json', params);}
}export default api
4、组件中使用
import $api from '../api/index.js';$api.recommendData({}).then((response) => {let feed = response.feed;this.setState({recommendList: feed.entry})}).catch(err => {console.log(err)})axios拦截器添加全局loading,多个请求合并一个loading
通过配置axios的过滤器,可以拦截用户请求,我们在这里添加全局loading,返回时在隐藏loading的显示。这里有个问题需要解决的是,如果同一时刻我们发起多个请求,那么会出现多个loading的问题,解决办法就是,通过设定一个count变量来记录当前接口请求数量,当count为0时再结束loading。
showFullScreenLoading、tryHideFullScreenLoading要干的事儿就是将同一时刻的请求合并,声明一个变量needLoadingRequestCount,每次调用showFullScreenLoading方法 needLoadingRequestCount + 1。调用tryHideFullScreenLoading()方法,needLoadingRequestCount - 1。needLoadingRequestCount为 0 时,结束 loading。
另外还可以通过参数形式设定不需要显示loading的请求,在拦截处通过判断来显示
1、在common.js文件中添加如下代码
import { Toast } from 'antd-mobile'
/*** 显示loading*/
function showLoading(){Toast.loading('加载中...', 0);
}/*** 隐藏loading*/
function hideLoading(){Toast.hide();
}/*** 合并请求,同一时刻只显示一个loading*/
let needLoadingRequestCount = 0
export function showFullScreenLoading() {if (needLoadingRequestCount === 0) {showLoading()}needLoadingRequestCount++
}export function hideFullScreenLoading() {if (needLoadingRequestCount <= 0){return}needLoadingRequestCount--if (needLoadingRequestCount === 0) {hideLoading()}
}
2、在axios中使用
import { showFullScreenLoading, hideFullScreenLoading} from '../utils/commons'// Add a request interceptor
_axios.interceptors.request.use(function (config) {// Do something before request is sentshowFullScreenLoading();return config;
}, function (error) {// Do something with request errorreturn Promise.reject(error);
});// Add a response interceptor
_axios.interceptors.response.use(function (response) {// Do something with response datasetTimeout(() => {hideFullScreenLoading();}, 1000);return response.data;
}, function (error) {// Do something with response errorreturn Promise.reject(error);
});
配置react-router
在React中,常用的有两个包可以实现这个需求,那就是react-router和react-router-dom,这两个不同之处就是后者比前者多出了 这样的 DOM 类组件,所以我们只需要使用react-router-dom就可以了
1、安装
npm install react-router-dom --save-dev2、创建路由组件router/index.js
import React from 'react';
import { HashRouter, Route, Switch } from 'react-router-dom';
import Home from '../pages/Home';
import Profile from '../pages/profile/Profile';const BasicRoute = () => (<HashRouter><Switch><Route exact path="/" component={Home} /><Route exact path="/profile" component={Profile} /></Switch></HashRouter>
);export default BasicRoute;
将两个页面组件Home和Detail使用Route组件包裹,外面套用Switch作路由匹配,当路由组件检测到地址栏与Route的path匹配时,就会自动加载响应的页面
3、入口文件index.js引入router组件
import React from 'react';
import ReactDOM from 'react-dom';
import Router from './router/router';ReactDOM.render(<Router/>,document.getElementById('root')
);
4、路由跳转
this.props.history.push("/search/result");添加vw适配手机屏幕
1、默认webpack的配置是隐藏的,通过eject 显示webpack配置(此操作不可逆)
npm run eject
2、安装postcss
npm install --save postcss-aspect-ratio-mini postcss-px-to-viewport postcss-write-svg postcss-cssnext postcss-viewport-units cssnano3、webpack配置
修改webpack.config.js,添加如下代码:
{// Options for PostCSS as we reference these options twice// Adds vendor prefixing based on your specified browser support in// package.jsonloader: require.resolve('posREtcss-loader'),options: {// Necessary for external CSS imports to work// https://github.com/facebook/create-react-app/issues/2677ident: 'postcss',plugins: () => [require('postcss-flexbugs-fixes'),require('postcss-preset-env')({autoprefixer: {flexbox: 'no-2009',},stage: 3,}),// Adds PostCSS Normalize as the reset css with default options,// so that it honors browserslist config in package.json// which in turn let's users customize the target behavior as per their needs.postcssNormalize(),// 添加vw配置 startpostcssAspectRatioMini({}),postcssPxToViewport({viewportWidth: 750, // (Number) The width of the viewport.viewportHeight: 1334, // (Number) The height of the viewport.unitPrecision: 3, // (Number) The decimal numbers to allow the REM units to grow to.viewportUnit: 'vw', // (String) Expected units.selectorBlackList: ['.ignore', '.hairlines', '.list-row-bottom-line', '.list-row-top-line'], // (Array) The selectors to ignore and leave as px.minPixelValue: 1, // (Number) Set the minimum pixel value to replace.mediaQuery: false // (Boolean) Allow px to be converted in media queries.}),postcssWriteSvg({utf8: false}),postcssPresetEnv({}),// postcssViewportUnits({// filterRule: rule => rule.selector.indexOf('::after') === -1 && rule.selector.indexOf('::before') === -1 && rule.selector.indexOf(':after') === -1 && rule.selector.indexOf(':before') === -1// }),postcssViewportUnits({}),cssnano({"cssnano-preset-advanced": {zindex: false,autoprefixer: false},})// 添加vw配置 end],sourceMap: isEnvProduction && shouldUseSourceMap,},},这里,配置之后运行项目会发现有个报错ReferenceError: postcssPresetEnv is not defined
是因为我们没有引入postcssPresetEnv
安装并添加以下依赖
npm install postcss-preset-env --save-dev
const postcssPresetEnv = require('postcss-preset-env');
配置好了之后,再访问我们的页面,可以发现已经自动转成vw了
4、兼容低版本android,加入viewport-units-buggyfill hack
下载viewport-units-buggyfill.min.js到public文件夹下面,修改index.html添加如下代码:
<script src='%PUBLIC_URL%/viewport-units-buggyfill.min.js'></script><script>window.onload = function () {window.viewportUnitsBuggyfill.init({hacks: window.viewportUnitsBuggyfillHacks});}</script>或者使用cdn的方式引入
<script src="//g.alicdn.com/fdilab/lib3rd/viewport-units-buggyfill/0.6.2/??viewport-units-buggyfill.hacks.min.js,viewport-units-buggyfill.min.js"></script>
安装scss
npm install node-sass sass-loader --save
在React中的几种样式写法
行内样式、声明样式、引入样式、CSS Modules模块化
1、行内样式
<div style={{ background: '#eee', width: '200px', height: '200px'}}><p style= {{color:'red', fontSize:'40px'}}>行内样式</p></div>2、声明样式
const style1={ background:'#eee',width:'200px',height:'200px'}<div style={style1}><p style= {style2}>行内样式</p></div>3、引入样式
.person{width: 60%;margin:16px auto;
}
import './Person.css';
<div className='person'><p>person:Hello world</p></div>
4、css module
CSS Modules 的做法就是通过配置将.css文件进行编译,编译后在每个用到css的组件中的css类名都是独一无二的,从而实现CSS的局部作用域。
在create-react-app2.0之前的版本,配置CSS Modules是需要eject弹出webpack来配置的,幸运的是,create-react-app自从2.0.版本就已经开始支持CSS Modules了
(1)局部样式
命名规则: xxx.module.css 引入方式 import xxx from 'xxx.module.css'用法:<div className={xxx.styleName}>(2)全局样式
命名规则: xxx.css 引入方式 import ‘xxx.css’用法:<div className='styleName'>全局样式与局部样式混合使用:
<div className={`styleName ${xxx['styleName']}`} > 其中styleName表示全局样式 ${xxx['styleName']表示局部样式,注意{ }内使用模板字符串 ·
5、css多类名写法
(1) css module模块中写法
<div className={[`${styles.sideInBox}`,`${styles.sideTitleBox}`].join(' ')}></div> (2) 如果是全局样式写法
className={`title ${index === this.state.active ? 'active' : ''}`}React条件渲染的几种方式
参考https://www.cnblogs.com/xiaodi-js/p/9119826.html
1、条件表达式
<div>{isLoggedIn ? (<LogoutButton onClick={this.handleLogoutClick} />) : (<LoginButton onClick={this.handleLoginClick} />)}</div>2、&&操作符
<div><h1>Hello!</h1>{unreadMessages.length > 0 &&<h2>You have {unreadMessages.length} unread messages.</h2>}</div>3、列表遍历
jxs的语法,js代码要放在{}里面,html标签使用return ()包裹
return (<div className='appList-container'><ul className='list'>{this.props.list.map((item, index) => {return (<li className='list-item' key={index}><div className='app-index'>{index+1}</div><img className='app-icon' src={item['im:image'][0].label} alt="" /><div className='app-info'><div className='app-name'>{item['im:name'].label}</div><div className='app-categray'>{item.category.attributes.label}</div></div></li>)})}</ul></div>);事件处理
<button onClick={this.handleClick}>ck me</button>两种事件传参方式
<button onClick={(e) => this.deleteRow(id, e)}>Delete Row</button>
<button onClick={this.deleteRow.bind(this, id)}>Delete Row</button>
获取input表单值
两种方法,受控组件和非受控组件。
推荐使用受控组件,即通过this.state获取,因为其符合react规范;
非受控组件,给标签指定ref属性
<input className='search-bar' type="text" ref='keyword' onKeyUp={this.appSearch.bind(this)}>
appSearch(e){let keyword = this.refs.keyword.value}
react中使用防抖
appSearch = debounce(() => {}, 500);组合组件
参考https://www.jianshu.com/p/0b005dc60bda
在react开发中,在某些场景会遇到如下组件嵌套形式的开发,例如group和cell或者RadioGroup、RadioOption
<RadioGroup name="option"><RadioOption label="选项一" value="1" /><RadioOption label="选项二" value="2" /></RadioGroup>,state定义及赋值
constructor(props) {super(props);this.state = { appList:[]};}
this.setState({appList: feed.entry})
父子组件传参
1、父传子
<AppList list={this.state.appList}></AppList>在子组件获取值
this.props.list2、子传父
触发父组件事件
this.props.appSearch(keyword);父组件监听事件
<Search appSearch={this.appSearch.bind(this)}></Search>引入redux和react-redux、redux-thunk
文档
https://react-redux.js.org/introduction/quick-start
http://cn.redux.js.org/docs/introduction/ThreePrinciples.html
类似vuex,redux是一个数据状态管理工具,但是用法和vuex有些区别
react-redux帮助你完成数据订阅,redux-thunk可以放你实现异步action,redux-logger是redux的日志中间件
redux-thunk 是一个比较流行的 redux 异步 action 中间件。redux-thunk 帮助你统一了异步和同步 action 的调用方式,把异步过程放在 action 级别解决,对 component 没有影响
import { createStore, applyMiddleware } from 'redux';
import thunk from 'redux-thunk';
import rootReducer from './reducers';
// 创建store的时候,第二个参数是中间件,redux-thunk提供了一个thunk中间件,用于处理异步的action
export default createStore(rootReducer,applyMiddleware(thunk)
);
1、对redux的理解
(1)单一数据源:
整个应用的 state 被储存在一棵 object tree 中,并且这个 object tree 只存在于唯一一个 store 中
(2)State只读:
唯一改变 state 的方法就是触发 action,action 是一个用于描述已发生事件的普通对象
(3)执行修改:
为了描述 action 如何改变 state tree ,你需要编写 reducers
Reducer 只是一些纯函数,它接收先前的 state 和 action,并返回新的 state
随着应用变大,你可以把它拆成多个小的 reducers,分别独立地操作 state tree 的不同部分
2、对mapStateToProps和mapDispatchToProps的理解
使用 React Redux 库的 connect() 方法来生成容器组件前,需要先定义 mapStateToProps 这个函数来指定如何把当前 Redux store state 映射到展示组件的 props 中。
除了读取 state,容器组件还能分发 action。类似的方式,可以定义mapDispatchToProps() 方法接收 dispatch() 方法并返回期望注入到展示组件的 props 中的回调方法。它可以是一个函数,也可以是一个对象。
// 将state 映射到展示组件的 props 中
const mapStateToProps = state => {return {searchList: state.searchList}
}const mapDispatchToProps = dispatch => {return {saveSearchList: searchList => dispatch(saveSearchList(searchList))}
}// export default SearchResult;
// 通过connect生成容器组件
export default connect(mapStateToProps,mapDispatchToProps
)(SearchResult)
3、安装redux react-redux redux-thunk
npm install --save redux react-redux redux-thunk
npm install --save-dev redux-logger
4、使用react-hot-loader实现局部热更新
#安装
npm install --save-dev react-hot-loader
#使用
import { AppContainer } from 'react-hot-loader';
import Route from './router/';
const render = Component => {
ReactDOM.render(<AppContainer><Component /></AppContainer>,document.getElementById("root"));
}
render(Route);
引入antd-mobile移动端UI框架
antd-mobile文档
https://mobile.ant.design/index-cn
1、安装依赖
npm install antd-mobile --save2、安装 babel-plugin-import
npm install babel-plugin-import --save3、在 package.json 配置 antd-mobile 的按需加载(在babel下添加)
"plugins": [["import",{"libraryName": "antd-mobile","style": "css"}]],4、组件中使用
import { Toast,Button } from 'antd-mobile'
<Button type="primary">primary</Button>
上拉刷新及加载更多
这里使用react-pullload这个库
1、安装
npm install --save react-pullload2、使用
import ReactPullLoad, { STATS } from "react-pullload";
import "react-pullload/dist/ReactPullLoad.css";constructor(props) {super(props);this.state = { appList: [],appListAll: [],recommendList:[],hasMore: true,action: STATS.init,pageSize:10,page:1};}handleAction = action => {//new action must do not equel to old actionif (action === this.state.action) {return false;}if (action === STATS.refreshing) {this.handRefreshing();} else if (action === STATS.loading) {this.handLoadMore();} else {//DO NOT modify below codethis.setState({action: action});}};// 刷新handRefreshing = ()=>{this.setState({action: STATS.refreshing});this.getAppList();}// 加载更多handLoadMore = ()=>{if (STATS.loading === this.state.action) {return false;}//无更多内容则不执行后面逻辑if (!this.state.hasMore) {return;}// 显示正在加载this.setState({action: STATS.loading});let page = this.state.page+1;setTimeout(() => {this.getPageData(page);}, 1500);}render() {return (<div className='container'><div className='search-bar'><Search onFoucs={this.onFoucs.bind(this)}></Search></div><ReactPullLoadclassName="block"isBlockContainer={true}downEnough={100}action={this.state.action}handleAction={this.handleAction}hasMore={this.state.hasMore}distanceBottom={100}><Recommend list={this.state.recommendList}></Recommend><AppList list={this.state.appList}></AppList></ReactPullLoad></div>);}
因为是使用的mock数据,获取的是全部数据,所以这里采用前端分页的方式加载更多
// 分页加载getPageData(page){let resultList = [], list = [];let appListAll = this.state.appListAll;let pageSize = this.state.pageSize;let totalPage = Math.ceil(appListAll.length / pageSize);//总页数let startIndex = pageSize * (page - 1);let endIndex = pageSize * page;for (let i = startIndex; i < endIndex; i++) {resultList.push(appListAll[i]);}if (page >= totalPage){this.setState({ hasMore: false});}if (page===1){list = resultList;}else{list = this.state.appList.concat(resultList);}this.setState({appList: list,page: page,pageSize: pageSize,action: STATS.reset})}图片懒加载
http://npm.taobao.org/package/react-lazy-load
1、安装
npm install --save react-lazy-load2、使用
import LazyLoad from 'react-lazy-load';<LazyLoad offsetVertical={100}><img className='app-icon' src={item['im:image'][0].label} alt="" />
</LazyLoad>问题总结
1、在react中进入页面自动获取input输入焦点 ,弹出键盘
input中设置ref属性(非受控组件),通过 this.refs.keyword调用
<input className='search-input' type="text" ref='keyword' onChange={this.appSearch.bind(this)} onFocus={this.onFoucs.bind(this)} placeholder="搜索应用" />也可以写成ref={(input) => { this.textInput = input; }}方式
<input type="text" ref={(input) => { this.textInput = input; }} />
使用this.textInput.focus();方式调用钩子函数中中调用
componentDidMount(){this.refs.keyword.focus();}
2、父组件调用子组件方法(搜索组件,有两个地方使用到,首页和搜索页,其中首页不需要自动获取焦点,进入搜索页时需要自动获取焦点)
通过在搜索结果页里面获取搜索子组件的实例并调用foucs方法进行聚焦,从而不影响其他使用搜索组件的父组件状态
(1)子组件中定义foucs方法
focus(){this.refs.keyword.focus();}
(2)设置input的ref属性
<input className='search-input' type="text" ref='keyword' onChange={this.appSearch.bind(this)} onFocus={this.onFoucs.bind(this)} placeholder="搜索应用" />(3)父组件中调用foucs方法
componentDidMount(){this.manualFocusInst.focus();}<Search appSearch={this.appSearch.bind(this)} ref={(ref)=>this.manualFocusInst = ref} onCancel={this.onCancel.bind(this)} onFoucs={this.onFoucs.bind(this)} showCancelBtn={true}></Search>
3、react build的时候报错
throw new BrowserslistError('Unknown browser query `' + selection + '`')解决办法是找到packpage.json里的browserslist,然后修改
"browserslist": ["last 2 versions","android 4","opera 12"],build开启静态服务访问
npm install -g serveserve -s build4、组件上面不能直接添加className,如
解决方式使用一个父div进行包裹
<div className='search-bar'><Search onFoucs={this.onFoucs.bind(this)}></Search></div>5、ios 系统下img不显示问题,解决方案如下:
/*兼容ios不显示图片问题*/
img {content: normal !important
}
6、1px问题,解决方案
/*伪元素1px*/
.row-cell:before {content: " ";position: absolute;left: 0;top: 0;right: 0;height: 1px;border-top: 1px solid #e5e5e5;color: #e5e5e5;transform-origin: 0 0;transform: scaleY(0.5);z-index: 2;
}
相关文档
https://react.docschina.org/
https://www.redux.org.cn/
https://react-redux.js.org/
http://react-guide.github.io/react-router-cn
https://mobile.ant.design
最后
代码我已经提交到github上去了,如果觉得还可以,欢迎star或者fork
github仓库
在线访问
参考阅读
https://www.jianshu.com/p/8954e9fb0c7e
https://blog.csdn.net/z9061/article/details/84619309
https://www.jianshu.com/p/f97aa775899f
https://www.cnblogs.com/jack-liu6/p/9927336.html