GMap.NET有两个版本,分别是WinForm和WPF的版本,WinForm版本的教程很多。这次主要介绍的WPF版本的操作。
要下载GMap.NET请点击这里,这个最好下载下来,可以参考里面的Demo来学习。下载下来后,用visual studio打开SourceCode里面的sln文件。打开的时候可能需要让你下载什么东西,这个有点不记得了,但是关于数据库的那个应该不用下载。
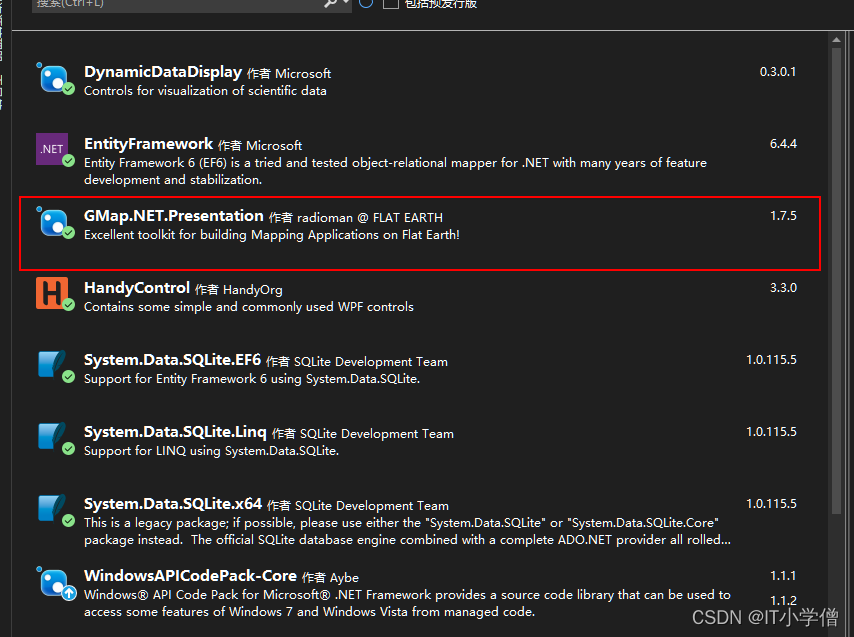
1、导入dll
1-1、第一种方法
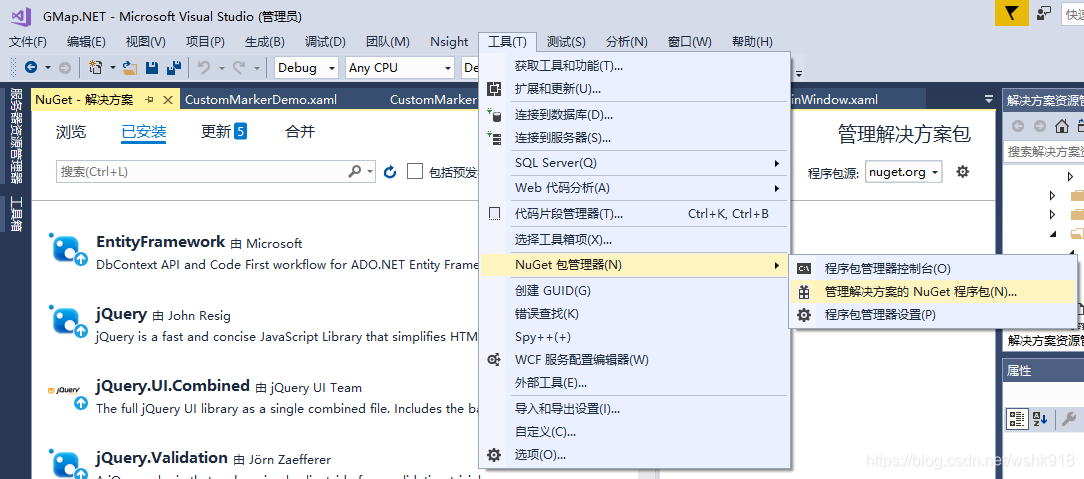
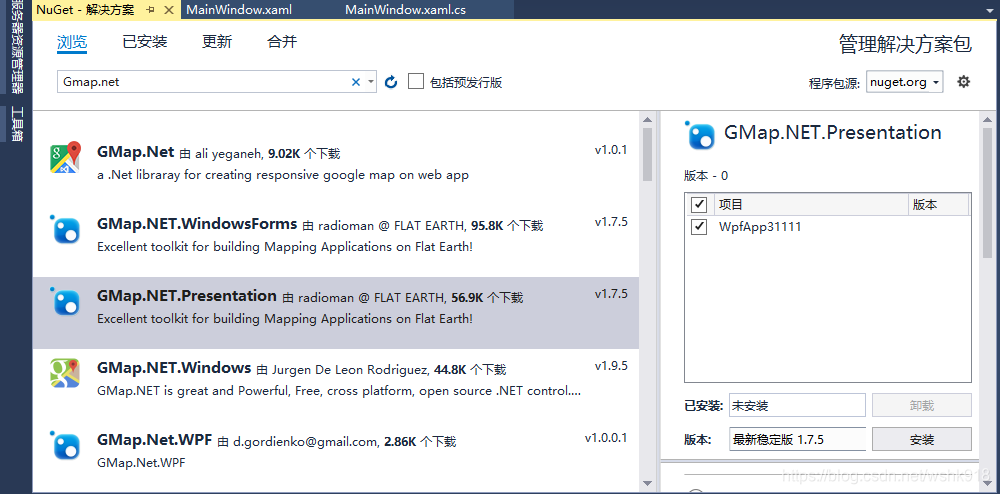
按照下图打开NuGet包管理器,然后输入Gmap.net进行搜索,点击想要安装的dll,然后选择项目,点击安装即可。
1-2、第二种方法
这种方法就是运行下载下来的源代码,然后再拷贝Debug下面生成的dll文件。这样的做法更加灵活,可以自己更改代码。
2、导入GMapControl控件
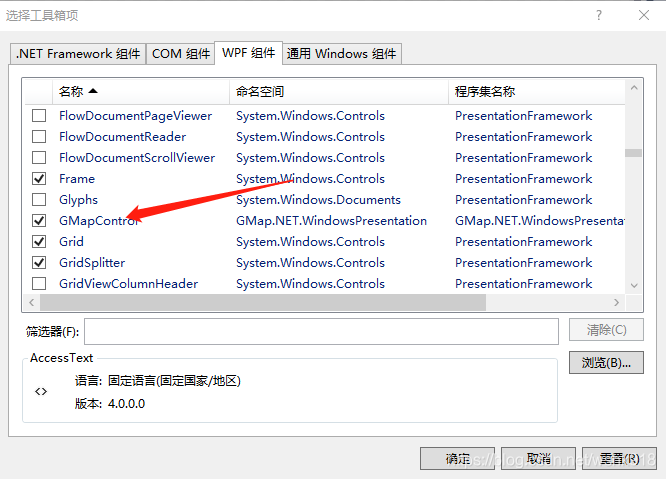
2-1、再工具箱空白处右键“选项”然后选中GMapControl,点击确定。即可在工具箱中使用GMapControl控件。
3、导入高德地图
高德的地图和google地图使用的坐标一致,可以切换使用,但是据说百度的又增加了偏移。
3-1、普通地图
using GMap.NET;
using GMap.NET.MapProviders;
using GMap.NET.Projections;
using System;
using System.Collections.Generic;
using System.Linq;
using System.Text;
using System.Threading.Tasks;namespace jiemian3.CustomMap
{public abstract class AMapProviderBase : GMapProvider{public AMapProviderBase(){MaxZoom = null;RefererUrl = "http://www.amap.com/";//Copyright = string.Format("©{0} 高德 Corporation, ©{0} NAVTEQ, ©{0} Image courtesy of NASA", DateTime.Today.Year);    }public override PureProjection Projection{get { return MercatorProjection.Instance; }}GMapProvider[] overlays;public override GMapProvider[] Overlays{get{if (overlays == null){overlays = new GMapProvider[] { this };}return overlays;}}}public class AMapProvider : AMapProviderBase{public static readonly AMapProvider Instance;readonly Guid id = new Guid("EF3DD303-3F74-4938-BF40-232D0595EE88");public override Guid Id{get { return id; }}readonly string name = "AMap";public override string Name{get{return name;}}static AMapProvider(){Instance = new AMapProvider();}public override PureImage GetTileImage(GPoint pos, int zoom){try{string url = MakeTileImageUrl(pos, zoom, LanguageStr);return GetTileImageUsingHttp(url);}catch (Exception ex){return null;}}string MakeTileImageUrl(GPoint pos, int zoom, string language){var num = (pos.X + pos.Y) % 4 + 1;//string url = string.Format(UrlFormat, num, pos.X, pos.Y, zoom);string url = string.Format(UrlFormat, pos.X, pos.Y, zoom);return url;}//static readonly string UrlFormat = "http://webrd04.is.autonavi.com/appmaptile?x={0}&y={1}&z={2}&lang=zh_cn&size=1&scale=1&style=7";static readonly string UrlFormat = "http://webrd01.is.autonavi.com/appmaptile?lang=zh_cn&size=1&scale=1&style=7&x={0}&y={1}&z={2}";}
}
3-2、高德卫星地图,但是高德卫星地图(官网的地图)的数据不完整
using GMap.NET;
using GMap.NET.MapProviders;
using GMap.NET.Projections;
using System;
using System.Collections.Generic;
using System.Linq;
using System.Text;
using System.Threading.Tasks;namespace jiemian3.CustomMap
{public class AMapSateliteProvider : AMapProviderBase{private readonly Guid id = new Guid("FCA94AF4-3467-47c6-BDA2-6F52E4A145BC");public static readonly AMapSateliteProvider Instance = new AMapSateliteProvider();//private readonly string name = Resources.Strings.AMapSatellite;private readonly string name = "AMapSatellite";private static readonly string UrlFormat = "http://webst04.is.autonavi.com/appmaptile?x={0}&y={1}&z={2}&lang=zh_cn&size=1&scale=1&style=6";public override PureImage GetTileImage(GPoint pos, int zoom){string url = this.MakeTileImageUrl(pos, zoom, GMapProvider.LanguageStr);return base.GetTileImageUsingHttp(url);}private string MakeTileImageUrl(GPoint pos, int zoom, string language){string str = string.Format(UrlFormat, pos.X, pos.Y, zoom);Console.WriteLine("url:" + str);return str;}public override Guid Id{get{return this.id;}}public override string Name{get{return this.name;}}}
}
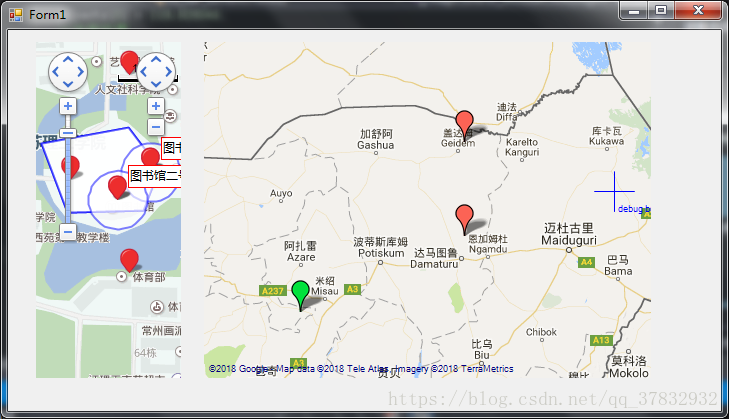
4、自定义Marker
winform版的自己GMap提供了第三方的marker,但是WPF的需要自己写。可以参考源代码项目中Demo目录下面的“Demo.WindowsPresentation”,WPF所有的代码都可以参考这个Demo。我直接把“Demo.WindowsPresentation”里面对应的代码粘贴到下面。
因为这些代码再一个单独的文件夹下面,所以注意命名空间和路径,自己做调整。
CustomMarkerRed.xaml
<UserControlxmlns="http://schemas.microsoft.com/winfx/2006/xaml/presentation"xmlns:x="http://schemas.microsoft.com/winfx/2006/xaml"x:Class="Demo.WindowsPresentation.CustomMarkers.CustomMarkerRed"Height="40" Width="30" Opacity="10"><Image Name="icon" Source="red-dot.png" VerticalAlignment="Center" HorizontalAlignment="Center" />
</UserControl>
CustomMarkerRed.xaml.cs
using System.Windows;
using System.Windows.Controls;
using System.Windows.Controls.Primitives;
using System.Windows.Input;
using System.Windows.Media;
using GMap.NET.WindowsPresentation;namespace Demo.WindowsPresentation.CustomMarkers
{/// <summary>/// Interaction logic for CustomMarkerDemo.xaml/// </summary>public partial class CustomMarkerRed{Popup Popup;Label Label;GMapMarker Marker;MainWindow MainWindow;public CustomMarkerRed(MainWindow window, GMapMarker marker, string title){this.InitializeComponent();this.MainWindow = window;this.Marker = marker;Popup = new Popup();Label = new Label();this.Loaded += new RoutedEventHandler(CustomMarkerDemo_Loaded);this.SizeChanged += new SizeChangedEventHandler(CustomMarkerDemo_SizeChanged);this.MouseEnter += new MouseEventHandler(MarkerControl_MouseEnter);this.MouseLeave += new MouseEventHandler(MarkerControl_MouseLeave);this.MouseMove += new MouseEventHandler(CustomMarkerDemo_MouseMove);this.MouseLeftButtonUp += new MouseButtonEventHandler(CustomMarkerDemo_MouseLeftButtonUp);this.MouseLeftButtonDown += new MouseButtonEventHandler(CustomMarkerDemo_MouseLeftButtonDown);Popup.Placement = PlacementMode.Mouse;{Label.Background = Brushes.Blue;Label.Foreground = Brushes.White;Label.BorderBrush = Brushes.WhiteSmoke;Label.BorderThickness = new Thickness(2);Label.Padding = new Thickness(5);Label.FontSize = 22;Label.Content = title;}Popup.Child = Label;}void CustomMarkerDemo_Loaded(object sender, RoutedEventArgs e){if(icon.Source.CanFreeze){icon.Source.Freeze();}}void CustomMarkerDemo_SizeChanged(object sender, SizeChangedEventArgs e){Marker.Offset = new Point(-e.NewSize.Width/2, -e.NewSize.Height);}void CustomMarkerDemo_MouseMove(object sender, MouseEventArgs e){if(e.LeftButton == MouseButtonState.Pressed && IsMouseCaptured){Point p = e.GetPosition(MainWindow.MainMap);Marker.Position = MainWindow.MainMap.FromLocalToLatLng((int) p.X, (int) p.Y);}}void CustomMarkerDemo_MouseLeftButtonDown(object sender, MouseButtonEventArgs e){if(!IsMouseCaptured){Mouse.Capture(this);}}void CustomMarkerDemo_MouseLeftButtonUp(object sender, MouseButtonEventArgs e){if(IsMouseCaptured){Mouse.Capture(null);}}void MarkerControl_MouseLeave(object sender, MouseEventArgs e){Marker.ZIndex -= 10000;Popup.IsOpen = false;}void MarkerControl_MouseEnter(object sender, MouseEventArgs e){Marker.ZIndex += 10000;Popup.IsOpen = true;}}
}
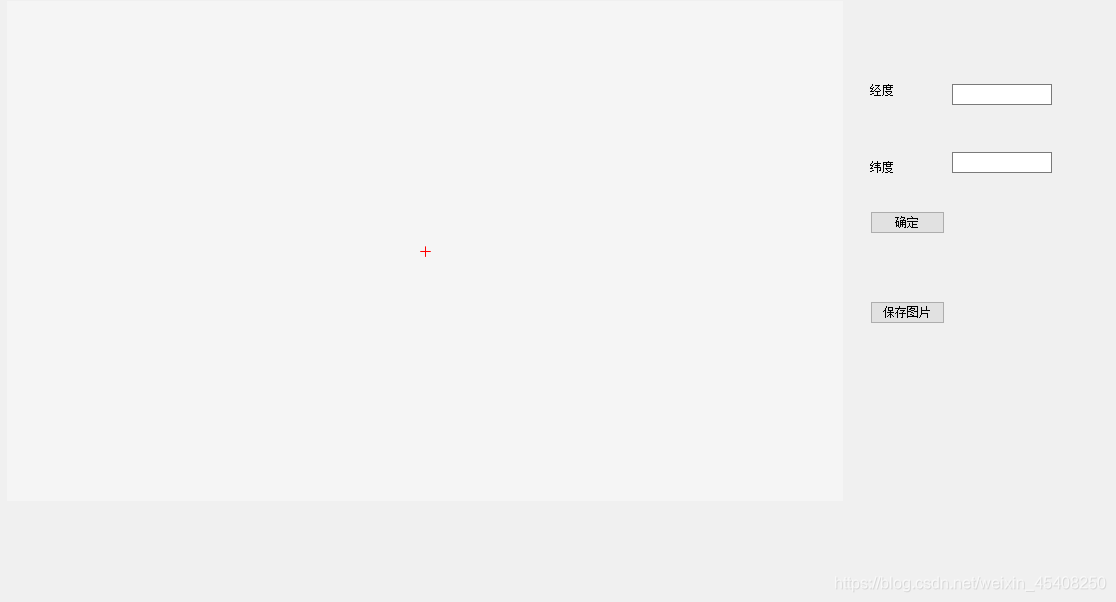
在主界面中使用
currentMarker = new GMapMarker(MainMap.Position);
{currentMarker.Shape = new CustomMarkerRed(this, currentMarker, "custom position marker");currentMarker.Offset = new System.Windows.Point(-15, -15);currentMarker.ZIndex = int.MaxValue;MainMap.Markers.Add(currentMarker);
}
图片如下:

5、绘制多边形
下面只公布部分代码和思想,如果有不懂的可以提问。有些不方面提供。
5-1、多边形
使用dll中提供的GMapPolygon类。
List<PointLatLng> points = new List<PointLatLng>();
//在这块添加一些points
GMapPolygon polygon = new GMapPolygon(points);polygon.ZIndex = 10; //设置Zindex,显示的优先级(层)
polygon.RegenerateShape(gmap); //gmap就是地图控件
//下面这个比较重要,是设置样式。
(polygon.Shape as Path).Stroke = Brushes.GreenYellow;
(polygon.Shape as Path).StrokeThickness = 5;
(polygon.Shape as Path).Effect = null;
gmap.Markers.Add(polygon);
5-2、折线(路径)
使用GMapRoute类,基本和上面的一样。
List<PointLatLng> points = new List<PointLatLng>();
//在这块添加一些points
GMapRoute route = new GMapRoute(points);//
route.ZIndex = 10;
route.RegenerateShape(gmap);
(route.Shape as Path).Stroke = Brushes.Blue;
(route.Shape as Path).StrokeThickness = 5;
(route.Shape as Path).Effect = null;
gmap.Markers.Add(route);
5-3、根据鼠标画矩形
这个需要自己写一些鼠标事件。这个自己发挥吧,代码有点乱,自己思考也不难。因为一些原因,这部分代码不能全部公布,多多理解。
下面的代码是画矩形的,只是没有鼠标事件的代码。已经很接近了。
PointLatLng startpoint = mainmarker.Position;List<PointLatLng> list_points = new List<PointLatLng>();if (startpoint.Lat > current_point.Lat){if (startpoint.Lng < current_point.Lng){//右下list_points.Add(startpoint);list_points.Add(new PointLatLng(startpoint.Lat, current_point.Lng));list_points.Add(current_point);list_points.Add(new PointLatLng(current_point.Lat, startpoint.Lng));}else{//左下list_points.Add(startpoint);list_points.Add(new PointLatLng(current_point.Lat, startpoint.Lng));list_points.Add(current_point);list_points.Add(new PointLatLng(startpoint.Lat, current_point.Lng));}}else{if (startpoint.Lng < current_point.Lng){//右上list_points.Add(startpoint);list_points.Add(new PointLatLng(startpoint.Lat, current_point.Lng));list_points.Add(current_point);list_points.Add(new PointLatLng(current_point.Lat, startpoint.Lng));}else{//左上list_points.Add(startpoint);list_points.Add(new PointLatLng(current_point.Lat, startpoint.Lng));list_points.Add(current_point);list_points.Add(new PointLatLng(startpoint.Lat, current_point.Lng));}}double lat = (startpoint.Lat+current_point.Lat) / 2;double lng = (startpoint.Lng + current_point.Lng) / 2;double heightlat = Math.Abs(current_point.Lat-startpoint.Lat);double widthlng = Math.Abs(current_point.Lng-startpoint.Lng);rectLatLng = RectLatLng.FromLTRB(startpoint.Lng,startpoint.Lat,current_point.Lng,current_point.Lat);rectangle = new GMapPolygon(list_points);rectangle.ZIndex = Rectangle_index;rectangle.RegenerateShape(gmap);(rectangle.Shape as Path).Stroke = Brushes.GreenYellow;(rectangle.Shape as Path).StrokeThickness = 5;(rectangle.Shape as Path).Effect = null;gmap.Markers.Add(rectangle);
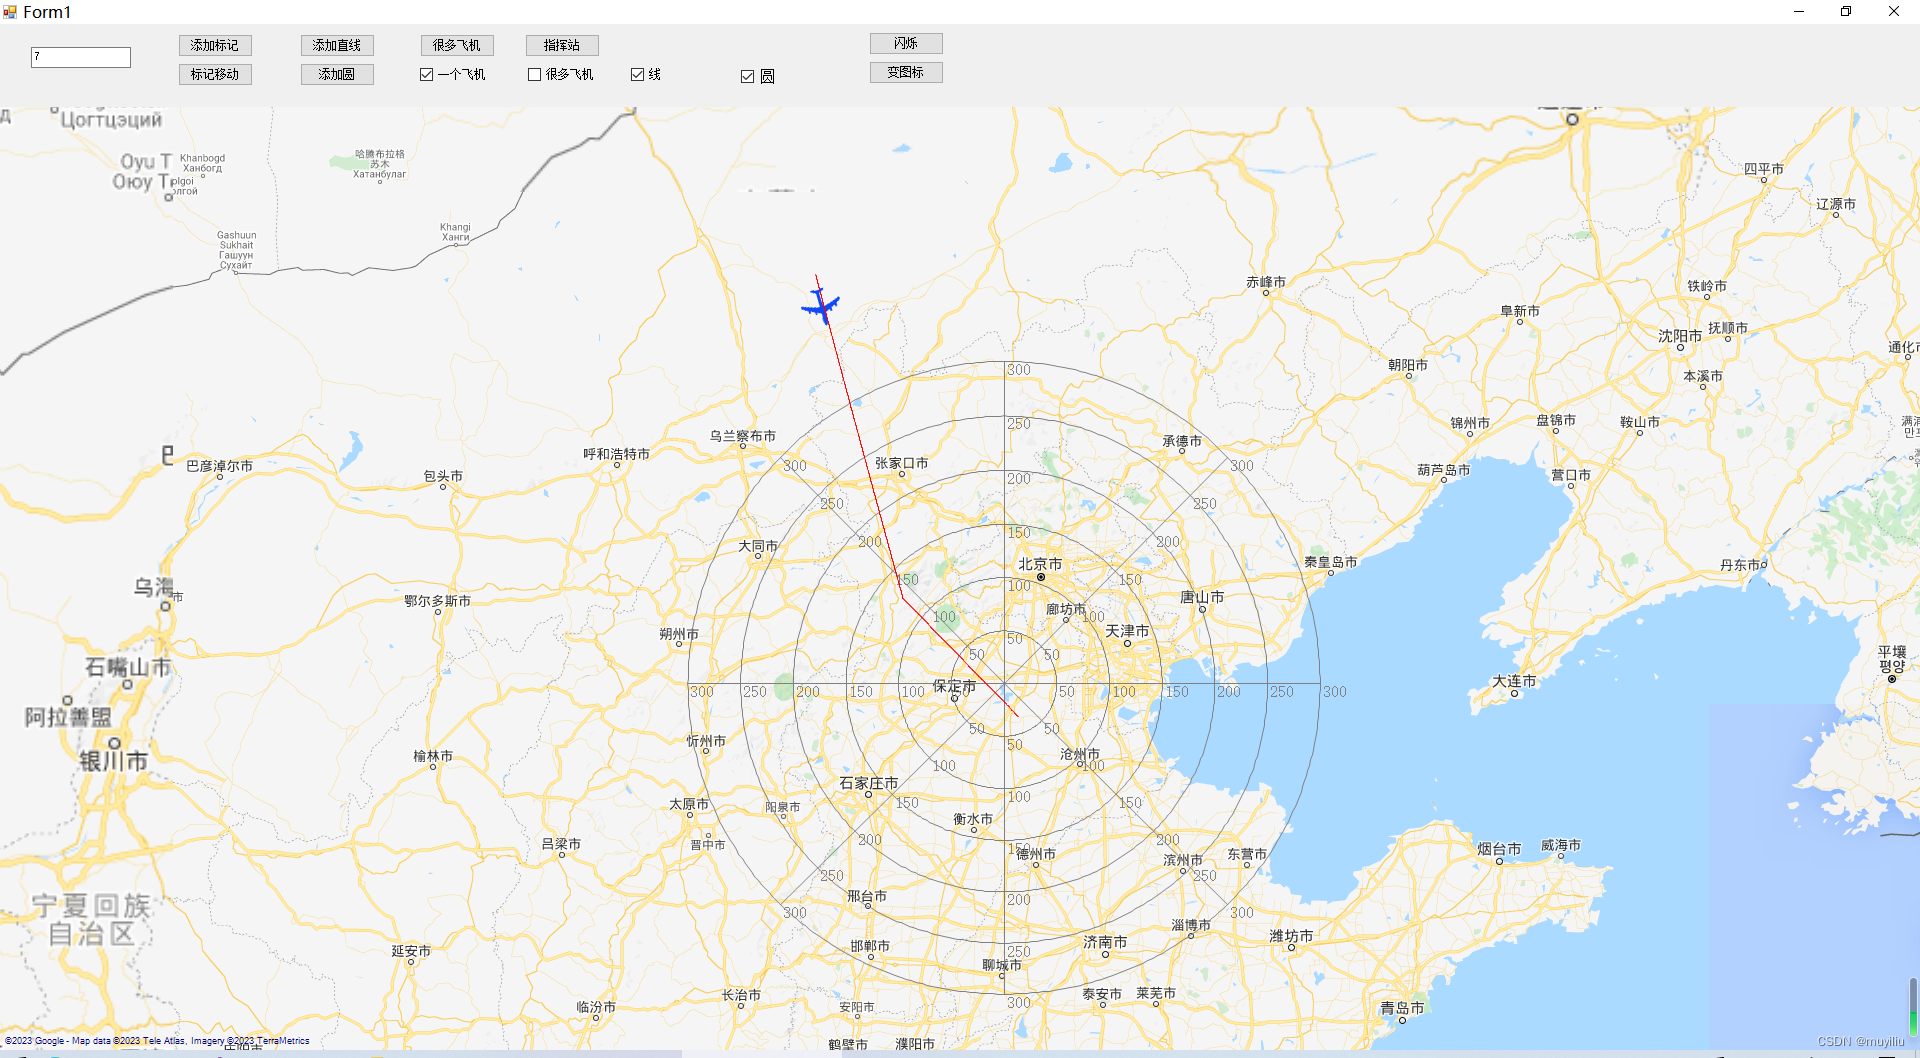
5-4、根据鼠标画圆形
上面的矩形还好是GMAP自己控件画的,但是圆形没有,也不能根据点画,因为有无数个点。最主要的是画的圆形要能够更具地图缩放。这部分还是参考Demo中的代码。思路是:使用一个XMAL控件,里面是一个圆,设置属性是填充的,然后改变边框即可改变圆的大小。首先根据鼠标移动位置和中心点的经纬度坐标转化成界面坐标,然后计算半径,画圆。
Circle.xaml
<UserControl x:Class="Demo.WindowsPresentation.CustomMarkers.Circle"xmlns="http://schemas.microsoft.com/winfx/2006/xaml/presentation"xmlns:x="http://schemas.microsoft.com/winfx/2006/xaml"Height="300" Width="300" Background="Transparent"><Grid><Ellipse Stroke="Red" Fill="AliceBlue" Opacity="0.44" /></Grid>
</UserControl>
Circle.xaml.cs
using System;
using System.Collections.Generic;
using System.Linq;
using System.Text;
using System.Windows;
using System.Windows.Controls;
using System.Windows.Data;
using System.Windows.Documents;
using System.Windows.Input;
using System.Windows.Media;
using System.Windows.Media.Imaging;
using System.Windows.Navigation;
using System.Windows.Shapes;
using GMap.NET;namespace Demo.WindowsPresentation.CustomMarkers
{/// <summary>/// Interaction logic for Circle.xaml/// </summary>public partial class Circle : UserControl{public Circle(){InitializeComponent();}public PointLatLng Center;public PointLatLng Bound;}
}
画圆的代码
PointLatLng center = mainmarker.Position;
circle = new GMapMarker(center);
circle_shape = new Circle();
circle_shape.Center = center;
circle_shape.Bound = current_point;
circle_shape.Tag = circle;
circle_shape.IsHitTestVisible = false;
UpdateCircle(circle_shape);//下面的代码
circle.Shape = circle_shape;
circle.ZIndex = Circle_index;
gmap.Markers.Add(circle);
更新圆的大小的代码,这块每次在地图加载的时候调用就可以让圆不断变化大小。
private void UpdateCircle(Circle c){var pxCenter = gmap.FromLatLngToLocal(c.Center);var pxBounds = gmap.FromLatLngToLocal(c.Bound);Console.WriteLine(pxCenter + " " + pxBounds);double a = (double)(pxBounds.X - pxCenter.X);double b = (double)(pxBounds.Y - pxCenter.Y);//半径var pxCircleRadius = Math.Sqrt(a * a + b * b);Console.WriteLine("半径为:" + pxCircleRadius);c.Width = pxCircleRadius * 2;c.Height = pxCircleRadius * 2;(c.Tag as GMapMarker).Offset = new System.Windows.Point(-c.Width / 2, -c.Height / 2);}
6、Zindex
WPF中没有GMapOverlay,但是可以使用Zindex来设置虚拟的。Zindex越大的显示就越靠上。