在这篇文章中,我们想看看几个滚动视图的变体或子类以及它们是如何使用的。以下是我们迄今为止涵盖的变体:
ScrollView - 超类
NestedScrollView - 子类
HorizontalScrollView - 子类
StickyScrollView - 子类和第三方库。
ParallaxScrollView - 子类和第三方库
1.滚动视图
Android ScrollView 教程和示例
一个 ScrollView 是一个 android 布局,它允许它的子视图垂直滚动。这很重要,因为在许多情况下您需要滚动内容。通常,诸如ListView和recyclerview之类的adapterviews具有滚动功能,但视图数量并不多。因此我们不使用滚动视图,否则我们会降低性能。
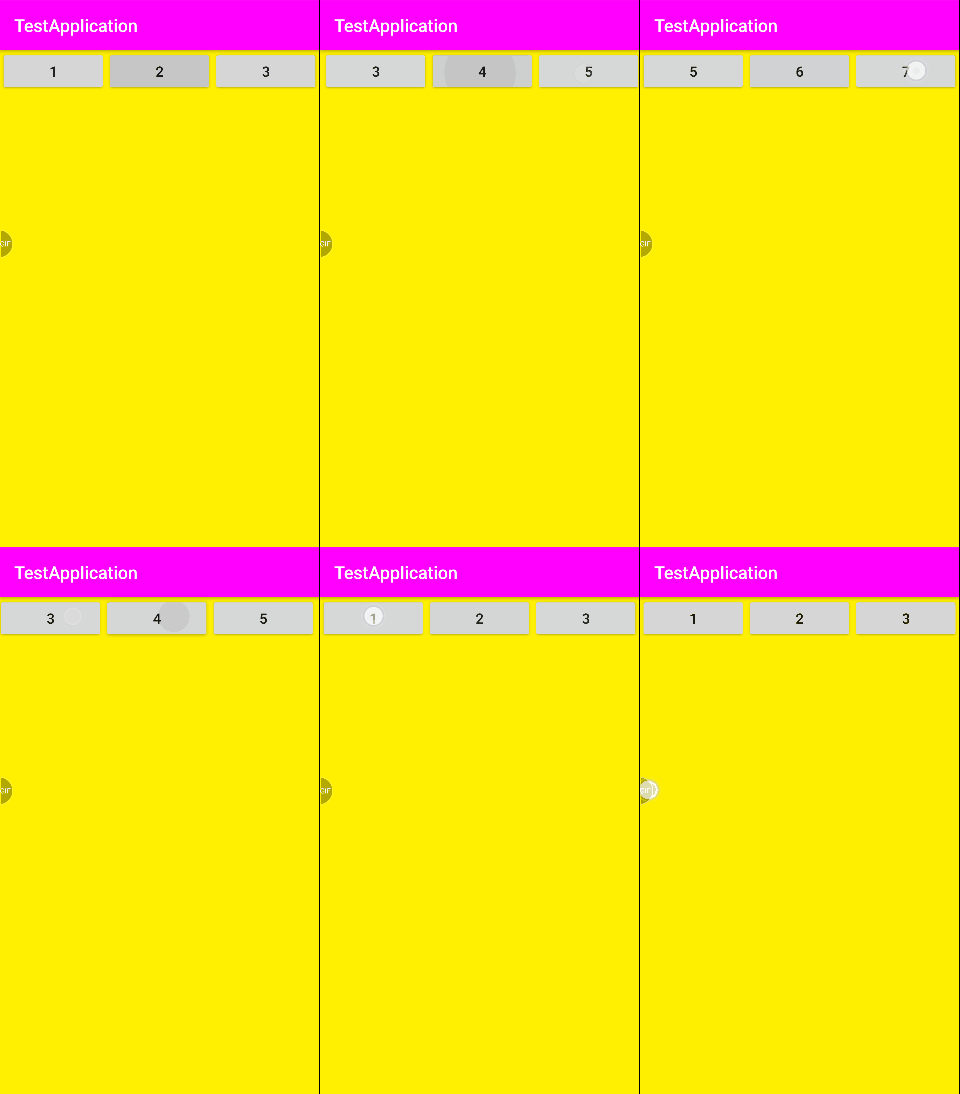
使用滚动视图,您只能向上或向下滚动。但是,如果您想要水平滚动,则可以使用 HorizontalScrollView。
此外, ScrollView 应该只有一个直接子级。这意味着,如果您希望添加多个子项,请使用诸如relativelayout或LinearLayout 之类的 ViewGroup 。然后将这些孩子添加到视图组,将视图组添加到 Scrollview。
Android 工程师建议您使用 NestedScrollView 而不是 ScrollView 进行垂直滚动。
这是因为后者提供了更大的用户界面灵活性和对材料设计滚动模式的支持。
ScrollView API 定义
滚动视图作为一个类驻留在android.widget包中并从 FrameLayout 派生:
public class ScrollView extends FrameLayout
下面是 FrameLayout 的继承层次结构:
java.lang.Object↳ android.view.View↳ android.view.ViewGroup↳ android.widget.FrameLayout↳ android.widget.ScrollView
重要的 ScrollView 方法
(a).scrollTo(int x, int y)
在此方法中,您传递视图的滚动位置。这个版本还将滚动限制在我们孩子的边界上。
public static void scrollToUp(ScrollView scrollView) {scrollView.scrollTo(0, 0);}
(b).smoothScrollTo(int x, int y)
像scrollTo(int, int),但平滑滚动而不是立即滚动。
public static void smoothScrollToUp(ScrollView scrollView) {scrollView.smoothScrollTo(0, 0);}
(C).getChildAt(int index)
此方法将返回组中指定位置的视图。
View child = scrollView.getChildAt(0);
(d).getChildCount()
此方法返回组中孩子的数量。
int count = scrollView.getChildCount();
快速滚动视图示例
- ScrollView - 如何滚动到顶部
让我们看看如何滚动到滚动视图的顶部。
public static void scrollToUp(ScrollView scrollView) {scrollView.scrollTo(0, 0);}
2.如何在ScrollView中向下滚动
然后,我们还想了解如何以编程方式向下滚动到滚动视图的底部。
这是一个静态方法,我们将ScrollView实例作为参数传递。首先,我们获得height滚动视图的 ,因为它是子项计数。
在一天结束时,我们仍然使用该scrollTo()方法,传入x和y位置。
public static void scrollToDown(ScrollView scrollView) {int y = scrollView.getHeight();int count = scrollView.getChildCount();if (count > 0) {View view = scrollView.getChildAt(count - 1);y = view.getBottom() + scrollView.getPaddingBottom();}scrollView.scrollTo(0, y);}
3.如何平滑向上滚动
我们使用smoothScrollTo()方法并传递位置。
public static void smoothScrollToUp(ScrollView scrollView) {scrollView.smoothScrollTo(0, 0);}
4.如何平滑向下滚动
以下是我们如何以编程方式向下滚动。
public static void smoothScrollToDown(ScrollView scrollView) {int y = scrollView.getHeight();int count = scrollView.getChildCount();if (count > 0) {View view = scrollView.getChildAt(count - 1);y = view.getBottom() + scrollView.getPaddingBottom();}scrollView.smoothScrollTo(0, y);}
- 如何通过子视图计算ScrollView的高度
public static int calculaetHeightByView(ScrollView scrollView, View viewin) {int topAll = viewin.getTop();ViewParent p = viewin.getParent();while (p != null) {topAll += ((View) p).getTop();if (p instanceof NestedScrollView) {break;}p = p.getParent();}return topAll;}
6.如何创建具有最大高度限制的滚动视图
如果我们希望为我们的滚动视图设置最大高度限制怎么办。好吧,我们可以简单地通过从android.widget.ScrollView类派生来创建自定义滚动视图,覆盖我们的构造函数以及onMeasure()方法。
import android.content.Context;
import android.util.AttributeSet;
import android.widget.ScrollView;/*** ScrollView with maximum height limit*/
public class MaxHeightScrollView extends ScrollView {private final MaxSizeHelper mHelper = new MaxSizeHelper();public MaxHeightScrollView(Context context) {this(context, null);}public MaxHeightScrollView(Context context, AttributeSet attrs) {super(context, attrs);if (isInEditMode()) {return;}mHelper.init(context, attrs);}@Overrideprotected void onMeasure(int widthMeasureSpec, int heightMeasureSpec) {heightMeasureSpec = MeasureSpec.makeMeasureSpec(mHelper.getMaxHeight(), MeasureSpec.AT_MOST);super.onMeasure(widthMeasureSpec, heightMeasureSpec);}public void setMaxHeight(int maxHeight) {mHelper.setMaxHeight(maxHeight);}
}
- 完整的 ScrollView 示例
让我们看一个完整的滚动视图示例。
(a).MainActivity.java
import android.os.Bundle;
import android.support.v7.app.ActionBarActivity;
import android.util.Log;
import android.view.MotionEvent;
import android.view.View;
import android.widget.Button;
import android.widget.ScrollView;
import android.widget.TextView;public class MainActivity extends ActionBarActivity implements View.OnClickListener {private static final String TAG = "Main";private ScrollView scrollView;@Overrideprotected void onCreate(Bundle savedInstanceState) {super.onCreate(savedInstanceState);setContentView(R.layout.activity_main);Final Text View textview = ( Text View ) findViewById ( R . id . txt );textView.setText(R.string.content);Button btnUp = (Button) findViewById(R.id.btn_up);Button btnDown = (Button) findViewById(R.id.btn_down);btnUp.setOnClickListener(this);btnDown.setOnClickListener(this);scrollView = (ScrollView) findViewById(R.id.scroll);scrollView.setOnTouchListener(new View.OnTouchListener() {@Overridepublic boolean onTouch(View v, MotionEvent event) {switch (event.getAction()) {case MotionEvent.ACTION_DOWN:Log . d ( TAG , "Finger press, Y coordinate:" + scrollView . getScrollY ());break;case MotionEvent.ACTION_UP:Log . d ( TAG , "Finger raised, Y coordinate:" + scrollView . getScrollY ());break;case MotionEvent.ACTION_MOVE:/*** scrollView.getScrollY(): vertical distance scrolled by ScrollView* scrollView.getHeight(): the height of one screen* scrollView.getChildAt(0).getMeasuredHeight(): the total height of the child tags inside the ScrollView* Here is the total height of the TextView**/Log . d ( TAG , "Finger swipe, Y coordinate:" + scrollView . getScrollY () +",scrollView.getHeight():" +scrollView.getHeight() +",scrollView.getChildAt(0).getMeasuredHeight():" +scrollView.getChildAt(0).getMeasuredHeight() +",scrollView.getMeasuredHeight():" +scrollView.getMeasuredHeight());// Whether to slide to the bottom of the scroll bar: The total height of the TextView <= the height of a screen +// The vertical distance of the ScrollView scrollif (scrollView.getChildAt(0).getMeasuredHeight() <= scrollView.getHeight() +scrollView.getScrollY()) {Log . d ( TAG , "Already to the bottom bird!" );textView.append(getResources().getString(R.string.content));}}return false;}});}@Overridepublic void onClick(View v) {/*** scrollTo: each time the relative distance is scrolled from the starting (X or Y axis) position* scrollBy: scroll from the last relative position*/switch (v.getId()) {case R.id.btn_up:scrollView.scrollBy(0, -30);break;case R.id.btn_down:scrollView.scrollBy(0, 30);}}
}
(b).activity_main.xml
<LinearLayout xmlns:android="http://schemas.android.com/apk/res/android"xmlns:tools="http://schemas.android.com/tools"android:layout_width="match_parent"android:layout_height="match_parent"android:orientation="vertical"tools:context=".MainActivity"><Buttonandroid:id="@+id/btn_up"android:layout_width="wrap_content"android:layout_height="wrap_content"android:text="@string/up"/><Buttonandroid:id="@+id/btn_down"android:layout_width="wrap_content"android:layout_height="wrap_content"android:text="@string/down"/><ScrollViewandroid:id="@+id/scroll"android:layout_width="wrap_content"android:layout_height="wrap_content"><TextViewandroid:id="@+id/txt"android:text="@string/hello_world"android:layout_width="wrap_content"android:layout_height="wrap_content"/></ScrollView></LinearLayout>
- NestedScrollView
Android NestedScrollView 教程和示例。
NestedScrollView 是一个 ScrollView,它能够在新旧版本的 Android 上充当嵌套滚动父项和子项。
NestedScrollView 中默认启用嵌套滚动。
在许多情况下,建议使用 NestedScrollView 而不是 ScrollView。
这是因为它具有提供更大的用户界面灵活性并支持材料设计滚动模式的能力。
NestedScrollView API 定义
NestedScrollView 是在android中添加的version 22.1.0,属于Maven artifact com.android.support:support-compat:latest_version。
与 ScrollView 一样,嵌套滚动视图也派生自 FrameLayout。
然而,它更进一步并实现了三个滚动界面:
NestedScrollingParent - 由 [ViewGroups(/android/viewgroup)] 实现的接口,希望支持由嵌套子视图委托的滚动操作。
NestedScrollingChild2 - 由希望支持将嵌套滚动操作分派到协作父 ViewGroup 的 View 子类实现的接口。
ScrollingView - 一个可以由 Views 实现的接口,提供滚动相关的 API。
public class NestedScrollView extends FrameLayout implements NestedScrollingParent, NestedScrollingChild2, ScrollingView
这是nestedscrollview的继承层次结构:
java.lang.Object↳ android.view.View↳ android.view.ViewGroup↳ android.widget.FrameLayout↳ android.support.v4.widget.NestedScrollView
您可以在 android 开发人员文档中找到完整的 API 参考。
快速嵌套滚动视图示例
1.如何通过子视图计算NestedScrollView的高度
public static int caculateHeightByView(NestedScrollView scrollView, View viewin) {int topAll = viewin.getTop();ViewParent p = viewin.getParent();while (p != null) {topAll += ((View) p).getTop();if (p instanceof NestedScrollView) {break;}p = p.getParent();}return topAll;}
HorizontalScrollView
Android HorizontalScrollView 教程和示例。
HorizontalScrollView 是一个视图层次结构的布局容器,可以由用户滚动,允许它大于物理显示。
顾名思义,您可以使用HorizontalScrollView进行水平滚动。如果你想垂直滚动,那么你可以使用 ScrollView 甚至更好的 NestedScrollView。
所有这些“滚动视图”,包括 HorizontalScrollView,都源自 FrameLayout。
因此,您应该努力只放置一个孩子。然后那个孩子可以有多个其他视图。
很多人喜欢使用水平方向的LinearLayout。因此提供了一种很好且简单的方式来显示然后滚动水平排列的视图。
请注意,某些视图能够处理自己的滚动。这就是 textView。因此,它不需要HorizontalScrollView。
HorizontalScrollView API 定义
添加了 HorizontalScrollViewAPI level 3实际上比您想象的要多。
我们说它派生自 FrameLayout
public class HorizontalScrollView extends FrameLayout
这是它的继承树:
java.lang.Object↳ android.view.View↳ android.view.ViewGroup↳ android.widget.FrameLayout↳ android.widget.HorizontalScrollView
HorizontalScrollView 示例
即将推出。
- StickyScrollView
StickyScrollView 是一个库,它为您提供带有自定义页眉和页脚的滚动视图。它非常适合显示细节,例如产品细节。您可能知道 scrollview 是一种允许滚动其子项的布局。
好吧 StickScrollview 为您提供与滚动视图相同的功能,但允许您添加页眉和页脚。
StickyScrollView 是用 Java 编写的并扩展了 ScrollView 类:
public class StickyScrollView extends ScrollView implements IStickyScrollPresentation {//...
安装
StickScrollView 托管在 Maven jitpack 中,因此首先要安装到您的根级 build/gradle 并将 jitpack 注册为存储库:
allprojects {repositories {...maven { url "https://jitpack.io" }}
}
然后将其添加为依赖项:
dependencies {implementation 'com.github.amarjain07:StickyScrollView:1.0.2'
}
如何使用它
好吧,它是一个布局,所以它的用法非常简单:
<com.amar.library.ui.StickyScrollViewxmlns:app="http://schemas.android.com/apk/res-auto"android:layout_width="match_parent"android:layout_height="match_parent"app:stickyHeader="@+id/titleLayout"app:stickyFooter="@+id/buttonLayout">...<LinearLayoutandroid:id="@+id/titleLayout"android:layout_width="match_parent"android:layout_height="wrap_content">...</LinearLayout><LinearLayoutandroid:id="@+id/buttonLayout"android:layout_width="match_parent"android:layout_height="wrap_content">...</LinearLayout>...</com.amar.library.ui.StickyScrollView>
完整的例子
首先按照上面的说明安装。然后确保您的最低 API 级别为 API 16 或更高。
(a).activity_main.xml
<?xml version="1.0" encoding="utf-8"?>
<com.amar.library.ui.StickyScrollView xmlns:android="http://schemas.android.com/apk/res/android"xmlns:app="http://schemas.android.com/apk/res-auto"xmlns:tools="http://schemas.android.com/tools"android:id="@+id/scrollView"android:layout_width="match_parent"android:layout_height="match_parent"app:stickyFooter="@+id/buttons"app:stickyHeader="@+id/title"tools:context="com.amar.sample.MainActivity"><LinearLayoutandroid:layout_width="match_parent"android:layout_height="wrap_content"android:orientation="vertical"><ImageViewandroid:layout_width="match_parent"android:layout_height="420dp"android:src="@drawable/nike" /><Viewandroid:layout_width="match_parent"android:layout_height="0.1dp"android:background="@android:color/darker_gray" /><LinearLayoutandroid:id="@+id/title"android:layout_width="match_parent"android:layout_height="wrap_content"android:background="@android:color/white"android:orientation="vertical"android:padding="15dp"><TextViewandroid:layout_width="wrap_content"android:layout_height="wrap_content"android:text="Product Title"android:textStyle="bold" /><TextViewandroid:layout_width="wrap_content"android:layout_height="wrap_content"android:text="Product Description goes here"android:textStyle="italic" /></LinearLayout><Viewandroid:layout_width="match_parent"android:layout_height="0.1dp"android:background="@android:color/darker_gray" /><LinearLayoutandroid:id="@+id/offer"android:layout_width="match_parent"android:layout_height="wrap_content"android:orientation="vertical"android:padding="15dp"><TextViewandroid:layout_width="wrap_content"android:layout_height="wrap_content"android:text="Product Offer"android:textStyle="bold" /><TextViewandroid:layout_width="wrap_content"android:layout_height="wrap_content"android:text="Product Offer Desc goes here"android:textStyle="italic" /></LinearLayout><Viewandroid:layout_width="match_parent"android:layout_height="0.1dp"android:background="@android:color/darker_gray" /><LinearLayoutandroid:layout_width="match_parent"android:layout_height="wrap_content"android:orientation="vertical"android:padding="15dp"><TextViewandroid:layout_width="wrap_content"android:layout_height="wrap_content"android:text="Product Similar"android:textStyle="bold" /><TextViewandroid:layout_width="wrap_content"android:layout_height="wrap_content"android:text="Similar goes here"android:textStyle="italic" /></LinearLayout><LinearLayoutandroid:id="@+id/buttons"android:layout_width="match_parent"android:layout_height="wrap_content"><TextViewandroid:id="@+id/save"android:layout_width="match_parent"android:layout_height="match_parent"android:layout_weight="1"android:background="#535766"android:drawableLeft="@mipmap/ic_wishlist"android:gravity="center"android:padding="15dp"android:text="SAVE"android:textColor="@android:color/white"android:textSize="14sp" /><TextViewandroid:id="@+id/buy"android:layout_width="match_parent"android:layout_height="match_parent"android:layout_weight="1"android:background="#0BC6A0"android:drawableLeft="@mipmap/ic_bag"android:gravity="center"android:maxLines="1"android:text="BUY"android:textColor="@android:color/white"android:textSize="14sp" /></LinearLayout><LinearLayoutandroid:layout_width="match_parent"android:layout_height="wrap_content"android:orientation="vertical"android:padding="15dp"><TextViewandroid:layout_width="wrap_content"android:layout_height="wrap_content"android:text="Other product related info goes here!"android:textStyle="bold" /><TextViewandroid:layout_width="wrap_content"android:layout_height="wrap_content"android:text="You can add more data here"android:textStyle="italic" /></LinearLayout><Viewandroid:layout_width="match_parent"android:layout_height="0.1dp"android:background="@android:color/darker_gray" /><TextViewandroid:layout_width="wrap_content"android:layout_height="wrap_content"android:padding="15dp"android:text="More colors"android:textStyle="bold" /><LinearLayoutandroid:layout_width="match_parent"android:layout_height="wrap_content"android:orientation="horizontal"><ImageViewandroid:layout_width="0dp"android:layout_height="220dp"android:layout_weight="1"android:src="@drawable/similar_1" /><ImageViewandroid:layout_width="0dp"android:layout_height="620dp"android:layout_weight="1"android:src="@drawable/similar_2" /></LinearLayout></LinearLayout>
</com.amar.library.ui.StickyScrollView>
(b).MainActivity.java
首先添加您的导入,包括 StickyScrollView 库:
import android.support.v7.app.AppCompatActivity;
import android.os.Bundle;
import android.view.View;
import android.widget.Toast;import com.amar.library.ui.StickyScrollView;
然后创建您的活动类:
public class MainActivity extends AppCompatActivity implements View.OnClickListener {
将 StickyScrollView 定义为实例字段:
private StickyScrollView scrollView;
在 onCreate() 方法中引用视图:
@Overrideprotected void onCreate(Bundle savedInstanceState) {super.onCreate(savedInstanceState);setContentView(R.layout.activity_main);scrollView = (StickyScrollView) findViewById(R.id.scrollView);findViewById(R.id.buy).setOnClickListener(this);findViewById(R.id.save).setOnClickListener(this);findViewById(R.id.title).setOnClickListener(this);}
现在处理点击事件:
@Overridepublic void onClick(View v) {switch (v.getId()) {case R.id.buy:Toast.makeText(this, scrollView.isFooterSticky() ? "Footer is Sticky" : "Footer is not sticky", Toast.LENGTH_SHORT).show();break;case R.id.save:Toast.makeText(this, scrollView.isFooterSticky() ? "Footer is Sticky" : "Footer is not sticky", Toast.LENGTH_SHORT).show();break;case R.id.title:Toast.makeText(this, scrollView.isHeaderSticky() ? "Header is Sticky" : "Header is not sticky", Toast.LENGTH_SHORT).show();break;}}
这是完整的代码:
package com.amar.sample;import android.support.v7.app.AppCompatActivity;
import android.os.Bundle;
import android.view.View;
import android.widget.Toast;import com.amar.library.ui.StickyScrollView;public class MainActivity extends AppCompatActivity implements View.OnClickListener {private StickyScrollView scrollView;@Overrideprotected void onCreate(Bundle savedInstanceState) {super.onCreate(savedInstanceState);setContentView(R.layout.activity_main);scrollView = (StickyScrollView) findViewById(R.id.scrollView);findViewById(R.id.buy).setOnClickListener(this);findViewById(R.id.save).setOnClickListener(this);findViewById(R.id.title).setOnClickListener(this);}@Overridepublic void onClick(View v) {switch (v.getId()) {case R.id.buy:Toast.makeText(this, scrollView.isFooterSticky() ? "Footer is Sticky" : "Footer is not sticky", Toast.LENGTH_SHORT).show();break;case R.id.save:Toast.makeText(this, scrollView.isFooterSticky() ? "Footer is Sticky" : "Footer is not sticky", Toast.LENGTH_SHORT).show();break;case R.id.title:Toast.makeText(this, scrollView.isHeaderSticky() ? "Header is Sticky" : "Header is not sticky", Toast.LENGTH_SHORT).show();break;}}
}
这是演示:

Android StickyScrollView
Android StickyScrollView
特别感谢@amarjain07提供了这个很棒的库和示例。
下载范例
5.Parallax Scroll
Android 视差滚动库教程和示例。
ParallaxScroll 是一个库,它为我们提供了适用于 Android 的Parallax ScrollView 和ListView。
ParallaxScroll 通过这些特殊的适配器视图丰富了我们:
视差列表视图。
视差可扩展列表视图。
ParallaxScrollView。
这个库是由Nir Hartmann创建的。
该库已存在 5 年多,并且仍在积极维护中。它还包含我们稍后将探讨的示例。
ParallaxScroll 支持Android 1.6及以上。
演示版
Android 视差滚动

Android 视差滚动
在此处查看 Google Play 上的演示应用程序。
ParallaxScrollView 内部细节
在跳到使用示例之前,让我们探索视差的内部细节。我们希望看到构建库的几个类,以便我们甚至可以扩展。
(a).ParallaxScrollView
这是内部派生自 ScrollView 的类。
大家都知道,scrollview 是一个视图层次结构的 Layout 容器,可以被用户滚动,允许它大于物理显示。
与大多数 View 资源一样,ParallaxScrollView公开了三个公共构造函数:
public ParallaxScrollView(Context context, AttributeSet attrs, int defStyle) {}public ParallaxScrollView(Context context, AttributeSet attrs) {}public ParallaxScrollView(Context context) {}
(a).ParallaxListView
ParallaxListView派生自ListView类:
public class ParallaxListView extends ListView {..}
它还有三个构造函数,我们可以用来创建它的实例:
public ParallaxListView(Context context, AttributeSet attrs, int defStyle) {}public ParallaxListView(Context context, AttributeSet attrs) {}protected void init(Context context, AttributeSet attrs) {}
它继续向我们公开一些除了普通 ListView 方法之外我们可以使用的方法:
@Overridepublic void setOnScrollListener(OnScrollListener l);public void addParallaxedHeaderView(View v);public void addParallaxedHeaderView(View v, Object data, boolean isSelectable) ;
(C).ParallaxExpandableListView
ParallaxExpandableListView 将视差滚动添加到它派生的 ExpandableListView。
public class ParallaxExpandableListView extends ExpandableListView {..}
这个类为我们提供了两个用于创建对象的构造函数:
public ParallaxExpandableListView(Context context, AttributeSet attrs, int defStyle) {}public ParallaxExpandableListView(Context context, AttributeSet attrs) {}
除了从 ExpandableListView 派生的方法之外,这里还有一些我们可以使用的方法。
@Overridepublic void setOnScrollListener(OnScrollListener l) {}public void addParallaxedHeaderView(View v) {super.addHeaderView(v);}public void addParallaxedHeaderView(View v, Object data, boolean isSelectable) {}
安装视差滚动
您可以通过 gradle 从它的 maven 存储库安装 ParallaxScroll。
在 android 1.6 及更高版本中你需要的一切。然后在应用级 build.gradle 中添加以下实现语句:
implementation 'com.github.nirhart:parallaxscroll:1.0'
然后您同步项目以将库文件添加到您的项目中。
使用视差滚动
假设您想使用 a ScrollView,那么您可以在布局中添加以下内容。
<com.nirhart.parallaxscroll.views.ParallaxScrollView xmlns:android="http://schemas.android.com/apk/res/android"xmlns:tools="http://schemas.android.com/tools"xmlns:app="http://schemas.android.com/apk/res-auto"android:layout_width="match_parent"android:layout_height="match_parent"app:parallax_factor="1.9"tools:context=".MainActivity" ><LinearLayoutandroid:layout_width="match_parent"android:layout_height="wrap_content"android:orientation="vertical" ><TextViewandroid:layout_width="match_parent"android:layout_height="200dp"android:background="@drawable/item_background"android:gravity="center"android:text="PARALLAXED"android:textSize="50sp"tools:ignore="HardcodedText" /><TextViewandroid:layout_width="match_parent"android:layout_height="wrap_content"android:text="Lorem ipsum dolor sit amet, consectetur adipisicing elit, sed do eiusmod tempor incididunt ut labore et dolore magna aliqua. Ut enim ad minim veniam, quis nostrud exercitation ullamco laboris nisi ut aliquip ex ea commodo consequat. Duis aute irure dolor in reprehenderit in voluptate velit esse cillum dolore eu fugiat nulla pariatur. Excepteur sint occaecat cupidatat non proident, sunt in culpa qui officia deserunt mollit anim id est laborum. Lorem ipsum dolor sit amet, consectetur adipisicing elit, sed do eiusmod tempor incididunt ut labore et dolore magna aliqua. Ut enim ad minim veniam, quis nostrud exercitation ullamco laboris nisi ut aliquip ex ea commodo consequat. Duis aute irure dolor in reprehenderit in voluptate velit esse cillum dolore eu fugiat nulla pariatur. Excepteur sint occaecat cupidatat non proident, sunt in culpa qui officia deserunt mollit anim id est laborum."android:textSize="26sp"android:background="@android:color/white"android:padding="5dp"tools:ignore="HardcodedText" /></LinearLayout></com.nirhart.parallaxscroll.views.ParallaxScrollView>
在这种情况下,我们使用了 aParallaxScrollView并在其中放置了一个带有将滚动的文本内容的LinearLayout。
那么你也可以在你的布局中添加一个ParallaxListView和ParallaxExpandableListView。
完整的视差滚动示例。
这是一个例子。
- Single Parallax ListView example 单视差 ListView 示例。
让我们从查看我们的SingleParallaxListView示例开始。
(a).CustomListAdapter.java
我们从编写适配器类开始。它将派生自 BaseAdapter。
package com.nirhart.parallaxscrollexample;import android.view.LayoutInflater;
import android.view.View;
import android.view.ViewGroup;
import android.widget.BaseAdapter;
import android.widget.TextView;public class CustomListAdapter extends BaseAdapter {private LayoutInflater inflater;public CustomListAdapter(LayoutInflater inflater) {this.inflater = inflater;}@Overridepublic int getCount() {return 20;}@Overridepublic Object getItem(int position) {return null;}@Overridepublic long getItemId(int position) {return 0;}@Overridepublic View getView(int position, View convertView, ViewGroup parent) {TextView textView = (TextView) convertView;if (textView == null)textView = (TextView) inflater.inflate(R.layout.item, null);textView.setText("Item " + position);return textView;}
}
(b)。SingleParallaxListView.java
这是我们的活动课。此活动将包含我们的 ParallaxListView。
package com.nirhart.parallaxscrollexample;
import android.app.Activity;
import android.content.Intent;
import android.net.Uri;
import android.os.Bundle;
import android.view.Gravity;
import android.view.LayoutInflater;
import android.view.Menu;
import android.view.MenuInflater;
import android.view.MenuItem;
import android.widget.TextView;import com.nirhart.parallaxscroll.views.ParallaxListView;public class SingleParallaxListView extends Activity {@Overrideprotected void onCreate(Bundle savedInstanceState) {super.onCreate(savedInstanceState);setContentView(R.layout.list_one_parallax);ParallaxListView listView = (ParallaxListView) findViewById(R.id.list_view);CustomListAdapter adapter = new CustomListAdapter(LayoutInflater.from(this));TextView v = new TextView(this);v.setText("PARALLAXED");v.setGravity(Gravity.CENTER);v.setTextSize(40);v.setHeight(200);v.setBackgroundResource(R.drawable.item_background);listView.addParallaxedHeaderView(v);listView.setAdapter(adapter);}@Overridepublic boolean onCreateOptionsMenu(Menu menu) {MenuInflater inflater = getMenuInflater();inflater.inflate(R.menu.main, menu);return true;}@Overridepublic boolean onOptionsItemSelected(MenuItem item) {if (item.getItemId() == R.id.action_github) {Intent browserIntent = new Intent(Intent.ACTION_VIEW, Uri.parse("https://github.com/nirhart/ParallaxScroll"));startActivity(browserIntent);}return true;}
}
(C).list_one_parallax.xml
您可以看到这是将膨胀到我们的SingleParallaxListView.
<com.nirhart.parallaxscroll.views.ParallaxListView xmlns:android="http://schemas.android.com/apk/res/android"xmlns:tools="http://schemas.android.com/tools"xmlns:app="http://schemas.android.com/apk/res-auto"android:id="@+id/list_view"android:layout_width="match_parent"android:layout_height="match_parent"app:parallax_factor="1.9"tools:context=".MainActivity" />
- 多视差 ListView 示例。
我们正在使用CustomListAdapter我们已经定义的。
(a)。MultipleParallaxListView.java
package com.nirhart.parallaxscrollexample;import android.app.Activity;
import android.content.Intent;
import android.net.Uri;
import android.os.Bundle;
import android.view.LayoutInflater;
import android.view.Menu;
import android.view.MenuInflater;
import android.view.MenuItem;import com.nirhart.parallaxscroll.views.ParallaxListView;public class MultipleParallaxListView extends Activity {@Overrideprotected void onCreate(Bundle savedInstanceState) {super.onCreate(savedInstanceState);setContentView(R.layout.list_multiple_parallax);ParallaxListView listView = (ParallaxListView) findViewById(R.id.list_view);CustomListAdapter adapter = new CustomListAdapter(LayoutInflater.from(this));listView.setAdapter(adapter);}@Overridepublic boolean onCreateOptionsMenu(Menu menu) {MenuInflater inflater = getMenuInflater();inflater.inflate(R.menu.main, menu);return true;}@Overridepublic boolean onOptionsItemSelected(MenuItem item) {if (item.getItemId() == R.id.action_github) {Intent browserIntent = new Intent(Intent.ACTION_VIEW, Uri.parse("https://github.com/nirhart/ParallaxScroll"));startActivity(browserIntent);}return true;}
}
(b) list_multiple_parallax.xml
<com.nirhart.parallaxscroll.views.ParallaxListView xmlns:android="http://schemas.android.com/apk/res/android"xmlns:tools="http://schemas.android.com/tools"xmlns:app="http://schemas.android.com/apk/res-auto"android:id="@+id/list_view"android:layout_width="match_parent"android:layout_height="match_parent"app:parallax_factor="1.9"app:circular_parallax="true"tools:context=".MainActivity" />
单视差 ScrollView 示例
现在让我们看一下单视差滚动视图示例。
(a).SingleParallaxScrollView.java
package com.nirhart.parallaxscrollexample;import android.app.Activity;
import android.content.Intent;
import android.net.Uri;
import android.os.Bundle;
import android.view.Menu;
import android.view.MenuInflater;
import android.view.MenuItem;public class SingleParallaxScrollView extends Activity {@Overrideprotected void onCreate(Bundle savedInstanceState) {super.onCreate(savedInstanceState);setContentView(R.layout.scroll_one_parallax);}@Overridepublic boolean onCreateOptionsMenu(Menu menu) {MenuInflater inflater = getMenuInflater();inflater.inflate(R.menu.main, menu);return true;}@Overridepublic boolean onOptionsItemSelected(MenuItem item) {if (item.getItemId() == R.id.action_github) {Intent browserIntent = new Intent(Intent.ACTION_VIEW, Uri.parse("https://github.com/nirhart/ParallaxScroll"));startActivity(browserIntent);}return true;}
}
(b) scroll_one_parallax.xml
<com.nirhart.parallaxscroll.views.ParallaxScrollView xmlns:android="http://schemas.android.com/apk/res/android"xmlns:tools="http://schemas.android.com/tools"xmlns:app="http://schemas.android.com/apk/res-auto"android:layout_width="match_parent"android:layout_height="match_parent"app:parallax_factor="1.9"tools:context=".MainActivity" ><LinearLayoutandroid:layout_width="match_parent"android:layout_height="wrap_content"android:orientation="vertical" ><TextViewandroid:layout_width="match_parent"android:layout_height="200dp"android:background="@drawable/item_background"android:gravity="center"android:text="PARALLAXED"android:textSize="50sp"tools:ignore="HardcodedText" /><TextViewandroid:layout_width="match_parent"android:layout_height="wrap_content"android:text="Lorem ipsum dolor sit amet, consectetur adipisicing elit, sed do eiusmod tempor incididunt ut labore et dolore magna aliqua. Ut enim ad minim veniam, quis nostrud exercitation ullamco laboris nisi ut aliquip ex ea commodo consequat. Duis aute irure dolor in reprehenderit in voluptate velit esse cillum dolore eu fugiat nulla pariatur. Excepteur sint occaecat cupidatat non proident, sunt in culpa qui officia deserunt mollit anim id est laborum. Lorem ipsum dolor sit amet, consectetur adipisicing elit, sed do eiusmod tempor incididunt ut labore et dolore magna aliqua. Ut enim ad minim veniam, quis nostrud exercitation ullamco laboris nisi ut aliquip ex ea commodo consequat. Duis aute irure dolor in reprehenderit in voluptate velit esse cillum dolore eu fugiat nulla pariatur. Excepteur sint occaecat cupidatat non proident, sunt in culpa qui officia deserunt mollit anim id est laborum."android:textSize="26sp"android:background="@android:color/white"android:padding="5dp"tools:ignore="HardcodedText" /></LinearLayout></com.nirhart.parallaxscroll.views.ParallaxScrollView>
- SingleParallaxAlphaScrollView 示例
(a) SingleParallaxAlphaScrollView.java
package com.nirhart.parallaxscrollexample;import android.app.Activity;
import android.content.Intent;
import android.net.Uri;
import android.os.Bundle;
import android.view.Menu;
import android.view.MenuInflater;
import android.view.MenuItem;public class SingleParallaxAlphaScrollView extends Activity {@Overrideprotected void onCreate(Bundle savedInstanceState) {super.onCreate(savedInstanceState);setContentView(R.layout.scroll_one_parallax_alpha);}@Overridepublic boolean onCreateOptionsMenu(Menu menu) {MenuInflater inflater = getMenuInflater();inflater.inflate(R.menu.main, menu);return true;}@Overridepublic boolean onOptionsItemSelected(MenuItem item) {if (item.getItemId() == R.id.action_github) {Intent browserIntent = new Intent(Intent.ACTION_VIEW, Uri.parse("https://github.com/nirhart/ParallaxScroll"));startActivity(browserIntent);}return true;}
}
(b) scroll_one_parallax_alpha.xml
<com.nirhart.parallaxscroll.views.ParallaxScrollView xmlns:android="http://schemas.android.com/apk/res/android"xmlns:tools="http://schemas.android.com/tools"xmlns:app="http://schemas.android.com/apk/res-auto"android:layout_width="match_parent"android:layout_height="match_parent"app:parallax_factor="1.9"app:alpha_factor="1.9"tools:context=".MainActivity" ><LinearLayoutandroid:layout_width="match_parent"android:layout_height="wrap_content"android:orientation="vertical" ><TextViewandroid:layout_width="match_parent"android:layout_height="200dp"android:background="@drawable/item_background"android:gravity="center"android:text="PARALLAXED"android:textSize="50sp"tools:ignore="HardcodedText" /><TextViewandroid:layout_width="match_parent"android:layout_height="wrap_content"android:text="Lorem ipsum dolor sit amet, consectetur adipisicing elit, sed do eiusmod tempor incididunt ut labore et dolore magna aliqua. Ut enim ad minim veniam, quis nostrud exercitation ullamco laboris nisi ut aliquip ex ea commodo consequat. Duis aute irure dolor in reprehenderit in voluptate velit esse cillum dolore eu fugiat nulla pariatur. Excepteur sint occaecat cupidatat non proident, sunt in culpa qui officia deserunt mollit anim id est laborum. Lorem ipsum dolor sit amet, consectetur adipisicing elit, sed do eiusmod tempor incididunt ut labore et dolore magna aliqua. Ut enim ad minim veniam, quis nostrud exercitation ullamco laboris nisi ut aliquip ex ea commodo consequat. Duis aute irure dolor in reprehenderit in voluptate velit esse cillum dolore eu fugiat nulla pariatur. Excepteur sint occaecat cupidatat non proident, sunt in culpa qui officia deserunt mollit anim id est laborum."android:textSize="26sp"android:background="@android:color/white"android:padding="5dp"tools:ignore="HardcodedText" /></LinearLayout></com.nirhart.parallaxscroll.views.ParallaxScrollView>
SingleParallax ExpandableListView示例
(a) CustomExpandableListAdapter.java
package com.nirhart.parallaxscrollexample;import android.view.LayoutInflater;
import android.view.View;
import android.view.ViewGroup;
import android.widget.BaseExpandableListAdapter;
import android.widget.TextView;public class CustomExpandableListAdapter extends BaseExpandableListAdapter {private LayoutInflater inflater;public CustomExpandableListAdapter(LayoutInflater inflater) {this.inflater = inflater;}@Overridepublic String getChild(int groupPosition, int childPosition) {return "Group " + groupPosition + ", child " + childPosition;}@Overridepublic long getChildId(int groupPosition, int childPosition) {return 0;}@Overridepublic View getChildView(int groupPosition, int childPosition, boolean isLastChild, View convertView, ViewGroup parent) {TextView textView = (TextView) convertView;if (textView == null)textView = (TextView) inflater.inflate(R.layout.item_child, null);textView.setText(getChild(groupPosition, childPosition));return textView;}@Overridepublic int getChildrenCount(int groupPosition) {return groupPosition*2+1;}@Overridepublic String getGroup(int groupPosition) {return "Group " + groupPosition;}@Overridepublic int getGroupCount() {return 20;}@Overridepublic long getGroupId(int groupPosition) {return 0;}@Overridepublic View getGroupView(int groupPosition, boolean isExpanded, View convertView, ViewGroup parent) {TextView textView = (TextView) convertView;if (textView == null)textView = (TextView) inflater.inflate(R.layout.item, null);textView.setText(getGroup(groupPosition));return textView;}@Overridepublic boolean hasStableIds() {return false;}@Overridepublic boolean isChildSelectable(int groupPosition, int childPosition) {return false;}
}
(b)SingleParallaxExpandableListView.java
package com.nirhart.parallaxscrollexample;import android.app.Activity;
import android.content.Intent;
import android.net.Uri;
import android.os.Bundle;
import android.view.Gravity;
import android.view.LayoutInflater;
import android.view.Menu;
import android.view.MenuInflater;
import android.view.MenuItem;
import android.widget.TextView;import com.nirhart.parallaxscroll.views.ParallaxExpandableListView;public class SingleParallaxExpandableListView extends Activity {@Overrideprotected void onCreate(Bundle savedInstanceState) {super.onCreate(savedInstanceState);setContentView(R.layout.expand_list_one_parallax);ParallaxExpandableListView listView = (ParallaxExpandableListView) findViewById(R.id.list_view);TextView v = new TextView(this);v.setText("PARALLAXED");v.setGravity(Gravity.CENTER);v.setTextSize(40);v.setHeight(200);v.setBackgroundResource(R.drawable.item_background);listView.addParallaxedHeaderView(v);CustomExpandableListAdapter adapter = new CustomExpandableListAdapter(LayoutInflater.from(this));listView.setAdapter(adapter);}@Overridepublic boolean onCreateOptionsMenu(Menu menu) {MenuInflater inflater = getMenuInflater();inflater.inflate(R.menu.main, menu);return true;}@Overridepublic boolean onOptionsItemSelected(MenuItem item) {if (item.getItemId() == R.id.action_github) {Intent browserIntent = new Intent(Intent.ACTION_VIEW, Uri.parse("https://github.com/nirhart/ParallaxScroll"));startActivity(browserIntent);}return true;}
}
© expand_list_one_parallax.xml
<com.nirhart.parallaxscroll.views.ParallaxExpandableListView xmlns:android="http://schemas.android.com/apk/res/android"xmlns:tools="http://schemas.android.com/tools"xmlns:app="http://schemas.android.com/apk/res-auto"android:id="@+id/list_view"android:layout_width="match_parent"android:layout_height="match_parent"app:parallax_factor="1.9"tools:context=".MainActivity" />```您可以在下面获得完整的源示例:下载
另请查看我们的视频教程,它更详细,并逐步进行了解释。1.	GitHub	[Direct Download](https://github.com/nirhart/ParallaxScroll/tree/master/ParallaxScrollExample)
2.	GitHub	[Library](https://github.com/nirhart/ParallaxScroll)
3.	Google Play	[Demo App](https://play.google.com/store/apps/details?id=com.nirhart.parallaxscrollexample)


