环境安装
tensorflow 安装,一直不太想用mace的部分原因是不支持tensorflow2.模型, 但为了GPU(OpenCL)还是要用啊。
Shell
set -e
学习笔记: shell 中的 set -e , set +e 用法_滴水成川-CSDN博客_linux set-eset -eset命令的-e参数,linux自带的说明如下:"Exit immediately if a simple command exits with a non-zero status."也就是说,在"set -e"之后出现的代码,一旦出现了返回值非零,整个脚本就会立即退出。有的人喜欢使用这个参数,是出于保证代码安全性的考虑。但有的时候,这种美好的初衷,也会导致严重的问题。https://blog.csdn.net/xiaofei125145/article/details/39345331
tput
shell 终端terminfo命令 tput - Pyerlife - 博客园tput命令 可以更改终端功能,如移动或更改光标,更改文本属性,清除终端屏幕的特定区域等。 光标属性 在shell脚本或命令行中,可以利用tput命令改变光标属性。 利用上面参数编写一个终端时钟 shhttps://www.cnblogs.com/technologylife/p/8275044.html$0, $@
https://segmentfault.com/a/1190000021435389![]() https://segmentfault.com/a/1190000021435389
https://segmentfault.com/a/1190000021435389
asan
【内存】内存检测工具sanitizer[内存泄漏、内存越界] VS valgrind_bandaoyu的note-CSDN博客![]() https://blog.csdn.net/bandaoyu/article/details/106920878
https://blog.csdn.net/bandaoyu/article/details/106920878
bazel
绿色记忆:Bazel学习笔记https://blog.gmem.cc/bazel-study-note
bazel使用教程_A_L_A_N-CSDN博客_bazel clean查看bazel版本bazel version清除build结果bazel clean --expungebuildbazel build :<exe name> # 在BUILD所在的package目录下执行,编译指定的targetbazel build :all # 编译该package下的所有targetbazel build ... # 编译该p...https://blog.csdn.net/A_L_A_N/article/details/88018718?spm=1001.2101.3001.6650.4&utm_medium=distribute.pc_relevant.none-task-blog-2~default~CTRLIST~default-4.no_search_link&depth_1-utm_source=distribute.pc_relevant.none-task-blog-2~default~CTRLIST~default-4.no_search_link
bazel 工具函数_TH_NUM的博客-CSDN博客Bazel 官方文档不管是写WORKSPACE,BUILD、.bzl(主要是一些函数)或者其他文件,都要遵循一些Bazel的规则,有些规则是bazel内置的函数使用说明,有的规则是一些语法分析用到的。例如:cc_library( name = "mkl_dnn", srcs = glob([ "src/common/*.cpp", "src/common/*.hpp", "src/cpu/*.cpp", "src/cpu/https://blog.csdn.net/TH_NUM/article/details/107008922
Docker:
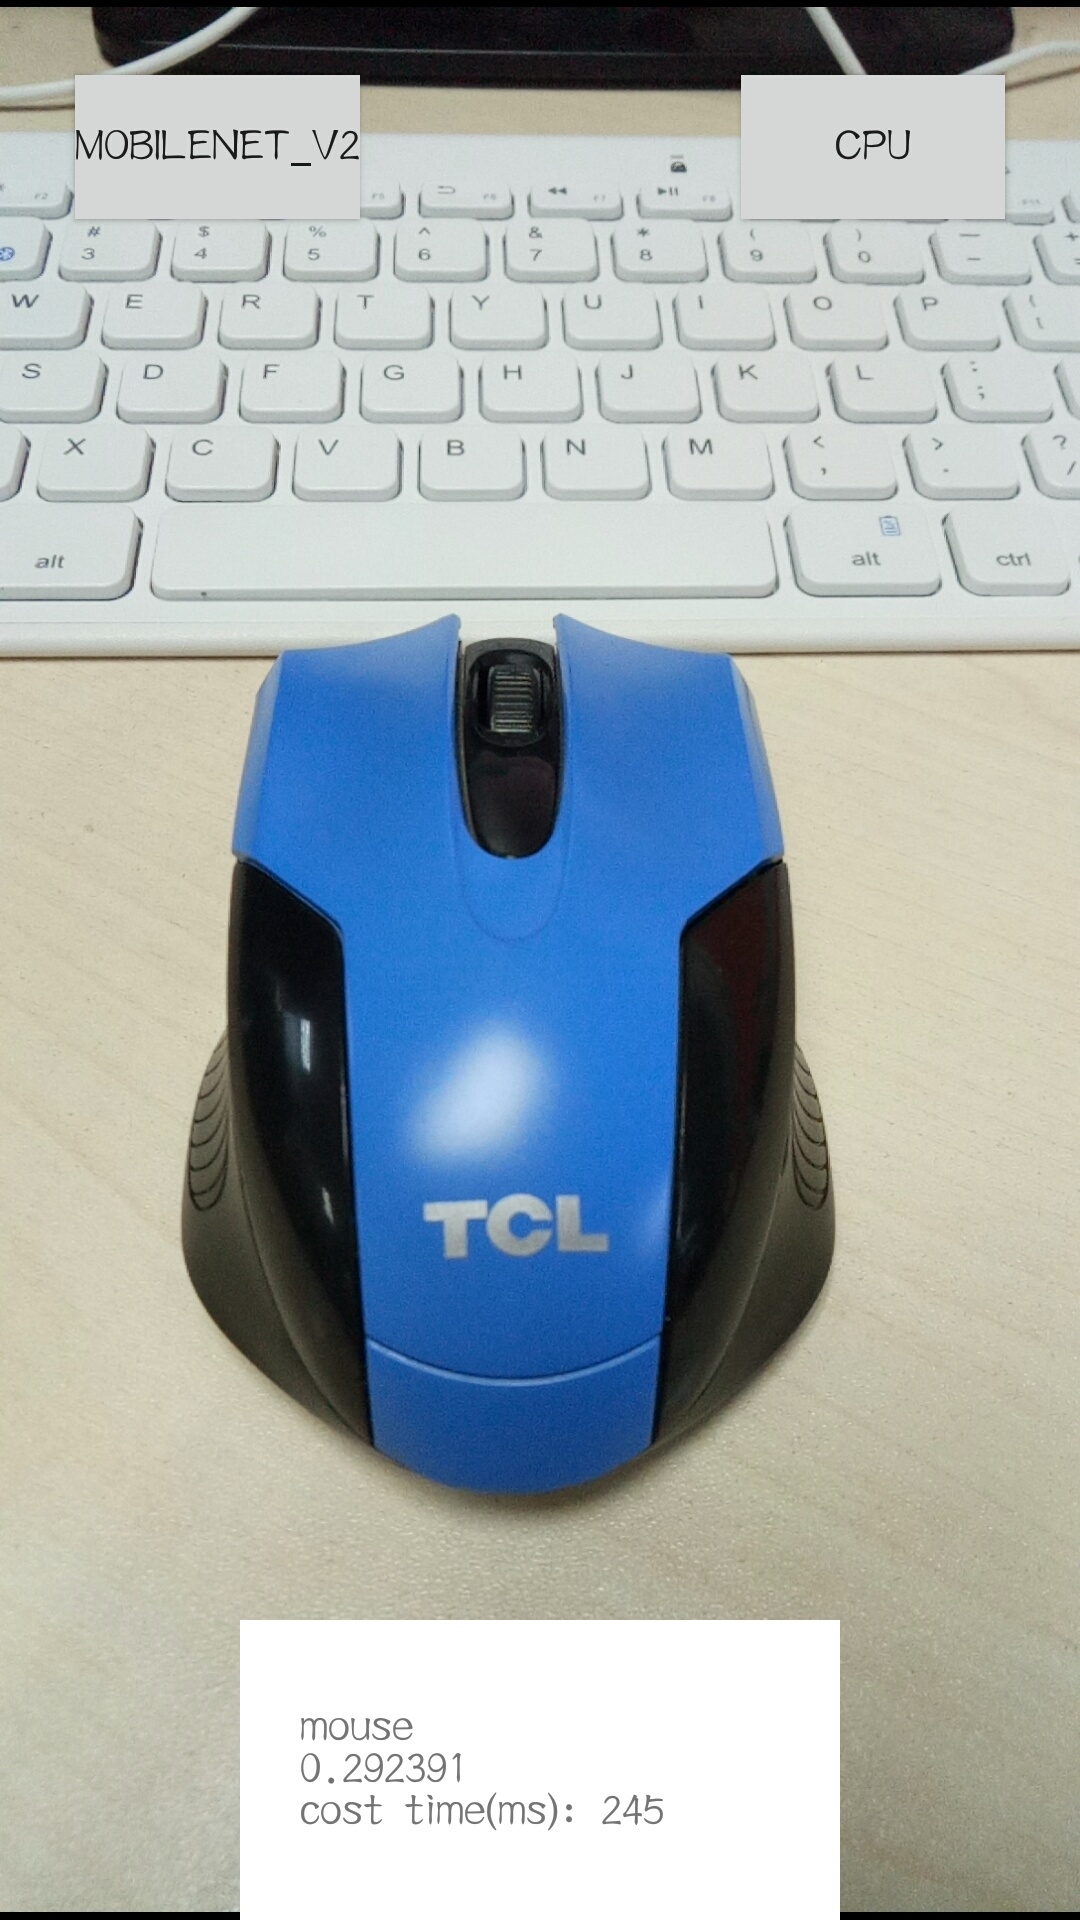
在Android手机上使用MACE实现图像分类 - 云+社区 - 腾讯云在之前笔者有介绍过《在Android设备上使用PaddleMobile实现图像分类》,使用的框架是百度开源的PaddleMobile。在本章中,笔者将会介绍使用...![]() https://cloud.tencent.com/developer/article/1623827
https://cloud.tencent.com/developer/article/1623827
配置编译环境,真的很麻烦,还是直接使用docker
apt-get install docker.io //安装docker
docker pull registry.cn-hangzhou.aliyuncs.com/xiaomimace/mace-dev
//下载mace docker
git clone https://github.com/XiaoMi/mace.git //下载mace代码,
关联docker到本地代码,一般使用docker的编译环境,而代码是本地的,如果编译环境编译、改变了本地的代码,就和本地编译没有什么区别了,最起码对开发任务透明了。
本地下载mace后,git 会自动创建 mace 目录,cd mace: 然后执行
mace git:(master) sudo docker run -it -v $PWD:/mace registry.cn-hangzhou.aliyuncs.com/xiaomimace/mace-dev
进入docker后会看到bin, home等目录这些是docker里的不是本地的,本地的目录是mace, 也是docker的目录,这样就可以使用docker 环境操作mace共享目录了
root@700c5afbd9fd:/# ls
bin boot dev etc home lib lib64 mace
mace/examples/android/build.sh文件分析
shell命令dirs、pushd、popd - 简书https://www.jianshu.com/p/29aebe08ef23
mace/tools/python/convert.py
python tools/python/convert.py --config ../mace-models/mobilenet-v2/mobilenet-v2.yml
参数相对简单
def parse_args():
parser = argparse.ArgumentParser()
parser.add_argument(
'--config',
type=str,
default="",
required=True,
help="the path of model yaml configuration file.")
parser.add_argument(
'--output',
type=str,
default="build",
help="output dir")
parser.add_argument(
"--enable_micro",
action="store_true",
help="enable convert micro.")
flgs, _ = parser.parse_known_args()
return flgs
if __name__ == '__main__':
flags = parse_args() //解析输入参数到flags
conf = config_parser.parse(flags.config) // from utils import config_parser解析yaml文件
convert(conf, flags.output, flags.enable_micro)
功能就是解析config yaml 文件,生成/输出
def convert(conf, output, enable_micro=False):
----
output_model_file = model_output + "/" + model_name + ".pb"
output_params_file = model_output + "/" + model_name + ".data"
(output_model_file + "_txt") 也是描述model file
解析保存到文件
python tools/converter.py convert --config=examples/android/mobilenet.yml --target_abis=$TARGET_ABI --debug_mode --mace_lib_type=dynamic(不起作用)
mace/tools/converter.py
pushd ../..
python tools/converter.py convert --config=examples/android/mobilenet.yml --target_abis=$TARGET_ABI
//调用了pythont/convert.py
convert.convert(configs, MODEL_CODEGEN_DIR, flags.enable_micro)
./tools/common.py:477:CODEGEN_BASE_DIR = 'mace/codegen'
./tools/common.py:478:MODEL_CODEGEN_DIR = CODEGEN_BASE_DIR + '/models'
./tools/common.py:479:ENGINE_CODEGEN_DIR = CODEGEN_BASE_DIR + '/engine'
./tools/common.py:480:LIB_CODEGEN_DIR = CODEGEN_BASE_DIR + '/lib'
./tools/common.py:481:OPENCL_CODEGEN_DIR = CODEGEN_BASE_DIR + '/opencl'
python tools/converter.py convert/run
python文件后面的 convert是输入参数吗?是怎么样解析的?
convert
parser = argparse.ArgumentParser()
subparsers = parser.add_subparsers()
convert = subparsers.add_parser(
'convert',
parents=[all_type_parent_parser, convert_run_parent_parser],
help='convert to mace model (file or code)')
convert.add_argument(
"--enable_micro",
action="store_true",
help="enable convert micro.")
convert.set_defaults(func=convert_func)
all_type_parent_parser.add_argument(
"--model_graph_format",
type=str,
default="",
help="[file, code], MACE Model graph format.")
all_type_parent_parser.add_argument(
"--model_data_format",
type=str,
default="",
help="['file', 'code'], MACE Model data format.")
def convert_func(flags):
configs = config_parser.parse(flags.config)
print(configs)
//model_graph_format: code 来着yml file
//model_data_format: code
embed_graph_def = model_graph_format == ModelFormat.code
if embed_graph_def:
os.makedirs(model_header_dir)
sh_commands.gen_mace_engine_factory_source( //生成了c++ and .h files?
configs[YAMLKeyword.models].keys(),
embed_model_data)
sh.cp("-f", glob.glob("mace/codegen/engine/*.h"),
model_header_dir)
convert.convert(configs, MODEL_CODEGEN_DIR, flags.enable_micro)
for model_name, model_config in configs[YAMLKeyword.models].items():
if flags.enable_micro:
data_type = model_config.get(YAMLKeyword.data_type, "")
if data_type != FPDataType.bf16_fp32.value:
data_type = FPDataType.fp32_fp32.value
model_codegen_dir = "%s/%s" % (MODEL_CODEGEN_DIR, model_name)
# encrypt file
encrypt.encrypt(model_name,
"%s/model/%s.pb" % (model_codegen_dir, model_name),
"%s/model/%s.data" % (model_codegen_dir, model_name),
model_codegen_dir,
bool(model_config.get(YAMLKeyword.obfuscate, 1)),
model_graph_format == "code",
model_data_format == "code")
# code then build
if model_graph_format == ModelFormat.code:
build_model_lib(configs, flags.address_sanitizer, flags.debug_mode)
print_library_summary(configs)
生成的文件for model
mace/mace/codegen/engine
mace/mace/codegen/models/xxx/ code, model, org_model
cc_library(
name = "generated_models",
srcs = glob(["models/**/*.cc"]),
hdrs = glob(["models/**/*.h"]),
copts = [
"-Werror",
"-Wextra",
"-Wno-missing-field-initializers",
],
deps = [
"//mace/core",
],
)
cc_library( //使用model的接口
name = "generated_mace_engine_factory", 怎么copy到另一个路径下的
hdrs = glob(["engine/*.h"]),
copts = [
"-Werror",
"-Wextra",
"-Wno-missing-field-initializers",
],
deps = [
"//include:public_headers",
],
)
codegen
➜ codegen git:(master) ✗ ls -al
-rw-rw-r-- 1 ws ws 1590 12月 20 19:46 BUILD.bazel
-rw-rw-r-- 1 ws ws 2174 12月 20 19:46 CMakeLists.txt
-rw-rw-r-- 1 ws ws 199 12月 20 19:46 model_version_script.lds
drwxrwxr-x 2 ws ws 4096 12月 20 19:46 tools
生成的文件
➜ codegen git:(master) ✗ ls -al
total 32
-rw-rw-r-- 1 ws ws 1590 12月 20 19:46 BUILD.bazel
-rw-rw-r-- 1 ws ws 2174 12月 20 19:46 CMakeLists.txt
drwxr-xr-x 2 root root 4096 12月 21 13:22 engine
drwxr-xr-x 6 root root 4096 12月 21 13:23 models
-rw-rw-r-- 1 ws ws 199 12月 20 19:46 model_version_script.lds
drwxrwxr-x 2 ws ws 4096 12月 20 19:46 tools
生成两个文件夹: engine and models 其中models 里又包含了多个文件夹,其中文件夹的名字由yaml 文件中的model的name 决定的
其中engine
➜ codegen git:(master) ✗ tree engine
engine
└── mace_engine_factory.h (yaml里的所有model都用这个接口头文件)
➜ models git:(master) ✗ ls -al
drwxr-xr-x 5 root root 4096 12月 21 13:23 mobilenet_v1
drwxr-xr-x 5 root root 4096 12月 21 13:24 mobilenet_v1_quant
drwxr-xr-x 5 root root 4096 12月 21 13:23 mobilenet_v2
drwxr-xr-x 5 root root 4096 12月 21 13:23 mobilenet_v2_quant
➜ mobilenet_v1 git:(master) ✗ ls -al
drwxr-xr-x 2 root root 4096 12月 21 13:23 code
-rw-r--r-- 1 root root 8444116 12月 21 13:23 mobilenet_v1.data
-rw-r--r-- 1 root root 16565 12月 21 13:23 mobilenet_v1.pb
drwxr-xr-x 2 root root 4096 12月 21 13:23 model
drwxr-xr-x 2 root root 4096 12月 21 13:23 org_model
其中model 里包含
➜ model git:(master) ✗ ls -al
解析出model graph
-rw-r--r-- 1 root root 53711 12月 21 13:23 default_graph_index.html
-rw-r--r-- 1 root root 8444116 12月 21 13:23 mobilenet_v1.data // 训练得到的参数
-rw-r--r-- 1 root root 16565 12月 21 13:23 mobilenet_v1.pb // 网络结构
-rw-r--r-- 1 root root 36987 12月 21 13:23 mobilenet_v1.pb_txt //可读的网络结构
code
➜ code git:(master) ✗ ls
default_graph_graph.cc default_graph_tensor34.cc
default_graph_op0.cc default_graph_tensor35.cc
default_graph_op1.cc default_graph_tensor36.cc
default_graph_op2.cc default_graph_tensor37.cc
default_graph_op3.cc default_graph_tensor38.cc
default_graph_tensor31.cc mobilenet_v1.h
default_graph_tensor32.cc model.cc
default_graph_tensor33.cc tensor_data.cc
def build_model_lib(configs, address_sanitizer, debug_mode):
MaceLogger.header(StringFormatter.block("Building model library"))
# create model library dir
library_name = configs[YAMLKeyword.library_name]
for target_abi in configs[YAMLKeyword.target_abis]:
model_lib_output_path = get_model_lib_output_path(library_name,
target_abi)
library_out_dir = os.path.dirname(model_lib_output_path)
if not os.path.exists(library_out_dir):
os.makedirs(library_out_dir)
toolchain = infer_toolchain(target_abi)
sh_commands.bazel_build(
MODEL_LIB_TARGET,
abi=target_abi,
toolchain=toolchain,
enable_hexagon=hexagon_enabled(configs),
enable_hta=hta_enabled(configs),
enable_apu=apu_enabled(configs),
enable_qnn=qnn_enabled(configs),
enable_opencl=opencl_enabled(configs),
enable_quantize=quantize_enabled(configs),
enable_bfloat16=bfloat16_enabled(configs),
enable_fp16=fp16_enabled(configs),
address_sanitizer=address_sanitizer,
symbol_hidden=get_symbol_hidden_mode(debug_mode),
debug_mode=debug_mode
)
sh.cp("-f", MODEL_LIB_PATH, model_lib_output_path)
向外的输出
mace/build
➜ build git:(master) ✗ tree
.
├── downloads
└── mobilenet
├── include
│ └── mace
│ └── public
│ ├── mace_engine_factory.h
│ ├── mobilenet_v1.h
│ ├── mobilenet_v1_quant.h
│ ├── mobilenet_v2.h
│ └── mobilenet_v2_quant.h
└── model
└── arm64-v8a
└── mobilenet.a
all_type_parent_parser.add_argument(
"--debug_mode",
action="store_true", // 写入即是 true, 默认是false
help="Reserve debug symbols.")
Building model library ******************************************
^[[0m * Build //mace/codegen:generated_models with ABI arm64-v8a ('build', '//mace/codegen:generated_models', '--config', 'android', '--cpu=arm64-v8a',
'--define', 'cpu_enabled=true',
'--define', 'neon=true',
'--define', 'opencl=false',
'--define', 'quantize=false',
'--define', 'bfloat16=false',
'--define', 'fp16=false',
'--define', 'rpcmem=true',
'--define', 'hexagon=false',
'--define', 'hta=false',
'--define', 'apu=false',
'--define', 'apu_version=-1',
'--define', 'qnn=false',
'--config', 'debug')
Build done!
^[[92m--------------------------------------------------------------
Library --------------------------------------------------------------
| key | value |
==============================================================
| MACE Model Path| build/mobilenet/model|
--------------------------------------------------------------
| MACE Model Header Path| build/mobilenet/include/mace/public|
--------------------------------------------------------------
使用的编译工具链
59 cmake -DANDROID_ABI="arm64-v8a" \
60 -DCMAKE_TOOLCHAIN_FILE=${ANDROID_NDK_HOME}/build/cmake/android.toolchain.cmake \
61 -DANDROID_NATIVE_API_LEVEL=21 \
62 -DCMAKE_BUILD_TYPE=Release \
63 -DANDROID_STL=c++_shared \
64 -DMACE_ENABLE_NEON=${MACE_ENABLE_NEON} \
65 -DMACE_ENABLE_QUANTIZE=${MACE_ENABLE_QUANTIZE} \
66 -DMACE_ENABLE_OPENCL=${MACE_ENABLE_OPENCL} \
67 -DMACE_ENABLE_HEXAGON_DSP=${MACE_ENABLE_HEXAGON_DSP} \
68 -DMACE_ENABLE_HEXAGON_HTA=${MACE_ENABLE_HEXAGON_HTA} \
69 -DMACE_ENABLE_QNN=${MACE_ENABLE_QNN} \
70 -DMACE_ENABLE_MTK_APU=${MACE_ENABLE_MTK_APU} \
71 -DMACE_MTK_APU_VERSION=${MACE_MTK_APU_VERSION} \
72 -DMACE_ENABLE_BFLOAT16=${MACE_ENABLE_BFLOAT16} \
73 -DMACE_ENABLE_OPT_SIZE=ON \
74 -DMACE_ENABLE_OBFUSCATE=ON \
75 -DMACE_ENABLE_TESTS=ON \
76 -DMACE_ENABLE_BENCHMARKS=ON \
77 -DMACE_ENABLE_CODE_MODE=${MACE_ENABLE_CODE_MODE} \
78 -DMACE_ENABLE_RPCMEM=ON \
-DCMAKE_VERBOSE_MAKEFILE=ON \
79 -DCMAKE_INSTALL_PREFIX=install \
会打印出编译链接信息
echo $ANDROID_NDK_HOME
/opt/android-ndk-r19c
android-ndk-r19c/toolchains/llvm/prebuilt/linux-x86_64/bin
/opt/android-ndk-r19c/toolchains/llvm/prebuilt/linux-x86_64/bin/clang++ --target=aarch64-none-linux-android21
aarch64-linux-android-ar
aarch64-linux-android-objdump -s XXX.o
生成libmace.so
bazel build --config android --config optimization --config debug $BAZEL_LIBMACE_TARGET --define cpu_enabled=true --define neon=true --define opencl=true --define quantize=true --cpu=$TARGET_ABI
怎样生成含有debug信息的so
需要配置--config debug 但 --config optimization --config debug 冲突,需要去掉--config optimization, 两者不能共存
编译生成路径:
BAZEL_GEN_LIBMACE_PATH=bazel-bin/mace/libmace/libmace.so
android-ndk-r19c/sources/cxx-stl/llvm-libc++/libs/arm64-v8a/libc++_shared.so
虽然上面设置了debug, 编译出来的o/so还是没有符号表, add2line还是对应不到行号,
还需要 --cxxopt='-g'
/home/ws/Android/Sdk/ndk/android-ndk-r19c/toolchains/llvm/prebuilt/linux-x86_64/bin
➜ bin ./aarch64-linux-android-addr2line -C -f -e /home/ws/code/backup/mace_new/mace/build/lib/arm64-v8a/libmace.so 0000000000129f34
mace::(anonymous namespace)::QnnLogCallback(char const*, QnnLog_Level_t, unsigned long, std::__va_list)
/proc/self/cwd/mace/runtimes/qnn/qnn_wrapper.cc:76
ndk-depends
ndk-depends path/to/libfoo.so
Dump all dependencies of libfoo.so, in topological order, so
that any library listed in the result appears before any other
library it depends on.
ndk-depends --print-paths path/to/libfoo.so
Same as above, but also prints the path of the libraries on
your host file system.
ndk-depends -L some/other/path path/to/libfoo.so
Append 'some/other/path' to the search path for depending libraries
when looking at the dependencies for 'libfoo.so'
ndk-depends --print-direct path/to/libfoo.so
Only print the _direct_ dependencies of libfoo.so, and nothing
else, in the order they appear in the file.
ndk-depends path/to/libfoo.so --print-java
Prints a Java source fragment that corresponds to the load
of 'libfoo' with System.loadLibrary(). This lists all libraries
in reverse order, and ignores system libraries (e.g. libc.so).
ndk-depends path/to/libfoo.so --print-dot | dot -Tpng -o /tmp/graph.png
Prints the dependency graph as Graphviz .dot file, then generate
a PNG image for it.
ndk-depends --help
Print complete usage details.
➜ android-ndk-r17b git:(master) ✗ ndk-depends --print-paths
~/code/mace/examples/android/macelibrary/src/main/jniLibs/arm64-v8a/libmace.so
WARNING: Could not find library: libc++_shared.so
libmace.so -> /home/ws/code/mace/examples/android/macelibrary/src/main/jniLibs/arm64-v8a/libmace.so
libm.so -> $ /system/lib/libm.so 这里的$什么意思
liblog.so-> $ /system/lib/liblog.so
libdl.so -> $ /system/lib/libdl.so
libc.so -> $ /system/lib/libc.so
libc++_shared.so -> !! Could not find library
ndk-depends: not found - XiaoMi/Mace
使用ads 不用关心 libc++shared.so 也不会有问题,但使用build.sh 的gradle 编译必须加libc++_shared.so, 为什么?
生成 Jni
cmake file
native function
Processor affinity
https://en.wikipedia.org/wiki/Processor_affinity
Processor affinity, or CPU pinning or "cache affinity", enables the binding and unbinding of a process or a thread to a central processing unit (CPU) or a range of CPUs, so that the process or thread will execute only on the designated CPU or CPUs rather than any CPU. This can be viewed as a modification of the native central queue scheduling algorithm in a symmetric multiprocessing operating system. Each item in the queue has a tag indicating its kin processor. At the time of resource allocation, each task is allocated to its kin processor in preference to others.
Processor affinity takes advantage of the fact that remnants of a process that was run on a given processor may remain in that processor's state (for example, data in the cache memory) after another process was run on that processor. Scheduling a CPU-intensive process that has few interrupts to execute on the same processor may improve its performance by reducing degrading events such as cache misses, but may slow down ordinary programs because they would need to wait for that CPU to become available again.[1] A practical example of processor affinity is executing multiple instances of a non-threaded application, such as some graphics-rendering software.[citation needed]
Linux中CPU亲和性(affinity) - LubinLew - 博客园0、准备知识 超线程技术(Hyper-Threading):就是利用特殊的硬件指令,把两个逻辑内核(CPU core)模拟成两个物理芯片, 让单个处理器都能使用线程级并行计算,进而兼容多线程操作系统和https://www.cnblogs.com/lubinlew/p/cpu_affinity.html
93 cc_binary(
94 name = "libmace.so",
95 linkopts = if_darwin(
96 ["-Wl,-install_name,libmace.so"],
97 [
98 "-Wl,-soname,libmace.so",
99 "-Wl,--version-script",
100 "$(location //mace/libmace:mace_version_script.lds)",
101 ],
102 ),
103 linkshared = 1,
104 linkstatic = 0,
105 deps = [
106 "//mace/libmace",
107 "//mace/libmace:mace_version_script.lds",
108 ],
109 )
MACE 提供了用于模型转换、编译、测试运行、测试基准、正确性检查的命令行工具 (tools/converter.py)。Note:
tools/converter.py需要在当前工程的根目录下运行。- 当
linkshared设置为1时,build_type应为proto。此时,只支持Android设备。
986 build_arg = ""
987 if configs[YAMLKeyword.model_graph_format] == ModelFormat.code:
988 mace_check(os.path.exists(ENGINE_CODEGEN_DIR),
989 ModuleName.RUN,
990 "You should convert model first.")
991 build_arg = "--per_file_copt=mace/tools/mace_run.cc@-DMODEL_GRAPH_FORMAT_CODE" # noqa
CreateMaceEngineFromCode: 定义在mace/codegen/engine/mace_engine_factory.h(只有build type for code时才会生成)
核心数据结构是 MaceEngine: Init
CreateMaceEngineFromProto: 输入不是原始模型文件如pb, 而是 mace model:net and data
怎样使用build tpye: file 模式
为便于模型文件更新和单独创建而不是合成一个static文件(减少memory)
https://towardsdatascience.com/machine-learning-at-the-edge-a751397e5a06![]() https://towardsdatascience.com/machine-learning-at-the-edge-a751397e5a06
https://towardsdatascience.com/machine-learning-at-the-edge-a751397e5a06
小米开源框架MACE 如何构建和使用 - Cache One![]() http://www.cache.one/read/3250181使用libMACE在Android GPU上运行PyTorch模型_weixin_26739079的博客-程序员ITS404 - 程序员ITS404
http://www.cache.one/read/3250181使用libMACE在Android GPU上运行PyTorch模型_weixin_26739079的博客-程序员ITS404 - 程序员ITS404![]() https://www.its404.com/article/weixin_26739079/108259823https://programmersought.com/article/65393733144/
https://www.its404.com/article/weixin_26739079/108259823https://programmersought.com/article/65393733144/![]() https://programmersought.com/article/65393733144/
https://programmersought.com/article/65393733144/
🚀 Ejecute su modelo de PyTorch en la GPU de Android usando libMACE![]() https://manualestutor.com/desarrollador-de-android/ejecute-su-modelo-de-pytorch-en-la-gpu-de-android-usando-libmace/
https://manualestutor.com/desarrollador-de-android/ejecute-su-modelo-de-pytorch-en-la-gpu-de-android-usando-libmace/
Java demo代码


JniMaceUtils.java // 封装native接口
package com.xiaomi.mace;
public class JniMaceUtils {
static { //何时加载 so
System.loadLibrary("mace_mobile_jni");
}
public static native int maceMobilenetCreateGPUContext(
String storagePath,
String openclCacheFullPath,
int opencl_cache_reuse_policy);
public static native int maceMobilenetCreateEngine(
int ompNumThreads,
int cpuAffinityPolicy,
int gpuPerfHint,
int gpuPriorityHint,
String model,
String device);
public static native float[] maceMobilenetClassify(
float[] input);
}
package com.xiaomi.mace.demo;
import android.os.Handler;
import android.os.HandlerThread;
import android.util.Log;
import com.xiaomi.mace.JniMaceUtils;
import com.xiaomi.mace.demo.camera.MessageEvent;
import com.xiaomi.mace.demo.result.InitData;
import com.xiaomi.mace.demo.result.LabelCache;
import com.xiaomi.mace.demo.result.ResultData;
import org.greenrobot.eventbus.EventBus;
public class AppModel { //通过AppModel调用JniMaceUtils
private boolean stopClassify = false;
private Handler mJniThread;
public static AppModel instance = new AppModel();
private AppModel() {
// HandlerThread extends Thread that has a looper
HandlerThread thread = new HandlerThread("jniThread");
thread.start();
// Handler with thread and threas's message queue and looper
mJniThread = new Handler(thread.getLooper());
}
public void maceMobilenetCreateGPUContext(final InitData initData) {
mJniThread.post(new Runnable() {
@Override
public void run() {
int result = JniMaceUtils.maceMobilenetCreateGPUContext(
initData.getStoragePath());
Log.i("APPModel", "maceMobilenetCreateGPUContext result = " + result);
}
});
}
public void maceMobilenetCreateEngine(final InitData initData, final CreateEngineCallback callback) {
mJniThread.post(new Runnable() {
@Override
public void run() {
int result = JniMaceUtils.maceMobilenetCreateEngine(
initData.getOmpNumThreads(), initData.getCpuAffinityPolicy(),
initData.getGpuPerfHint(), initData.getGpuPriorityHint(),
initData.getModel(), initData.getDevice());
Log.i("APPModel", "maceMobilenetCreateEngine result = " + result);
if (result == -1) {
stopClassify = true;
MaceApp.app.mMainHandler.post(new Runnable() {
@Override
public void run() {
callback.onCreateEngineFail(InitData.DEVICES[0].equals(initData.getDevice()));
}
});
} else {
stopClassify = false;
}
}
});
}
public void maceMobilenetClassify(final float[] input) {
mJniThread.post(new Runnable() {
@Override
public void run() {
if (stopClassify) {
return;
}
long start = System.currentTimeMillis();
float[] result = JniMaceUtils.maceMobilenetClassify(input);
final ResultData resultData = LabelCache.instance().getResultFirst(result);
resultData.costTime = System.currentTimeMillis() - start;
EventBus.getDefault().post(new MessageEvent.MaceResultEvent(resultData));
}
});
}
public interface CreateEngineCallback {
void onCreateEngineFail(final boolean quit);
}
}
package com.xiaomi.mace.demo.camera;
CameraEngage.java
public void onResume() {
if (mTextureView.isAvailable()) {
openCamera(mTextureView.getWidth(), mTextureView.getHeight());
} else {
mTextureView.setSurfaceTextureListener(this);
}
}
@Override
public void onSurfaceTextureAvailable(SurfaceTexture surface, int width, int height) {
mSurfaceTexture = surface;
openCamera(width, height);
}
public void openCamera(int width, int height) {
startCapturePic();
}
private void startCapturePic() {
mBackgroundHandlerThread = new HandlerThread("captureBackground");
mBackgroundHandlerThread.start();
mBackgroundHandler = new Handler(mBackgroundHandlerThread.getLooper());
synchronized (lock) {
isCapturePic = true;
}
// post runable to messagequeue
mBackgroundHandler.post(mHandleCapturePicRunnable);
}
private Runnable mHandleCapturePicRunnable = new Runnable() {
@Override
public void run() {
synchronized (lock) {
if (isCapturePic) {
handleCapturePic();
}
}
// loop post mHandleCapturePicRunnable
mBackgroundHandler.postDelayed(mHandleCapturePicRunnable, 200);
}
};
private void handleCapturePic() {
if (mTextureView != null) {
Bitmap bitmap = mTextureView.getBitmap(FINAL_SIZE, FINAL_SIZE); //get Bitmap
if (bitmap != null) {// get
bitmap.getPixels(colorValues, 0, bitmap.getWidth(), 0, 0, bitmap.getWidth(), bitmap.getHeight());
handleColorRgbs();
bitmap.recycle();
}
}
}
private void handleColorRgbs() {
floatBuffer.rewind();
for (int i = 0; i < colorValues.length; i++) {
int value = colorValues[i];
floatBuffer.put((((value >> 16) & 0xFF) - 128f)/ 128f);
floatBuffer.put((((value >> 8) & 0xFF) - 128f) / 128f);
floatBuffer.put(((value & 0xFF) - 128f) / 128f);
}
// get input data then run model to get data
AppModel.instance.maceMobilenetClassify(floatBuffer.array());
}
package com.xiaomi.mace.demo.result;
public class InitData {
// runtime
public static final String[] DEVICES = new String[]{"CPU", "GPU"};
// models
public static final String[] MODELS = new String[]{"mobilenet_v1",
"mobilenet_v2", "mobilenet_v1_quant", "mobilenet_v2_quant"};
private static final String[] ONLY_CPU_MODELS = new String[]{
"mobilenet_v1_quant", "mobilenet_v2_quant"};
private String model;
private String device = "";
private int ompNumThreads;
private int cpuAffinityPolicy;
private int gpuPerfHint;
private int gpuPriorityHint;
private String storagePath = "";
public InitData() {
model = MODELS[0];
device = DEVICES[0];
// runtime: cpu
ompNumThreads = 2;
cpuAffinityPolicy = 1;
// runtime: gpu
gpuPerfHint = 3;
gpuPriorityHint = 3;
storagePath = Environment.getExternalStorageDirectory().getAbsolutePath() + File.separator + "mace";
Log.i("wenshuai", "storagePath for what? " + storagePath);
File file = new File(storagePath);
if (!file.exists()) {
file.mkdir();
}
}
}
// 模型输出
public class ResultData {
public String name;
public float probability;
}
// 模型能力
public class LabelCache {
private static LabelCache labelCache;
private LabelCache() {
readCacheLabelFromLocalFile();
}
private List<Float> floatList = new ArrayList<>();
private List<String> resultLabel = new ArrayList<>();
private ResultData mResultData;
}
package com.xiaomi.mace.demo;
public class CameraActivity extends Activity implements View.OnClickListener, AppModel.CreateEngineCallback {
CameraEngage mCameraEngage;
ImageView mPictureResult;
Button mSelectMode;
Button mSelectPhoneType;
CameraTextureView mCameraTextureView;
private TextView mResultView;
private InitData initData = new InitData();
@Override
protected void onCreate(Bundle savedInstanceState) {
super.onCreate(savedInstanceState);
getWindow().setFlags(WindowManager.LayoutParams.FLAG_FULLSCREEN,
WindowManager.LayoutParams.FLAG_FULLSCREEN);
setContentView(R.layout.activity_camera); // 设置资源文件
mPictureResult = findViewById(R.id.iv_picture); // iv_picture右下角一个view什么用?
mResultView = findViewById(R.id.tv_show_result); // 显示结果
mCameraTextureView = findViewById(R.id.camera_texture); // 预览窗口
mCameraEngage = CameraFactory.genCameEngage(mCameraTextureView);
mSelectMode = findViewById(R.id.tv_select_mode); // model选择
mSelectMode.setOnClickListener(this);
mSelectPhoneType = findViewById(R.id.tv_select_phone_type); //runtime 选择
mSelectPhoneType.setOnClickListener(this);
initJni(); //初始化jni
initView();
}
private void initJni() {
AppModel.instance.maceMobilenetCreateGPUContext(initData);
AppModel.instance.maceMobilenetCreateEngine(initData, this);
}
}
AppModel.instance.maceMobilenetCreateGPUContext(initData);
// GPU 初始化是调用 mace::GPUContextBuilder()
JNIEXPORT jint JNICALL
Java_com_xiaomi_mace_JniMaceUtils_maceMobilenetCreateGPUContext(
JNIEnv *env, jclass thisObj, jstring storage_path) {
MaceContext &mace_context = GetMaceContext();
// DO NOT USE tmp directory.
// Please use APP's own directory and make sure the directory exists.
const char *storage_path_ptr = env->GetStringUTFChars(storage_path, nullptr);
if (storage_path_ptr == nullptr) return JNI_ERR;
const std::string storage_file_path(storage_path_ptr);
env->ReleaseStringUTFChars(storage_path, storage_path_ptr); //这个路径什么用途?
mace_context.gpu_context = mace::GPUContextBuilder()
.SetStoragePath(storage_file_path)
.Finalize();
return JNI_OK;
}
JNIEXPORT jint JNICALL
Java_com_xiaomi_mace_JniMaceUtils_maceMobilenetCreateEngine(
JNIEnv *env, jclass thisObj,
jint num_threads, jint cpu_affinity_policy,
jint gpu_perf_hint, jint gpu_priority_hint,
jstring model_name_str, jstring device) {
MaceContext &mace_context = GetMaceContext();
// CreateMaceEngineFromCode: create the engine based on config
mace::MaceStatus create_engine_status =
CreateMaceEngineFromCode(mace_context.model_name,
nullptr,
0,
input_names,
output_names,
config,
&mace_context.engine);
}
mace_engine_factory.h
MaceStatus CreateMaceEngineFromCode(
const std::string &model_name,
const unsigned char *model_weights_data,
const size_t model_weights_data_size,
const std::vector<std::string> &input_nodes,
const std::vector<std::string> &output_nodes,
const MaceEngineConfig &config,
std::shared_ptr<MaceEngine> *engine) {
net_def = mace::mobilenet_v1::CreateNet();
engine->reset(new mace::MaceEngine(config));
model_data = mace::mobilenet_v1::LoadModelData();
const int64_t model_size = mace::mobilenet_v1::GetModelSize();
status = (*engine)->Init(net_def.get(), input_nodes, output_nodes,
model_data, model_size);
}
JNIEXPORT jfloatArray JNICALL
Java_com_xiaomi_mace_JniMaceUtils_maceMobilenetClassify(
JNIEnv *env, jclass thisObj, jfloatArray input_data) {
// using engine call into model based on inputs and get outputs
mace_context.engine->Run(inputs, &outputs);
}
vimrc for ycm
'-I',
'/home/ws/code/opensource_wenshuai_branch/mace',
'-I',
'/home/ws/code/opensource_wenshuai_branch/mace/include',
'-I',
'/home/ws/code/opensource_wenshuai_branch/mace/build/cmake-build/host',
'-I',
'/home/ws/code/opensource_wenshuai_branch/mace/build/cmake-build/host/third_party/protoc/src/protoc/src',
'-I',
'/home/ws/code/opensource_wenshuai_branch/mace/build/cmake-build/host/third_party/half/src/half',
'-I',
'/home/ws/code/opensource_wenshuai_branch/mace/build/cmake-build/host/third_party/gflags/src/gflags_gflags-build/include',
JNI
JNI role

何时使用JNI
In summary, use the JNI if your Java application must interoperate with native code that resides in the same process. (native so 在同一进程)
使用JNI的步骤

简单实例
HelloWorld.java: 声明native 函数的java class
class HelloWorld {
// a member function is a native function
private native void print();
public static void main(String[] args) {
// new a object and call its member function
new HelloWorld().print();
}
static {
// static initialze LoadLibray: libHelloWorld.so
System.loadLibrary("HelloWorld");
}
}
编译 HelloWorld.java
javac HelloWorld.java
生成 native C 头文件 HelloWorld.h
javah -jni HelloWorld
实现HelloWorld.c
#include <jni.h>
#include <stdio.h>
#include "HelloWorld.h"
JNIEXPORT void JNICALL
Java_HelloWorld_print(JNIEnv *env, jobject obj)
{
printf("Hello World!\n");
return;
}
编译native 文件为so库
cmake_minimum_required(VERSION 3.5)
project(HellWorld)
#Generate the shared library from the library sources
add_library(HelloWorld SHARED
HelloWorld.c
)
target_include_directories(HelloWorld
PRIVATE
./
/usr/lib/jvm/java-8-openjdk-amd64/include
/usr/lib/jvm/java-8-openjdk-amd64/include/linux
)
运行
java -Djava.library.path=./build HelloWorld
java -Djava.library.path=./build(so所在路径) HelloWorld(直接用class name)
Java 和 native 数据传递
Mapping of Types
Argument types in the native method declaration(java 里native的声明) have corresponding types in native programming languages(这里的native 指的是 native code).
The JNI defines a set of C and C++ types that correspond to types in the Java programming language. There are two kinds of types in the Java programming language: primitive
types such as int , float , and char , and reference types such as classes, instances,
and arrays.
In the Java programming language, strings are instances of the java.lang.String class.
The JNI treats primitive types and reference types differently. The mapping of
primitive types is straightforward. For example, the type int in the Java program-
ming language maps to the C/C++ type jint (defined in jni.h as a signed 32-bit
integer), while the type float in the Java programming language maps to the C
and C++ type jfloat (defined in jni.h as a 32-bit floating point number). 原型数据类型直接对应
The JNI passes objects to native methods as opaque references. Opaque references are C pointer types that refer to internal data structures in the Java virtual machine. The exact layout of the internal data structures, however, is hidden from the programmer. The native code must manipulate the underlying objects via the appropriate JNI functions, which are available through the JNIEnv interface pointer. For example, the corresponding JNI type for java.lang.String is
jstring . The exact value of a jstring reference is irrelevant to the native code. The native code calls JNI functions such as GetStringUTFChars to access the contents of a string. 引用如jstring这些引用的内存布局对用户是隐藏,要访问内部成员需要使用JNIEnv interface 函数
jstring to c string

String 函数分为两类: Unicode and UTF 两种编码格式
JNIEXPORT jstring JNICALL
Java_Prompt_getLine(JNIEnv *env, jobject obj, jstring prompt)
{
char buf[128];
const jbyte *str; // jni分配内存,用完要释放
str = (*env)->GetStringUTFChars(env, prompt, NULL); //jstring -> c string
if (str == NULL) {
return NULL; /* OutOfMemoryError already thrown */
}
printf("%s", str);
(*env)->ReleaseStringUTFChars(env, prompt, str);
/* We assume here that the user does not type more than
* 127 characters */
scanf("%s", buf);
return (*env)->NewStringUTF(env, buf);
}
// jni是否隐藏分配内存
JNIEXPORT jstring JNICALL
Java_Prompt_getLine(JNIEnv *env, jobject obj, jstring prompt)
{
/* assume the prompt string and user input has less than 128
characters */
char outbuf[128], inbuf[128];
int len = (*env)->GetStringLength(env, prompt);
(*env)->GetStringUTFRegion(env, prompt, 0, len, outbuf);
printf("%s", outbuf);
scanf("%s", inbuf);
return (*env)->NewStringUTF(env, inbuf);
}
primitive Array
类似jstring

JNIEXPORT jint JNICALL
Java_IntArray_sumArray(JNIEnv *env, jobject obj, jintArray arr)
{
jint *carr;
jint i, sum = 0;
carr = (*env)->GetIntArrayElements(env, arr, NULL);
if (carr == NULL) {
return 0; /* exception occurred */
}
for (i=0; i<10; i++) {
sum += carr[i];
}
(*env)->ReleaseIntArrayElements(env, arr, carr, 0);
return sum;
}
Arrays of Objects
class ObjectArrayTest {
private static native int[][] initInt2DArray(int size);
public static void main(String[] args) {
int[][] i2arr = initInt2DArray(3);
for (int i = 0; i < 3; i++) {
for (int j = 0; j < 3; j++) {
System.out.print(" " + i2arr[i][j]);
}
System.out.println();
}
}
static {
System.loadLibrary("ObjectArrayTest");
}
}
#include "ObjectArrayTest.h"
#include <jni.h>
#include <stdio.h>
JNIEXPORT jobjectArray JNICALL Java_ObjectArrayTest_initInt2DArray(JNIEnv *env,
jclass cls,
jint size) {
jobjectArray result;
int i;
// FindClass: [I: mean intArray (object)
jclass intArrCls = (*env)->FindClass(env, "[I");
if (intArrCls == NULL) {
return NULL; /* exception thrown */
}
// Create ObjectArray: intArrCls
result = (*env)->NewObjectArray(env, size, intArrCls, NULL);
if (result == NULL) {
return NULL; /* out of memory error thrown */
}
for (i = 0; i < size; i++) {
jint tmp[256]; /* make sure it is large enough! */
int j;
// create jintArray
jintArray iarr = (*env)->NewIntArray(env, size);
if (iarr == NULL) {
return NULL; /* out of memory error thrown */
}
for (j = 0; j < size; j++) {
tmp[j] = i + j;
}
// SetIntArray: 赋值IntArray by native
(*env)->SetIntArrayRegion(env, iarr, 0, size, tmp);
// 赋值ObjectArray
(*env)->SetObjectArrayElement(env, result, i, iarr);
(*env)->DeleteLocalRef(env, iarr);
}
return result;
}
输入参数:
input/output node name
MaceStatus CreateMaceEngineFromCode(
const std::string &model_name,
const unsigned char *model_weights_data,
const size_t model_weights_data_size,
const std::vector<std::string> &input_nodes,
const std::vector<std::string> &output_nodes,
const MaceEngineConfig &config,
std::shared_ptr<MaceEngine> *engine,
bool *model_data_unused = nullptr,
MaceEngine *tutor = nullptr,
bool fake_warmup = false) {
}
怎样得到input_nodes? std::vector<std:string>
元素是std::string 的 vector
参考mace/tools/mace_run.cc
Split是mace实现的函数,返回std::vector<std::string>, 输入参数是 std::string该字符串被Split的参数分割如: “inpout0, input1”
std::vector<std::string> input_names = Split(FLAGS_input_node, ',');
input/output node shape
void ParseShape(const std::string &str, std::vector<int64_t> *shape) {
std::string tmp = str;
while (!tmp.empty()) {
int dim = atoi(tmp.data());
shape->push_back(dim);
size_t next_offset = tmp.find(",");
if (next_offset == std::string::npos) {
break;
} else {
tmp = tmp.substr(next_offset + 1);
}
}
}
std::string InputShape("1, 20, 30: 2, 40, 50");
多个shape分割: Split(std::string ':')
std::vector<std::string> input_shapes = Split(FLAGS_input_shape, ':');
std::vector<std::string> output_shapes = Split(FLAGS_output_shape, ':');
const size_t input_count = input_shapes.size();
const size_t output_count = output_shapes.size();
//创建元素为shape的vector, 调用ParseShape
std::vector<std::vector<int64_t>> input_shape_vec(input_count);
std::vector<std::vector<int64_t>> output_shape_vec(output_count);
for (size_t i = 0; i < input_count; ++i) {
ParseShape(input_shapes[i], &input_shape_vec[i]);
}
for (size_t i = 0; i < output_count; ++i) {
ParseShape(output_shapes[i], &output_shape_vec[i]);
}
std::map怎么使用
#include <iostream>
#include <map>
using namespace std;
int main(void) {map<char, int> m = {{'a', 100},{'b', 200},{'c', 300},{'d', 400},{'e', 500},};auto it = m.find('c'); //fist, second指的是key,value对cout << "迭代器指向 " << it->first << " = " << it->second << endl;return 0;
}
输出:
迭代器指向 c = 300
gflags
使用gflag和glog_heroacool的专栏-CSDN博客
google的gflags官方文档(中文版)2018_hao_san_520的博客-CSDN博客_gflags下载
google的gflags官方文档(中文版)2018_hao_san_520的博客-CSDN博客_gflags下载
C++ shared_ptr使用动态数组(std::shared_ptr and std::weak_ptr with array support)_我爱加菲猫-CSDN博客_shared_ptr 数组C++ shared_ptr使用动态数组(std::shared_ptr and std::weak_ptr with array support)_我爱加菲猫-CSDN博客_shared_ptr 数组
应对端侧部署深度学习巨大挑战,解密小米深度学习框架MACE - 哔哩哔哩本文来自PaperWeekly和biendata组织的企业AI技术实战讲座,详细介绍了小米公司的深度学习在端侧落地的机遇与挑战,以及专为移动端优化的深度学习框架MACE。作者李滨,小米AI实验室工程师。一、背景介绍小米是一家以技术立业的公司,自研技术已经成为小米AI技术能力的主要部分。具体来看,小米的AI能力主要分为上图中显示的5个层次,从底层的基础云服务到AI核心技术、AI应用、人工智能开放平台,再到最上层的生态场景,小米都有布局。回到大背景来看,近些年深度学习在视觉、语音和NLP等领域应用越https://www.bilibili.com/read/cv6621319

