文章目录
- JAVA ANNOTATION PROCESSING
- 引言
- 代码实现
- annotation-processor
- 实现一个 `Processor`
- 创建 `AbstractProcessor` 的子类
- app
- 测试
- Reference
JAVA ANNOTATION PROCESSING
引言
源码级别的注解处理最开始出现于 JAVA 5 中, 它提供了一种在编译期生成额外 “源文件” 的机制. 请注意这个 “源文件” 甚至可以不是 Java 文件, 开发者可以根据源码中的注解利用这一机制, 生成任意文件, 如 描述文件,
资源文件, 元数据文件甚至是文档等等.
本文将利用 Java Annotation Processing 的机制在编译期为目标 Class
生成额外的源文件. 代码仓库地址.
注解处理通过多个阶段实现, 每一个阶段开始, 编译器都从源码中搜寻注解并选择能够处理它们的编译器来处理. JAVA 注解处理的相关特性提供于包 javax.annotation.processing 中,
但其已经有一个部分实现的抽象类 AbstractProcessor, 所以最终我们只需要继承这个抽象类即可.
为了测试 JAVA ANNOTATION PROCESSING 的能力, 我们需要构建两个模块, 其中 annotation-processor 提供注解的能力: 包含处理器本身以及一个自定义的注解, app 模块用于应用其能力并做测试: 包含被注解标注的类.
代码实现
假设在 app 中有一个简单的 Java 类, 形如:
public class Person {private int age;private String name;// ~ getters and setters
}
我们想通过 JAVA ANNOTATION PROCESSING 为其提供一个构造器, 类似 lombok 的 @Builder 做的工作, 期望能让 Person 可以以构造模式的思想来构造, 形如:
// ~ PersonBuilder
Person person = new PersonBuilder().setAge(25).setName("caplike").build();
马上开始!
annotation-processor
负责注解处理. 在本例的逻辑中, 我们会实现, 扫描标记了 @BuilderProperty 的 set 方法, 并生成对应的构造器. 该模块的依赖如下, 我们将会使用到 Google 的 auto-service 库用于生成处理器的元数据文件.
关于 Auto Service
Java annotation processors and other systems use java.util.ServiceLoader to register implementations of well-known types using META-INF metadata. However, it is easy for a developer to forget to update or correctly specify the service descriptors.
AutoService generates this metadata for the developer, for any class annotated with@AutoService, avoiding typos, providing resistance to errors from refactoring, etc.推荐阅读: ServiceLoader 的原理与设计思想
<dependencies><dependency><groupId>com.google.auto.service</groupId><artifactId>auto-service</artifactId><version>${auto-service.version}</version><scope>provided</scope></dependency><dependency><groupId>org.apache.commons</groupId><artifactId>commons-lang3</artifactId></dependency><dependency><groupId>org.projectlombok</groupId><artifactId>lombok</artifactId></dependency><dependency><groupId>ch.qos.logback</groupId><artifactId>logback-classic</artifactId></dependency></dependencies><build><plugins><plugin><groupId>org.apache.maven.plugins</groupId><artifactId>maven-compiler-plugin</artifactId><version>${maven-compiler-plugin.version}</version><configuration><source>1.8</source><target>1.8</target></configuration></plugin></plugins>
</build>
思路是: 为 POJO 的 set 方法提供一个注解, 然后 annotation-processor 识别标注了注解的目标类和其方法, 生成 PersonBuilder. 如下:
@Target(ElementType.METHOD)
@Retention(RetentionPolicy.SOURCE)
public @interface BuilderProperty {
}
RetentionPolicy.SOURCE 表示该注解仅能在源码处理而非运行时可用.
实现一个 Processor
创建 AbstractProcessor 的子类
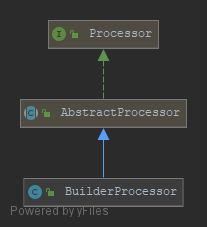
我们需要在 annotation-processor 模块中继承 AbstractProcessor 类来实现自己的处理类, 命名为 BuilderProcessor.
① 我们需要指定这个自定义处理类 “有能力” 处理的注解和支持的源码等级. 可以通过实现 Processor 接口提供的 getSupportedAnnotationTypes 和 getSupportedSourceVersion 或者通过注解 @SupportedAnnotationTypes 以及 @SupportedSourceVersion 做到. 并且支持通配符.
@AutoService该注解是 Google auto-service 库中提供的, 用于生成 SPI 的元信息供
ServiceProvider识别.推荐阅读: ServiceLoader 的原理与设计思想
② 随后我们需要迭代所有的目标类的注解类型 (在本案例中, 当前处理器只支持 cn.caplike.demo.repository.annotation.processor.BuilderProperty 这个注解, 所以 annotation set 只会有这唯一一个元素).
③ 利用 RoundEnvironment 获取所有标注了 @BuilderProperty 的 “元素”.
④ 获取标注了 @BuilderProperty 的 set 方法.
⑤ 生成文件.
/*** Description: 注解处理器.<br>* Details: 首先我们需要指定当前 Processor 能够处理的注解, 以及支持的源码级别.* 通过实现 Processor 接口的方法 {@code getSupportedAnnotationTypes} & {@code getSupportedSourceVersion}* 和 {@code @SupportedAnnotationTypes} & {@code @SupportedSourceVersion} 注解的方式都可以做到这一点.<br>* Attention: <b>支持通配符, 如: cn.caplike.demo.repository.annotation.processor.*</b>** @author LiKe* @version 1.0.0* @date 2020-03-30 10:27*/
@Slf4j
@SupportedAnnotationTypes({"cn.caplike.demo.repository.annotation.processor.BuilderProperty"}) // ①
@SupportedSourceVersion(SourceVersion.RELEASE_8) // ①
@AutoService(Processor.class)
public class BuilderProcessor extends AbstractProcessor {/*** Description: 对于每一个标注了目标注解的源文件, 编译器都会调用该方法.** @param annotations 配置为需要被处理的注解* @param roundEnv    {@link RoundEnvironment} 携带了当前和之前处理阶段的环境 (上下文) 信息* @return 应该返回为 {@code true}: 当注解都被处理了 (<strong>这样就不会传递给下一个 Processor</strong>).* @author LiKe* @date 2020-03-30 10:34:33* @see AbstractProcessor#process(Set, RoundEnvironment)*/@Overridepublic boolean process(Set<? extends TypeElement> annotations, RoundEnvironment roundEnv) {annotations.forEach(theAnnotation -> { // ②log.debug("需要被处理的注解: {}", theAnnotation.getSimpleName().toString());// 获取所有被标注了 @BuilderProperty 注解的元素. ③final Set<? extends Element> annotatedElements = roundEnv.getElementsAnnotatedWith(theAnnotation);// ~ 保证标注了 @BuilderProperty 注解的方法是 set 方法 ④final Map<Boolean, List<Element>> annotatedMethods = annotatedElements.stream().collect(Collectors.partitioningBy(element ->// 这里我们使用 Element.asType() 方法以接收 TypeMirror 的实例, 后者让我们即便在源码处理阶段也能够获取到类型.((ExecutableType) element.asType()).getParameterTypes().size() == 1 && element.getSimpleName().toString().startsWith("set")));final List<Element> setters = annotatedMethods.get(true);final List<Element> otherMethods = annotatedMethods.get(false);otherMethods.forEach(element -> processingEnv.getMessager().printMessage(Diagnostic.Kind.ERROR,"@BuilderProperty must be applied to a setXxx method " + "with a single argument", element));if (!setters.isEmpty()) {final String className = ((TypeElement) setters.get(0).getEnclosingElement()).getQualifiedName().toString();final Map<String, String> setterMap = setters.stream().collect(Collectors.toMap(setter -> setter.getSimpleName().toString(),setter -> ((ExecutableType) setter.asType()).getParameterTypes().get(0).toString()));// ~ 生成文件 ⑤try {this.writeBuilderFile(className, setterMap);} catch (IOException e) {throw new RuntimeException(e);}}});return true;}private void writeBuilderFile(String className, Map<String, String> setterMap) throws IOException {String packageName = null;final int indexOfLastDot = StringUtils.lastIndexOf(className, ".");if (indexOfLastDot > 0) {packageName = className.substring(0, indexOfLastDot);}final String simpleClassName = className.substring(indexOfLastDot + 1);final String builderClassName = className + "Builder";final String builderSimpleClassName = builderClassName.substring(indexOfLastDot + 1);final JavaFileObject builderFile = processingEnv.getFiler().createSourceFile(builderClassName);try (PrintWriter out = new PrintWriter(builderFile.openWriter())) {if (StringUtils.isNotBlank(packageName)) {out.print("package ");out.print(packageName);out.println(";");out.println();}out.print("public class ");out.print(builderSimpleClassName);out.println(" {");out.println();out.print("    private ");out.print(simpleClassName);out.print(" object = new ");out.print(simpleClassName);out.println("();");out.println();out.print("    public ");out.print(simpleClassName);out.println(" build() {");out.println("        return object;");out.println("    }");out.println();setterMap.forEach((methodName, argumentType) -> {out.print("    public ");out.print(builderSimpleClassName);out.print(" ");out.print(methodName);out.print("(");out.print(argumentType);out.println(" value) {");out.print("        object.");out.print(methodName);out.println("(value);");out.println("        return this;");out.println("    }");out.println();});out.println("}");}}
}
app
该模块引入 annotation-processor 并使用它提供的能力, 只需要:
<!--引入 annotation-processor -->
<dependency><groupId>cn.caplike.demo.repository.java.annotation.processor</groupId><artifactId>annotation-processor</artifactId><version>1.0.0-SNAPSHOT</version>
</dependency>
在 app 模块中, Person 类应该形如:
public class Person {private int age;private String name;@BuilderPropertypublic void setAge(int age) {this.age = age;}@BuilderPropertypublic void setName(String name) {this.name = name;}// getters …}
测试
首先我们在 annotation-processor 根目录运行 mvn clean compile 编译该模块,

可以看到引入了该模块的 app 工程的 class 文件夹里已经有了名为 PersonBuilder 的文件. 类容为:
public class PersonBuilder {private Person object = new Person();public Person build() {return object;}public PersonBuilder setName(java.lang.String value) {object.setName(value);return this;}public PersonBuilder setAge(int value) {object.setAge(value);return this;}}
这就是我们利用 JAVA Annotation Processing 生成的额外文件.

在 app 工程中随便写个 main 方法测试:
@Slf4j
public class App {public static void main(String[] args) {log.info("Person built: {}", new PersonBuilder().setAge(18).build());}
}
可以看到输出:
13:20:32.616 [main] INFO cn.caplike.demo.repository.annotation.processor.app.App - Person built: cn.caplike.demo.repository.annotation.processor.app.Person@36d4b5c
- END -
Reference
-
Java source-level annotation processing
-
Java service provider interface
-
Google auto-service
-
ServiceLoader 的原理与设计思想