最近做项目用到了ssm,虽然以前用过ssm但这段时间发现,用过不代表就会了,即使以前用过,但现在要搭一个ssm框架不看教程还是很难,最基本的maven仓库需要哪些坐标都搞不清楚,所以今天打算写篇博客梳理一下。
一.基础梳理
俗话说:工欲善其事必先利其器,要想搭建一个ssm架子,首先必须了解ssm都代表什么,每一部分在架子里担任什么角色行驶什么作用。
1.spring
spring是开放源代码的设计层框架,它解决的是业务层逻辑和其他各层之间的耦合问题,思想是,平时我们主动new对象,内存帮我们创建对象分配内存,现在是我们需要什么对象直接从spring容器里取出就OK,以此实现松耦合的功能。
这个框架的特征:
轻量,控制反转,面向切面,容器等
spring是一个很强大的工具,值得我们深究
2.mybatis
谈到mybatis这个框架,我也少不了吹一波彩虹屁,这个半自动化的ORM框架真的很强大,她的前生是apache下的ibatis,至于他改名为mybatis是因为换主人了。这是一个持久层框架,他可以定制sql和高级的映射功能,她帮我们避免了绝大多数的JDBC代码和结果集的获取等。
至于mybatis的特点,那首要说的就是方便灵活,可以说开发写一个项目mybatis帮我们完成了三分之一的工作。
3.springmvc
接下来说说springmvc,这是一个属于SpringFrameWork的后续产品,也是spring全家桶的一部分,学web开发的都知道web三层架构,springmvc就是V层及视图层。在我目前看来springmvc给我最优质的感觉就是参数绑定这个强大技能,减少了自己每次主动从request域里找数据的痛苦,而且他附加的json数据自动转换也十分方便,虽然这个功能自己也很容易实现,但总觉的没人家的好用。
4.介绍了ssm的组成,就进入整合了
ssm整合当然是在maven项目里方便啊,如果在动态web项目里整合,那jar包够你下一壶的了。
建立maven项目我不写步骤了,如果还不知道用maven里的哪个Artifact的,那就自己一个一个建着看吧,先把哪个干什么的搞清楚再来。
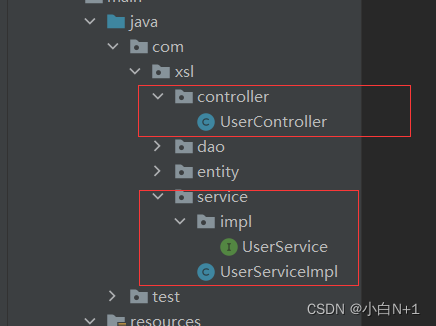
这里先把我的项目结构图附上
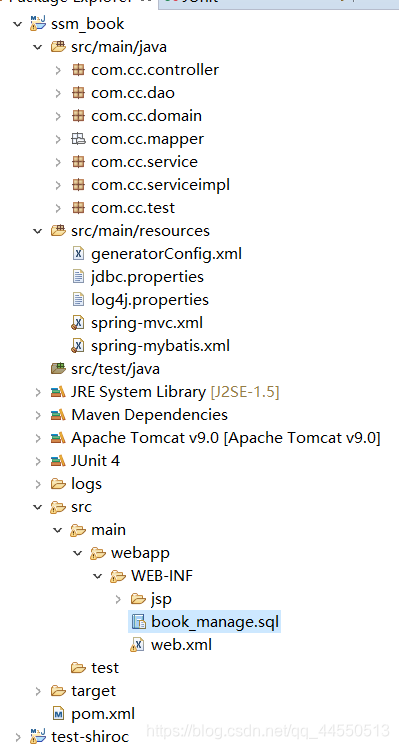
下面说说 每个文件代表的含义
- src/main/java 这个不多说,就是放代码的 地方
- sr/main/resources 存放资源文件的 地方,诸如配置文件
---- generatorConfig.xml 这个是配置逆向工程的配置文件
---- jdbc.properties 数据库连接数据文件
---- log4j.properties 日志配置文件
---- springmvc.xml springmvc的配置文件
---- springmybatis.xml 这个文件我把spring和mybatis 的配置文件放在一起了,因为整合里mybatis没几行代码,单独用一个文件浪费,嘿嘿嘿。
此处说明下,本文只介绍ssm整合,不介绍mybatis逆向工程,如果感兴趣的可以去看
mybatis逆向工程
下面介绍每个文件都写了什么内容
首先是jdbc.properties文件
driver=com.mysql.cj.jdbc.Driver
url=jdbc:mysql://localhost:3306/test_all?useUnicode=true&characterEncoding=utf-8&useSSL=false&serverTimezone = GMT
username=root
password=123456
#\u5B9A\u4E49\u521D\u59CB\u8FDE\u63A5\u6570
initialSize=0
#\u5B9A\u4E49\u6700\u5927\u8FDE\u63A5\u6570
maxActive=20
#\u5B9A\u4E49\u6700\u5927\u7A7A\u95F2
maxIdle=20
#\u5B9A\u4E49\u6700\u5C0F\u7A7A\u95F2
minIdle=1
#\u5B9A\u4E49\u6700\u957F\u7B49\u5F85\u65F6\u95F4
maxWait=60000
这个文件就不说了。如果这都看不懂劝你回头是岸吧。
接下来是log4j.properties
log4j.rootLogger=INFO,Console,File
#\u5B9A\u4E49\u65E5\u5FD7\u8F93\u51FA\u76EE\u7684\u5730\u4E3A\u63A7\u5236\u53F0
log4j.appender.Console=org.apache.log4j.ConsoleAppender
log4j.appender.Console.Target=System.out
#\u53EF\u4EE5\u7075\u6D3B\u5730\u6307\u5B9A\u65E5\u5FD7\u8F93\u51FA\u683C\u5F0F\uFF0C\u4E0B\u9762\u4E00\u884C\u662F\u6307\u5B9A\u5177\u4F53\u7684\u683C\u5F0F
log4j.appender.Console.layout = org.apache.log4j.PatternLayout
log4j.appender.Console.layout.ConversionPattern=[%c] - %m%n  #\u6587\u4EF6\u5927\u5C0F\u5230\u8FBE\u6307\u5B9A\u5C3A\u5BF8\u7684\u65F6\u5019\u4EA7\u751F\u4E00\u4E2A\u65B0\u7684\u6587\u4EF6
log4j.appender.File = org.apache.log4j.RollingFileAppender
#\u6307\u5B9A\u8F93\u51FA\u76EE\u5F55
log4j.appender.File.File = logs/ssm.log
#\u5B9A\u4E49\u6587\u4EF6\u6700\u5927\u5927\u5C0F
log4j.appender.File.MaxFileSize = 10MB
# \u8F93\u51FA\u6240\u4EE5\u65E5\u5FD7\uFF0C\u5982\u679C\u6362\u6210DEBUG\u8868\u793A\u8F93\u51FADEBUG\u4EE5\u4E0A\u7EA7\u522B\u65E5\u5FD7
log4j.appender.File.Threshold = ALL
log4j.appender.File.layout = org.apache.log4j.PatternLayout
log4j.appender.File.layout.ConversionPattern =[%p] [%d{yyyy-MM-dd HH\:mm\:ss}][%c]%m%n
这里面可以不用知道,复制粘贴就好,感兴趣的可以去查下资料
接下来划重点了
先说spring-mybatie.xml
<?xml version="1.0" encoding="UTF-8"?>
<beans xmlns="http://www.springframework.org/schema/beans"  xmlns:xsi="http://www.w3.org/2001/XMLSchema-instance" xmlns:p="http://www.springframework.org/schema/p"  xmlns:context="http://www.springframework.org/schema/context"  xmlns:mvc="http://www.springframework.org/schema/mvc"  xsi:schemaLocation="http://www.springframework.org/schema/beans    http://www.springframework.org/schema/beans/spring-beans-3.1.xsd    http://www.springframework.org/schema/context    http://www.springframework.org/schema/context/spring-context-3.1.xsd    http://www.springframework.org/schema/mvc    http://www.springframework.org/schema/mvc/spring-mvc-4.0.xsd">  <!-- 自动扫描 -->  <context:component-scan base-package="com.cc" />  <!-- 引入配置文件 -->  <bean id="propertyConfigurer"  class="org.springframework.beans.factory.config.PropertyPlaceholderConfigurer">  <property name="location" value="classpath:jdbc.properties" />  </bean>  <bean id="dataSource" class="org.apache.commons.dbcp.BasicDataSource"  destroy-method="close">  <property name="driverClassName" value="${driver}" />  <property name="url" value="${url}" />  <property name="username" value="${username}" />  <property name="password" value="${password}" />  <!-- 初始化连接大小 -->  <property name="initialSize" value="${initialSize}"></property>  <!-- 连接池最大数量 -->  <property name="maxActive" value="${maxActive}"></property>  <!-- 连接池最大空闲 -->  <property name="maxIdle" value="${maxIdle}"></property>  <!-- 连接池最小空闲 -->  <property name="minIdle" value="${minIdle}"></property>  <!-- 获取连接最大等待时间 -->  <property name="maxWait" value="${maxWait}"></property>  </bean>  <!-- spring和MyBatis完美整合,不需要mybatis的配置映射文件 -->  <bean id="sqlSessionFactory" class="org.mybatis.spring.SqlSessionFactoryBean">  <property name="dataSource" ref="dataSource" />  <!-- 自动扫描mapping.xml文件 -->  <property name="mapperLocations" value="classpath:com/cc/mapper/*.xml"></property>  </bean>  <!-- DAO接口所在包名,Spring会自动查找其下的类 -->  <bean class="org.mybatis.spring.mapper.MapperScannerConfigurer">  <property name="basePackage" value="com.cc.dao" />  <property name="sqlSessionFactoryBeanName" value="sqlSessionFactory"></property>  </bean>  <!-- (事务管理)transaction manager, use JtaTransactionManager for global tx -->  <bean id="transactionManager"  class="org.springframework.jdbc.datasource.DataSourceTransactionManager">  <property name="dataSource" ref="dataSource" />  </bean>  </beans>
说下这里面一些必须配置的类和所配置的类是干什么的
- org.springframework.beans.factory.config.PropertyPlaceholderConfigurer
这个类相信都知道是干什么的,不说了 - org.apache.commons.dbcp.BasicDataSource
这个类就是给dbcp连接池加上jdbc.properties文件里的数据 - org.mybatis.spring.SqlSessionFactoryBean
SQLSessionFactoryBean类是mybatis的核心类,必须配置,这个类用来获取session工厂 - org.mybatis.spring.mapper.MapperScannerConfigurer
此类作用是取代手动添加Mapper,自动扫描完成接口代理,顾名思义,底部是代理模式实现
- org.springframework.jdbc.datasource.DataSourceTransactionManager
事务管理类,可以暂时不了解
接下来是springmvc.xml配置文件
<?xml version="1.0" encoding="UTF-8"?>
<beans xmlns="http://www.springframework.org/schema/beans"  xmlns:xsi="http://www.w3.org/2001/XMLSchema-instance" xmlns:p="http://www.springframework.org/schema/p"  xmlns:context="http://www.springframework.org/schema/context"  xmlns:mvc="http://www.springframework.org/schema/mvc"  xsi:schemaLocation="http://www.springframework.org/schema/beans    http://www.springframework.org/schema/beans/spring-beans-3.1.xsd    http://www.springframework.org/schema/context    http://www.springframework.org/schema/context/spring-context-3.1.xsd    http://www.springframework.org/schema/mvc    http://www.springframework.org/schema/mvc/spring-mvc-4.0.xsd">  <!-- 配置自动扫描包。让springmvc认为包下用了@controller注解的类的控制器 -->
<context:component-scan base-package="com.cc.controller"></context:component-scan><mvc:annotation-driven></mvc:annotation-driven>
<!-- 静态资源位置 -->
<mvc:resources location="/resource/**" mapping="/resource"/><!--避免IE执行AJAX时,返回JSON出现下载现象 -->  <bean id="mappingJacksonHttpMessageConverter"  class="org.springframework.http.converter.json.MappingJacksonHttpMessageConverter">  <property name="supportedMediaTypes">  <list>  <value>text/html;charset=UTF-8</value>  </list>  </property>  </bean>
<!--启动springmvc的注解功能,完成请求到pojo的映射 -->
<bean class="org.springframework.web.servlet.mvc.annotation.AnnotationMethodHandlerAdapter"><property name="messageConverters"><list><!-- JSON转换器 -->	<ref bean="mappingJacksonHttpMessageConverter"/>	</list></property>
</bean>
<!-- 配置文件上传 -->
<bean id="multipartResolver" class="org.springframework.web.multipart.commons.CommonsMultipartResolver"><!--设置编码--><property name="defaultEncoding" value="utf-8"></property><!-- 文件大小的最大值 --><property name="maxUploadSize" value="10485760000"></property><!-- 内存中的最大值 --><property name="maxInMemorySize" value="40960"></property><!-- 启用是为了推迟文件解析,以便捕获文件大小异常 --><property name="resolveLazily" value="true"/>
</bean>
<!-- 配置视图解析器ViewResolve 因为此处配置的是ContentNegotingViewResolver试图解析器,所以可以配置多个试图解析器
通过order进行排序-->
<bean class="org.springframework.web.servlet.view.ContentNegotiatingViewResolver"><property name="order" value="1"></property><property name="mediaTypes"><map><!-- 告诉视图解析器,返回的类型为json格式 --><entry key="json" value="application/json" /><entry key="xml" value="application/xml" /><entry key="htm" value="text/htm" /></map></property><property name="defaultViews"><list><!-- ModelAndView里的数据变成JSON 此类把model里的数据转换为json格式--><bean class="org.springframework.web.servlet.view.json.MappingJacksonJsonView" /></list></property><property name="ignoreAcceptHeader" value="true"></property>
</bean>
<!-- 视图跳转解析器 -->
<bean class="org.springframework.web.servlet.view.InternalResourceViewResolver"><!-- 这里的配置是自动给后面action的方法return的字符串加上前缀和后缀,变成一个 可用的url地址 -->  <property name="prefix" value="/WEB-INF/jsp/" />  <property name="suffix" value=".jsp" />
</bean>
</beans>
注解很详细,不说了,打字太累了
别忘了web.xml
<?xml version="1.0" encoding="UTF-8"?>
<web-app xmlns:xsi="http://www.w3.org/2001/XMLSchema-instance"  xmlns="http://java.sun.com/xml/ns/javaee"  xsi:schemaLocation="http://java.sun.com/xml/ns/javaee http://java.sun.com/xml/ns/javaee/web-app_3_0.xsd"  version="3.0"><display-name>Archetype Created Web Application</display-name><!-- 编码过滤器 -->  <filter>  <filter-name>encodingFilter</filter-name>  <filter-class>org.springframework.web.filter.CharacterEncodingFilter</filter-class>  <async-supported>true</async-supported>  <init-param>  <param-name>encoding</param-name>  <param-value>UTF-8</param-value>  </init-param>  </filter>  <filter-mapping>  <filter-name>encodingFilter</filter-name>  <url-pattern>/*</url-pattern>  </filter-mapping>  <!-- Spring MVC servlet -->  <servlet>  <servlet-name>SpringMVC</servlet-name>  <servlet-class>org.springframework.web.servlet.DispatcherServlet</servlet-class>  <init-param>  <param-name>contextConfigLocation</param-name>  <param-value>classpath:spring-mvc.xml</param-value>  </init-param>  <load-on-startup>1</load-on-startup>  <async-supported>true</async-supported>  </servlet>  <servlet-mapping>  <servlet-name>SpringMVC</servlet-name>  <url-pattern>/</url-pattern>  </servlet-mapping>  <welcome-file-list>  <welcome-file>/index.jsp</welcome-file>  </welcome-file-list>
</web-app>
5.配置文件搞定,现在来看看具体代码吧
user.java
三个字段 id,username,password
package com.cc.dao;import com.cc.domain.User;public interface UserMapper {int deleteByPrimaryKey(Integer id);int insert(User record);int insertSelective(User record);User selectByPrimaryKey(Integer id);int updateByPrimaryKeySelective(User record);int updateByPrimaryKey(User record);
}
UserMapper.xml
<?xml version="1.0" encoding="UTF-8" ?>
<!DOCTYPE mapper PUBLIC "-//mybatis.org//DTD Mapper 3.0//EN" "http://mybatis.org/dtd/mybatis-3-mapper.dtd" >
<mapper namespace="com.cc.dao.UserMapper" ><resultMap id="BaseResultMap" type="com.cc.domain.User" ><id column="id" property="id" jdbcType="INTEGER" /><result column="user_name" property="userName" jdbcType="VARCHAR" /><result column="password" property="password" jdbcType="VARCHAR" /><result column="age" property="age" jdbcType="INTEGER" /></resultMap><sql id="Base_Column_List" >id, user_name, password, age</sql><select id="selectByPrimaryKey" resultMap="BaseResultMap" parameterType="java.lang.Integer" >select <include refid="Base_Column_List" />from user_twhere id = #{id,jdbcType=INTEGER}</select><delete id="deleteByPrimaryKey" parameterType="java.lang.Integer" >delete from user_twhere id = #{id,jdbcType=INTEGER}</delete><insert id="insert" parameterType="com.cc.domain.User" >insert into user_t (id, user_name, password, age)values (#{id,jdbcType=INTEGER}, #{userName,jdbcType=VARCHAR}, #{password,jdbcType=VARCHAR}, #{age,jdbcType=INTEGER})</insert><insert id="insertSelective" parameterType="com.cc.domain.User" >insert into user_t<trim prefix="(" suffix=")" suffixOverrides="," ><if test="id != null" >id,</if><if test="userName != null" >user_name,</if><if test="password != null" >password,</if><if test="age != null" >age,</if></trim><trim prefix="values (" suffix=")" suffixOverrides="," ><if test="id != null" >#{id,jdbcType=INTEGER},</if><if test="userName != null" >#{userName,jdbcType=VARCHAR},</if><if test="password != null" >#{password,jdbcType=VARCHAR},</if><if test="age != null" >#{age,jdbcType=INTEGER},</if></trim></insert><update id="updateByPrimaryKeySelective" parameterType="com.cc.domain.User" >update user_t<set ><if test="userName != null" >user_name = #{userName,jdbcType=VARCHAR},</if><if test="password != null" >password = #{password,jdbcType=VARCHAR},</if><if test="age != null" >age = #{age,jdbcType=INTEGER},</if></set>where id = #{id,jdbcType=INTEGER}</update><update id="updateByPrimaryKey" parameterType="com.cc.domain.User" >update user_tset user_name = #{userName,jdbcType=VARCHAR},password = #{password,jdbcType=VARCHAR},age = #{age,jdbcType=INTEGER}where id = #{id,jdbcType=INTEGER}</update>
</mapper>
package com.cc.service;import com.cc.domain.User;public interface IUserService {public User getUserById(int userId); }package com.cc.serviceimpl;import javax.annotation.Resource;import org.springframework.stereotype.Service;import com.cc.dao.UserMapper;
import com.cc.domain.User;
import com.cc.service.IUserService;@Service("userService")
public class UserServiceImpl implements IUserService { @Resource private UserMapper userDao; public User getUserById(int userId) { // TODO Auto-generated method stub return this.userDao.selectByPrimaryKey(userId); } } package com.cc.controller;import javax.servlet.http.HttpServletRequest;import org.slf4j.Logger;
import org.slf4j.LoggerFactory;
import org.springframework.stereotype.Controller;
import org.springframework.ui.Model;
import org.springframework.web.bind.annotation.RequestMapping;
import org.springframework.web.bind.annotation.RequestMethod;import com.cc.domain.User;@Controller
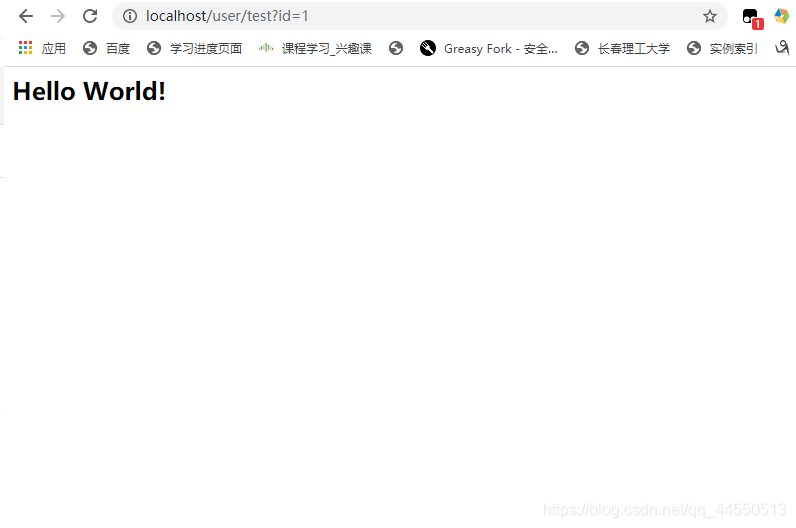
@RequestMapping("/user") public class UserController { private static Logger log=LoggerFactory.getLogger(UserController.class);// /user/test?id=1@RequestMapping(value="/test",method=RequestMethod.GET) public String test(HttpServletRequest request,Model model){ int userId = Integer.parseInt(request.getParameter("id")); System.out.println("userId:"+userId);User user=null;if (userId==1) {user = new User(); user.setAge(11);user.setId(1);user.setPassword("123");user.setUserName("javen");}log.debug(user.toString());model.addAttribute("user", user); return "index"; }
}
package com.cc.controller;import javax.servlet.http.HttpServletRequest;import org.slf4j.Logger;
import org.slf4j.LoggerFactory;
import org.springframework.stereotype.Controller;
import org.springframework.ui.Model;
import org.springframework.web.bind.annotation.RequestMapping;
import org.springframework.web.bind.annotation.RequestMethod;import com.cc.domain.User;@Controller
@RequestMapping("/user")  public class UserController {  private static Logger log=LoggerFactory.getLogger(UserController.class);// /user/test?id=1@RequestMapping(value="/test",method=RequestMethod.GET)  public String test(HttpServletRequest request,Model model){  int userId = Integer.parseInt(request.getParameter("id"));  System.out.println("userId:"+userId);User user=null;if (userId==1) {user = new User();  user.setAge(11);user.setId(1);user.setPassword("123");user.setUserName("javen");}log.debug(user.toString());model.addAttribute("user", user);  return "index";  }
}