一.开发环境
1.JDK8以上+Spring Boot 2.3.0+Thymeleaf+MyBatis Plus3.3.1+MySQL8.0+
2.部署:Linux,,(阿里云 腾讯云)JDK8+,MySQL8.0
3.部署方式:jar包部署,不需要Tomcat
二.新建工程
1)创建工程


创建完成
2)添加依赖pom.xml中加上三个依赖
<dependency><groupId>com.baomidou</groupId><artifactId>mybatis-plus-boot-starter</artifactId><version>3.3.1.tmp</version>
</dependency><dependency><groupId>com.baomidou</groupId><artifactId>mybatis-plus-generator</artifactId><version>3.3.1.tmp</version>
</dependency><dependency><groupId>org.apache.velocity</groupId><artifactId>velocity</artifactId><version>1.7</version>
</dependency>
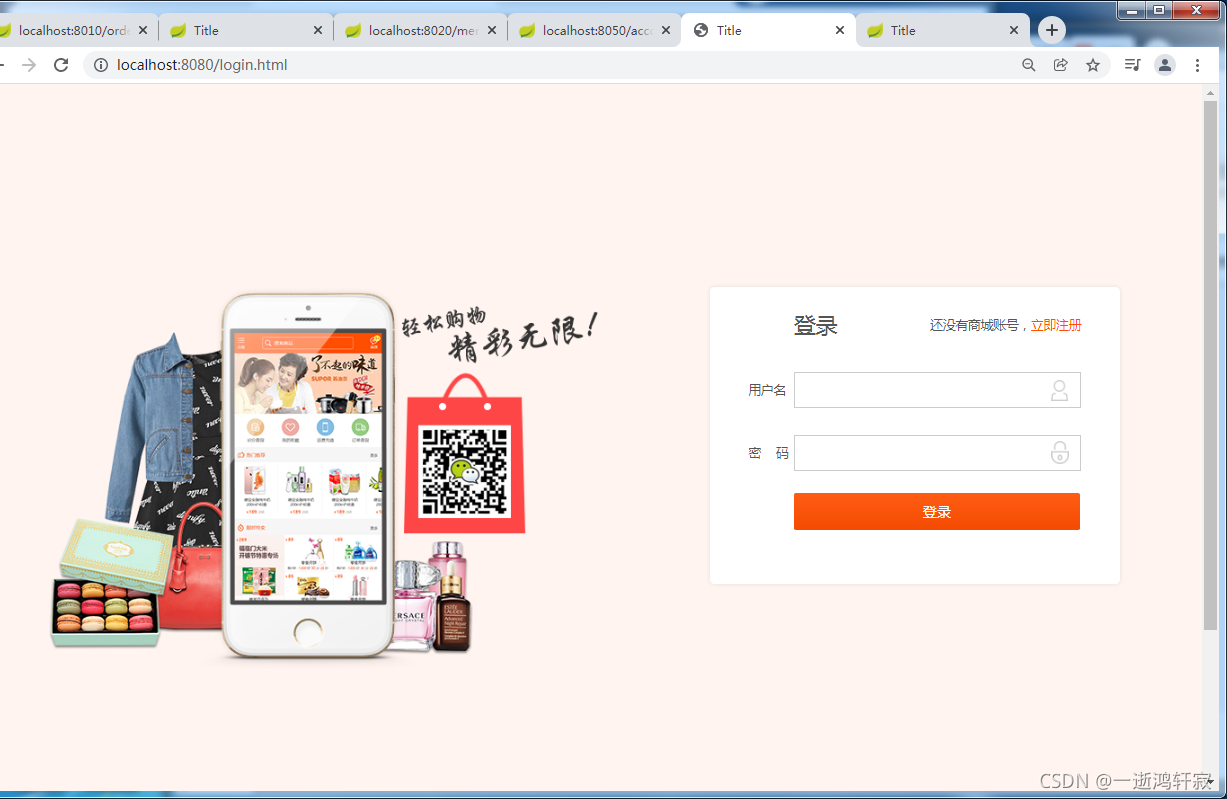
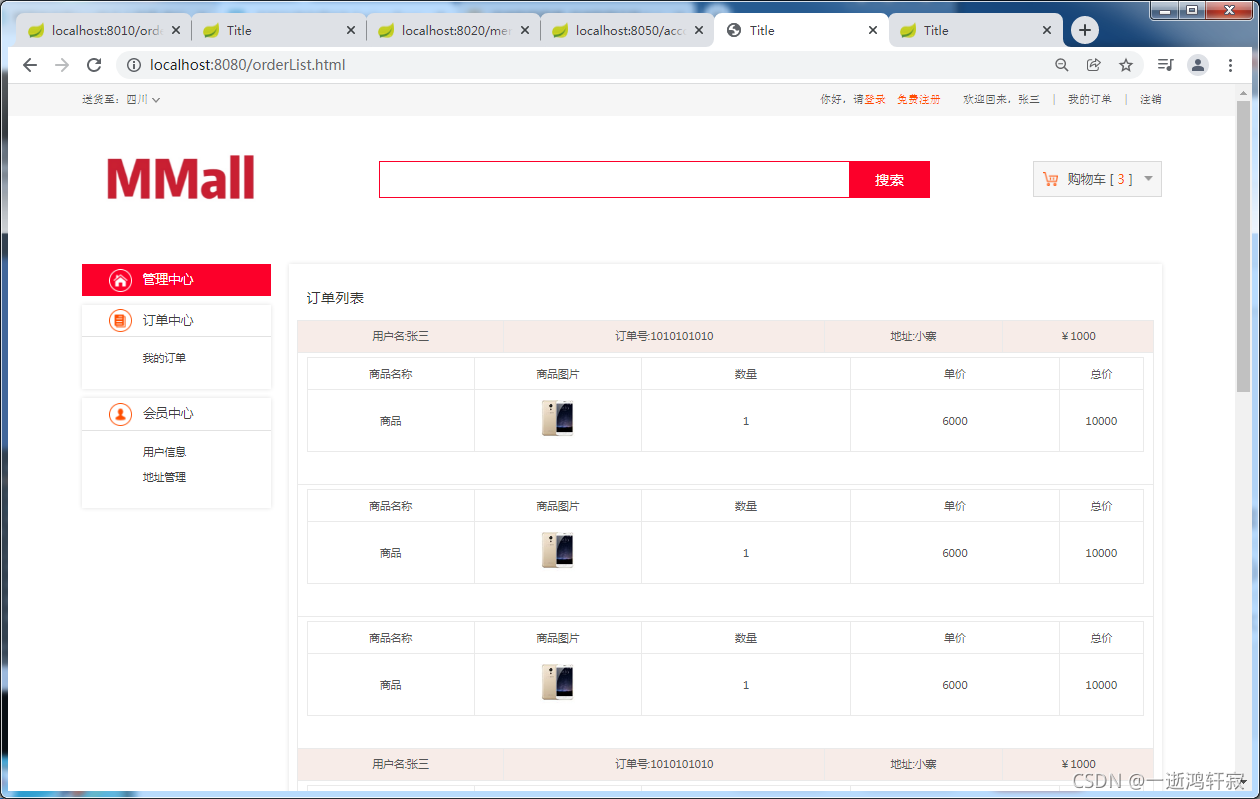
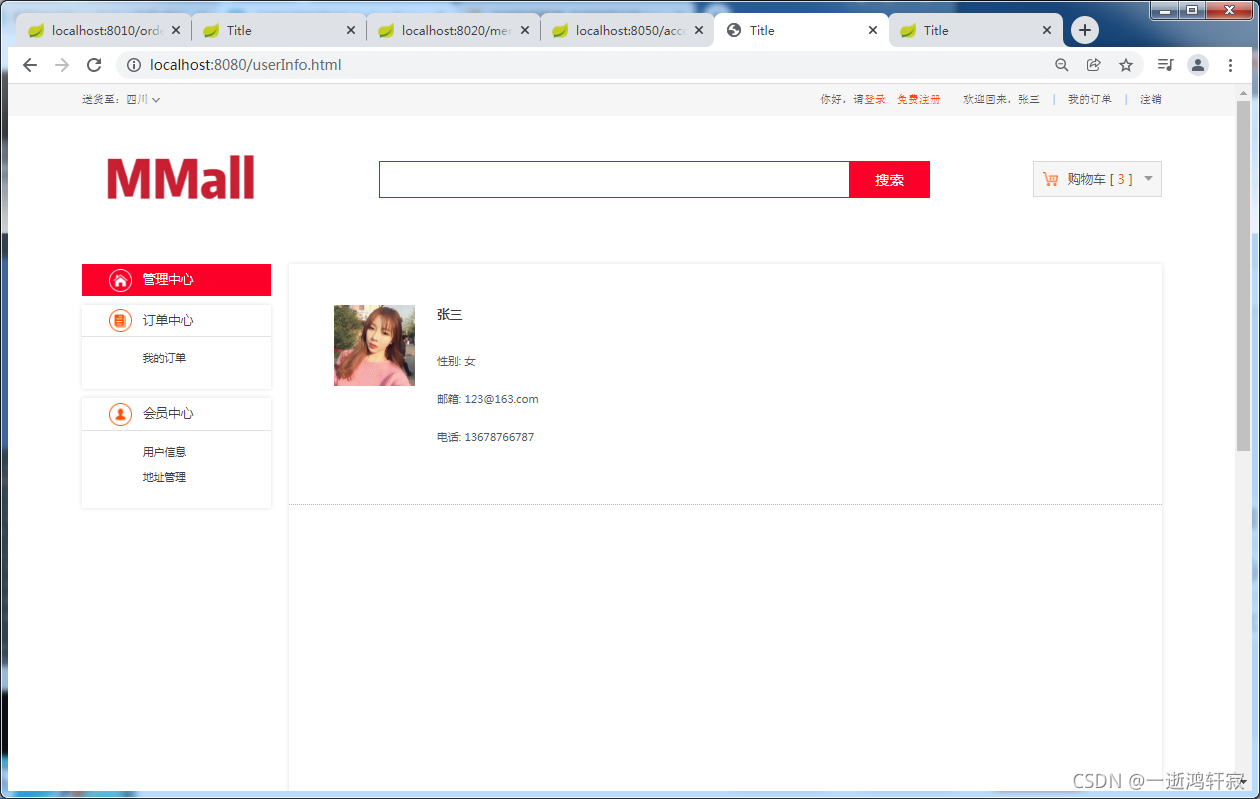
3)静态页面准备删除只留下static文件将静态页面相关代码复制进去
![]()
链接:https://pan.baidu.com/s/1uk6l69F0mBehzguRV6JYzA
提取码:sqsd
先写配置检测静态页面完整性
spring:thymeleaf:prefix: classpath:/static/suffix: .html
主页的映射必须加后台访问
![]()
package com.redhat.mmall002.controller;import org.springframework.stereotype.Controller;
import org.springframework.web.bind.annotation.GetMapping;
import org.springframework.web.bind.annotation.PathVariable;@Controller
public class RedirectHandler {@GetMapping("/{url}")public String redirect(@PathVariable("url") String url){return url;}
}
[1]启动项如果报错可以参考
原因:spring boot有对数据库的默认配置,spring boot会先去根据自己的配置获取数据库连接,下面这个注解是让spring不使用DataSourceAutoConfiguration,用我们自己的配置
解决方法:
配置
@SpringBootApplication(exclude = DataSourceAutoConfiguration.class)
启动服务测试

3)数据连接
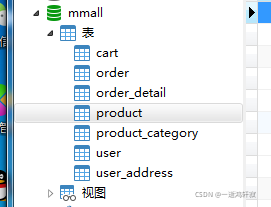
链接:https://pan.baidu.com/s/1Tp6UTtTlj9b3hROKMxsG-w
提取码:7lty
4.编写代码自动生成器main类文件
创建如下Main类运行:
package com.redhat.mmall002;import com.baomidou.mybatisplus.annotation.DbType;
import com.baomidou.mybatisplus.annotation.FieldFill;
import com.baomidou.mybatisplus.generator.AutoGenerator;
import com.baomidou.mybatisplus.generator.config.DataSourceConfig;
import com.baomidou.mybatisplus.generator.config.GlobalConfig;
import com.baomidou.mybatisplus.generator.config.PackageConfig;
import com.baomidou.mybatisplus.generator.config.StrategyConfig;
import com.baomidou.mybatisplus.generator.config.po.TableFill;
import com.baomidou.mybatisplus.generator.config.rules.NamingStrategy;import java.util.ArrayList;
import java.util.List;public class Main {public static void main(String[] args) {AutoGenerator autoGenerator = new AutoGenerator();DataSourceConfig dataSourceConfig = new DataSourceConfig();dataSourceConfig.setDbType(DbType.MYSQL);dataSourceConfig.setDriverName("com.mysql.cj.jdbc.Driver");dataSourceConfig.setUsername("root");dataSourceConfig.setPassword("123456");dataSourceConfig.setUrl("jdbc:mysql://localhost:3306/mmall?useUnicode=true&characterEncoding=UTF-8");autoGenerator.setDataSource(dataSourceConfig);GlobalConfig globalConfig = new GlobalConfig();globalConfig.setOpen(true);globalConfig.setOutputDir(System.getProperty("user.dir")+"/src/main/java");globalConfig.setAuthor("红帽");globalConfig.setServiceName("%sService");autoGenerator.setGlobalConfig(globalConfig);PackageConfig packageConfig = new PackageConfig();packageConfig.setParent("com.redhat.mmall002");packageConfig.setEntity("entity");packageConfig.setMapper("mapper");packageConfig.setController("controller");packageConfig.setService("service");packageConfig.setServiceImpl("service.impl");autoGenerator.setPackageInfo(packageConfig);StrategyConfig strategyConfig = new StrategyConfig();strategyConfig.setEntityLombokModel(true);strategyConfig.setNaming(NamingStrategy.underline_to_camel);strategyConfig.setColumnNaming(NamingStrategy.underline_to_camel);List<TableFill> list = new ArrayList<>();TableFill tableFill1 = new TableFill("create_time",FieldFill.INSERT);TableFill tableFill2 = new TableFill("update_time",FieldFill.INSERT_UPDATE);list.add(tableFill1);list.add(tableFill2);strategyConfig.setTableFillList(list);autoGenerator.setStrategy(strategyConfig);autoGenerator.execute();}
}
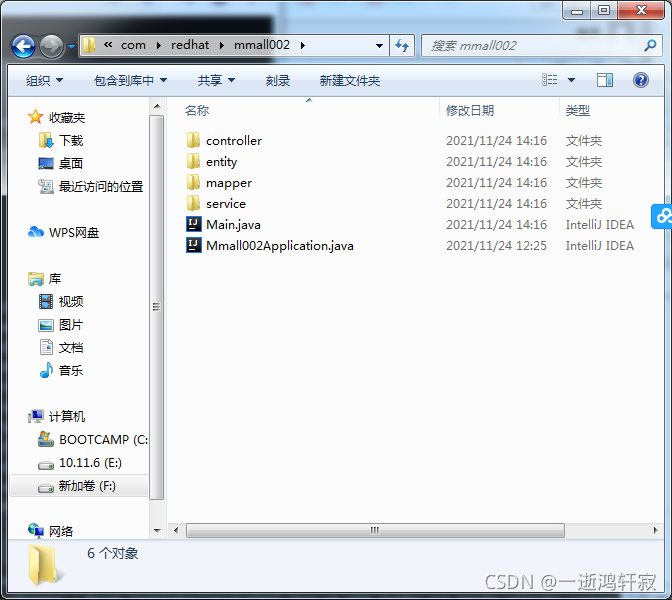
得出如下文件成功
5.创建测试类进行测试运行
1)将启动类还原需要用到访问数据库了
package com.redhat.mmall002;import org.mybatis.spring.annotation.MapperScan;
import org.springframework.boot.SpringApplication;
import org.springframework.boot.autoconfigure.SpringBootApplication;
import org.springframework.boot.autoconfigure.jdbc.DataSourceAutoConfiguration;@SpringBootApplication
@MapperScan("com.redhat.mmall002.mapper")
public class Mmall002Application {public static void main(String[] args) {SpringApplication.run(Mmall002Application.class, args);}
}
2)数据库配置文件application.yml
spring:thymeleaf:prefix: classpath:/static/suffix: .htmldatasource:url: jdbc:mysql://localhost:3306/mmall?useUnicode=true&characterEncoding=UTF-8username: rootpassword: 123456driver-class-name: com.mysql.cj.jdbc.Driver
mybatis-plus:configuration:log-impl: org.apache.ibatis.logging.stdout.StdOutImpl
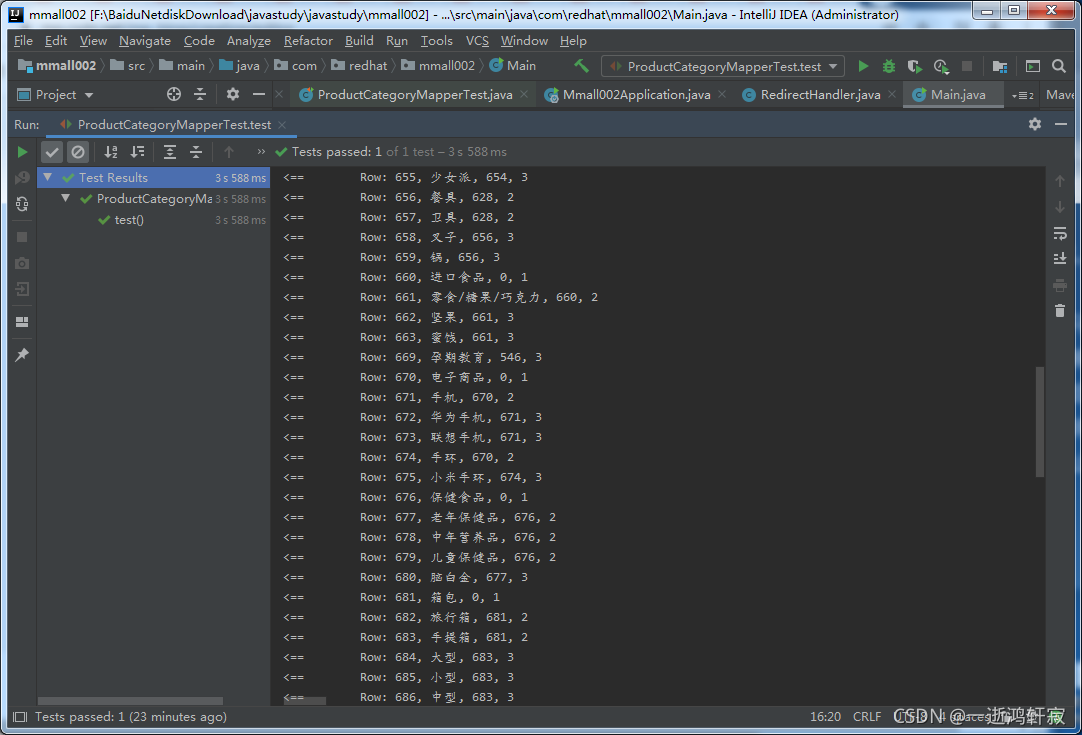
3)创建测试类go-to方法ProductCategoryMapperTest
package com.redhat.mmall002.mapper;import org.junit.jupiter.api.Test;
import org.springframework.beans.factory.annotation.Autowired;
import org.springframework.boot.test.context.SpringBootTest;import static org.junit.jupiter.api.Assertions.*;
@SpringBootTest
class ProductCategoryMapperTest {@Autowiredprivate ProductCategoryMapper mapper;@Testvoid test(){mapper.selectList(null).forEach(System.out::println);}
}
运行结果测试
二。系统环境搭建
1)创建封装VO
package com.redhat.mmall002.vo;import lombok.Data;import java.util.List;@Data
public class ProductCategoryVO {private Integer id;private String name;private List<ProductCategoryVO> children;
}
2)ProductCategoryService中声明方法
public interface ProductCategoryService extends IService<ProductCategory> {public List<ProductCategoryVO> getAllProductCategoryVO();}
3)在ProductCategoryServiceImpl中重写这个没有的方法
@Autowired
private ProductCategoryMapper productCategoryMapper;@Override
public List<ProductCategoryVO> getAllProductCategoryVO() {//实体类转VOList<ProductCategory> productCategoryList = productCategoryMapper.selectList(null);//VOList<ProductCategoryVO> productCategoryVOList = new ArrayList<>();for (ProductCategory productCategory : productCategoryList){ProductCategoryVO productCategoryVO = new ProductCategoryVO();productCategoryVO.setId(productCategory.getId());productCategoryVO.setName(productCategory.getName());productCategoryVOList.add(productCategoryVO);}return null;
}
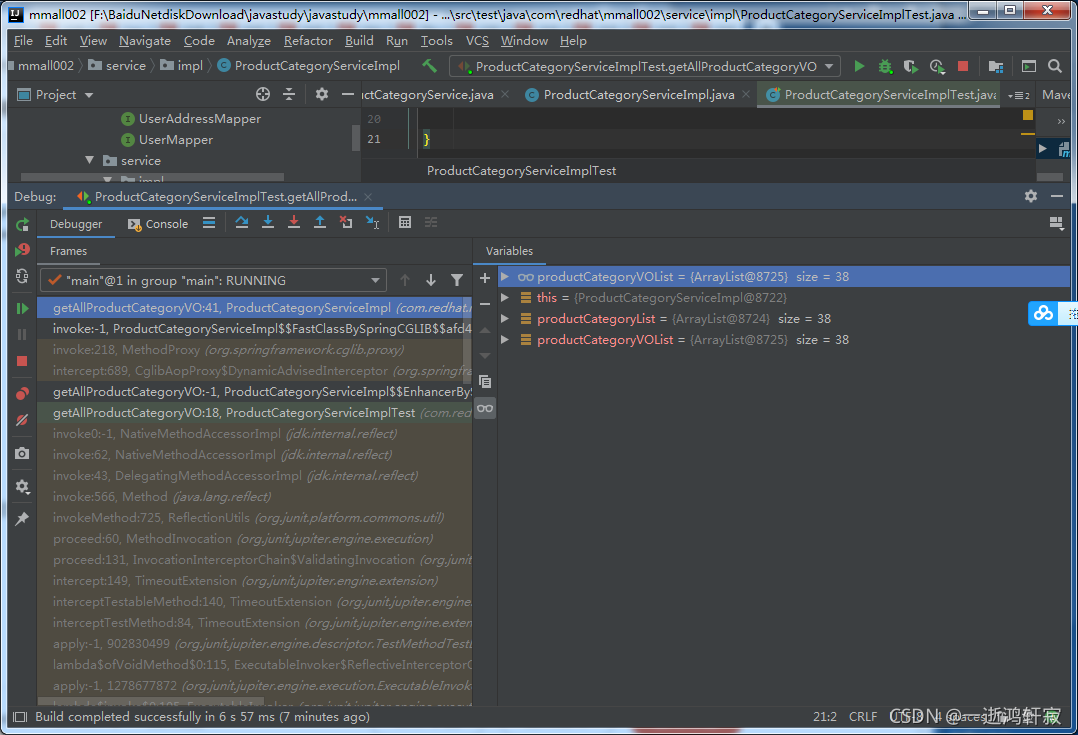
4.go-to创建新的ProductCategoryServiceImplTest 测试类
package com.redhat.mmall002.service.impl;import com.redhat.mmall002.service.ProductCategoryService;
import org.junit.jupiter.api.Test;
import org.springframework.beans.factory.annotation.Autowired;
import org.springframework.boot.test.context.SpringBootTest;import static org.junit.jupiter.api.Assertions.*;@SpringBootTest
class ProductCategoryServiceImplTest {@Autowiredprivate ProductCategoryService service;@Testvoid getAllProductCategoryVO(){service.getAllProductCategoryVO();}}
测试结果
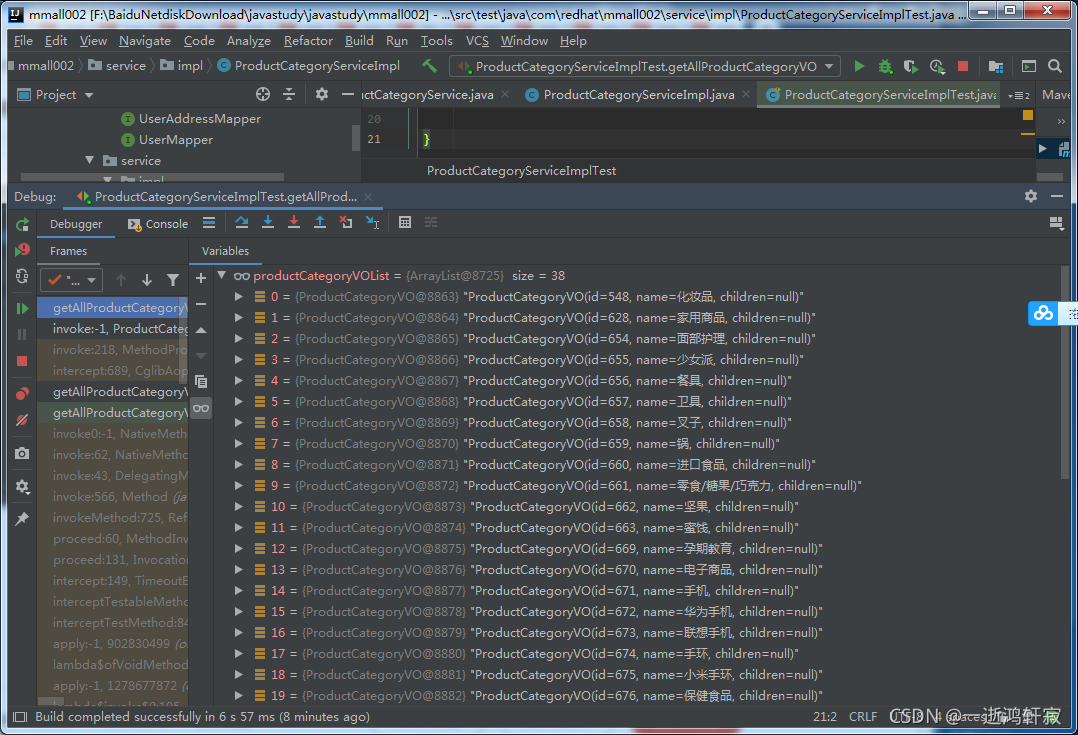
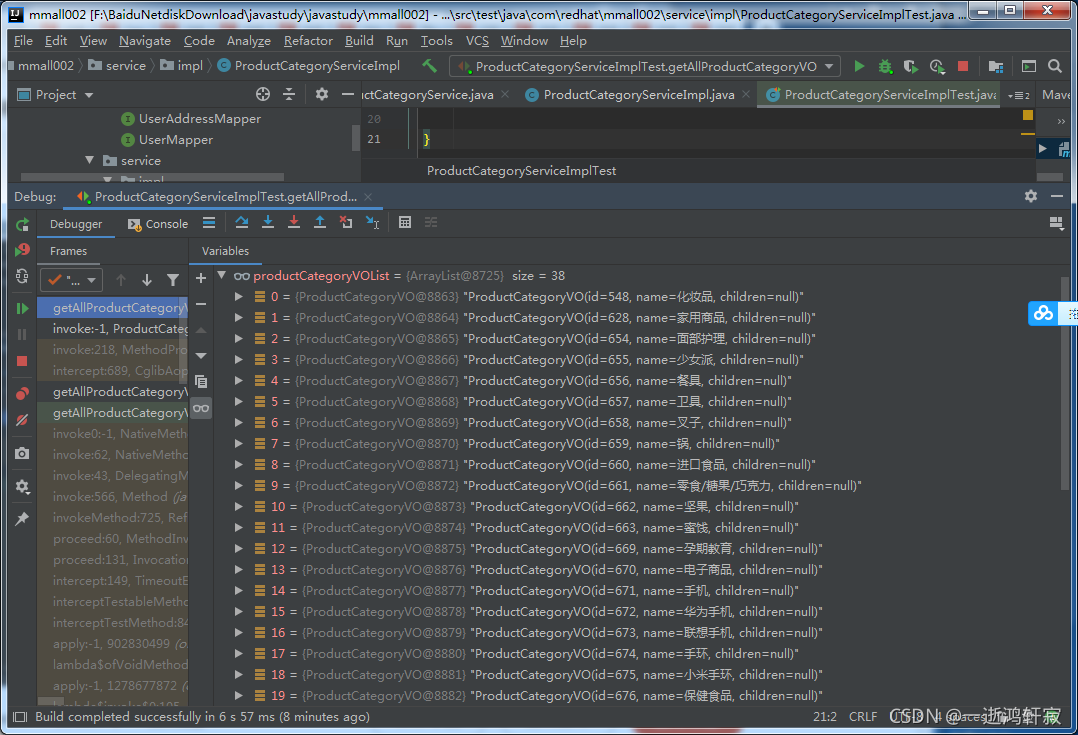
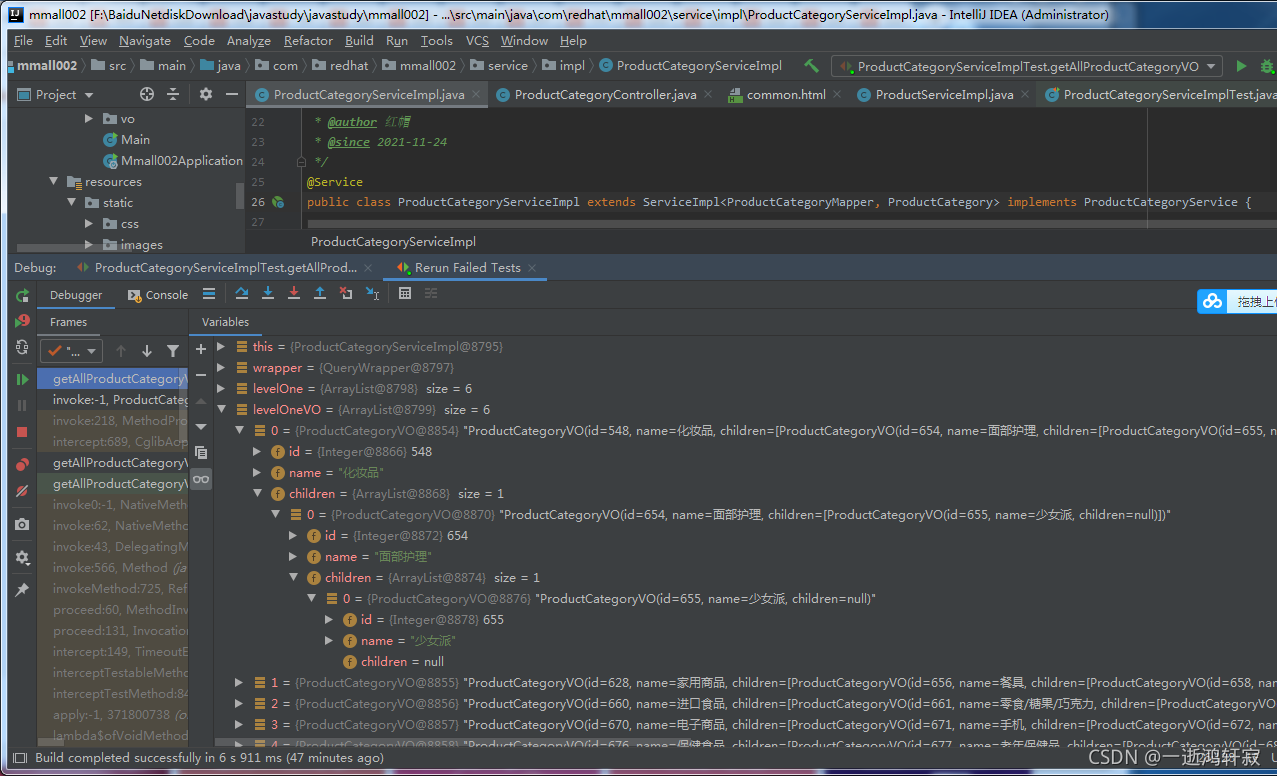
5.实现三级分类
1)ProductCategoryVO类中增加ProductCategoryVO
package com.redhat.mmall002.vo;import lombok.Data;import java.util.List;@Data
public class ProductCategoryVO {private Integer id;private String name;private List<ProductCategoryVO> children;public ProductCategoryVO(Integer id, String name) {this.id = id;this.name = name;}
}
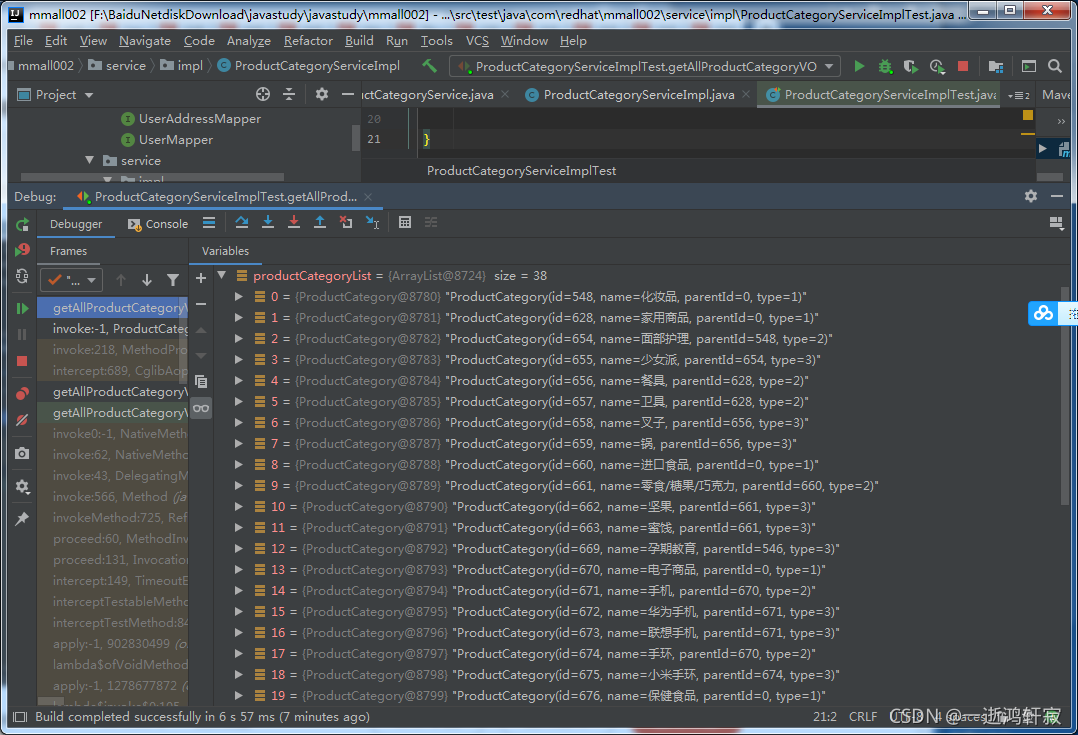
2)ProductCategoryServiceImpl中创建三级分类逻辑关系
package com.redhat.mmall002.service.impl;import com.baomidou.mybatisplus.core.conditions.query.QueryWrapper;
import com.redhat.mmall002.entity.ProductCategory;
import com.redhat.mmall002.mapper.ProductCategoryMapper;
import com.redhat.mmall002.service.ProductCategoryService;
import com.baomidou.mybatisplus.extension.service.impl.ServiceImpl;
import com.redhat.mmall002.vo.ProductCategoryVO;
import org.springframework.beans.BeanUtils;
import org.springframework.beans.factory.annotation.Autowired;
import org.springframework.stereotype.Service;import java.util.ArrayList;
import java.util.List;
import java.util.stream.Collectors;/*** <p>*  服务实现类* </p>** @author 红帽* @since 2021-11-24*/
@Service
public class ProductCategoryServiceImpl extends ServiceImpl<ProductCategoryMapper, ProductCategory> implements ProductCategoryService {@Autowiredprivate ProductCategoryMapper productCategoryMapper;@Overridepublic List<ProductCategoryVO> getAllProductCategoryVO() {
//        //实体类转VO
//        List<ProductCategory> productCategoryList = productCategoryMapper.selectList(null);
//        //VO
//        List<ProductCategoryVO> productCategoryVOList = new ArrayList<>();
//        for (ProductCategory productCategory : productCategoryList){
//            ProductCategoryVO productCategoryVO = new ProductCategoryVO();
//            BeanUtils.copyProperties(productCategory,productCategoryVO);//优化操作productCategoryVO.setId(productCategory.getId());productCategoryVO.setName(productCategory.getName());
//            productCategoryVOList.add(productCategoryVO);
//        }//一级分类QueryWrapper wrapper = new QueryWrapper();wrapper.eq("type",1);List<ProductCategory> levelOne = productCategoryMapper.selectList(wrapper);List<ProductCategoryVO> levelOneVO = levelOne.stream().map(e -> new ProductCategoryVO(e.getId(),e.getName())).collect(Collectors.toList());for (ProductCategoryVO levelOneProductCategoryVO : levelOneVO){wrapper = new QueryWrapper();wrapper.eq("type",2);wrapper.eq("parent_id",levelOneProductCategoryVO.getId());List<ProductCategory> levelTwo = productCategoryMapper.selectList(wrapper);List<ProductCategoryVO> levelTwoVO = levelTwo.stream().map(e -> new ProductCategoryVO(e.getId(),e.getName())).collect(Collectors.toList());levelOneProductCategoryVO.setChildren(levelTwoVO);for (ProductCategoryVO levelTwoProductCategoryVO : levelTwoVO){wrapper = new QueryWrapper();wrapper.eq("type",3);wrapper.eq("parent_id",levelTwoProductCategoryVO.getId());List<ProductCategory> levelThree = productCategoryMapper.selectList(wrapper);List<ProductCategoryVO> levelThreeVO = levelThree.stream().map(e -> new ProductCategoryVO(e.getId(),e.getName())).collect(Collectors.toList());levelTwoProductCategoryVO.setChildren(levelThreeVO);}}
//        //方法一
//        List<ProductCategoryVO> levelOneVO = new  ArrayList<>();
//         for (ProductCategory productCategory : levelOne){
//             ProductCategoryVO productCategoryVO = new ProductCategoryVO();
//             BeanUtils.copyProperties(productCategory,productCategoryVO);
//             levelOneVO.add(productCategoryVO);
//         }return levelOneVO;}
}
3)运行测试类测试结果分三级分类
4)实现前端页面调用找到公共类映射对应数据库数据commom.html中
<li th:each="levelOne:${list}"><div class="fj"><span class="n_img"></span> <span class="fl" th:text="${levelOne.name}"></span></div><div class="zj"><div class="zj_l"><div class="zj_l_c" th:each="levelTwo:${levelOne.children}"><h2><a href="/productList.html" th:text="${levelTwo.name}"></a></h2><a href="/productList.html" th:each="levelThree:${levelTwo.children}" th:text="${levelThree.name}"></a></div></div></div>
</li><li>
测试显示结果

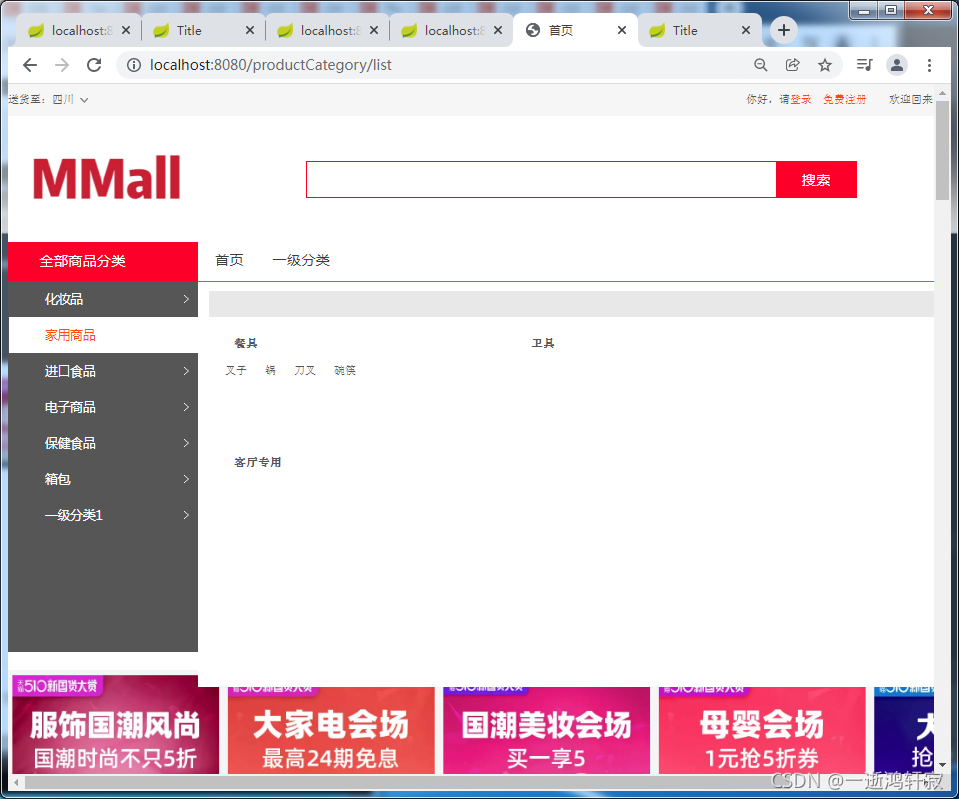
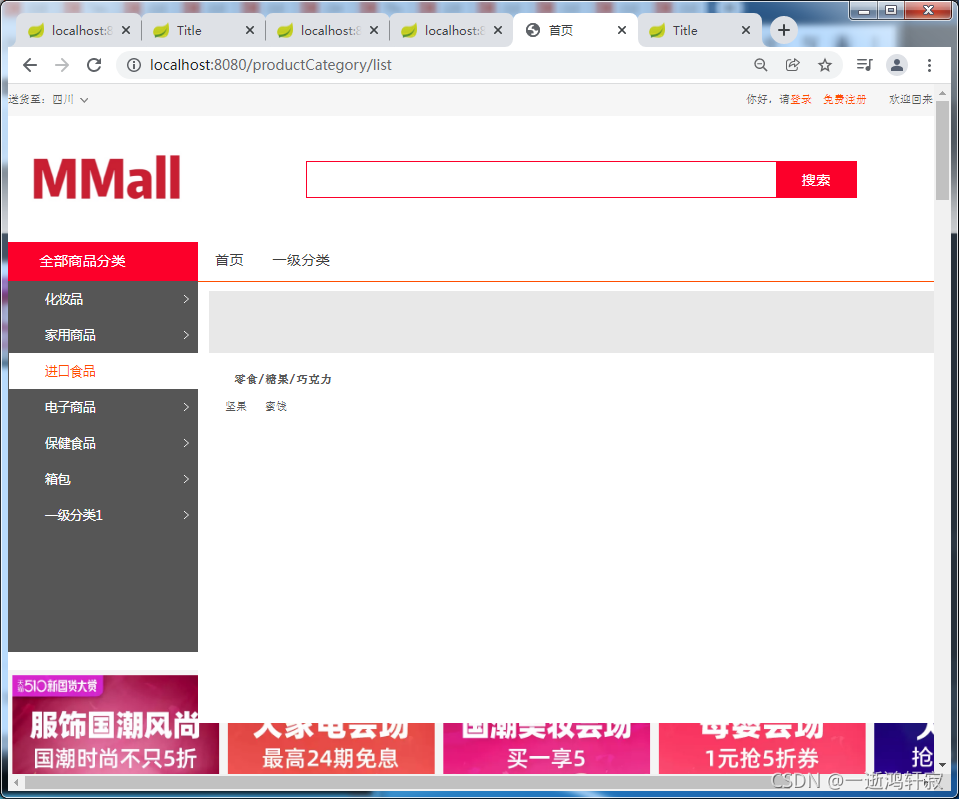
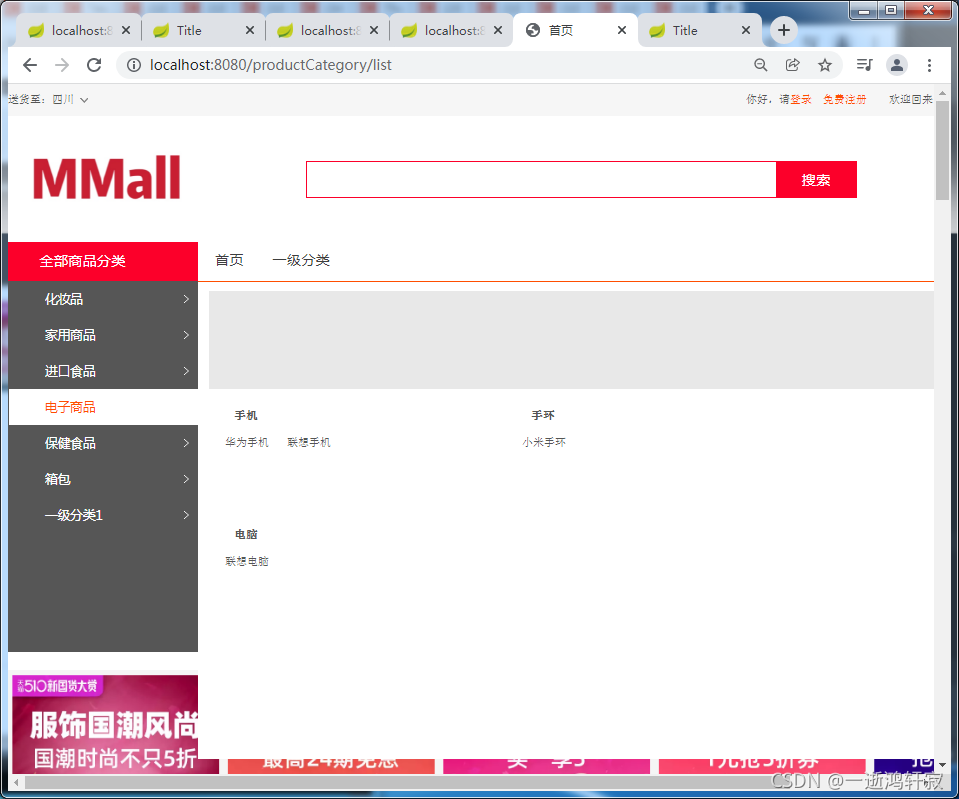
OK显示成功!