邮箱注册
- 流程图

javaMail简介
- Sun定义的一套接收、发送电子邮件的API
- 支持各种邮件协议,开发人员无需考虑底层通信细节
- 被作为Java EE的一部分,但没有被加入标准JDK中
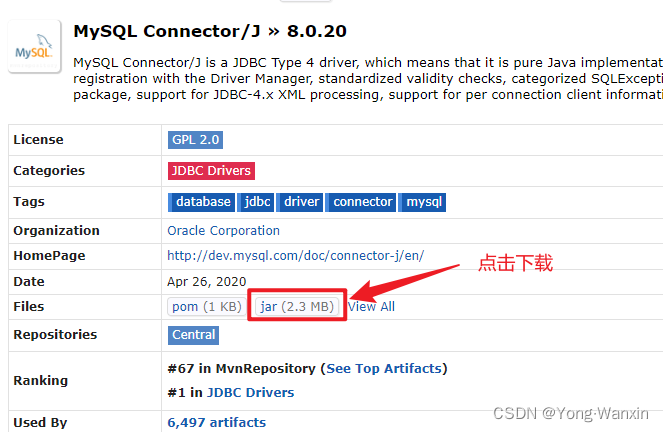
- 需要获取jar包
<dependency><groupId>javax.mail</groupId><artifactId>mail</artifactId><version>1.4.7</version>
</dependency>- 常用API
- Message:创建和解析邮件内容的核心API
- Transport:发送邮件的API
- 使用步骤
- 使用Properties对象封装连接所需的信息
- 获取Session对象
- 封装Message对象
- 使用Transport发送邮件
- 关闭连接
- 通过原生javaMail发送邮件示例
public class SendEmail
{public static void main(String [] args){  // 收件人电子邮箱String to = "abcd@gmail.com";// 发件人电子邮箱String from = "web@gmail.com";// 指定发送邮件的主机为 localhostString host = "localhost";// 获取系统属性Properties properties = System.getProperties();// 设置邮件服务器properties.setProperty("mail.smtp.host", host);// 获取默认session对象Session session = Session.getDefaultInstance(properties);try{// 创建默认的 MimeMessage 对象MimeMessage message = new MimeMessage(session);// Set From: 头部头字段message.setFrom(new InternetAddress(from));// Set To: 头部头字段message.addRecipient(Message.RecipientType.TO,new InternetAddress(to));// Set Subject: 头部头字段message.setSubject("This is the Subject Line!");// 设置消息体message.setText("This is actual message");// 发送消息Transport.send(message);System.out.println("Sent message successfully....");Transport.close();}catch (MessagingException mex) {mex.printStackTrace();}}
}
Spring Mail API
- 对于JavaMail中邮件发送的相关功能,Spring提供了一个抽象层,简化了操作
- 常用API
- MailMessage:允许用户快速设置邮件内容的各种属性信息
- MailSender:提供了发送简单邮件的策略
- 使用步骤
- 导入所需jar文件
- 使用SimpleMailMessage实现简单的邮件消息
- 在Spring中配置JavaMailSenderImpl用以发送邮件
详细步骤
- 邮箱注册
- dao完成用户表的增删改查
- userService中编写createByMail方法:添加用户,生成激活码,发送邮件,激活码存入redis
- controller:邮箱验证(验证邮箱格式合法性),调用createByMail
- 邮箱验证
- dao完成用户激活状态的更新
- userService中编写activate方法:验证激活码,更新用户
- controller:调用activate
-
userService中添加方法
void itriptxCreateByMail(ItripUser user) throws Exception;-
编写mailService
void sendActivationMail(String mailTo, String activationCode);-
实现itriptxCreateByMail方法
@Override
public void itriptxCreateByMail(ItripUser user) throws Exception {// 添加用户信息itripUserMapper.insertItripUser(user);// 生成激活码String activationCode = MD5.getMd5(user.getUserCode(), 32);// 发送邮件mailService.sendActivationMail(user.getUserCode(), activationCode);// 激活码存入redisredisAPI.set("activation:" + user.getUserCode(), activationCode, 30 * 60);
}-
实现sendActivationMail方法,发送用户邮箱激活码
@Service
public class MailServiceImpl implements MailService {@Autowiredprivate MailSender mailSender;@Autowiredprivate SimpleMailMessage mailMessage;/*** 发送注册激活邮件*/public void sendActivationMail(String mailTo, String activationCode) {mailMessage.setTo(mailTo);mailMessage.setText("注册邮箱:" + mailTo + " 激活码:" + activationCode);mailSender.send(mailMessage);}}-
编写applicationContext-mail.xml配置mail相关内容,通过实例化这个bean进行注入
<?xml version="1.0" encoding="UTF-8"?>
<beans xmlns="http://www.springframework.org/schema/beans"xmlns:xsi="http://www.w3.org/2001/XMLSchema-instance"xsi:schemaLocation="http://www.springframework.org/schema/beanshttp://www.springframework.org/schema/beans/spring-beans-2.5.xsd"><bean id="mailSender" class="org.springframework.mail.javamail.JavaMailSenderImpl"><property name="defaultEncoding" value="utf-8"/><property name="host" value="smtp.qq.com"/><property name="port" value="25"/><property name="username" value="***"/><property name="password" value="***"/></bean><bean id="mailMessage" class="org.springframework.mail.SimpleMailMessage"><property name="subject" value="请激活您的账户"/><property name="from" value="发送的邮箱号,必须到响应的邮箱开启服务"/></bean>
</beans>-
在applicationContext-mybatis.xml中导入mail的配置文件
<!--导入邮件配置-->
<import resource="applicationContext-mail.xml"/>-
测试
-
注意,user表中的username为必填,所以需要设置
-
邮件发送方必须开启第三方邮件服务
-
-
userService中编写activateByMail方法
boolean activateByMail(String email, String code) throws Exception;-
实现activateByMail方法,判断邮箱以及激活码是否正确,正确则修改用户的状态为已经激活
@Override
public boolean activateByMail(String email, String code) throws Exception {// 验证激活码String key = "activation:" + email;if (redisAPI.exists(key)) {if (redisAPI.get(key).equals(code)) {ItripUser itripUser = findByUsername(email);if (EmptyUtils.isNotEmpty(itripUser)) {itripUser.setActivated(1);//激活用户itripUser.setUserType(0);//自注册用户itripUser.setFlatID(itripUser.getId());itripUserMapper.updateItripUser(itripUser);return true;}}}return false;
}-
编写userController
-
先判断邮箱规范以及用户是否存在,成功才存进数据库,但是状态为未激活,通过接口发送激活码,并且存进Redis中
@Controller
@RequestMapping(value = "api")
public class UserController {@Autowiredprivate UserService userService;@RequestMapping(value = "/registerByMail", method = RequestMethod.POST, produces = "application/json")public @ResponseBodyDto registerByMail(@RequestBody ItripUserVO userVO) {if (!validEmail(userVO.getUserCode()))return DtoUtil.returnFail("请使用正确的邮箱地址注册", ErrorCode.AUTH_ILLEGAL_USERCODE);try {if (null == userService.findByUsername(userVO.getUserCode())) {ItripUser user = new ItripUser();user.setUserCode(userVO.getUserCode());user.setUserName(userVO.getUserName());user.setUserType(0);user.setUserPassword(MD5.getMd5(user.getUserPassword(), 32));userService.itriptxCreateByMail(user);return DtoUtil.returnSuccess();} else {return DtoUtil.returnFail("用户已存在,注册失败", ErrorCode.AUTH_USER_ALREADY_EXISTS);}} catch (Exception e) {e.printStackTrace();return DtoUtil.returnFail(e.getMessage(), ErrorCode.AUTH_UNKNOWN);}}
编写IrtripUserVo
判断用户邮箱以及激活码是否正确,并且返回结果给用户
@RequestMapping(value = "/activateByMail", method = RequestMethod.PUT, produces = "application/json")@ResponseBodypublic Dto activateByMail(@RequestParam String email, @RequestParam String code) {try {if (userService.activateByMail(email, code)) {return DtoUtil.returnSuccess("激活成功");} else {return DtoUtil.returnSuccess("激活失败");}} catch (Exception e) {e.printStackTrace();return DtoUtil.returnFail("激活失败", ErrorCode.AUTH_ACTIVATE_FAILED);}}
下面这部分可在前台页面用Jquery验证
/**
* 合法E-mail地址:
* 1. 必须包含一个并且只有一个符号“@”
* 2. 第一个字符不得是“@”或者“.”
* 3. 不允许出现“@.”或者.@
* 4. 结尾不得是字符“@”或者“.”
* 5. 允许“@”前的字符中出现“+”
* 6. 不允许“+”在最前面,或者“+@”
*/
private boolean validEmail(String email) {String regex = "^\\s*\\w+(?:\\.{0,1}[\\w-]+)*@[a-zA-Z0-9]+(?:[-.][a-zA-Z0-9]+)*\\.[a-zA-Z]+\\s*$";return Pattern.compile(regex).matcher(email).find();}