Android简单计算器实现
前言
最近刚开始学习安卓,只是简单的看到布局那块,就开始上手写了,从布局那里就开始各种乱,还到处拖按钮,一开始的第一版只能实现两个数的运算,比较简单,就是简单的上了个手,在第二版里实现了多项式的运算(没加括号的),最难的是里面的逻辑代码算法那块。

这个是我第一版的,,,可能我是有毒吧,,这样的计算器,不被人打死就好

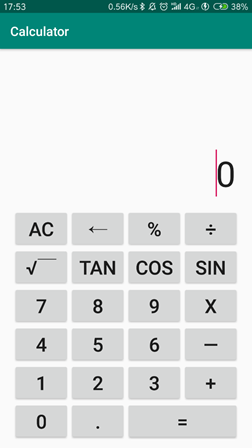
这个是我第二版的,,实现了许多计算优先级的问题,可以记住上次计算的结果,错误输入的时候会提示
在UI那块
我采用的是嵌套的布局结构,在最外层是用的是LinearLayout的线性竖线布局,内层是LinearLayout的线性横向布局,每个内层里横向布局,设置权重,让按钮很整体很好布局。外层的竖线线性布局,可以让按钮紧贴最下面,方便,调整Testview和每个横行的比例关系,下面上代码:
在app/src/main/res/layout/中的activity_main.xml中的代码
<?xml version="1.0" encoding="utf-8"?>
<LinearLayout xmlns:android="http://schemas.android.com/apk/res/android"android:orientation="vertical"android:layout_width="match_parent"android:layout_height="match_parent"><LinearLayout
        android:layout_width="match_parent"android:layout_height="0dp"android:orientation="horizontal"android:layout_weight="2"><TextView
         android:layout_width="match_parent"android:layout_height="match_parent"android:id="@+id/et_input"android:textSize="40sp"/></LinearLayout><LinearLayout
        android:layout_width="match_parent"android:layout_height="0dp"android:layout_weight="1"android:orientation="horizontal"android:weightSum="4"><Button
           android:layout_width="0dp"android:layout_height="match_parent"android:text="C"android:textSize="40sp"android:id="@+id/btn_clear"android:layout_weight="1"android:background="#ffffff"/><Button
            android:layout_width="0dp"android:layout_height="match_parent"android:text="/"android:textSize="40sp"android:id="@+id/btn_divide"android:layout_weight="1"android:background="#ffffff"/><Button
            android:layout_width="0dp"android:layout_height="match_parent"android:text="X"android:textSize="40sp"android:id="@+id/btn_multiply"android:layout_weight="1"android:background="#ffffff"/><Button
            android:layout_width="0dp"android:layout_height="match_parent"android:text="T"android:textSize="40sp"android:id="@+id/btn_del"android:layout_weight="1"android:background="#ffffff"/></LinearLayout><LinearLayout
        android:layout_width="fill_parent"android:layout_height="0dp"android:layout_weight="1"android:gravity="center"android:weightSum="4"><Button
            android:layout_width="0dp"android:layout_height="match_parent"android:text="7"android:textSize="30sp"android:id="@+id/btn_7"android:layout_weight="1"android:background="#ffffcc"/><Button
            android:layout_width="0dp"android:layout_height="match_parent"android:text="8"android:textSize="30sp"android:id="@+id/btn_8"android:layout_weight="1"android:background="#ffffcc"/><Button
            android:layout_width="0dp"android:layout_height="match_parent"android:text="9"android:textSize="30sp"android:id="@+id/btn_9"android:layout_weight="1"android:background="#ffffcc"/><Button
            android:layout_width="0dp"android:layout_height="match_parent"android:text="-"android:textSize="50sp"android:id="@+id/btn_minus"android:layout_weight="1"android:background="#ffffff"/></LinearLayout><LinearLayout
        android:layout_width="fill_parent"android:layout_height="0dp"android:orientation="horizontal"android:layout_weight="1"android:weightSum="4"><Button
             android:layout_width="0dp"android:layout_height="match_parent"android:text="4"android:textSize="30sp"android:id="@+id/btn_4"android:layout_weight="1"android:background="#ffffcc"/><Button
            android:layout_width="0dp"android:layout_height="match_parent"android:text="5"android:textSize="30sp"android:id="@+id/btn_5"android:layout_weight="1"android:background="#ffffcc"/><Button
            android:layout_width="0dp"android:layout_height="match_parent"android:text="6"android:textSize="30sp"android:id="@+id/btn_6"android:layout_weight="1"android:background="#ffffcc"/><Button
            android:layout_width="0dp"android:layout_height="match_parent"android:text="+"android:textSize="40sp"android:id="@+id/btn_plus"android:layout_weight="1"android:background="#ffffff"/></LinearLayout><LinearLayout
        android:layout_width="fill_parent"android:layout_height="0dp"android:orientation="horizontal"android:layout_weight="1"android:weightSum="4"><Button
           android:layout_width="0dp"android:layout_height="match_parent"android:text="1"android:textSize="30sp"android:id="@+id/btn_1"android:layout_weight="1"android:background="#FFFFCC"/><Button
           android:layout_width="0dp"android:layout_height="match_parent"android:text="2"android:textSize="30sp"android:id="@+id/btn_2"android:layout_weight="1"android:background="#FFFFCC"/><Button
            android:layout_width="0dp"android:layout_height="match_parent"android:text="3"android:textSize="30sp"android:id="@+id/btn_3"android:layout_weight="1"android:background="#FFFFCC"/><Button
             android:layout_width="0dp"android:layout_height="match_parent"android:text="."android:textSize="40sp"android:id="@+id/btn_point"android:layout_weight="1"android:background="#FFFFFF"/></LinearLayout><LinearLayout
        android:layout_width="fill_parent"android:layout_height="0dp"android:orientation="horizontal"android:layout_weight="1"android:weightSum="4"><Button
            android:layout_width="0dp"android:layout_height="match_parent"android:text="("android:textSize="30sp"android:id="@+id/btn_left"android:layout_weight="1"android:background="#FFFFCC"/><Button
            android:layout_width="0dp"android:layout_height="match_parent"android:text="0"android:textSize="30sp"android:id="@+id/btn_0"android:background="#FFFFCC"android:layout_weight="1" /><Button
            android:layout_width="0dp"android:layout_height="match_parent"android:text=")"android:textSize="30sp"android:id="@+id/btn_right"android:layout_weight="1"android:background="#FFFFCC"/><Button
            android:layout_width="0dp"android:layout_height="match_parent"android:text="="android:textSize="30sp"android:id="@+id/btn_equal"android:background="#99CCFF"android:layout_weight="1" /></LinearLayout></LinearLayout>
逻辑代码
1.在主体部分
思路:就是 按照按钮点击事件的套路,每当点击按钮时,就会执行onClick()的方法,我们在这个方法里加入个switch循环,每个case:是按钮的id,我们申请个private StringBuilder的字符串。每按一个按钮,只要满足要求,不是错误的输入,就调用append()方法,将按钮的值当字符存入这个字符串中,当用户按到等号时,调用另一个java文件的自己写的处理的类(想都写在mainActivity也行啊,不过太长了)。
下面是主体代码
在app/src/main/java/com/example/hasee/MainActivity中的
import android.support.v7.app.AppCompatActivity;
import android.os.Bundle;
import android.view.View;
import android.widget.Button;
import android.widget.TextView;
import java.util.Arrays;public class MainActivity extends AppCompatActivity implements View.OnClickListener {Button btn_0;Button btn_1;Button btn_2;Button btn_3;Button btn_4;Button btn_5;Button btn_6;Button btn_7;Button btn_8;Button btn_9;Button btn_point; //小数点Button btn_clear; //清除Button btn_del;   //删除Button btn_plus;Button btn_minus;Button btn_multiply;Button btn_divide;Button btn_equal;Button btn_left;Button btn_right;private TextView et_input;private StringBuilder pending = new StringBuilder();private void initView() {btn_0 = (Button) findViewById(R.id.btn_0);btn_1 = (Button) findViewById(R.id.btn_1);btn_2 = (Button) findViewById(R.id.btn_2);btn_3 = (Button) findViewById(R.id.btn_3);btn_4 = (Button) findViewById(R.id.btn_4);btn_5 = (Button) findViewById(R.id.btn_5);btn_6 = (Button) findViewById(R.id.btn_6);btn_7 = (Button) findViewById(R.id.btn_7);btn_8 = (Button) findViewById(R.id.btn_8);btn_9 = (Button) findViewById(R.id.btn_9);btn_point = (Button) findViewById(R.id.btn_point);btn_clear = (Button) findViewById(R.id.btn_clear);btn_del = (Button) findViewById(R.id.btn_del);btn_plus = (Button) findViewById(R.id.btn_plus);btn_minus = (Button) findViewById(R.id.btn_minus);btn_multiply = (Button) findViewById(R.id.btn_multiply);btn_divide = (Button) findViewById(R.id.btn_divide);btn_equal = (Button) findViewById(R.id.btn_equal);et_input = (TextView) findViewById(R.id.et_input);btn_left = (Button) findViewById(R.id.btn_left);btn_right = (Button) findViewById(R.id.btn_right);btn_0.setOnClickListener(this);btn_1.setOnClickListener(this);btn_2.setOnClickListener(this);btn_3.setOnClickListener(this);btn_4.setOnClickListener(this);btn_5.setOnClickListener(this);btn_6.setOnClickListener(this);btn_7.setOnClickListener(this);btn_8.setOnClickListener(this);btn_9.setOnClickListener(this);btn_point.setOnClickListener(this);btn_plus.setOnClickListener(this);btn_equal.setOnClickListener(this);btn_minus.setOnClickListener(this);btn_multiply.setOnClickListener(this);btn_del.setOnClickListener(this);btn_divide.setOnClickListener(this);btn_clear.setOnClickListener(this);btn_divide.setOnClickListener(this);btn_left.setOnClickListener(this);btn_right.setOnClickListener(this);}@Overrideprotected void onCreate(Bundle savedInstanceState) {super.onCreate(savedInstanceState);setContentView(R.layout.activity_main);initView();}public void onClick(View v) {int last = 0;if(pending.length()!=0){last = pending.codePointAt(pending.length()-1);}switch (v.getId()) {case R.id.btn_0:pending = pending.append("0");et_input.setText(pending);break;case R.id.btn_1:pending = pending.append("1");et_input.setText(pending);break;case R.id.btn_2:pending = pending.append("2");et_input.setText(pending);break;case R.id.btn_3:pending = pending.append("3");et_input.setText(pending);break;case R.id.btn_4:pending = pending.append("4");et_input.setText(pending);break;case R.id.btn_5:pending = pending.append("5");et_input.setText(pending);break;case R.id.btn_6:pending = pending.append("6");et_input.setText(pending);break;case R.id.btn_7:pending = pending.append("7");et_input.setText(pending);break;case R.id.btn_8:pending = pending.append("8");et_input.setText(pending);break;case R.id.btn_9:pending = pending.append("9");et_input.setText(pending);break;case R.id.btn_plus://if (last >= '0' && last <= '9' ) {pending = pending.append("+");// }et_input.setText(pending);break;case R.id.btn_minus://if (last >= '0' && last <= '9') {pending = pending.append("-");//  }et_input.setText(pending);break;case R.id.btn_multiply:// if (last >= '0' && last <= '9' ) {pending = pending.append("*");// }et_input.setText(pending);break;case R.id.btn_divide:// if (last >= '0' && last <= '9' ) {pending = pending.append("/");// }et_input.setText(pending);break;case R.id.btn_point:if (judje1()) {pending = pending.append(".");et_input.setText(pending);}break;case R.id.btn_right:// )右括号if((last>='0' &&last<='9'||last==')')&&judje2()==1) {pending = pending.append(")");et_input.setText(pending);}break;case R.id.btn_left:// (左括号if((last!='(')||(last<='0' &&last>='9')){pending = pending.append("(");et_input.setText(pending);}break;case R.id.btn_del: //删除if (pending.length() != 0) {pending = pending.delete(pending.length() - 1, pending.length());et_input.setText(pending);}break;case R.id.btn_clear: //清空pending = pending.delete(0, pending.length());et_input.setText(pending);break;case R.id.btn_equal: // =等于if ((pending.length() > 1)) {InfixInToDuffix inf = new InfixInToDuffix();String jieguo;try {String a = inf.toSuffix(pending);jieguo = inf.dealEquation(a);} catch (Exception ex) {jieguo = "出错";}et_input.setText(pending + "=" + jieguo);pending = pending.delete(0, pending.length());if (Character.isDigit(jieguo.charAt(0))) {pending = pending.append(jieguo);}}break;default:break;}}private boolean judje1() {String a = "+-*/.";int[] b = new int[a.length()];int max;for (int i = 0; i < a.length(); i++) {String c = "" + a.charAt(i);b[i] = pending.lastIndexOf(c);}Arrays.sort(b);if (b[a.length() - 1] == -1) {max = 0;} else {max = b[a.length() - 1];}if (pending.indexOf(".", max) == -1) {return true;} else {return false;}}private int judje2(){int a=0,b=0;for(int i = 0 ; i < pending.length() ;i++){if(pending.charAt(i)=='(' ) {a++;}if(pending.charAt(i)==')' ) {b++;}}if(a == b)return 0;if(a > b)return 1;return 2;}}
2.在逻辑算法方面
思路:自己把用户输入的数字和运算符全部在peng这个字符串里,不论咋样,都要把这个字符串里面的计算式子从中缀表达式转化为后缀表达式,,,至于为啥要转换再算表达式,是因为中缀表达式是符合人类的计算但不方便计算机的计算,后缀表达式方便计算机的计算,便于它判断优先级,具体的我给两篇其他人写的东西,了解下
中缀表达式转化为后缀表达式的
http://write.blog.csdn.net/mdeditor
后缀表达式的计算过程的
http://www.nowamagic.net/librarys/veda/detail/2307
别人写的,觉得里面讲的简单明了,很好理解
下面写下自己写的类InfixInToDuffix类
在在app/src/main/java/com/example/hasee/中的重新创建一个InfixInToDuffix,在里面写(这个不是我写的,我只是拿来借用一下)
import java.util.HashMap;
import java.util.List;
import java.util.Map;
import java.lang.*;
import java.util.ArrayList;
import java.util.*;public class InfixInToDuffix {//使用集合定义好符号的运算优先级别private static final Map<Character,Integer>basic =new HashMap<Character, Integer>();static {basic.put('-',1);basic.put('+', 1);basic.put('*', 2);basic.put('/', 2);basic.put('(', 0);//在运算中  ()的优先级最高,但是此处因程序中需要 故设置为0}//将中缀表达式转换为后缀表达式public String toSuffix(StringBuilder infix){List<String> queue = new ArrayList<String>();                                    //定义队列  用于存储 数字  以及最后的  后缀表达式List<Character> stack = new ArrayList<Character>();                             //定义栈    用于存储  运算符  最后stack中会被 弹空char[] charArr = infix.substring(0,infix.length()).trim().toCharArray();                                    //字符数组  用于拆分数字或符号String standard = "*/+-()";                                                        //判定标准 将表达式中会出现的运算符写出来char ch = '&';                                                                    //在循环中用来保存 字符数组的当前循环变量的  这里仅仅是初始化一个值  没有意义int len = 0;                                                                    //用于记录字符长度 【例如100*2,则记录的len为3 到时候截取字符串的前三位就是数字】for (int i = 0; i < charArr.length; i++) {                                        //开始迭代ch = charArr[i];                                                            //保存当前迭代变量if(Character.isDigit(ch)) {                                                    //如果当前变量为 数字len++;}else if(ch == '.'){                                                        //如果当前变量为  .  会出现在小数里面len++;}else if(standard.indexOf(ch) != -1) {                                        //如果是上面标准中的 任意一个符号if(len > 0) {                                                            //长度也有queue.add(String.valueOf(Arrays.copyOfRange(charArr, i - len, i)));    //说明符号之前的可以截取下来做数字len = 0;                                                            //长度置空}if(ch == '(') {                                                            //如果是左括号stack.add(ch);                                                        //将左括号 放入栈中continue;                                                            //跳出本次循环  继续找下一个位置}if (!stack.isEmpty()) {                                                    //如果栈不为emptyint size = stack.size() - 1;                                        //获取栈的大小-1  即代表栈最后一个元素的下标boolean flag = false;                                                //设置标志位while (size >= 0 && ch == ')' && stack.get(size) != '(') {            //若当前ch为右括号,则 栈里元素从栈顶一直弹出,直到弹出到 左括号queue.add(String.valueOf(stack.remove(size)));                    //注意此处条件:ch并未入栈,所以并未插入队列中;同样直到找到左括号的时候,循环结束了,所以左括号也不会放入队列中【也就是:后缀表达式中不会出现括号】size--;                                                            //size-- 保证下标永远在栈最后一个元素【栈中概念:指针永远指在栈顶元素】flag = true;                                                    //设置标志位为true  表明一直在取()中的元素}if(ch==')'&&stack.get(size) == '('){flag = true;}while (size >= 0 && !flag && basic.get(stack.get(size)) >= basic.get(ch)) {    //若取得不是()内的元素,并且当前栈顶元素的优先级>=对比元素 那就出栈插入队列queue.add(String.valueOf(stack.remove(size)));                    //同样  此处也是remove()方法,既能得到要获取的元素,也能将栈中元素移除掉size--;}}if(ch != ')') {                                                            //若当前元素不是右括号stack.add(ch);                                                        //就要保证这个符号 入栈} else {                                                                //否则就要出栈 栈内符号stack.remove(stack.size() - 1);}}if(i == charArr.length - 1) {                                                //如果已经走到了  中缀表达式的最后一位if(len > 0) {                                                            //如果len>0  就截取数字queue.add(String.valueOf(Arrays.copyOfRange(charArr, i - len+1, i+1)));}int size = stack.size() - 1;                                            //size表示栈内最后一个元素下标while (size >= 0) {                                                        //一直将栈内  符号全部出栈 并且加入队列中  【最终的后缀表达式是存放在队列中的,而栈内最后会被弹空】queue.add(String.valueOf(stack.remove(size)));size--;}}}String a = queue.toString();return a.substring(1,a.length()-1);}public String dealEquation(String equation){String [] arr = equation.split(", ");                                    //根据, 拆分字符串List<String> list = new ArrayList<String>();                            //用于计算时  存储运算过程的集合【例如list中当前放置  100   20  5  /  则取出20/5 最终将结果4存入list   此时list中结果为  100  4 】for (int i = 0; i < arr.length; i++) {                                    //此处就是上面说的运算过程, 因为list.remove的缘故,所以取出最后一个数个最后两个数  都是size-2int size = list.size();switch (arr[i]) {case "+": double a = Double.parseDouble(list.remove(size-2))+ Double.parseDouble(list.remove(size-2)); list.add(String.valueOf(a));     break;case "-": double b = Double.parseDouble(list.remove(size-2))- Double.parseDouble(list.remove(size-2)); list.add(String.valueOf(b));     break;case "*": double c = Double.parseDouble(list.remove(size-2))* Double.parseDouble(list.remove(size-2)); list.add(String.valueOf(c));     break;case "/": double d = Double.parseDouble(list.remove(size-2))/ Double.parseDouble(list.remove(size-2)); list.add(String.valueOf(d));       break;default: list.add(arr[i]);     break;                                    //如果是数字  直接放进list中}}return list.size()== 1 ? list.get(0) : "运算失败" ;                    //最终list中仅有一个结果,否则就是算错了}}
改APP图标方面
首先:准备一张你想要的图标图片,把格式改成png(必须这样做,切记切记)
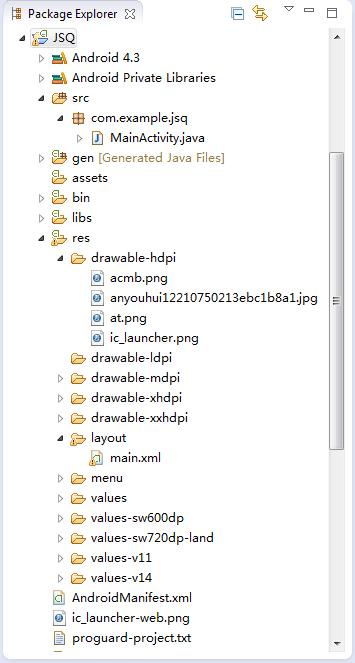
其次:把这张图片放到app/src/main/res/drawable中
最后:在app/src/main/AndroidManifest.xml里
<application
        android:allowBackup="true"android:icon="@drawable/img_5"//这个是用来改APP的图标的,把里面的一换就行了android:label="sakura的计算器"//这个是用来改APP的名字的android:supportsRtl="true"android:theme="@style/AppTheme"><activity android:name=".MainActivity"><intent-filter><action android:name="android.intent.action.MAIN" /><category android:name="android.intent.category.LAUNCHER" /></intent-filter></activity></applicati结
n>
总结
写一个计算器其实布局什么的都不难,主体用switch这些也都没撒,就是如何将中缀表达式转换为后缀表达式,然后根据优先级的问题,来计算表达式,自己做的第一个APP,希望对大家有帮助。